Carestream HEALTH CS 9000 User Manual Download Page 29

CS 9000 and CS 9000 3D User Guide (SM764)_Ed 01

4–1

Chapter 4

GETTING STARTED

Switching on the Unit

Before switching on the unit, check that:

The installation of the unit is complete.

The 

computer

 is switched on.

IMPORTANT

You must switch on the computer and wait for it to be ready for the 
connection before switching on the unit.

To switch on the unit, follow these steps:

1. On the unit column, press the 

ON

 button.

2. Switch on the unit and wait for a minute for the connection between the unit and the 

computer

 to be established. In the status bar, 

 must become 

.

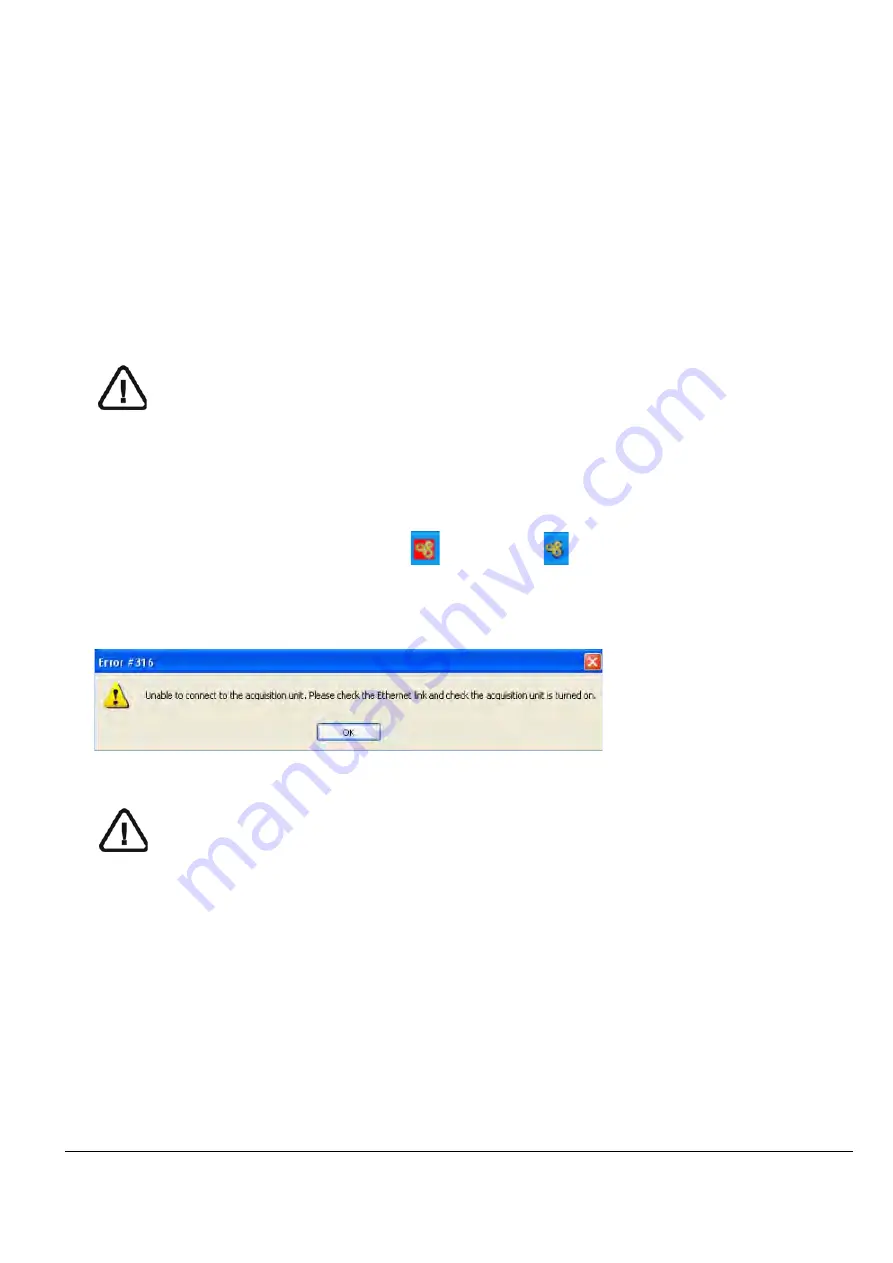
3. If you start the imaging software before the connection is established an error 

message is displayed. Click 

OK,

 close the imaging software and wait for the 

connection to be established.

4. You can now proceed to start the imaging software.

IMPORTANT

To increase the operating life of the X-ray tube, if the unit has not been 
used for a month, you must follow the following procedures before 
use. 

1. In the 

Panoramic Acquisition 

window, select the 

Parameter pane.

2. Select the following series of parameter settings:

70 kV - 6.3 mA

80 kV - 10 mA

85 kV - 10 mA

3. Leave the X-ray room and close the door. For each parameter setting, from the X-ray 

remote control, press and hold the button to launch the X-ray.

The unit is now ready to be used for acquisition.

Summary of Contents for CS 9000

Page 1: ...CS 9000 AND CS 9000 3D User Guide...

Page 2: ...dimensional X ray images of the dento maxillofacial region The information contained in this guide may be subject to modification without notice justification or notification to the persons concerned...

Page 3: ...quisition Interface 3 1 Acquisition Interface 3 2 Panoramic Acquisition Interface Overview 3 2 Panoramic Program Pane 3 4 Panoramic Patient Pane 3 5 Panoramic Parameters Pane 3 6 3D Acquisition Interf...

Page 4: ...ers 5 13 Preparing and Positioning Adult and Pediatric Patients 5 15 Launching the X ray 5 17 X Ray Dose Emission Information 5 19 6 TROUBLESHOOTING Quick Troubleshooting 6 1 7 MAINTENANCE Daily 7 1 C...

Page 5: ...indicate potential risk to personnel or equipment WARNING Warns you to avoid injury to yourself or others by following the safety instructions precisely CAUTION Alerts you to a condition that might ca...

Page 6: ...Conventions in this Guide 1 2 About This Guide...

Page 7: ...el Panoramic digital sensor X ray source assembly X ray remote control Chin rest base Panoramic chin rest and bite block Temple supports Hand grips Acquisition interface The CS 9000 3D unit is compose...

Page 8: ...S 9000 3D UNIT OVERVIEW Mobile Components Figure 2 1 illustrates the up and down movement of the CS 9000 and CS 9000 3D mobile component and the 180 rotation of the rotative arm Figure 2 1 CS 9000 and...

Page 9: ...nits Figure 2 2 CS 9000 and CS 9000 3D Unit Functional Components 1 ON OFF button 6 Temple supports 2 Unit fixed arm 7 Sensor 3 Control panel 8 X ray source assembly 4 Hand Grips 9 Unit rotative arm 5...

Page 10: ...the panoramic and the 3D digital sensor of CS 9000 and CS 9000 3D Figure 2 3 CS 9000 and CS 9000 3D Unit Panoramic and 3D Digital Sensor Locations IMPORTANT When the unit is ONLY panoramic the 3D opt...

Page 11: ...trates the location of the CS 9000 and CS 9000 3D lasers Figure 2 4 CS 9000 and CS 9000 3D Unit Laser Beam Positions 1 3D central positioning laser beam 2 Mid sagittal positioning laser beam 3 Horizon...

Page 12: ...nt for 3D acquisition 4 Laser Beam button Activates the beams to correctly position the patient 5 3D Position Verification button Positions the unit rotative arm at the selected or memorized 3D positi...

Page 13: ...trol enables you to launch a radiological image acquisition via the exposure button from outside the X ray room You must press and hold the exposure button until the end of acquisition Premature relea...

Page 14: ...sitioning a patient They are delivered with the CS 9000 and CS 9000 3D digital imaging unit Panoramic Positioning Accessories Table 2 1 Panoramic Positioning Accessories and Replacement Parts Accessor...

Page 15: ...00 3D User Guide SM764 _Ed 01 2 9 3D Positioning Accessories Table 2 2 3D Positioning Accessories and Replacement Parts Accessory Description 3D bite block 3D bite block support 3D head rest and head...

Page 16: ...IEW Patient Positioning Indicators Table 2 3 Patient Positioning Indicators represented on the chin rest base Positioning Indicators Description For sinus positioning For TMJ x2 and TMJ x4 positioning...

Page 17: ...t link NOT via a LAN General Software Overview CS 9000 and CS 9000 3D operate with the following software Imaging Software Acquisition interface Imaging Software The imaging software is a user friendl...

Page 18: ...een Displays the acquired image in real time 3 Selected Parameter Display Displays the current acquisition parameter settings 4 System Status Screen Displays various alert or warning messages originat...

Page 19: ...nes Program pane Examination type options Patient pane Patient type parameter options Parameters pane Exposure parameter options 11 Selector Button Selects different acquisition setting options Click...

Page 20: ...nding to the right side of the patient Click on a section of the jaw to select an anatomical zone for radiological examination The selected segment is highlighted Figure 3 2 Panoramic Program Pane 1 R...

Page 21: ...d parameters must be based on the age and morphology of the patient Figure 3 3 Panoramic Patient Pane 1 Patient type parameters Click if the patient is a child if the patient is small if the patient i...

Page 22: ...ogical image acquisition If the default parameter setting is not adapted to your patient s type you can manually adapt the parameter settings to the patient s type and save this setting as the default...

Page 23: ...eal time 3 Selected Parameter Display Displays the current acquisition parameter settings 4 System Status Screen Displays various alert or warning messages originating from the unit 5 X Rays ON OFF bu...

Page 24: ...X Ray Emission Indicator Yellow indicates the X ray emission status 12 Exit button Closes the Acquisition window 13 Validation button Validates the selected region of interest 14 Cancellation button...

Page 25: ...2 interfaces 3D single volume Program pane by default 3D multi volume Stitching Program pane Figure 3 6 3D Single Volume Program Pane Figure 3 7 3D Multi Volume Stitching Program Pane 1 Selection Ind...

Page 26: ...must be based on the age and morphology of the patient Figure 3 8 3D Patient Pane 1 Patient type parameters Click if the patient is a child if the patient is small if the patient is medium if the pati...

Page 27: ...cquisition If the default parameter setting is not adapted to your patient s type you can manually adapt the parameter settings to the patient s type and save this setting as the default setting Figur...

Page 28: ...Acquisition Interface 3 12 IMAGING SOFTWARE OVERVIEW...

Page 29: ...become 3 If you start the imaging software before the connection is established an error message is displayed Click OK close the imaging software and wait for the connection to be established 4 You c...

Page 30: ...isition Windows To access the Acquisition windows follow these steps 1 In the Imaging window from the toolbar click or to access the Panoramic Acquisition window or click or to access the 3D Acquisiti...

Page 31: ...anatomical zone for the X ray image such as panoramic TMJ x2 or sinus 2 Click the Patient button to access the Patient pane Select the patient Type Dental arch morphology Incisors orientation 3 If the...

Page 32: ...Panel press and hold to raise the chin rest to the maximum height 4 Ask the patient to enter the unit On the Control Panel press and hold to adjust the unit to the height of the patient 5 Ask the pati...

Page 33: ...alignment The horizontal 2 positioning laser beam for a Frankfort plane alignment 7 Correctly align the Frankfort and midsagittal planes using and the adjusting thumb wheel NOTE You can re activate th...

Page 34: ...nd Pediatric Patients 5 4 ACQUIRING IMAGES 8 Immobilize the patient s head with the temple supports 3 9 Ask the patient to do the following close their eyes remain still swallow place their tongue in...

Page 35: ...ndicating X ray emission The image appears on the Preview Screen of the Panoramic Acquisition window When the acquisition ends the Panoramic Acquisition window disappears and the acquired image is aut...

Page 36: ...ce on the chin rest support and cover it with a hygienic sheath 3 Press and hold to raise the chin rest to the TMJ x4 positioning indicator 4 Correctly position the patient using the 2 positioning las...

Page 37: ...on of interest and click to validate the selection or click to cancel the modifications 3 Click the Parameter button to access the Parameter pane kV and mA If the default parameter settings for kV and...

Page 38: ...D Single Volume Image for Adult and Pediatric Patients 5 8 ACQUIRING IMAGES 5 Press and hold to raise the chin rest to the following positioning indicators For an upper jaw positioning For a lower jaw...

Page 39: ...ask the patient to bite into a plate of dental impression paste and wait for the imprint to harden 3 Place the dental imprint on the bite block location Press and hold to align the unit rotative arm...

Page 40: ...patient s shoulders 3 Ask the patient to enter the unit On the Control Panel press and hold to adjust the unit to the height of the patient 4 Ask the patient to do the following Stand up straight or...

Page 41: ...idsagittal 1 positioning laser beam The 3D FoV 2 positioning laser beam 7 Press and hold to align the upper or lower jaw with the 3D FoV 2 positioning laser beam Tighten the temple supports 3 8 Ask th...

Page 42: ...low indicating X ray emission The image appears in the Preview Screen When the acquisition ends the 3D Acquisition window disappears 3 Open the 3D head support and release the patient while waiting fo...

Page 43: ...on parameters Reset the unit rotative arm to the start position for patient to enter the unit Select the patient file Access the 3D Imaging window Access the 3D Acquisition window 2 Click the Patient...

Page 44: ...rior right Anterior posterior left 6 Click to initialize the rotative arm position for the multi volume 7 Position the 3D bite block support and 3D bite block with the patient s bite registration 8 Pr...

Page 45: ...a lead apron with a thyroid collar Ensure that the apron lays flat across the patient s shoulders 3 Ask the patient to enter the unit On the Control Panel press and hold to adjust the unit to the heig...

Page 46: ...1 positioning laser beam The 3D FoV 2 positioning laser beam 7 Press and hold to align the upper or lower jaw with the 3D FoV 2 positioning laser beam Tighten the temple supports 3 8 Ask the patient t...

Page 47: ...irst region of interest acquisition The turns yellow indicating X ray emission The image appears in the Preview Screen When you release the exposure button the rotative arm is automatically positioned...

Page 48: ...isition ends the 3D Acquisition window disappears 5 Open the temple supports and release the patient while waiting for the 3D image reconstruction Remove the dental impression paste from the bite bloc...

Page 49: ...ht click on each image to display the estimated emitted dose received by the patient You can use this information to calculate the effective dose received by the patient for the image The radiation em...

Page 50: ...X Ray Dose Emission Information 5 20 ACQUIRING IMAGES...

Page 51: ...the exposure button prematurely Relaunch the acquisition and hold the exposure button until the end of the acquisition cycle Table 6 2 Quick Troubleshooting Information Error Code Information Message...

Page 52: ...Ceph mode Wait for the end of the positioning process I 18 Unidentified Sensor positioning The Sensor is incorrectly positioned for acquisition Check that no object stops the correct positioning of t...

Page 53: ...off the unit 2 Clean all accessible parts of the unit using low level disinfectants that are U S Environmental Protection Agency EPA registered or low level disinfectants that are recognized by your...

Page 54: ...example glutaraldehyde glutaraldehyde with phenol hydrogen peroxide hydrogen peroxide with peracetic acid ortho phthalaldehyde 4 Use immediately or within a short period of time CAUTION You MUST cove...

Page 55: ...chemical or detergent residue 3 Disinfect with an EPA registered hospital disinfectant for low level activity for example quaternary ammonium compounds some phenolics and some iodophors You must use...

Page 56: ...tain optimum image quality the image quality must be controlled regularly To control the image quality follow these steps 1 On your desktop double click The Calibrations and Quality Control Software w...

Page 57: ...the Import field Click Next and follow the instructions 5 Select the desired test and follow the on screen instructions You have two test options Constancy test This test must be executed regularly by...

Page 58: ...Controlling the Image Quality 7 6 MAINTENANCE...

Reviews: