9
ENG
MasterAria +030220481 - rel. 1.0 - 12.11.2007
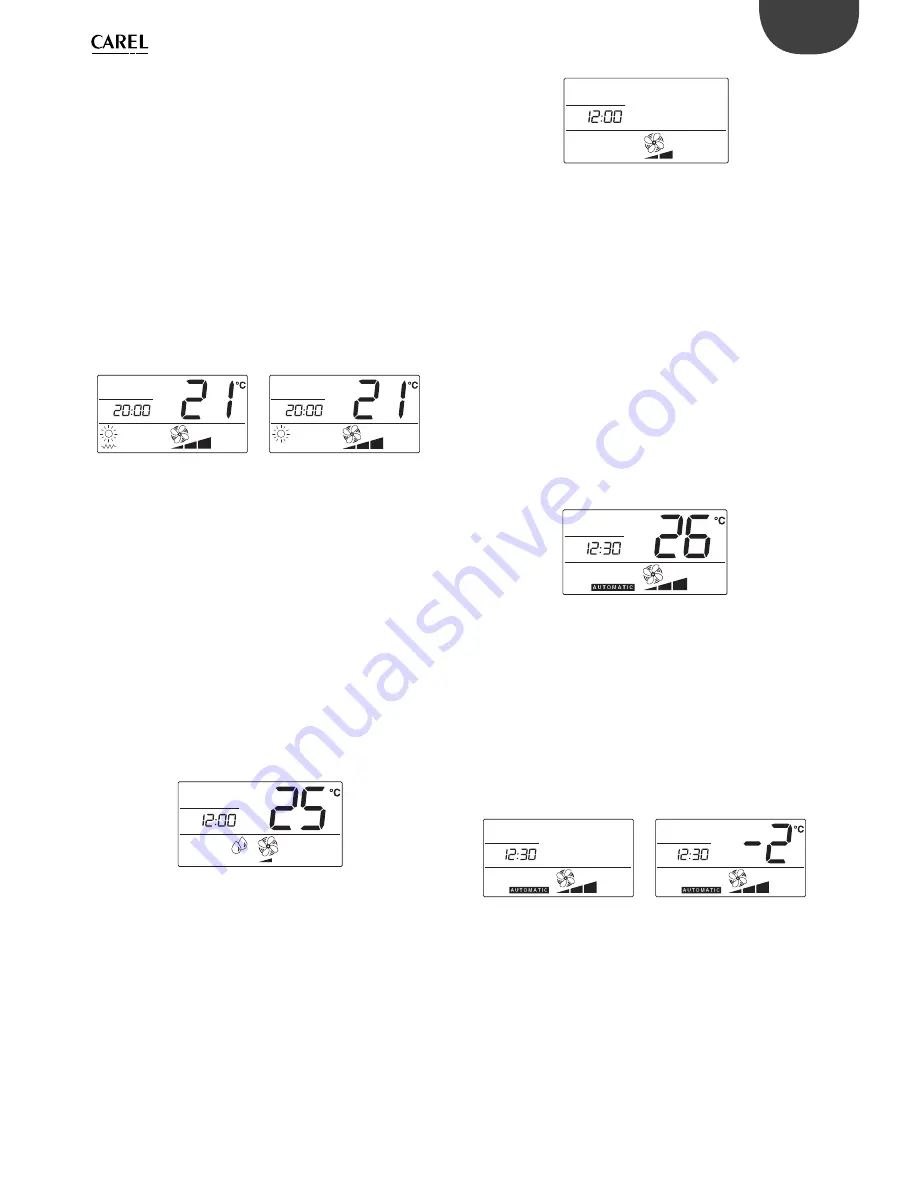
Heating
Once having switched the device on, by pressing the ON/OFF button:
Repeatedly press the MODE button until the heating symbol only (sun)
•
or the heating symbol with heater, if installed (*), comes on. In the
latter case, the electric heater is also used as a source of heat;
Set the set point (desired temperature) using the UP & DOWN
•
buttons;
Repeatedly press the fan button to select the desired fan speed; if AUTO
•
mode is selected, the speed is decided by the electronic controller
based on the deviation from the set point (the greater the deviation,
the higher the speed).
If the HEAT ENABLE function is active, the fan is started only if the coil
temperature is high enough, to avoid undesired flows of cold air. If
this condition is not satisfied the heating symbol (sun) flashes.
If the electric heater is installed (signalled by the corresponding symbol
on the display), the fan continues operating for 20 seconds after it has
been deactivated. This time is also maintained when switching off the
device using the ON/OFF button.
with heater
without heater
Fig. 2.d
Fig. 2.e
(*): For the installation of the electric heater, see the paragraph on
“Confi guration“.
Dehumidifi cation
Once having switched the device on, by pressing the ON/OFF button:
Repeatedly press the MODE button until the dehumidifi cation symbol
•
(droplets) comes on;
Set the set point (desired temperature) using the UP & DOWN
•
buttons;
Repeatedly press the fan button to select the desired fan speed; if
•
AUTO mode is selected, the fan works at minimum speed.
The fan is started only if the coil temperature is low enough, so as
to avoid undesired fl ow of hot and humid air. If this condition is not
satisfi ed, the dehumidifi cation symbol fl ashes. MasterAria starts in
cooling mode so as to bring the room temperature closer to the set
point (set point +3 °C) using the selected speed, and then runs fan on/
off cycles at minimum speed to decrease the humidity.
Fig. 2.f
Ventilation
This operating mode can be disabled by setting parameter 38=8. The
mode may be useful for circulating the air in the room. In this case, also set
the minimum opening of the outside damper (parameter 119> 0%).
Once having switched the device on, by pressing the ON/OFF button:
Repeatedly press the MODE button so that only the fan symbol is on
•
(at the bottom of the display) together with the corresponding speed
bar.
Repeatedly press the fan button to select the desired fan speed; if
•
AUTO mode is selected, the speed is set to medium.
The fan is started only if the room temperature is within the range of
temperatures from 15 to 35 °C, to avoid undesired fl ows of hot or cold
air.
Fig. 2.g
AUTOMATIC
Once having switched the device on, by pressing the ON/OFF button:
Repeatedly press the MODE button until the AUTOMATIC symbol
•
comes on;
Set the set point (desired temperature) using the UP & DOWN
•
buttons;
Repeatedly press the fan button to select the desired fan speed; if AUTO
•
mode is selected, the speed is decided by the electronic controller
based on the deviation from the set point (the greater the deviation,
the higher the speed).
The operating mode (heating or cooling) is decided by the electronic
controller based on the deviation from the set point: if the room
temperature is higher than the set point, the controller activates cooling
mode, while if it is lower heating mode is activated.
The fan is started only if the coil temperature is suitable for the heating
or cooling functions.
AUTOMATIC mode
AUTO
MAN
ON
OFF
HR
HR
Fig. 2.h
Comfort
In some systems, the set point is decided by the manager of the installation;
in these cases, the user may increase or decrease the set point by up to 3
°C to compensate for diff erent perception of the room temperature. The
value is changed by pressing the UP and DOWN buttons and is displayed
for 5 seconds, after which the previous display resumes.
AUTOMATIC mode
with comfort active
comfort variation
AUTO
MAN
ON
OFF
HR
HR
AUTO
MAN
ON
OFF
HR
HR
Fig. 2.i
Fig. 2.j
Summary of Contents for MasterAria
Page 1: ...MasterAria User manual electronic controller...
Page 2: ......
Page 4: ......
Page 6: ......
Page 56: ...Notes...
Page 57: ...Notes...
Page 58: ...Notes...
Page 59: ......


