background image

27

E

Using the Full 

Rang

e of Features

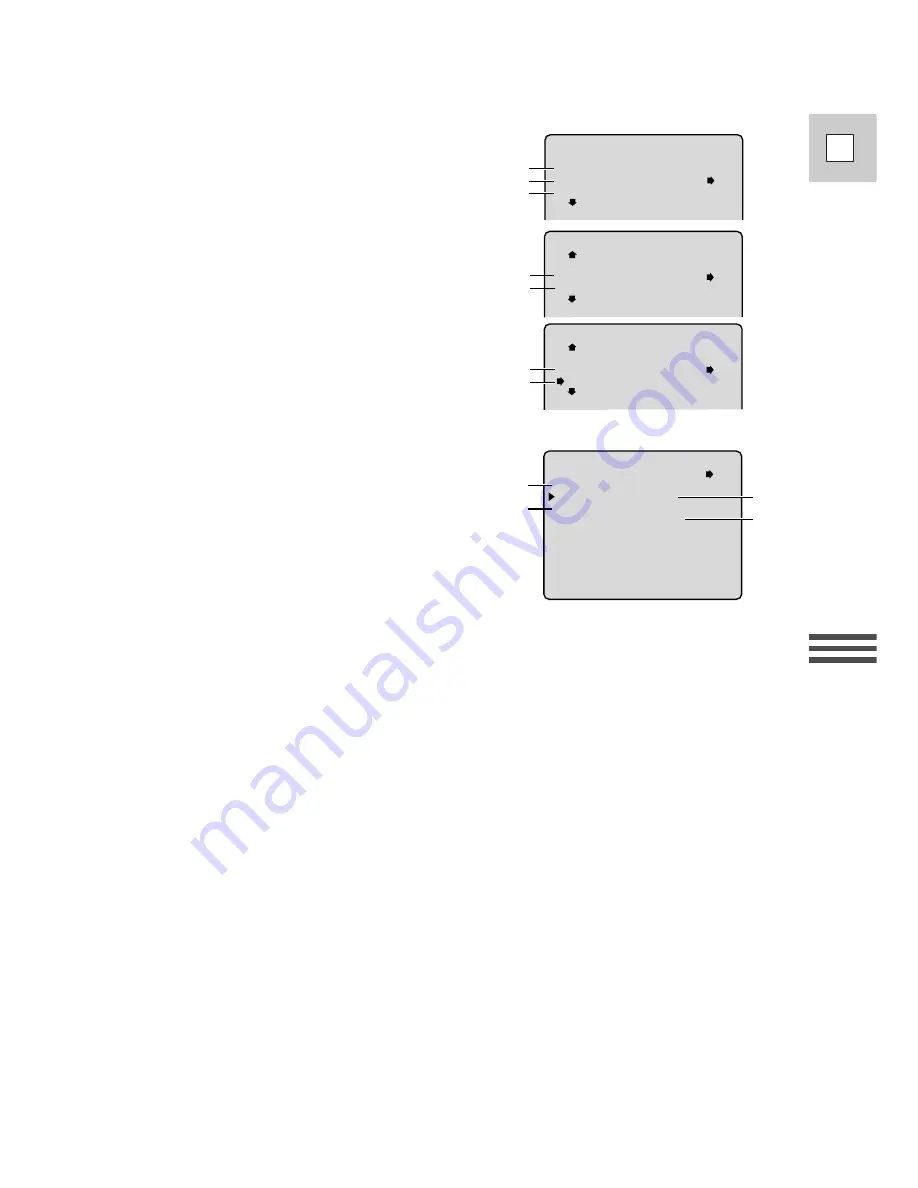
Edit menu (EDIT MODE)

q

Set ............................................p. 63

w

Relocate ..................................p. 70

e

Delete ......................................p. 69

r

Preview ....................................p. 65

t

Start..........................................p. 66

y

Clear all ..................................p. 69

u

Select set up ............................p. 61

Set up menu (SET UP)

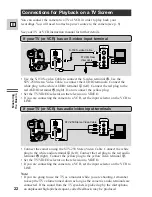
q

Wireless control ......................p. 30

w

Select recorder  ........................p. 61

e

Cut-in adjustments ..................p. 67

r

Cut-out adjustments ................p. 67

ED I

M O D E

T

A

C

E

R

LO

TE

[M EN U ] R TN

E T

S

D E LE TE

ED I

M O D E

T

[M EN U ] R TN

T

T

S AR

E

R V

P

EW

I

D E LE TE

ED I

M O D E

T

[M EN U ] R TN

T

T

S AR

R

L

L L

C EA

A

U

E

S T

P

e

q

t

u

y

r

w

S E T U P

[M EN U ] R TN

W I

E

R

N

E LE

CUT–I
CUT–

A D J

R CO R D

.

.

R

S S C
E

0 :0 0

1–A

O N

. .

U T

O

A D J.

0 :0 0

.

. . . .

.

e

q

r

w

Summary of Contents for Ultura

Page 1: ... VIDEO CAMCORDER Instruction Manual CAMESCOPE ET LECTEUR VIDEO NUMERIQUES Mode d emploi VIDEOCAMARA Y GRABADORA DIGITAL Manual de Instrucciones ENGLISH FRANÇAIS ESPAÑOL Mini Digital Video Cassette NTSC E F Es ...

Page 2: ...ment into an outlet on a circuit different from that to which the receiver is connected Consult the dealer or an experienced radio TV technician for help Use of shielded cable is required to comply with class B limits in Subpart B of Part 15 of FCC Rules Do not make any changes or modifications to the equipment unless otherwise specified in the manual If such changes or modifications should be mad...

Page 3: ...es may cause the product and cart combination to overturn 10 Power Sources The CA 500A Compact Power Adapter should be operated only from the type of power source indicated on the marking label If you are not sure of the type of power supply to your home consult your product dealer or local power company Regarding other power sources such as battery power refer to instructions in this manual 11 Po...

Page 4: ...lled onto or objects have fallen into the product c If the product has been exposed to rain or water d If the product does not operate normally even if you follow the operating instructions Adjust only those controls that are covered by the operation instructions Improper adjustment of other controls may result in damage and will often require extensive work by a qualified technician to restore th...

Page 5: ...Balance 56 Returning to a Pre Marked Position 58 The Auto Editing Function 59 Preparing for Editing 60 Using the Editing Function for the First Time 61 Choosing a Scene 63 Preview and Recording 65 Cut In and Cut Out Adjustments 67 Deleting Scenes and Clearing the Program 69 Reordering Scenes 70 Simple Editing to a VCR 71 Preparing the Camera 74 Notes on Using the Batteries 75 Setting the Audio Mix...

Page 6: ... give you pleasure for years to come To get the most out of your new camcorder we recommend that you read this manual thoroughly there are many sophisticated features which will add to your recording enjoyment Getting started To get started we suggest that you master the basic operations of the camcorder first before moving on to use its full range of features For quick reference in addition to th...

Page 7: ... Canon s innovative FlexiZone Control is a unique way to use a video camera FlexiZone Control Digital effects Optical Image Stabilizer PCM Digital Sound 2 5 LCD Screen An LCD screen makes it easy for you to shoot colorful well composed video It is also great for playback 16 lens and 64 320 digital zoom A complete set of editing functions is built in turn your recordings into finished productions w...

Page 8: ...utlet 1 Connect the power adapter to the camera s DC IN terminal 2 Plug the adapter into an AC outlet 3 Remove the power adapter after use Always turn the camera off before connecting removing the power source CA 500 Compact Power Adapter Specifications Power supply 100 240V AC 50 60Hz Power consumption 12 W Rated output 9 5V 0 8A DC Operating temperature range 32 104 F 0 40 C Dimensions 2 1 2 1 1...

Page 9: ...he battery pack is less than 50 charged Double flashes mean that it is between 50 and 75 charged Triple flashes mean that it is more than 75 charged The indicator glows steadily when the battery pack is fully charged Charging will also take place when the camera is in stop mode during VCR mode or the power is off in camera mode This charging will take longer than when the POWER switch is set to OF...

Page 10: ...ce Mastering the Basics 10 E Loading a Cassette CLOSE THIS FIRST PUSH OPEN EJECT Loading and unloading Only use videocassettes marked with the D logo Notes After loading a cassette use record search p 40 to find the point where you want to start recording Do not interfere with the cassette compartment while it is opening or closing automatically or attempt to close the cover Do not leave the casse...

Page 11: ...Cassette Memory You cannot use the cassette memory function with this camcorder Handling cassettes To protect the tape heads transfer cassettes directly from the tape case to the camcorder do not open the tape protect cover or touch the tape itself Do not use cassettes where the tape has been damaged or spliced they may damage the camcorder Do not insert anything into the small holes on the casset...

Page 12: ...power indicator lights up red This selects the camera s Easy Recording program It allows you to simply point and shoot without making any manual adjustments see p 42 2 Turn the standby lever to MOVIE PAUSE appears in the display the camera is now in record pause mode The camera will turn itself off if you leave it in record pause mode for more than about five minutes To return to record pause mode...

Page 13: ...asy Recording the camera has seven other recording programs Slide the POWER switch to the Q position to give you access to these recording programs p 41 and also to the digital effects p 45 To check that the camera is recording correctly make a test recording first Before making important recordings clean the video heads using a Canon DVM CL Digital Video Head Cleaning Cassette or a commercially a...

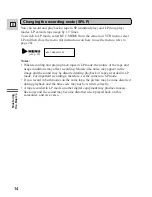
Page 14: ...aying back tapes in LP mode the nature of the tape and usage conditions may affect recording Mosaic like noise may appear in the image and the sound may be distorted during playback of tapes recorded in LP mode For important recordings therefore set the camera to SP mode If you record in both modes on the same tape the picture may become distorted during playback and the time code may not be writt...

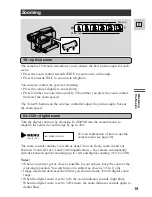
Page 15: ...m range by up to 20 Zooming 16 optical zoom W I D E T E L E Zoom out Zoom in T W D ZOOM 64 The zoom control continues to work as usual You can freely zoom in and out between 1 and 64 or 1 and 320 magnification the camera automatically switches between optical zooming up to 16 and digital zooming 16 to 320 For an explanation of how to use the camera menu see page 26 see p 26 Notes When you want to ...

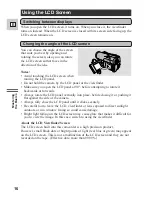
Page 16: ... before attempting to rotate it backwards or forwards Always rotate the LCD panel vertically into place before closing it or pushing it flat against the side of the camera Always fully close the LCD panel until it clicks securely Be careful not to leave the LCD viewfinder or lens exposed to direct sunlight outdoors or in a window Doing so could cause damage Bright light falling on the LCD screen m...

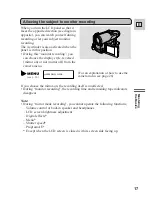
Page 17: ...ring the Basics 17 E MIRROR ON For an explanation of how to use the camera menu see page 26 see p 26 Allowing the subject to monitor recording If you choose the mirror on the recording itself is unaffected During monitor recording the recording time and remaining tape indicators disappear Note During mirror mode recording you cannot operate the following functions Volume control of built in speake...

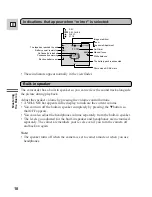
Page 18: ...eaker The levels you adjusted for the built in speaker and headphones are memorized separately The camera remembers your levels even if you turn the camera off and back on again Note The speaker turns off when the camera is set to camera mode or when you use headphones REC REC PAUSE EJECT STOP A F O F F Self timer Manual focus White balance Zoom Exposure Adjustment Image stabilizer No Cassette is ...

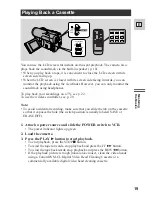
Page 19: ... To avoid accidental recording make sure that you slide the tab on the cassette so that it exposes the hole the switch position is usually labeled SAVE or ERASE OFF 1 Attach a power source and slide the POWER switch to VCR The power indicator lights up green 2 Load the cassette 3 Press the PLAY e button to start playback To end playback press the STOP 3 button To wind the tape forwards stop playba...

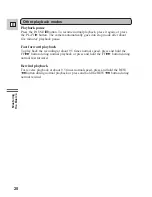
Page 20: ...layback pause Fast forward playback To play back the recording at about 9 5 times normal speed press and hold the FF 1 button during normal playback or press and hold the FF 1 button during normal fast forward Rewind playback For reverse playback at about 9 5 times normal speed press and hold the REW button during normal playback or press and hold the REW button during normal rewind Other playback...

Page 21: ...button to return to normal playback The camera automatically returns to playback after about 30 seconds of slow playback Slow Reverse Playback To play back in reverse at about 1 5 normal speed press the 4a button and then the SLOW M button during normal playback Press PLAY e to return to normal playback The camera automatically returns to 1 reverse playback after about 30 seconds of slow playback ...

Page 22: ...able Connections for Playback on a TV Screen VIDEO S VIDEO INPUT AUDIO L R S 150 S video Cable STV 250 Stereo Video Cable DV IN OUT AV OUT S DC IN 9 5V If your TV or VCR has an S video input terminal Connect the camera using the STV 250 Stereo Video Cable Connect the white plug to the white audio terminal 7 left Connect the red plug to the red audio terminal 9 right Connect the yellow plug to the ...

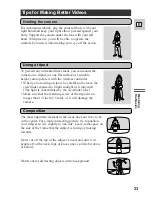
Page 23: ...ment in the scene does not have to be in the center For a more interesting picture try to position your subject so it is slightly to one side Leave some space on the side of the frame that the subject is facing or moving towards For maximum stability grip the camera firmly with your right hand and keep your right elbow pressed against your body Support the camera under the lens with your left hand...

Page 24: ...um shot Close up Instead of zooming while recording try to choose your picture angle before you begin A good way to tell a story with video is to begin with a long shot that establishes the situation and then move in with medium shots and close ups to show the details Remember to change your viewpoint for each shot Remember that any camera movement or change in picture angle should have a definite...

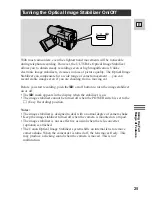
Page 25: ... you start recording push the i on off button to turn the image stabilizer on or off The i mark appears in the display when the stabilizer is on The image stabilizer cannot be turned off when the POWER switch is set to the Easy Recording position Notes The image stabilizer is designed to deal with a normal degree of camera shake Keep the image stabilizer turned off when the camera is mounted on a ...

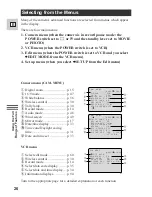
Page 26: ...ind screen p 49 o Mirror mode p 17 0 Date time display p 33 111 Time zone Daylight saving time p 31 2 Date and time set p 33 VCR menu q Select edit mode p 60 w Wireless control p 30 e Record mode p 14 r Select data code display p 35 t Select date and time display p 34 y Information displays p 94 C C AM MENU CAM MENU S M ENU LO SE C M ENU LO SE C D D ZOOM 16 9 E E O R TALLY LAM M P P AUD I MODE O W...

Page 27: ...nu SET UP q Wireless control p 30 w Select recorder p 61 e Cut in adjustments p 67 r Cut out adjustments p 67 ED I MODE T A C E R LO TE MENU R TN ET S DELETE ED I MODE T MENU R TN T T S AR E R V P EW I DELETE ED I MODE T MENU R TN T T S AR R L LL C EA A U E S T P e q t u y r w SET UP MENU R TN W I E R N ELE CUT I CUT AD J R CO RD R SS C E 0 00 1 A ON UT O AD J 0 00 e q r w ...

Page 28: ... the command dial to choose the option setting 5 Press the set button to select the option setting 6 Press the MENU button once more to close the menu Notes You can only see eight options on the screen at the same time Pointers at the top bottom of the screen indicate that there are more options that you can scroll through You may often find it convenient to use the wireless controller to move aro...

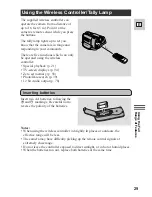
Page 29: ...s controller Special playback p 21 TV screen displays p 94 Zero set memory p 58 Photo Date search p 39 12 bit Audio output p 78 Insert two AA batteries following the and markings Be careful not to reverse the polarity of the batteries 16ft Inserting batteries Notes When using the wireless controller in brightly lit places or outdoors the effective range will be less The camera may have difficulty ...

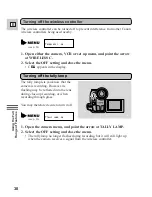
Page 30: ...e decide to turn it off Using the Full Range of Features 30 E Turning off the tally lamp TALLY LAMP ON 1 Open the camera menu and point the arrow at TALLY LAMP 2 Select the OFF setting and close the menu The tally lamp no longer flashes during recording but it will still light up when the camera receives a signal from the wireless controller WIRELESS C ON The wireless controller can be turned off ...

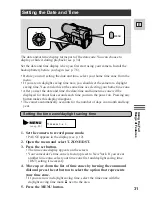
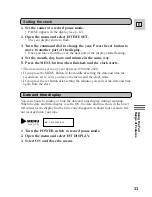
Page 31: ... disappear The camera automatically accounts for the number of days in a month and leap year 31 E Using the Full Range of Features 1 Set the camera to record pause mode PAUSE appears in the display see p 12 2 Open the menu and select T ZONE DST 3 Press the set button The time zone display appears on the screen Your camcorder s time zone is factory preset to New York If you are at another time zone...

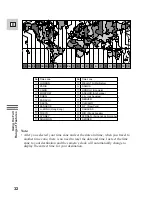
Page 32: ...iro FERNAN Fernando de Noronha AZORES No Time zone No Note After you selected your time zone and set the date and time when you travel to another time zone there is no need to reset the date and time Just set the time zone to your destination and the camera s clock will automatically change to display the correct time for your destination 1 24 1 2 3 4 5 6 7 8 9 10 11 12 13 14 15 16 17 18 19 20 21 ...

Page 33: ...t button to move to another part of the display Once you move from the year the next part of the display starts flashing 4 Set the month day hour and minute in the same way 5 Press the MENU button when finished and the clock starts The date can be set to any year between 1999 and 2020 If you press the MENU button in the middle of setting the date and time the seconds are set to zero you leave the ...

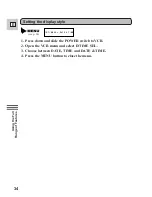
Page 34: ... 34 E 1 Press down and slide the POWER switch to VCR 2 Open the VCR menu and select D TIME SEL 3 Choose between DATE TIME and DATE TIME 4 Press the MENU button to close the menu Setting the display style D TIME SEL DATE TIME see p 26 ...

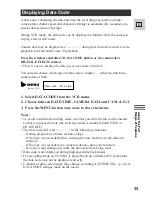
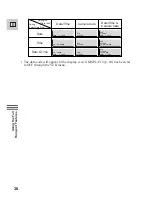
Page 35: ...nu 2 Choose between DATE TIME CAMERA DATA and CAM D T 3 Press the MENU button once more to close the menu Notes To avoid accidental recording make sure that you slide the tab on the cassette so that it exposes the hole the switch position is usually labeled SAVE or ERASE OFF The data code will read in the following situations During playback of a blank section of tape If the tape was recorded befo...

Page 36: ...ting Select Date Time 1 2 0 0 AM 1 2 0 0 AM F 3 1 2 2 0 0 0 1 2 0 0 0 0 AM 1 2 0 0 0 0 AM F 3 1 2 2 0 0 0 F 3 1 2 2 0 0 0 F 3 1 2 2 0 0 0 F 3 1 2 2 0 0 0 F 3 1 2 2 0 0 0 1 9 9 9 JAN 1 1 9 9 9 JAN 1 1 9 9 9 JAN 1 1 9 9 9 JAN 1 The data code will appear in the display even if DISPLAYS p 94 has been set to OFF through the VCR menu ...

Page 37: ...he camera is ready to take the still picture The focus exposure and zoom are now locked Also you cannot turn the image stabilizer on off To change the still picture before recording release the button select a new picture and then press down the start stop button lightly once more If the subject is unsuitable for autofocus p 84 the camera may not be in focus despite displaying the green mark In th...

Page 38: ... cannot use FlexiZone in photo mode If the FlexiZone mode is already selected the camera switches to Auto mode automatically You can also use the wireless controller to take pictures First turn the standby lever on the camera body to PHOTO Then use the PHOTO button on the wireless controller Take the picture with one full push Only take photos where it is bright enough to see the image in the disp...

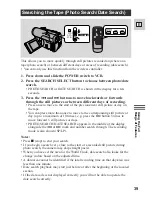
Page 39: ...s e g press the button 5 times to move forward 5 still pictures or days PHOTO SEARCH DATE SEARCH appears in the middle of the display alongside the or mark and number search through The recording mode is also shown SP LP 39 E Using the Full Range of Features P OFF VCR POWER SEARCH SELECT Searching the Tape Photo Search Date Search Notes Press 3 stop to end your search If you begin a search very cl...

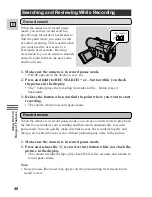
Page 40: ... mosaic like noise may appear on the screen during record search and record review REC SEARCH When the camera is in record pause mode you can use record search to play the tape forwards or backwards to find the point where you want to start or restart recording This is useful when you want to add a new scene to a previously used cassette By using record search you can ensure a smooth noise free jo...

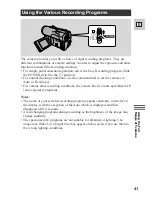
Page 41: ...command dial to set the camera to Auto or FlexiZone For various other recording conditions the camera has five more specialized AE auto exposure programs Notes The name of your selected recording program appears constantly on the left of the display with the exception of the Auto which is displayed and then disappears after 4 seconds Avoid changing programs during recording as the brightness of th...

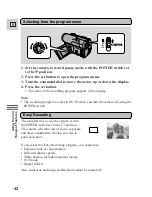
Page 42: ... Note The recording program is reset to AUTO when you turn the camera off using the POWER switch P OFF VCR POWER Easy Recording The simplest way to use the camera is with the POWER switch set to the position The camera will take care of focus exposure and other adjustments leaving you free to point and shoot If you select this Easy Recording program you cannot use Exposure lock or compensation Dif...

Page 43: ...te balance and so on You can adjust shutter speeds in the Auto Recording program 43 E Using the Full Range of Features Auto This program is useful for recording high speed sports scenes in brightly lit conditions Normal playback will be slightly jerky but you will get clear images which can be analyzed frame by frame during slow or paused playback AUTO SPORTS FLEXIZONE Portrait Use this program ou...

Page 44: ...ears underexposed in the display a sunny beach or ski resort for example You may notice some shudder when recording moving subjects This program allows you to record in dimly lit places It is generally best used for close ups of slow or stationary subjects as moving subjects may leave a trailing after image However you can take advantage of this to create special effects by rapid zooming or by pan...

Page 45: ... gradually expands sideways until it fills the whole of the screen When you end a scene the image is wiped from both sides of the screen Horizontal Wipe WIPE o When you start recording the picture begins as a thin horizontal line in the center of the screen which gradually expands upwards and downwards until it fills the whole screen When you end a scene the image is wiped from the top and bottom ...

Page 46: ...two seconds to make the digital effects menu appear The menu appears for four seconds 3 By pressing the DIGITAL EFFECTS button choose one of the digital effects from the list As for the Art Black and White Sepia and Strobe effects when you release the DIGITAL EFFECTS button chosen effect is activated and you can see the effect on the display Each time you press the DIGITAL EFFECTS button the chose...

Page 47: ...e trigger vertical wipe or horizontal wipe effects when the standby lever is set to PHOTO its name flashes purple in the display When you activate the fade vertical wipe or horizontal wipe effect at the beginning of recording a scene the camera first clears the screen and then applies the effect The camera remembers your chosen effect until you change it but when you switch the POWER switch to Eas...

Page 48: ... CD If you do plan to add new sound at a later date make sure you record in SP mode p 14 1 To switch the audio mode open the camera menu and select AUDIO MODE 2 Select 16 bit and close the menu The display appears for approximately 4 seconds Notes You cannot add new sound to a tape using this camcorder For details of playing back a tape that has new sound on stereo 2 see page 78 Headphones and ext...

Page 49: ...om interfering with the sound track It does not operate with an external microphone WS is displayed Turn it off when you want the microphone to be as sensitive as possible 1 Open the camera menu and point the arrow at WIND SCREEN 2 Select the OFF setting and close the menu WS is shown in the display Wind screen see p 26 ...

Page 50: ...g After recording a still picture for about six seconds the camera automatically goes into record pause mode Notes Initially the tally lamp flashes once a second then more quickly for a few seconds just before the camera starts to record To cancel the self timer before the countdown has begun press the SELF TIMER button again To cancel the self timer once the countdown has begun press the start st...

Page 51: ...s not in the center of the display When you want to shoot a moving subject It also makes it easy to use focus shift techniques You can direct the viewer s attention by focusing first on one part of the scene and then on another 1 Choose the FlexiZone recording program The FlexiZone control frame appears in the display 2 Use the FlexiZone controller to move the frame over the subject The controller...

Page 52: ...ly Press the FOCUS wheel again when you want to return to autofocus PUSH FOCUS Focus lock You can also adjust the focus temporarily without turning autofocus off in this case turn the manual focus wheel to set the focus without pressing it down and autofocus will start again as soon as you release the FOCUS wheel Notes The manual focus setting is canceled if you Slide the POWER switch to VCR or OF...

Page 53: ... the area that is currently inside the frame You can move the frame to focus on something else but the exposure area will not move with it E LOCK appears in the display 4 Press the button again when you want to cancel FlexiZone AE The exposure is now adjusted to suit the center of the screen again Press the button once more if you want to adjust the exposure for the frame s new position Note You c...

Page 54: ...rker turn the command dial counter clockwise to a maximum of 11 This may be necessary if the background is very dark or if the subject is spotlit E L OC K 0 E L OC K 11 E L OC K 0 E L OC K 11 When the exposure is locked you can adjust it manually making the picture brighter or darker in order to deal with difficult lighting conditions or to manipulate the mood of the scene The camera s iris can be...

Page 55: ...r speed Note The camera returns to the auto shutter setting when you slide the POWER switch away from the Q setting or change the recording program Concerning shooting in fluorescent lighting When the camera is set to Easy Recording mode auto mode or FlexiZone mode it automatically detects the flicker of fluorescent lighting and adjusts the shutter speed to compensate However if the brightness of ...

Page 56: ... light source the flashing may at times continue The result will remain better than with the auto setting and you can continue recording 3 Close the menu see p 26 The camera s auto white balance system compensates for a wide range of lighting conditions Although slight variations are unavoidable colors will appear natural in virtually every situation In some cases you will get better results by se...

Page 57: ...ite balance by first returning to the AUTO setting and then reselecting SET Try to record with light from a single source Correct white balance cannot be obtained for two types of lighting at once You cannot set the white balance or choose the indoor outdoor mode when the POWER switch is set to the Easy Recording program The camera returns to the AUTO setting when you slide the POWER switch away f...

Page 58: ... counter with indication disappears from the display and the time code reappears Notes Press the ZERO SET MEMORY button once more to cancel the zero set memory before you forward rewind the tape The zero set memory may not function correctly where there is a break between recordings on the tape You can also use zero set memory to mark a position on a tape in record pause mode When you then play ba...

Page 59: ...to Editing Function is simple Just watch your original tape and press the set button at the beginning and the end of each scene you want to record This creates an editing program Start the program and the camcorder automatically records the scenes you selected onto the tape in your VCR Before you record you can preview everything p 65 and even delete p 69 or re order scenes p 70 If you connect ano...

Page 60: ...o equipment is turned off to avoid accidental recording Infra red signals transmitter The Auto Editing Function enables you to smoothly rerecord scenes from an original tape in any order You can then view the entire finished product and make all the fine adjustments you want before the final recording It is easy to reorder to make your videos perfect 1 Connect the camera to the VCR See the Connect...

Page 61: ...rn the command dial clockwise to change the setting 2 If the setting is correct the VCR will start recording automatically This will occur as long as the camera is pointing at the VCR s remote sensor while you change the setting 3 If the VCR does not start recording try the next setting Turn the command dial to 7 B in the above example Try each setting in turn until the VCR starts to record During...

Page 62: ...rol signals vary depending on model and brand First choose the right RECORDER setting for your VCR The number indicates the VCR brand The letter indicates the set of signals Notes Once you find the correct setting remember this and do not change it unless you change VCRs See p 67 for details of the cut in and cut out adjustments If you try all the numbers and letters but the VCR has still not star...

Page 63: ...to record press the set button 5 Press it again at the end of the scene The beginning and end of the scene according to the counter the cut in and cut out points are displayed on the display The programmed number becomes highlightened The camera will not let you put in a cut in point later than its cut out point nor a cut out point earlier than its cut in point You will not be able to make scenes ...

Page 64: ...st three minutes of the tape If you program a cut in point with no cut out point following editing will continue until the tape end and then the camera and VCR stop automatically Editing a tape recorded in both SP and LP modes may be less accurate Avoid setting the cut in cut out points before non recorded portions Avoid making the program leaving non recorded portions between the cuts If when edi...

Page 65: ... POWER SET ED I MODE T R P E I V EW MENU R TN Preview and Recording Preview function 2 Press the set button The camera will now play all the scenes from the program number you selected in the order you have programmed them In PREVIEW mode the tape starts a little before each cut in point It will pause for 2 seconds precisely at the cut in point It pauses again at the cut out point The program numb...

Page 66: ... program START function 3 The editing program starts when you press the set button The camera automatically records the scenes you selected onto the tape in the VCR The Auto Editing Function carries out some operations such as frame advance at the cut in cut out points to ensure editing accuracy When you want to stop editing press the 3 stop buttons on the camera and the VCR If the Auto Editing Fu...

Page 67: ...record more than you wanted or lose the end of the scene CUT OUT ADJ prevents this by sending the command a little early or late If you have these problems with your VCR reset these adjustments Use the set up menu to set the cut in and cut out adjustments 67 E Editing Cut In and Cut Out Adjustments Setting the Cut In and Cut Out Adjustments 1 Open the set up menu and point the arrow at CUT IN ADJ ...

Page 68: ... the CUT OUT timer stops and CUT IN timer starts These times are what the CUT OUT ADJ and CUT IN ADJ settings should be For maximum accuracy take an average of at least three readings If your VCR has a frame advance function or a jog dial you can use it to find the precise starting times more conveniently 2 Set the CUT OUT ADJ and CUT IN ADJ settings to the center of the three readings Note The ca...

Page 69: ... T 0 0 0 0 0 0 5 0 0 4 0 0 0 3 2 0 0 0 1 0 6 0 0 0 T U C N I T U C T U O L T E E MENU R TN ED I L L L TOT L A C MODE T 0 0 0 0 0 0 5 0 0 4 0 0 0 3 2 0 0 0 1 0 6 0 0 0 T U C N I T U C T U O E R A A MENU R TN Deleting Scenes and Clearing the Program Clearing the whole display CLEAR ALL function Deleting a scene DELETE function 2 Press the set button The scene is deleted and that program number indic...

Page 70: ...lected program number moves one line up 3 Turn the command dial to select the new position 4 Press the set button The program is relocated at the point 5 Repeat as necessary with the other scenes until the program is ordered as you want it If a program number is left unprogrammed the editing function stops at that point the VCR also stops automatically ED I E TOT L A R MODE T 0 0 0 0 0 0 5 0 0 4 0...

Page 71: ...o channel or set the TV VIDEO selector to VIDEO Turn on the VCR and set its input selector to LINE Load a blank cassette and put the VCR in record pause mode See your TV and VCR instruction manuals for details 3 Slide the camera s POWER switch to VCR and load your recorded cassette If you cannot find the appropriate remote control setting for the camcorder to control your VCR you still can edit a ...

Page 72: ...ng to the ULTURA slide the POWER switch to VCR and press the DV REC button on the ULTURA or the wireless controller s REC PAUSE button DV IN appears in the display when you press play on the playback device Then press its pause button to start pause recording If the cables are not connected properly the camera displays the caution CHECK THE DV INPUT The image displayed by the camcorder that is bei...

Page 73: ... contents of the cassette If you try to record from such a tape via the digital cable COPYRIGHT PROTECTED DUBBING RESTRICTED appears in the display you cannot record the contents of the tape DK 1 DV Capture kit With the optional DK 1 kit you can download high quality beautiful still pictures for making cards calendars a digital photo album use on internet home pages and so on For full details of h...

Page 74: ...s through the attachment bars and adjust the length as shown Prepare the lens cap Adjust the viewfinder Attach the shoulder strap Hook the lens cap on to the grip belt while you are recording and place it over the lens when you have finished Fasten the grip belt Release the Velcro fastening and hold the camera with your right hand while you adjust the belt with your left Note Be careful not to lea...

Page 75: ...ifferent levels will be shown when you subject the battery pack and camcorder to different conditions When to recharge You can recharge a lithium ion battery pack whenever it is convenient Unlike a conventional battery pack it does not have to be fully discharged first However as the battery pack will naturally discharge itself over time it is best to charge it the same day you plan to use it or t...

Page 76: ...ttery pack is left in the camera the battery pack will gradually loose power even if the POWER switch is OFF Remove the battery pack from the camera when the camera is not in use Storing the battery pack If you do not use a battery pack for a period of more than a few months any remaining charge may cause damage to the battery pack and reduce usage time To prevent damage therefore aim to use a bat...

Page 77: ...r to avoid the risk of explosion DANGER Treat the battery pack with care Keep it away from fire or it might explode Do not expose the battery pack to temperatures greater than 140 F 60 C Do not leave it near a heater or inside a car in hot weather for example Do not try to disassemble or modify it Do not drop or knock it Do not get it wet WARNING The battery used in this device may present a fire ...

Page 78: ...ode 2 Choose the output Press AUDIO MONITOR on the wireless controller Four settings appear as you push the button STEREO1 for just stereo 1 STEREO2 for just stereo 2 MIX FIXED for an equal mix of stereo 1 and 2 MIX VARIABLE for when you want to mix the balance between stereo 1 and 2 To simply choose STEREO1 STEREO2 or MIX FIXED make sure your choice appears on the display If you choose MIX VARIAB...

Page 79: ...expose the camera to water Cover the camera when you are recording in rain or mist There is a risk of electric shock if water gets inside the camera contact qualified service personnel as soon as possible Protect the lens Sand and dust can damage the lens be especially careful on windy days Handle the camera gently Vibration or shock can cause damage Do not use the viewfinder or LCD screen as a ca...

Page 80: ... much darker than usual This is not a fault and as the screen warms up the display will return to normal Camera body and lens Use a soft dry cloth to clean the camera body or lens Never use chemically treated cloth or volatile solvents such as paint thinner Additional Information 80 E Maintenance L C D BRIGHTNESS Video heads When mosaic like noise appears on the playback picture the video heads ma...

Page 81: ...though you can always play back your recordings on the LCD screen your camera can only be connected to TVs which use the NTSC system This TV system is used in the following countries American Samoa Bahama Barbados Bermuda Bolivia Canada Chile Colombia Costa Rica Cuba Ecuador El Salvador Guam Guatemala Greenland Haiti Honduras Jamaica Japan Korea Mexico Micronesia Myanmar Nicaragua Panama Peru Phil...

Page 82: ...BEEN DETECTED is displayed for approximately 4 seconds Then the power indicator flashes and the h mark flashes in the display If there is a cassette in the camera it stops automatically and REMOVE THE CASSETTE is displayed for approximately 4 seconds and then v flashes in the display The camera may not detect the condensation immediately the condensation warning may not start flashing for 10 to 15...

Page 83: ...p 10 11 The tape has reached the end The POWER switch is not set to or Q p 12 The standby lever is set to LOCK p 12 You are attempting to play back or record from a copyright protected cassette p 73 The video heads are very dirty p 80 Refer to this checklist first if you have any problems with your camcorder Possible explanations are given for each problem on the list turn to the page numbers in p...

Page 84: ...Behind glass Without much contrast e g a white wall Reflective surfaces e g shiny car surfaces Night scenes Fast moving objects Slanted subjects Dark subjects Recording Playback Contd The camera is on manual focus p 51 The viewfinder lens needs adjusting p 74 The lens is dirty p 80 Cause and or what to do about it There are a number of restrictions on using the digital effects Refer to the notes o...

Page 85: ...oving There s no sound coming from the speaker during playback Cause and or what to do about it It is turned off p 30 The batteries are dead or not inserted It is turned off p 30 Check the screen displays p 75 External interference may cause the camera s microprocessor to malfunction temporarily If random letters appear in the display or if normal operation is interrupted remove and then replace t...

Page 86: ...er Set FS 46 Filter Set SR 37 5 46 Step up Ring SC 1000 Soft Carrying Case MB 100 Microphone Boom DC 900 DC Coupler SS 600 Shoulder Strap VL 10Li Battery Video Light S 150 S video Cable STV 250 Stereo Video Cable CV 150F DV Cable DK 1 DV Capture Kit Digital Device BP 915 Battery Pack WS 20 Wrist Strap Stereo Microphone commercially available Personal Computer BP 900 Series Lithium ion Battery Pack...

Page 87: ...st doubled The playback time figures show how long you can view playback with the LCD after attaching a fully charged battery pack Playback time will be shortened at low temperatures Call or visit your local retailer dealer for genuine Canon video accessories You can also obtain genuine accessories for your Canon camcorder by calling 1 800 828 4040 Canon U S A Information Center Battery pack Maxim...

Page 88: ...extreme wide angle position TL 46 Tele converter This tele converter lens increases the focal length of the camera lens by a factor of 1 4 The zoom and autofocus operate as usual so you can take full advantage of the extra range The image stabilizer is not as effective as usual when the tele converter is attached SR 37 5 46 Step up ring This makes it possible to use the 46 mm filters and converter...

Page 89: ...vantage of the sound quality and creative control it offers A long microphone may be visible in the picture To avoid this use the MB 100 Microphone Boom WS 20 Wrist Strap Provides an extra measure of protection for active shooting VL 10Li Battery Video Light This compact yet powerful video light can be used for both indoor and outdoor shooting Lithium ion battery packs can be used to power the lig...

Page 90: ... D72 Wireless Controller D83 0512 000 CA 500 Compact Power Adapter D85 0892 201 BP 915 Battery Pack D85 0952 201 SS 600 Shoulder Strap D81 1330 000 S 150 S video Cable D82 0330 202 STV 250 Stereo Video Cable D82 0516 000 Lens cap D52 0090 000 DVM E30 Digital Video Cassette D36 0012 000 Optional accessories CB 900 Car Battery Adapter D85 0502 201 CH 900 Dual Battery Charger Holder D85 0772 201 CG 5...

Page 91: ...minal P 48 Command dial P 28 Set button P 28 Stereo microphone Start stop button P 12 FOCUS wheel P 52 Tally lamp P 30 Remote sensor P 29 DIGITAL EFFECTS button P 46 Grip belt P 74 Tripod socket P 23 Battery release button P 9 Backup battery holder P 76 Battery cover P 9 Accessory shoe ...

Page 92: ...terminal P 71 DC 5V terminal OPEN button P 10 Cassette cover P 10 Viewfinder focusing lever P 74 Viewfinder protect cover P 80 self timer button P 50 DV REC button P 72 Infra red signals transmitter P 60 EJECT button P 10 Cassette compartment P 10 LCD BRIGHTNESS buttons P 80 Volume control buttons P 18 FlexiZone controller P 53 P OFF VCR POWER Program AE P 42 Easy Recording P 42 REC SEARCH P 40 Re...

Page 93: ...OTO button P 37 PLAY button P 19 TV SCREEN button P 94 SELF TIMER button P 50 DATA CODE button P 35 REW button P 20 button P 21 2 STOP button P 19 SLOW button P 21 button P 21 PAUSE button P 20 Zoom buttons P 15 Controller buttons P 28 SET button P 28 MIX BALANCE buttons P 78 SEARCH buttons P 39 SEARCH SELECT button P 39 button P 21 FF button P 20 MENU button P 28 Transmitter REC PAUSE button P 72...

Page 94: ...tinue to show warning caution displays when necessary 94 E Additional Information Screen Displays Record pause mode p 12 Recording p 12 The backup battery is not properly installed or needs replacing p 76 Shows how much battery power remains p 75 The battery pack is exhausted p 9 75 No cassette is loaded or it is set for erasure prevention p 10 11 TV SCREEN DATA CODE EC R USE PA N E D 5min ECT E J...

Page 95: ... L C D D ZOOM 16 9 W I E E REL O ESS C R TALLY LAM M P P AUD I MODE O W H ITE BAL W IND SCREEN O FF 64 ON AUTO AUTO 12 b i t ON T W T W T W H C R A E S O T O H P 5 H C R A E S E T A D 5 T W 64 T W 320 C VCR MENU S S S S M M ENU L C D E E O R D D D A AY TA DAT T A DATA COD M E E L L P P D MODE I I T ME T I I T E ON ON W I RE L ES S C C OFF Zoom in Zoom out The image stabilizer is turned on p 25 Cam...

Page 96: ...82 S W OFF FADE T W I PE ART BLK H W SEP I T A STRO E B W I PE Volume level p 18 Screen brightness p 80 DV input p 72 Photo mode p 37 Setting the AF AE F mark flashes white AF AE locked F mark lights up green Recording programs p 41 Manual exposure display p 53 Exposure locked Brighter than standard exposure level Darker than standard exposure level Manual focus is selected p 52 UTO A S ORT S P PO...

Page 97: ...CH V K E H T C D U I P N T D P A T N E E E U TH E P A R R P T S S I E V E N N O I T S E E A R F E O T R T S E I E EE N D D N N O O C T A E E T C B A H S N D O EM A E E H T V C R T S S T E E Y S S O C P P E O H G R T T I R R P C T I I R K B Y A L C A ED E T ED T C Y S O C P E O H G G R T T I R R P C T I R N B U D I B ED E T ED T C Recording reminder When you start recording the camera counts from 0...

Page 98: ...ssible Minimum focusing distance 2 5 8 feet 80 cm 3 8 inch 1 cm on maximum wide angle Maximum shutter speed 1 8 000 sec Minimum illumination 2 lx using the Low Light program Recommended illumination More than 100 lx Filter diameter 37 5 mm Viewfinder 0 55 inch color LCD approx 113 000 pixels LCD screen 2 5 in measured diagonally 120 000 pixels approx Microphone Stereo electret condenser microphone...

Page 99: ...and Time 31 Digital Effects 45 Digital Video 7 Digital Zoom 15 Displaying Data Code 35 DV Terminal 71 Easy Recording 42 Editing 71 Exposure 53 External Microphone 48 Ï Fade Trigger 45 Fast Forward 19 Feedback 22 Finding Your Way Around the ULTURA 94 FlexiZone 43 FlexiZone Control 51 Focusing 51 Ó Head Cleaning 80 Headphones 48 Horizontal Wipe 45 È Image Stabilizer 25 Introducing the ULTURA 7 Ò LAN...

Page 100: ...ensor 29 Rewind 19 Í S video 22 Sand Snow 44 Screen Displays 94 Self Timer 50 Sepia 46 Shoulder Strap 74 Shutter Speed 55 16 9 47 SP Mode 14 Speaker 18 Specifications 98 Sports 43 Spotlight 44 Standby Level 12 Storage 79 Strobe 46 System Diagram 86 Ê Tally Lamp 30 Tape Protection 11 Telephoto 15 Temperature 75 79 Time Code 97 Time Zone 31 Tripod 23 Troubleshooting 83 TV 22 94 Ë Using the Camera Ab...

Page 101: ...nty covers all defects encountered in normal use of the DV Camcorder and does not apply in the following cases a Loss of or damage to the DV Camcorder due to abuse mishandling improper packaging by you alteration accident leaking batteries exterior nicks scratches or dents electrical current fluctuations failure to follow operating instructions maintenance and environmental instructions prescribed...

Page 102: ... c The digital video equipment is used for commercial professional or industrial purposes This limited warranty does not cover the cabinet exterior finish of the digital video equipment video cassette tapes head cleanings nor does it apply to digital video equipment purchased outside Canada TO OBTAIN WARRANTY SERVICE Ship your Canon digital video equipment in its original carton box or equivalent ...

Page 103: ...CALGARY 2828 16th Street N E Calgary Alberta T2E 7K7 CANON CANADA INC MONTREAL 5990 Côte de Liesse Quebec H4T 1V7 If you have any questions call the Canon Canada Information Center toll free at 1 800 828 4040 Canada only Si vous avez des questions veuillez téléphoner sans frais au Canada 1 800 828 4040 Canada seulement MEXICO CANON MEXICANA S DE R L DE C V Periferico Sur No 4124 Col Ex Rancho de A...

Reviews: