background image

63

Shooting

¡

Compose each frame so that it overlaps 30 to 50 % of
the adjoining image. Try to keep the vertical misalign-
ment to within 10 % of the image height.

¡

Do not include moving items in the overlap.

¡

Do not try to stitch images that include both distant and
close items. Objects may appear warped or doubled up.

¡

Make the brightness in each image consistent. The final
image will appear unnatural if the difference in
brightness is too great.

¡

For good results, pan (swivel) the camera to take
successive shots.

¡

To shoot close-ups, slide the camera over the subject,
keeping it parallel as you move.

Shooting

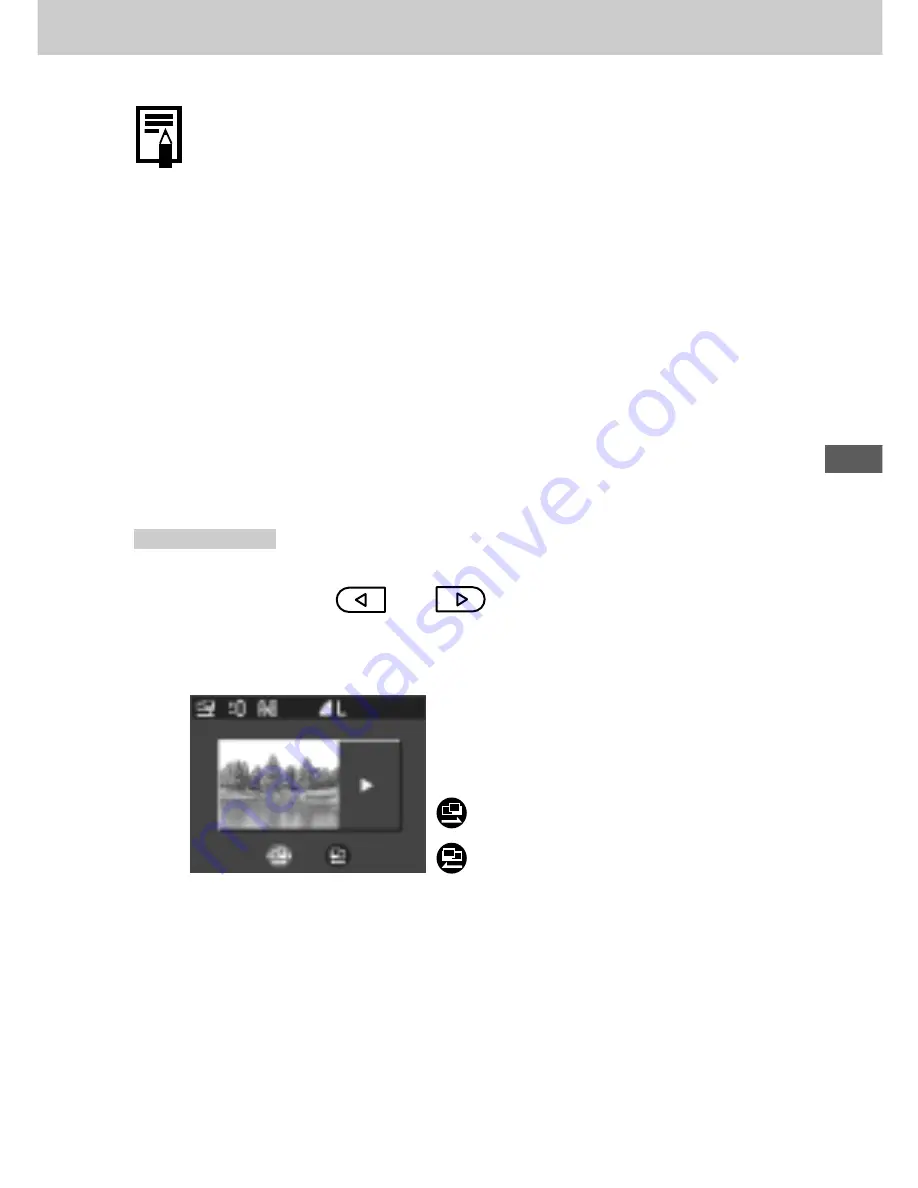
1

Press the 

 or 

 button to select the

sequence direction, and then press the
SET button.

¡

You can take the first shot immediately by pressing the
shutter button instead of the 

SET

 button.

2

Take the first shot.

 : Left to right horizontally.

 : Right to left horizontally.

Summary of Contents for PowerShot A40

Page 1: ...k Start section for a simple explanation of shooting replaying and erasing p 12 Please refer to the Software Starter Guide for information on installing the software and downloading images Please also...

Page 2: ...a Computer Printer User Guide Using the Printer and Printing Precautions This digital camera is designed to perform optimally when used with genuine Canon brand digital camera accessories Canon Brand...

Page 3: ...specifications of the hardware and software described herein at any time without prior notice No part of this guide may be reproduced transmitted transcribed stored in a retrieval system or translate...

Page 4: ...es Question Look here first 3How do I navigate the menus Selecting Menus and Settings p 41 3What settings are available under each function and Will my settings remain in effect even after I ve turned...

Page 5: ...view recorded images one at a time or in index form how to protect them or erase them and more Explains how to print and make print settings and how to select images for transferring to e mail Explain...

Page 6: ...hing the Strap 29 Basic Functions 30 Turning the Power On 30 Using the LCD Monitor 32 Using the Viewfinder to Shoot 37 Pressing the Shutter Button 38 Using the Zoom Focal Length 40 Selecting Menus and...

Page 7: ...79 Resetting the File Number 80 Functions Available in Each Shooting Mode 82 Replaying 86 Displaying Images Individually 86 Magnifying Images 87 Viewing Images in Sets of Nine Index View 88 Viewing Mo...

Page 8: ...from a CF Card 126 Connecting the Camera to a Computer Via the USB Cable 128 List of Menu Options and Messages 130 Rec Menu 130 Replay Menu 135 Resetting the Settings to Default 137 List of Messages 1...

Page 9: ...ing Against Copyright Infringement Please note that Canon digital cameras are intended for personal use and must be used in a manner that respects international and domestic copyright laws and regulat...

Page 10: ...imal eyes Exposure to the intense light produced by the flash may damage eyesight In particular remain at least one meter 39 inches away from infants when using the flash Store this equipment out of t...

Page 11: ...so may result in fire or electrical shock Immediately turn the camera s power off remove the camera batteries and unplug the power cord from the electrical outlet Please consult your camera distribut...

Page 12: ...potential for fires or electrical shocks Use of power sources not expressly recommended for this equipment may lead to overheating distortion of the equipment fire electrical shock or other hazards U...

Page 13: ...nly Canon AA size NiMH batteries and charger recommended for use with these batteries Use of another charger may cause batteries to overheat or deform posing risk of fire or electric shock Disconnect...

Page 14: ...store the equipment in humid or dusty areas Storage in such areas could lead to fire electrical shock or other damage Be careful not to bang the camera or subject it to strong impacts or shocks that...

Page 15: ...an airtight resealable plastic bag and letting it adjust to temperature changes slowly before removing it from the bag If Condensation Forms Inside the Camera Stop using the camera immediately if you...

Page 16: ...en the CF card slot cover and insert a CF card 3 Press the ON OFF button to turn the camera on p 30 Hold the ON OFF button down until the indicator next to the viewfinder starts flashing green If the...

Page 17: ...the way down The camera beeps once to indicate that it has taken the shot 7 View the recorded image The recorded image displays on the LCD monitor for approximately 2 seconds p 48 For information abou...

Page 18: ...use the dedicated USB cable included with the camera pp 104 128 If connecting to a printer use the direct interface cable DIF 100 included with the printer For a list of printers that work with this c...

Page 19: ...e it before using the camera Viewfinder p 37 Strap Eyelet p 29 CF Card Slot Cover p 22 Date Battery Holder p 142 Battery Cover p 18 LCD Monitor p 32 ON OFF Button p 30 MENU Menu Button p 41 Macro Snap...

Page 20: ...ur computer Orange Ready to shoot using the flash Flashing Orange Ready to shoot but shutter speed is slow This warns you that the picture may come out blurred Lower Indicator Yellow Macro Snapshot In...

Page 21: ...balance and other settings before shooting p 67 Manual You can manually set the shutter speed and aperture to achieve a particular effect p 69 Stitch Assist Use this mode when taking shots that you wa...

Page 22: ...era You may use optional nickel metal hydride NiMH batteries 1 Be sure that the camera power is off 2 Slide the battery cover lock and push the battery cover slightly forward Then open the cover 3 Ins...

Page 23: ...e alkaline or Canon AA size NiMH batteries only For information on handling the AA size rechargeable NiMH batteries see Using the Optional Battery Kits p 144 Never use manganese or lithium batteries a...

Page 24: ...ner pocket to warm them up prior to use But be careful that you don t put the batteries into a pocket together with a metal key chain or other metallic objects as these objects may cause batteries to...

Page 25: ...omptly If the LCD monitor is off this icon will appear when you press any of the following buttons DISPLAY or MENU Batteries are fully depleted and the camera can no longer operate You should replace...

Page 26: ...n the direction of the arrow and open it 1 2 3 Insert the CF card into the slot in the direction shown in the illustration Insert the CF card all the way into the slot so that the CF card eject button...

Page 27: ...rom the card Do not perform the following for image data may be lost or corrupted Do not shake the camera Do not turn off the power or open the CF card slot cover Be aware that use of CF cards whose c...

Page 28: ...n the card and lead to a malfunction To avoid condensation place the CF card in a sealed plastic bag before moving it into a different temperature zone and allow it to adjust slowly to the new tempera...

Page 29: ...the camera is first turned on or the date battery has run down Replace the date battery then reset the date and time starting from step 6 below 1 Press the ON OFF button to turn on the camera p 30 2 T...

Page 30: ...the value of the highlighted field Press the SET button to set the value and advance to the next field The final item selects the date display type Use or button to select and then press the SET butto...

Page 31: ...the Language Use this feature to select the language for the LCD monitor displays 1 Turn the mode dial to or 2 Press the MENU button The Rec Menu will display 3 Press or button to select and then pre...

Page 32: ...anguage 6 Press the SET button If you wish to cancel press the MENU button instead 7 Press the MENU button Hint for Easy Operation The Language menu can also be displayed in replay mode by holding dow...

Page 33: ...29 Preparing the Camera Basic Functions Be careful when carrying the camera by the strap Don t swing the camera on the strap and keep the strap and camera body clear of obstacles Attaching the Strap...

Page 34: ...wer save function is turned on and it activates restore power by pressing the ON OFF button Shooting Mode The power will automatically shut off approximately 3 minutes after the last function is acces...

Page 35: ...t an image While Connected to a Computer A warning message will appear on the computer screen approximately 5 minutes after the last function is accessed The power will automatically shut off approxi...

Page 36: ...itor display mode is memorized when the camera is turned off When the camera is turned on again it assumes the last mode However when the LCD monitor is turned on and the Change the Battery Pack messa...

Page 37: ...mera shake warning icon appears in the LCD monitor after the metering preparations are complete Mode The LCD monitor always comes on when you turn the mode dial to You can use the DISPLAY button to sw...

Page 38: ...nsation p 75 White Balance p 76 Photo Effect p 78 Compression p 50 L M S Resolution p 50 ISO 50 100 200 400 ISO Speed p 79 Focus Lock p 71 Flash p 52 Shooting Method pp 59 60 Macro Snapshot Infinity p...

Page 39: ...ample to the left Zoom powers reflect the combined optical and digital zoom effects These figures appear when the digital zoom is activated Mode In simple display mode the following information appear...

Page 40: ...ed as in the example on the previous page The following information may also appear with some image files An audio file other than a wav file or a file with an unrecognized format is attached A JPEG f...

Page 41: ...field to calculate the focal distance with high precision It delivers a crisp focus even when the photographic subject is slightly off center Image Seen in Viewfinder vs Recorded Image Please note tha...

Page 42: ...Lower Indicator Yellow Macro Snapshot Infinity Flashing Yellow Focusing difficulty single beep sounds When the indicator flashes yellow lock the focus before shooting p 71 The AF frame appears as foll...

Page 43: ...he shutter button is pressed halfway to assist focusing in certain conditions i e dark conditions The AF assist beam can be turned off p 132 If animals are your subject turn off the beam when shooting...

Page 44: ...zoom in on a subject with the zoom button Images can be zoomed up to 7 5 times PowerShot A40 or 6 times PowerShot A30 which combines the effect of the optical zoom p 57 Note that the image appears gra...

Page 45: ...Settings and Default Settings p 44 1 Press the MENU button The menu appears and modes mode 2 Press the or button to select a menu item and press the SET button The remainder of this procedure explains...

Page 46: ...lects items and settings Sets items and settings Available items differ by mode For information on print settings Selecting from the Print Order Menu p 102 Rec Menu Modes Replay Menu mode s s Selectin...

Page 47: ...43 Preparing the Camera Basic Functions Operation complete Operation complete Images erased Image marked for transferring Protect Rotate Erase all Transfer Auto Play Auto Play starts s...

Page 48: ...ine p 50 Normal Light Metering Evaluative Metering p 74 Spot AE point Metering ISO Speed 50 100 200 400 AUTO p 79 AiAF On Off p 73 Digital Zoom On Off p 57 Self Timer 10 sec 2 sec p 60 Review Off 2 se...

Page 49: ...ages in a slide show p 93 Print Order Sets the print settings p 102 Transfer Order Sets the transfer settings p 122 Default values Default languages and video system settings vary between regions Some...

Page 50: ...d when the camera has finished metering and the indicator beside the viewfinder will shine green or orange If the LCD monitor is on the AF frame will appear green The yellow indicator will flash and t...

Page 51: ...on the settings you can change see Functions Available in Each Shooting Mode p 82 With the Review function you can change the length of time images show on the LCD monitor after shooting or set it so...

Page 52: ...Display Duration p 49 There are two ways to display the image for longer Keeping the Shutter Button Pressed Press the SET button while the image is displayed in the LCD monitor Press the shutter butt...

Page 53: ...e menu see Selecting Menus and Settings p 41 2 Select a Review setting with the buttons and press the SET button With the Off option the image will not automatically display With the 2 sec or 10 sec o...

Page 54: ...s to send images electronically or to fit more images on a CF card The compression gets higher in the order Superfine Fine and Normal Select Superfine for a higher quality image or Normal if you wish...

Page 55: ...2 Press or button as necessary to adjust the setting and press the SET button Resolution Compression Display on the PowerShot A40 3 Press the MENU button For more information see Functions Available i...

Page 56: ...re The flash will not fire The red eye reduction lamp and the flash always fire The flash timing is adjusted to slow shutter speeds This reduces the chance that the background will be dark when shots...

Page 57: ...more of a chance of overexpo sure the closer you are to the subject Please note that a slow shutter speed will be selected in dark places when the flash is set to off or slow synchro Be careful to av...

Page 58: ...ction Light reflecting back from eyes can make them appear red when the flash is used in dark areas Under these conditions use the red eye reduction mode For this mode to be effective the subject must...

Page 59: ...e maximum telephoto setting Use this mode to record subjects in the range of 1 5 to 2 5 m 4 9 to 8 2 ft Use this mode to record landscapes and distant objects It can also be used for compositions comb...

Page 60: ...off center The exposure may not be optimal when the flash is used in macro mode in the range of 16 to 26 cm 6 3 to 10 2 in When the lens is zoomed out to the maximum wide angle position the recordabl...

Page 61: ...3 8 times 4 8 times and 6 0 times 1 In the Rec menu select Digital Zoom and press the SET button For information on using the menu see Selecting Menus and Settings p 41 2 Press the or button to select...

Page 62: ...Shoot the image Digital zoom is unavailable in some modes p 82 Images become coarser the more they are digitally zoomed 3 8 The combined magnifications of the optical zoom and digital zoom are displa...

Page 63: ...rd shooting conditions established by Canon Actual figures may vary according to the subject and shooting conditions 1 Press the button as necessary so that the appears on the LCD monitor 2 Shoot the...

Page 64: ...ot the image The self timer starts and the self timer lamp flashes when you press the shutter button down all the way Changing the self timer countdown time 1 In the Rec menu select Self timer and pre...

Page 65: ...button When 10 sec is selected the self timer sounds and the flashing gets faster 2 seconds before the shutter activates When 2 sec is selected the self timer sounds at the same time the shutter butto...

Page 66: ...titch the images together at your computer To create the panorama at your computer use the PhotoStitch software that came with your camera Framing a Subject The PhotoStitch program detects the overlap...

Page 67: ...s in each image consistent The final image will appear unnatural if the difference in brightness is too great For good results pan swivel the camera to take successive shots To shoot close ups slide t...

Page 68: ...hoot it 4 Take additional shots for the panorama in the same way You can take as many as 26 images 5 After taking the final image press the SET button For information on the settings you can change se...

Page 69: ...ting and about 30 seconds at the 160 120 setting The clip will end automatically after this time elapses or when the CF card becomes full The data reflects standard Canon testing conditions The actual...

Page 70: ...naurally PowerShot A40 only There is no shutter sound in movie mode QuickTime 3 0 or higher is required to replay movie files AVI Motion JPEG on a computer QuickTime 5 0 is included on the Canon Digit...

Page 71: ...manually 1 Shoot the image The nature of CCD image sensors is such that noise in the recorded image increases at slow shutter speeds This camera however applies special processing to images shot at sh...

Page 72: ...ed and aperture settings The following settings can be adjusted in mode but not in mode Exposure Compensation White Balance Flash Red Eye Reduction Flash On Slow Synchro Continuous Mode Snapshot Infin...

Page 73: ...achieve a particular effect This is convenient for shooting fireworks and other images where it is difficult to set the correct exposure automatically 1 Press the button once The Exposure menu appears...

Page 74: ...2 indicates 2 seconds 1 1500 1 1250 1 1000 1 800 1 640 1 500 1 400 1 320 1 250 1 200 1 160 1 125 1 100 1 80 1 60 1 50 1 40 1 30 1 25 1 20 1 15 1 13 1 10 1 8 1 6 1 5 1 4 0 3 0 4 0 5 0 6 0 8 1 1 3 1 6 2...

Page 75: ...y Subjects through glass Try to shoot as close to the glass as possible to reduce the chances of light reflecting back off the glass Focus Lock Method 1 1 Aim the camera so that a subject at the same...

Page 76: ...our finger press the button appears in the LCD monitor 4 Recompose the image and press the shutter button all the way to shoot the image Cancelling Focus Lock To cancel focus lock press the button the...

Page 77: ...AF frames the middle OFF one is selected to focus This is Center convenient for making sure the focus is exactly where you want it indicates the AF frame which appears on the monitor 1 In the Rec men...

Page 78: ...s the settings to the correct exposure for the main subject Meters the area within the spot AE point frame at the center of the LCD monitor Use this setting when you want to set the exposure on the su...

Page 79: ...n You can set the adjustment from 2 to 2 in 1 3 step increments If the LCD monitor is on you can check the results of the compensation by viewing the image on the LCD monitor A shot can be taken immed...

Page 80: ...e when shooting outdoors in sunlight on a clear day Use when shooting outdoors and the sunlight is not enough such as under cloudy skies in shade or at dusk For recording under tungsten and bulb type...

Page 81: ...results by viewing the image on the LCD monitor A shot can be taken immediately by pressing the shutter button The menu will reappear after the shot allowing you to adjust the setting 3 Press the SET...

Page 82: ...Low Records subjects with softened outlines Sharpening Sepia Records in sepia tones B W Records in black and white 1 Press the button one or more times 2 Select a photo effect If the LCD monitor is on...

Page 83: ...ct ISO Speed For information on using the menu see Selecting Menus and Settings p 41 2 Select an ISO speed 3 Press the MENU button The ISO AUTO setting is available only in mode Higher ISO speeds incr...

Page 84: ...ert a new unused CF card If you insert a card that already contains some images numbering resumes from the next available number The camera remembers the last file number and starts numbering from the...

Page 85: ...mes are duplicated About file numbering Image files are assigned numerical file names over the range 0001 to 9900 The camera stores these files into folders which are assigned folder numbers from 100...

Page 86: ...amera stores settings separately for each mode and retains these settings even if you switch to a different mode Function Auto Program Large Medium Resolution Small movie movie SuperFine Compression F...

Page 87: ...taking the first shot Not available Setting is retained even after power off 1 The ISO speed is automatically set between the equivalent of 50 and 150 2 AUTO cannot be selected Manual Stitch Assist Mo...

Page 88: ...Auto Program Single Shooting Continuous Method Self Timer Auto Focus Frame AF assist Beam Light Evaluative Metering Metering Spot Metering Digital Zoom Exposure Compensation White Balance Photo Effect...

Page 89: ...85 Shooting Manual Stitch Assist Movie Reference page J p 59 J p 60 p 73 p 132 p 74 p 57 J p 75 J p 76 J p 78 2 1 1 p 79...

Page 90: ...his feature to view recorded images one at a time on the LCD monitor Single Image Replay 1 Turn the mode dial to The LCD monitor displays the last recorded image 2 Use and button to display different...

Page 91: ...ress the button the image enlarges in the order approximately 2 5 times approximately 5 times approximately 10 times To slide the magnified image left or right on the monitor press or button To slide...

Page 92: ...image conveniently 1 Press the button twice Nine images appear at a time 2 Press or button to change the displayed images The previous or next set of nine images appears Hold the SET button and press...

Page 93: ...aying Erasing 4 Press the or button to select the image and press the button The selected image displays in Single Image Replay Hold the SET button and press the or button to jump to the first or last...

Page 94: ...ying When a movie has finished playing it will display the last frame If the SET button is pressed in this state the movie will start playing from the first frame Pausing and Resuming Play Press the S...

Page 95: ...experience frame dropping and audio breakup when replaying a movie on a computer with insufficient system resources You can hear the audio when a movie is played on a TV Adjust the volume on the TV s...

Page 96: ...d Settings p 41 2 Press or button to select the image you want to rotate and press the SET button Press the SET button to rotate the image 90 270 and back to original orientation 3 Press the MENU butt...

Page 97: ...s As with the single image display mode pressing the or button during auto play will advance through the images more rapidly Pausing and Resuming Auto Play You can pause Auto Play at any time by press...

Page 98: ...enus and Settings p 41 2 Press or button to select an image you wish to protect and then press the SET button to protect it The icon appears on protected images To remove the protection press the SET...

Page 99: ...95 Replaying Erasing Please note that even protected images are erased when a CF card is reformatted p 98...

Page 100: ...es This function will not erase protected images p 94 Erasing Images Individually 1 Press or button to select the image you want to erase and press the button 2 Press or button to select Erase and pre...

Page 101: ...the Replay menu select Erase all and press the SET button The LCD monitor asks for confirmation 2 Press or button to select OK and then press the SET button If you decide you don t want to erase all u...

Page 102: ...will permanently erase all data already on the card including all of its protected images Before formatting a card that has already been used be sure to check its contents 1 In the Rec menu select Se...

Page 103: ...If you are using a CF card from another manufacturer and the card is not functioning correctly you may be able to correct the problem by formatting the card CF cards that were formatted by another ca...

Page 104: ...you can specify the images on your CF card you want to print and how many copies you want DPOF Print Settings and then take the CF card to a participating photo lab to have them printed out later Refe...

Page 105: ...ss Date On Off d Select the print area p 112 DPOF Print Settings Select the image you want to print p 114 d Select how many copies you want p 114 d Select the print style p 116 Standard Index Date On...

Page 106: ...102 Selecting from the Print Order Menu Use the Print Order Menu as shown below to select all print settings Direct Print Function Set the mode dial to s DPOF Settings Set the mode dial to s s...

Page 107: ...enu on off Selects items and settings Sets items and settings Image p 110 Borders p 110 Date p 110 Style Number of copies p 109 Printing area p 112 Set up Reset p 118 Order Number of copies p 114 Prin...

Page 108: ...se load fully charged NiMH batteries p 144 or unused alkaline batteries before you begin Refer to the System Map included with this camera kit for printer information Please see your printer s user gu...

Page 109: ...ble When you insert the cable make sure the mark of the cable faces the rear of the camera monitor side 4 Turn the mode dial to and turn the camera on If the printer is correctly connected the icon wi...

Page 110: ...l be sure to hold the connector at its sides and pull it straight out Movies cannot be played when the camera is connected to a printer When the printer is disconnected the symbol will disappear from...

Page 111: ...rint and then press the SET button 2 Set the number of prints the print style and printing area settings as required Selecting the number of copies p 109 Setting the Print Style p 110 Selecting the pr...

Page 112: ...it until the current image is printed and then cancel before the next one starts The display will revert to standard replay mode Printing Errors An error message appears if an error occurs for some re...

Page 113: ...tings while the camera is connected to the printer Selecting the Number of Copies 1 While displaying the image press the SET button Press or button to select copies and press the SET button 2 Press th...

Page 114: ...on one page Borders Borderless Prints right to the edges of the page Bordered Prints with a border Date Prints the image s creation date This setting is only available for Card Size paper 1 While disp...

Page 115: ...CD monitor is printed at an enlarged size As a result the image s top bottom and sides may be cropped slightly The area of the image that will be printed will appear lighter than the rest of the image...

Page 116: ...area can only be specified with the borderless print style 1 While displaying the image press the SET button Press or button to select Printing area and press the SET button The BA marks appear indica...

Page 117: ...ting is cancelled with the following operations Printing When you set the printing area setting for another image When you close the Print mode i e turn the camera off change the camera mode after set...

Page 118: ...ing 1 Display the Print Order menu For selecting from the menu see Selecting from the Print Order Menu p 102 2 Press or button to select Order and then press the SET button 3 Press or button to select...

Page 119: ...The output of some digital printers or photo lab services may not reflect the specified print settings Movies cannot be printed Images are printed in order from oldest to newest by the shooting date A...

Page 120: ...oth in standard and index format Include the date on the print Include the file number on the print 1 Display the Print Order menu For selecting from the menu see Selecting from the Print Order Menu p...

Page 121: ...et Date and File No to On at the same time If you have chosen Both as the print type you can set both Date and File No to On However only the file numbers will be printed on index prints If you includ...

Page 122: ...and File No to Off 1 Display the Print Order menu For selecting from the menu see Selecting from the Print Order Menu p 102 2 Press or button to select Reset and then press the SET button 3 Press or...

Page 123: ...nt function 1 Display the Print Order menu For selecting from the menu see Selecting from the Print Order Menu p 102 2 Press or button to select Print and then press the SET button 3 Set the print sty...

Page 124: ...will revert to the standard replay mode To print the date set the Date setting in the print order menu in Step 2 on the previous page to On You cannot set the date to print with the Style menu in Ste...

Page 125: ...for which the print settings were set has been deleted before restarting If there was very little free space on the CF card when the printing was cancelled If these circumstances apply you can select...

Page 126: ...will display on images that have had transfer marks set by another DPOF compliant camera These settings will be overwritten by any marks set by your camera Selecting Images forTransferring 1 In the R...

Page 127: ...e procedures to select images in index replay 3 images Press the button to switch between single replay and index replay 4 Press the MENU button Images are transferred in order from oldest to newest b...

Page 128: ...and set it to display video input 2 Turn on the camera The image display that normally appears on the LCD monitor now appears on the TV monitor instead If the image disappears from the TV screen whil...

Page 129: ...deo output signal can be switched NTSC or PAL to accommodate different regional standards p 134 The default setting will vary between regions NTSC Japan U S A Canada Taiwan etc PAL Europe Asia excludi...

Page 130: ...r installing the supplied software download images automatically by simply connecting the camera to a computer with the supplied USB cable For information about system requirements and for more detail...

Page 131: ...ith the CF card 3 Copy images from the card into a folder of your choice on the hard disk The images are stored in the xxxCANON folders located under the DCIM folder where xxx is a three digit number...

Page 132: ...he camera s Digital terminal You do not need to turn off the computer or camera when making this connection Please refer to your computer manual for information regarding the location of the USB port...

Page 133: ...old power outlet with the optional AC Adapter Kit ACK600 when connected to a computer If you disconnect the USB cable while the camera is on the camera will automatically turn off If you leave the cam...

Page 134: ...L Large PowerShot A40 1600 x1200 pixels PowerShot A30 1280 x 960 pixels M Medium 1024 x 768 pixels S Small 640 x 480 pixels Sets the resolution of the frames as they are recorded to the CF card 320 x...

Page 135: ...100 200 400 AUTO Sets the AiAF to on the camera automatically selects the AF frame when taking a picture or off AF frame is set to the middle frame On Off Turns the digital zoom on the digital zoom c...

Page 136: ...rns the AF assist beam on or off On Off Sets how file numbers are assigned to images when new CF cards are inserted On Off Sets whether or not the beep sounds when the shutter button is pressed or whe...

Page 137: ...ressed On Off Sets the date time and date format Formats initializes a CF card Sets the language used in the menus and messages on the LCD monitor The menu may appear differently in some regions Engli...

Page 138: ...134 Item Setting Content Reference Menu Screen Page Sets the video output signal standard NTSC PAL Default setting Set up p 125 Video System...

Page 139: ...3 Replay Menu Item Setting Content Reference Menu Screen Page Protects images from accidental erasure Rotates images 90 or 270 degrees clockwise in the display Erases all images from a CF card excludi...

Page 140: ...2 Item Setting Content Reference Menu Screen Page Sets which images and how many copies will be printed on a printer with the direct print function or at a photo lab service Sets the images that will...

Page 141: ...on the camera The mode dial can be turned to any setting 2 Press the MENU button for longer than 5 seconds The message Reset settings to default appears on the LCD monitor 3 Press or button to select...

Page 142: ...t new print settings Naming error The camera cannot generate a file name for the image you have shot because a the card already contains a folder having the same name as the file to be created or b th...

Page 143: ...e The image you attempted to rotate was recorded by another camera or recorded in a format that cannot be rotated or edited on a computer Protected You attempted to erase a protected image Too many im...

Page 144: ...pted to print with an ink cartridge type incompatible with this camera Ink Cassette Error There is a problem with the ink cassette The paper size and ink type are from different sets Paper Jam Paper j...

Page 145: ...n image shot by a different camera or in an incompatible format or downloaded to and edited on a computer You attempted to print xx number of images with DPOF settings that were shot by a different ca...

Page 146: ...tery type CR2016 and install it as follows The date battery is preinstalled at the factory and may therefore expire earlier than its rated lifespan after the camera has been purchased Be particularly...

Page 147: ...Date Time menu proceed to set the current date and time p 25 The LCD monitor also displays the Set Date Time menu the very first time you turn on the camera This is normal and does not mean that the d...

Page 148: ...together with batteries that have been used in other devices When recharging batteries from the camera always recharge all four of them at the same time All batteries you place in the charger should...

Page 149: ...is depleted before charging them again After doing this several times battery performance will be restored If battery usage time is considerably low despite their terminals being wiped and the batter...

Page 150: ...camera and whenever you connect the camera to a computer Be sure that the camera is turned off before connecting or disconnecting the compact power adapter 1 Connect the power cord to the compact powe...

Page 151: ...147 Appendix Please do not attempt to use any AC adapter other than AC Adapter Kit ACK600 with your camera Use of a different adapter may result in damage to the camera or to the adapter...

Page 152: ...close up lens be sure to screw it on securely If the wide converter or close up lens comes lose it may fall from the camera posing risk of injury from shattered glass Never look into the sun or into...

Page 153: ...ele converter If you use the flash when shooting with the wide converter the outer area of the recorded image and especially the lower right corner will come out relatively dark The wide converter blo...

Page 154: ...ide angle and 13 to 25 cm 5 1 to 9 8 in at maximum telephoto from the lens tip Please do not use the flash when shooting with this lens Shooting Ranges in Macro Mode Distance between Shooting Range Le...

Page 155: ...nverter tele converter and close up lens all optional Attaching a Lens 1 Be sure that the camera is turned off 2 Press the ring release button and hold it down and turn the ring in the direction of th...

Page 156: ...the Conversion Lens Adapter and the camera and turn the adapter in the direction of the arrows as far as the C mark on the camera 5 Set the lens on the adapter and attach it securely by turning it in...

Page 157: ...dapter when removing the ring When shooting with these attachments please use the LCD monitor to compose your shots The attachments block part of the view through the viewfinder and the area shown in...

Page 158: ...u are unable to remove the dirt from the lens contact Canon Customer Support Help Desk Viewfinder Clean with a lens blower brush If necessary wipe lightly with a soft cloth or eyeglass lens wiper LCD...

Page 159: ...source Use only unused AA size alkaline batteries or Canon AA size NiMH batteries For the information about alkaline batteries see Proper Battery Handling p 19 Wipe the battery terminals with a clean...

Page 160: ...ay be corrupted Contact Canon Customer Help Desk Close the covers and then use the ON OFF button to turn the power off correctly Close the covers and then use the ON OFF button to turn the power off c...

Page 161: ...m by placing them in an inner pocket etc until ready to use them Wipe them well with a dry cloth before use If batteries are rechargeable Performance should return to normal after several charging cyc...

Page 162: ...Hold the camera steady when shooting Be careful not to block the AF auxiliary light emitter with your finger or other items Set the AF assist beam to On Batteries were placed in the charger in the wr...

Page 163: ...a to infinity mode Set the flash on Set exposure compensation to a positive value or use spot AE point light metering When flash is used the distance between lens and subject should not exceed 4 2 m 1...

Page 164: ...point light metering Turn the mode dial to any mode other than Operate the zoom before shooting in movie mode The subject is too close to the flash The subject is brighter than the surroundings Light...

Page 165: ...nder Primary imaging real image optical zoom viewfinder LCD Monitor 1 5 inch low temperature polycrystalline silicon TFT color LCD approx 120 000 pixels Autofocus TTL 3 point AiAF TTL 1 point center A...

Page 166: ...connection only Exclusive software Shooting program RemoteCapture is included in the camera kit Recording Media CompactFlash card Type I File Format Design rule for Camera File System DPOF compliant I...

Page 167: ...L selectable monaural audio A30 Universal Serial Bus USB mini B Video Output NTSC or PAL selectable Power Source Four AA alkaline batteries included Four AA rechargeable NiMH batteries optional Compac...

Page 168: ...Approx Battery NB 1AH 350 shots 1000 shots 240 min Test Conditions Shooting Room temperature 23 C 73 F alternating between wide angle and telephoto every 20 seconds flash used one in four shots power...

Page 169: ...412 46 92 189 379 760 35 70 143 288 577 S 50 99 206 415 831 87 172 353 707 1417 Movie 18 36 75 152 305 in seconds 48 97 198 399 799 PowerShot A30 FC 8M FC 16M FC 32M FC 64M FC 128M 10 21 43 88 177 L 1...

Page 170: ...1200 pixels 1280 960 pixels M Medium 1024 768 pixels 1024 768 pixels S Small 640 480 pixels 640 480 pixels 320 240 pixels 320 240 pixels 160 120 pixels 160 120 pixels Approximate File Size for One Im...

Page 171: ...er CB 3AH Supplied with the optional Battery and Charger Kit CBK100 Rated Input 100 240 V AC 50 60 Hz 8 W Rated Output 1 6 V DC 2 A Charging Time Approx 220 minutes Operating 0 35 C 32 95 F Temperatur...

Page 172: ...ion Lens Adapter LA DC52 is required for mounting to PowerShot A40 or A30 Dimensions Diameter 58 mm 2 3 in Length 30 5 mm 1 2 in Weight Approx 74 g 2 6 oz Tele converter TC DC52 optional Magnification...

Page 173: ...Diameter 52 mm standard filter thread Conversion Lens Adapter LA DC52 is required for mounting to PowerShot A40 or A30 Dimensions Diameter 54 mm 2 1 in Length 10 2 mm 0 4 in Weight Approx 55 g 1 9 oz...

Page 174: ...144 Status 21 C Care 154 CF Cards 22 About CF Cards 24 CF Card Reader 126 Downloading Images 126 Formatting a CF Card 98 Installing 22 Slot Cover 22 Components Guide 14 Compression 50 Computer Downlo...

Page 175: ...Setting 122 Remove All 122 Selecting Images 122 Indicator 16 Infinity 55 ISO Speed 79 L Language 27 LCD Monitor 32 Lens 14 148 Close Up Lens 150 Conversion Lens Adapter 151 Tele converter 149 Wide Co...

Page 176: ...g the Print Settings 118 Selecting from the Print Order Menu 102 Selecting Images 114 Setting 109 116 Specifying the Printing Area 112 Program AE 67 Protecting Images 94 R Recordable Images 34 Recorda...

Page 177: ...e 35 Shooting Modes 82 Functions Available 82 Shooting on a TV Set 124 Shutter Button 38 Shutter Speed 34 35 69 Snapshot 55 Stitch Assist 62 Framing a Subject 62 Shooting 63 Strap 29 T Telephoto 40 Te...

Page 178: ...anon Canada Inc Phone Canada 1 800 OK CANON 1 800 652 2666 24 hours day 7 days week EUROPE Europe Africa Middle East Canon Europa N V PO Box 2262 1180 EG Amstelveen The Netherlands Canon UK Ltd Helpde...

Page 179: ...k 023 5 681 681 Tel 023 5 670 123 Fax 023 5 670 124 Canon Danmark A S Phone 45 44882400 e mail helpdesk canon dk Canon Espa a S A Help Desk 906 301 255 Fax 91 411 54 48 E mail helpdesk1 btlink net Can...

Page 180: ...412 Fax 01 66 146 308 OCEANIA Canon Australia Pty Ltd Info Line 02 9805 2864 http www canon com au support crm html Canon New Zealand Ltd Info Line 0900 522666 ASIA Canon Singapore Pte Ltd 79 Anson R...

Page 181: ...aujana Resort Section U2 40150 Shah Alam Selangor Darul Ehsan Malaysia Phone 60 3 744 6000 60 3 745 0055 Fax 60 3 745 0505 Canon Marketing Thailand Co Ltd 10th Floor Bangkok City Tower 179 34 45 South...

Page 182: ...uipment off and on the user is encouraged to try to correct the interference by one or more of the following measures Reorient or relocate the receiving antenna Increase the separation between the equ...

Page 183: ...CDI E047 010 XXXXXXXXX 2002 CANON INC PRINTED IN JAPAN DIGITAL CAMERA Camera User Guide...

Reviews: