


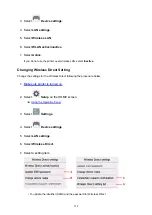


• Check that the ink tanks are installed in their correct positions.
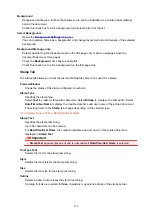
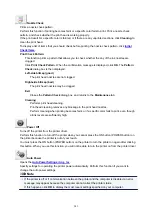
Start Print Head Alignment dialog box
This dialog box allows you to adjust the attachment position for the print head, or to print the current
setting value for the print head position.
Align Print Head
Aligns the print head.
Print head alignment corrects the installation positions of the print head and improves deviated colors
and lines.
Align the print head immediately after installing the print head.
Print Alignment Value
Click this button to check the current setting value of the print head position.
Prints the current setting value for the print head position.
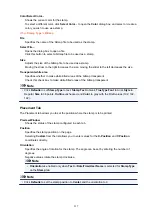
Print Head Alignment dialog box
To adjust the print head position manually, click
Align Print Head
in the
Start Print Head Alignment
dialog box, and perform the operations instructed in the messages. The
Print Head Alignment
dialog
box is then displayed.
This dialog box allows you to check the printed pattern and adjust the print head position.
Preview Window
Displays the pattern of
Print Head Alignment
, and checks the position of the selected pattern.
You can also change the setting by clicking the pattern on the screen directly.
Select the Pattern Number
Compare the printed adjustment patterns, and enter the pattern number of the pattern with the
least visible streaks or horizontal stripes into the corresponding box.
Note
• If you do not know how to analyze the printed pattern, see Adjusting Print Head Position.
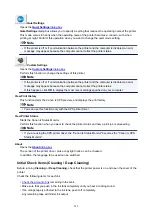
Initial Check Items (Nozzle Check)
Before running
Nozzle Check
, check that the printer power is on, and open the cover of the printer.
Check the following items for each ink.
•
remaining in the tank.
• Make sure that you push in the ink tank completely until you hear a clicking sound.
• If an orange tape is adhered to the ink tank, peel it off completely.
Any remaining tape will hinder ink output.
• Check that the ink tanks are installed in their correct positions.
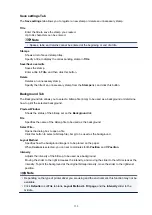
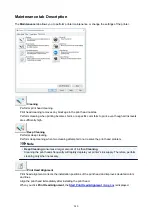
Auto Power Settings dialog box
When you click
Auto Power
, the
Auto Power Settings
dialog box is displayed.
This dialog box allows you to manage the printer power from the printer driver.
243
Summary of Contents for PIXMA TS6052
Page 19: ...Basic Operation Printing Photos from a Computer Copying 19...
Page 30: ...Handling Paper Originals Ink Tanks etc Loading Paper Loading Originals Replacing Ink Tanks 30...
Page 55: ...55...
Page 69: ...For Mac OS Adjusting Print Head Position 69...
Page 86: ...86...
Page 88: ...Transporting Your Printer Legal Restrictions on Scanning Copying Specifications 88...
Page 89: ...Safety Safety Precautions Regulatory Information WEEE EU EEA 89...
Page 103: ...Main Components and Their Use Main Components Power Supply Using the Operation Panel 103...
Page 104: ...Main Components Front View Rear View Inside View Operation Panel 104...
Page 123: ...The Page Setup tab is displayed again 123...
Page 132: ...For more on setting items on the operation panel Setting Items on Operation Panel 132...
Page 141: ...Language selection Changes the language for the messages and menus on the touch screen 141...
Page 148: ...Network Connection Network Connection Tips 148...
Page 190: ...Note Selecting Scaled changes the printable area of the document 190...
Page 226: ...Displaying the Print Results before Printing 226...
Page 300: ...ScanGear Scanner Driver Screens Basic Mode Tab Advanced Mode Tab 300...
Page 386: ...Scanning Problems Scanner Does Not Work ScanGear Scanner Driver Does Not Start 386...
Page 398: ...Errors and Messages An Error Occurs Message Appears 398...
Page 431: ...1660 Cause An ink tank is not installed What to Do Install the ink tank 431...


