background image

B

A

C

1
2
3

B

A

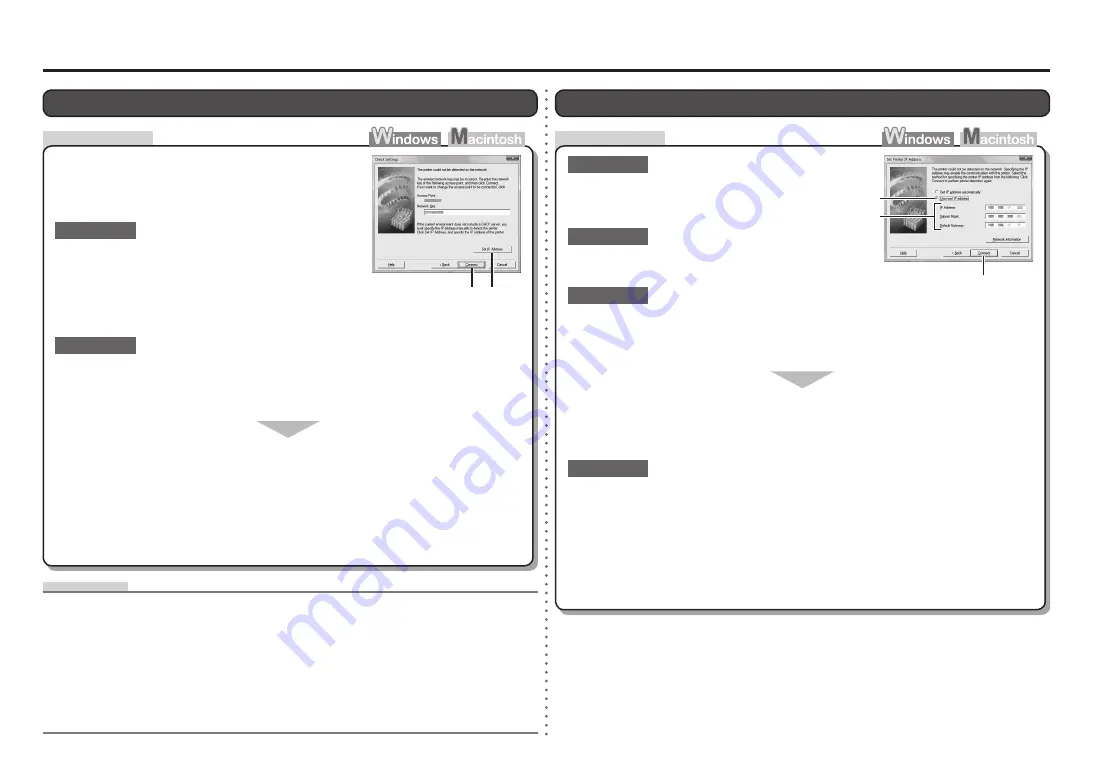
Set Printer IP Address

 Screen is Displayed

Select 

Use next IP address

 (B).

Enter the value you want to specify for each of 

IP Address

Subnet Mask

, and 

Default Gateway

 or 

Router

 (C).

Click 

Connect

 (A).

Make sure that you follow "Connection Checklist" on 

page 11, then click 

Connect

 (A).

Check 1

Check 2

Turn off the access point, turn it back on, then click 

Connect

 (A).

Check 4

If the problem is not solved even after following Check 1 to 3, follow the procedure 

below to specify the IP address.

When obtaining an IP address automatically, make sure that the DHCP function of the 

access point is active.

For details on how to check the settings of the access point, refer to the manual supplied with the 

access point or contact its manufacturer.

Enable the DHCP function of the access point, then click 

Connect

 (A).

For details on how to change the settings of the access point, refer to the manual supplied with 

the access point or contact its manufacturer.

Check 3

Check

Check Settings

 Screen is Displayed

The screen appears when an IP address was not 

obtained automatically due to incorrect network key or 

inactive DHCP function.

Make sure that the DHCP function of the access point is active.

For details on how to check the settings of the access point, refer to the manual supplied with the 

access point or contact its manufacturer.

For details on how to change the settings of the access point, refer to the manual supplied with 

the access point or contact its manufacturer.

If the DHCP function is inactive, enable the DHCP function of the access point or 

specify the IP address of the machine, then click 

Connect

 (A).

DHCP function

A function to automatically assign required information (IP address, etc.) to computers, printers or other 

devices connected to the network.

IP address

A numerical identification assigned to each computer or network device connected to a network.

Check 1

Check 2

If the network key is incorrect, enter the network key 

again and click 

Connect

 (A).

For details on how to check the network key of the access 

point, refer to the manual supplied with the access point or 

contact its manufacturer.

To specify the IP address of the machine, click 

Set IP Address

 (B), then follow the procedure in 

Check 4 of "Set Printer IP Address Screen is Displayed" on page 4.

Network Key

A password required to set to prevent unauthorized access to communication.

Check

Glossary

Summary of Contents for PIXMA MX340 Series

Page 1: ...ENGLISH ESPA OL Soluci n de problemas de configuraci n de red Network Setup Troubleshooting...

Page 2: ...o Be Used Screen is Displayed P 3 Set Printer IP Address Screen is Displayed Multiple APs detected is Displayed Check Settings Screen is Displayed P 4 P 7 P 5 The Machine is Not Displayed Detected on...

Page 3: ...e target access point is not displayed on the Detected Access Points List screen check the following points Is WPA WPA2 Enterprise set as a security protocol encryption standard on the access point Ch...

Page 4: ...is selected correctly by following the procedure below then proceed with the setup When using multiple access points roaming A unique number assigned to each network device MAC address Detected Acces...

Page 5: ...t network key or inactive DHCP function Make sure that the DHCP function of the access point is active For details on how to check the settings of the access point refer to the manual supplied with th...

Page 6: ...check the settings of the access point refer to the manual supplied with the access point or contact its manufacturer For details on how to change the settings of the access point refer to the manual...

Page 7: ...machine For details on how to change the settings of the access point refer to the manual supplied with the access point or contact its manufacturer To check the IP address of the machine select Devi...

Page 8: ...inted manual Getting Started Is the privacy separator feature enabled on the access point Disable the privacy separator feature Check 5 For details on how to change the settings of the access point re...

Page 9: ...otocol encryption standard and Network Key Check the access point settings For details on how to check the settings of the access point refer to the manual supplied with the access point or contact it...

Page 10: ...Perform to in Install the Software 2 on page 36 in the printed manual Getting Started When WEP 40 bit is selected in AirPort Utility AirPort Admin Utility select 64 bit When WEP Transitional Security...

Page 11: ...button Use the or button to select LAN settings then press the OK button Use the Menu button to select Device settings Restoring the Machine s Default LAN Settings to Perform Setup Again Follow the p...

Page 12: ...es in 10 Set Up a Wireless Connection on page 34 and onward in the printed manual Getting Started Turn on each device If the machine is already turned on turn it off then turn it back on Check 5 Check...

Page 13: ...urer Firewall A system to use computers connected to the Internet and corporate networks safely It protects computers and corporate networks against unauthorized access or restricts unauthorized acces...

Page 14: ...Printer IP Address Se muestra Varios PA detectados Multiple APs detected Se muestra la pantalla Comprobaci n de los ajustes Check Settings P 4 P 7 P 5 El equipo no se muestra detecta en la pantalla L...

Page 15: ...tra el punto de acceso de destino en la pantalla Lista de puntos de acceso detectados Detected Access Points List compruebe los puntos siguientes En el punto de acceso est establecido WPA WPA2 Empresa...

Page 16: ...aci n Si se utilizan varios puntos de acceso itinerancia N mero nico asignado a cada dispositivo de red Direcci n MAC Se volver a abrir la pantalla Lista de puntos de acceso detectados Detected Access...

Page 17: ...alla aparece cuando no se ha obtenido autom ticamente una direcci n IP como consecuencia de una clave de red incorrecta o una funci n DHCP inactiva Compruebe que la funci n DHCP del punto de acceso es...

Page 18: ...mprobar la configuraci n del punto de acceso consulte el manual suministrado con ste o p ngase en contacto con el fabricante Para obtener informaci n sobre c mo cambiar la configuraci n del punto de a...

Page 19: ...re c mo cambiar la configuraci n del punto de acceso consulte el manual suministrado con ste o p ngase en contacto con el fabricante Para comprobar la direcci n IP del equipo seleccione Config disposi...

Page 20: ...de una conexi n inal mbrica en la p gina 34 del manual impreso Gu a de inicio Est activada la funci n de separador de privacidad en el punto de acceso Desactive la funci n de separador de privacidad C...

Page 21: ...match Este mensaje aparece si no se finaliza la configuraci n en un periodo de tiempo de 10 minutos Establezca el c digo PIN nuevo para el punto de acceso o el ordenador Seleccione M todo c digo PIN P...

Page 22: ...uraci n manual Manual Setup Lleve a cabo los pasos a de Instalaci n del software 2 de la p gina 36 del manual impreso Gu a de inicio Si selecciona WEP de 40 bits WEP 40 bit en Utilidad AirPort Utilida...

Page 23: ...para seleccionar Configuraci n de LAN LAN settings a continuaci n pulse el bot n OK Utilice el bot n Men Menu para seleccionar Config dispositivo Device settings Restauraci n de la configuraci n de L...

Page 24: ...nual impreso Gu a de inicio Encienda cada dispositivo Si el equipo ya se ha encendido ap guelo y vuelva a encenderlo Comprobaci n 5 Comprobaci n 4 Comprobaci n 2 Comprobaci n 1 Para obtener informaci...

Page 25: ...abricante Firewall Sistema para utilizar con seguridad ordenadores conectados a Internet y redes corporativas Protege los ordenadores y las redes corporativas del acceso no autorizado o restringe el a...

Page 26: ...QT5 2810 V01 XXXXXXXX CANON INC 2010 PRINTED IN VIETNAM...

Reviews: