background image

Check

Set Up New Printer

 Screen is Displayed

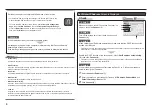
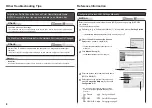
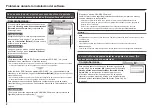
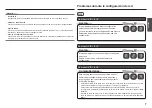
The screen appears when the machine cannot be detected during setup using WPS or 

WCN, or when setting up on an additional computer.

Is the machine connected to a network?

To check if the machine is connected to a network, print the 

Network 

Configuration Page

, then make sure that 

Link Status

 is set to 

Active

. To print 

the 

Network Configuration Page

, press the 

Maintenance

 button 11 times to 

display the screen shown to the right, then press the 

Black

 button or the 

Color


button.

Make sure that you follow Check 1, 2, 3, 4 and 6 of "Connection Checklist" on page 11, 

then click 

Redetect

Proceed with the setup.

Check 1

Check 2

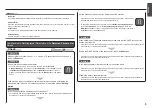
If the machine is not connected to a network, perform setup again by following the 

procedures from "6 Set Up a Wireless Connection" in the printed manual: 

Getting 

Started

.

WPS

Additional Computers Setup

Refer to the troubleshooting tip below only when configuring wireless settings by using WPS or WCN, or 

when setting up on an additional computer.

WCN

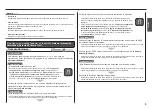
Glossary

A function to allow or block traffic from network devices with specified IP addresses.

IP address filtering

A function to prevent communication between multiple wireless devices (such as computers and 

printers) connected to an access point.

Privacy separator feature

DHCP function

A function to automatically assign required information (IP address, etc.) to computers, printers or other 

devices connected to the network.

IP address

A numerical identification assigned to each computer or network device connected to a network.

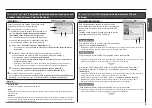
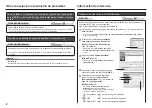
Is the privacy separator feature enabled on the access point?

Disable the privacy separator feature.

Check 5

Check 4

For details on how to change the settings of the access point, refer to the manual supplied with 

the access point or contact its manufacturer.

For details on how to check the settings of the access point, refer to the manual supplied with the 

access point or contact its manufacturer.

When obtaining an IP address automatically, make sure that the DHCP function of the 

access point is active.

For details on how to check the settings of the access point, refer to the manual supplied with the 

access point or contact its manufacturer.

Enable the DHCP function of the access point, then click 

Redetect

For details on how to change the settings of the access point, refer to the manual supplied with 

the access point or contact its manufacturer.

Is the IP filtering feature enabled on the access point?

Check 3

For details on how to check the settings of the access point, refer to the manual supplied with the 

access point or contact its manufacturer.

Set the access point to accept the IP address of the machine.

For details on how to change the settings of the access point, refer to the manual 

supplied with the access point or contact its manufacturer.

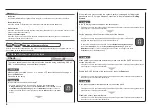
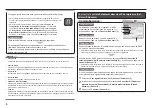
To check the IP address of the machine, print the 

Network Configuration Page

then check 

IP Address

. To print the 

Network Configuration Page

, press the 

Maintenance

 button 11 times to display the screen shown to the right, then press 

the 

Black

 button or the 

Color

 button.

Summary of Contents for PIXMA MP495 Series

Page 1: ...ENGLISH ESPAÑOL Solución de problemas de configuración de red Network Setup Troubleshooting ...

Page 2: ...ow the Access Point Name Network Name SSID Security Protocol encryption standard and Network Key The Machine is Not Detected after the Network Environment is Changed P 8 P 8 Connection Checklist P 11 Reference Information P 8 Restoring the Machine s Default LAN Settings to Perform Setup Again P 10 P 8 Configuring Wireless LAN Settings Manually P 8 P 2 Check Access Point to Be Used Screen is Displa...

Page 3: ...int is not displayed on the Detected Access Points List screen check the following points Is WPA WPA2 Enterprise set as a security protocol encryption standard on the access point WPA WPA2 Enterprise is not supported on the machine Change the security protocol encryption standard for the access point then configure settings again For details on how to change the security protocol encryption standa...

Page 4: ...ple access points D then click OK or Continue C When you have only one access point The access point selected in the Detected Access Points List screen will be used Make sure that the target access point is selected correctly by following the procedure below then proceed with the setup When using multiple access points roaming Glossary A unique number assigned to each network device MAC address A ...

Page 5: ... address Check 4 Enter the value you want to specify for each of IP Address Subnet Mask and Default Gateway or Router D Click Connect A Select Use next IP address C Check 4 Is the firewall function of your security software active A message may appear on the computer monitor warning that Canon software is attempting to access the network If the warning message appears set the security software to ...

Page 6: ...he network and host portions of an IP address Default gateway A device required to connect to external networks Set the access point to accept the IP address of the machine For details on how to change the settings of the access point refer to the manual supplied with the access point or contact its manufacturer To check the IP address of the machine print the Network Configuration Page then check...

Page 7: ... IP address A numerical identification assigned to each computer or network device connected to a network Is the privacy separator feature enabled on the access point Disable the privacy separator feature Check 5 Check 4 For details on how to change the settings of the access point refer to the manual supplied with the access point or contact its manufacturer For details on how to check the settin...

Page 8: ...tected Wait for a while then configure the settings again WPS The error appears when attempting to configure LAN settings of the machine from the Operation Panel while they are being configured in another way Configure the settings after completing the settings E 2 0 is Displayed Check the access point settings then configure WPS settings again For details on how to check the settings of the acces...

Page 9: ...tarted Select the security protocol for the access point in Encryption Method D then click Configuration E If the Detected Access Points List screen is displayed go to Action Check Check Other Troubleshooting Tips The Machine is Not Detected after the Network Environment is Changed IP address A numerical identification assigned to each computer or network device connected to a network Glossary Wai...

Page 10: ...nter the network key in WEP Key F WPA WPA2 Disable When WEP Transitional Security Network is selected in AirPort Utility select AES Secure Encryption Disable WPA WPA2 Enter the network key in Passphrase L Enter upper and lower case letters of the alphabet correctly when the network key is between 8 and 63 characters Letters are case sensitive Letters are not case sensitive if the network key is 64...

Page 11: ...LAN settings of the machine to the default state Default State Wireless LAN Inactive SSID BJNPSETUP Data encryption Inactive TCP IP settings Obtain an IP address automatically The LAN setting of the machine is now restored to the default state Perform setup again by following the procedures from 6 Set Up a Wireless Connection in the printed manual Getting Started The screen shown to the right appe...

Page 12: ...nt and machine installed in an open space where wireless communications are possible Also is there a microwave oven refrigerator etc nearby Install them in an open space with as few obstacles as possible Leave some space between the installation location and a microwave oven refrigerator etc so that its radio waves will not affect those from the access point Check 6 Firewall A system to use comput...

Page 13: ...dar de cifrado y la clave de red El equipo no se detecta después de modificar el entorno de red P 8 P 8 Lista de comprobación de las conexiones P 11 Información de referencia P 8 Restauración de la configuración de LAN predeterminada del equipo para volver a configurar P 10 P 8 Configuración manual de la LAN inalámbrica P 8 P 2 Se muestra la pantalla Comprobación del punto de acceso que se va a ut...

Page 14: ...o en la pantalla Lista de puntos de acceso detectados Detected Access Points List compruebe los puntos siguientes En el punto de acceso está establecido WPA WPA2 Empresa como protocolo de seguridad estándar de codificación El equipo no admite WPA WPA2 Empresa Cambie el protocolo de seguridad estándar de codificación del punto de acceso y vuelva a establecer la configuración Para obtener informació...

Page 15: ...n Aceptar OK o Continuar Continue C Si sólo se dispone de un punto de acceso Se utilizará el punto de acceso seleccionado en la pantalla Lista de puntos de acceso detectados Detected Access Points List Asegúrese de que se ha seleccionado correctamente el punto de acceso de destino según el procedimiento siguiente y a continuación continúe con la configuración Si se utilizan varios puntos de acceso...

Page 16: ...roduzca el valor que desee especificar para cada Dirección IP IP Address Máscara de subred Subnet Mask y Pasarela predeterminada Default Gateway o Router D Haga clic en Conectar Connect A Seleccione Usar siguiente dirección IP Use next IP address C Comprobación 4 Está activada la función de firewall del software de seguridad En la pantalla del ordenador puede aparecer un mensaje advirtiendo de que...

Page 17: ...e la red y del servidor de una dirección IP Pasarela predeterminada Dispositivo necesario para conectar con redes externas Configure el punto de acceso para que admita la dirección IP del equipo Para obtener información sobre cómo cambiar la configuración del punto de acceso consulte el manual suministrado con éste o póngase en contacto con el fabricante Para comprobar la dirección IP del equipo i...

Page 18: ...ctados a la red Dirección IP Identificación numérica asignada a cada ordenador o dispositivo de red conectado a una red Está activada la función de separador de privacidad en el punto de acceso Desactive la función de separador de privacidad Comprobación 5 Comprobación 4 Para obtener información sobre cómo cambiar la configuración del punto de acceso consulte el manual suministrado con éste o póng...

Page 19: ...er la configuración WPS El error aparece cuando se intentan configurar los parámetros de LAN del equipo desde el panel de control mientras se están configurando de otra manera Establezca los parámetros cuando finalice esa otra configuración Se muestra E 2 0 Compruebe la configuración del punto de acceso y a continuación vuelva a establecer la Configuración WPS WPS Settings Para obtener información...

Page 20: ...asos a de Instalación del software 1 del manual impreso Guía de inicio Seleccione el protocolo de seguridad del punto de acceso en Mét codif Encryption Method D y a continuación haga clic en Configuración Configuration E Si se abre la pantalla Lista de puntos de acceso detectados Detected Access Points List vaya al paso Acción Comprobaciones Comprobaciones Otros consejos para la solución de proble...

Page 21: ...lave WEP WEP Key F WPA WPA2 Desactivado Si selecciona WEP red seguridad de transición WEP Transitional Security Network en Utilidad AirPort elija AES codificación segura AES Secure Encryption Desactivado WPA WPA2 Introduzca la clave de red en Contraseña Passphrase L Cuando la clave de red tenga entre 8 y 63 caracteres introduzca correctamente las letras mayúsculas y minúsculas Se diferencia entre ...

Page 22: ...ración de LAN del equipo al estado predeterminado Estado predeterminado LAN inalámbrica Inactiva SSID BJNPSETUP Codificación de datos Inactiva Configuración TCP IP Obtener una dirección IP automáticamente La configuración de LAN del equipo se habrá restablecido al estado predeterminado Vuelva a establecer la configuración siguiendo el procedimiento descrito en 6 Configuración de una conexión inalá...

Page 23: ... instalados en un espacio abierto en el que es posible la comunicación inalámbrica Además hay algún horno microondas nevera etc cerca Instálelos en un espacio abierto con la menor cantidad de obstáculos posible Deje cierto espacio entre el lugar de instalación y cualquier horno microondas nevera etc que pudiera haber para que sus ondas de radio no afecten a las del punto de acceso Comprobación 6 F...

Page 24: ...QT5 2958 V01 XXXXXXXX CANON INC 2010 PRINTED IN VIETNAM ...

Reviews: