background image

62

Demonstration Mode

The demonstration mode displays the camcorder’s main features. It starts automatically 
when you leave the camcorder turned on (using the power adapter) without loading a 
recording media for more than 5 minutes. However, you can set the camcorder not to 
start the demonstration mode.

To deactivate the demonstration mode:

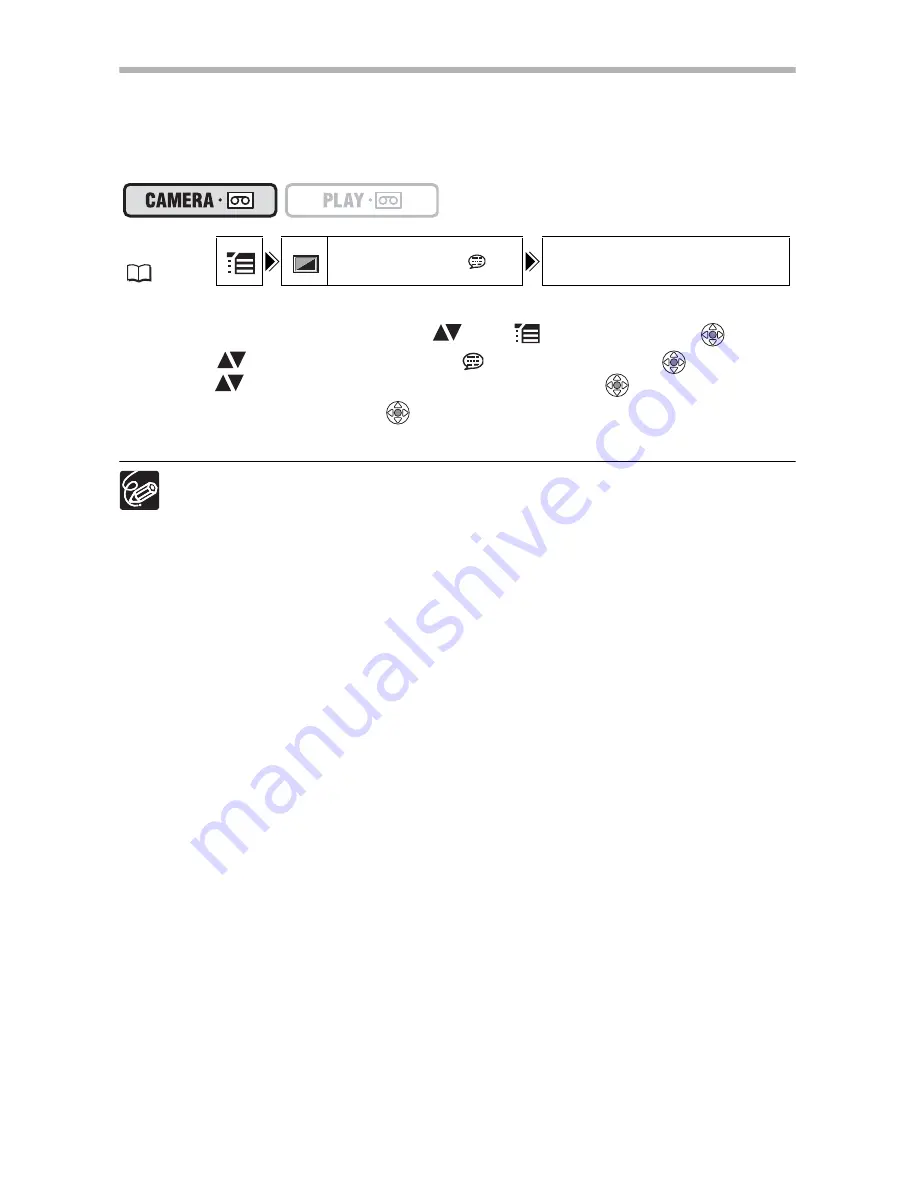
1. Open the FUNC. menu, select (

) the 

 icon and press (

). 

2. Select (

) the [DISPLAY SETUP/

] menu and press (

). Then, 

select (

) the [DEMO MODE] option and press (

).

3. Set it to [OFF] and press (

) to save the changes, then close the 

menu.

To cancel the demo mode once it has begun, press any button, turn off the 
camcorder or load a recording media.

MENU

(

33)

DISPLAY SETUP/

DEMO MODE ON

Summary of Contents for MV900

Page 1: ...English PUB DIE 253 PAL English Introduction Basic Functions Advanced Functions Editing Additional Information Digital Video Camcorder Instruction Manual Mini Digital Video Cassette...

Page 2: ...TO QUALIFIED SERVICE PERSONNEL WARNING TO REDUCE THE RISK OF FIRE OR ELECTRIC SHOCK DO NOT EXPOSE THIS PRODUCT TO RAIN OR MOISTURE CAUTION TO REDUCE THE RISK OF ELECTRIC SHOCK AND TO REDUCE ANNOYING I...

Page 3: ...ons in menus The functions assigned to the joystick change according to the operation mode You can display the joystick guide to remind you of the joystick s functions in each operating mode Push the...

Page 4: ...rademark or trademark of Microsoft Corporation in the United States and or other countries Macintosh and Mac OS are trademarks of Apple Computer Inc registered in the United States and other countries...

Page 5: ...Recording Using the Recording Programs 36 Adjusting the Exposure Manually 40 Adjusting the Focus Manually 41 Setting the White Balance 43 Selecting an Image Effect 44 Setting the Shutter Speed 45 Usi...

Page 6: ...6 List of Messages 70 Maintenance Others 71 Troubleshooting 76 System Diagram Availability differs from area to area 79 Optional Accessories 80 Specifications 82 Index 84...

Page 7: ...the Supplied Accessories Europe only Not included with the CA 570 Compact Power Adapter incl power cord BP 2L5 Battery Pack Lithium Button Battery CR1616 SS 900 Shoulder Strap STV 250N Stereo Video C...

Page 8: ...t side view Lens cover switch 18 open closed LCD BACKLIGHT button 15 Speaker 28 CHARGE indicator 10 Terminal cover switch 4 Grip belt 14 AV terminal 29 MIC microphone terminal 50 DV terminal 63 65 Zoo...

Page 9: ...ry release button 10 LCD screen 15 Joystick 3 FUNC button 33 D EFFECTS button 51 WIDE SCR button 54 DATA CODE button 56 Backup battery compartment 12 Start stop button 18 Battery attachment unit 10 Se...

Page 10: ...Connect the power cord to the adapter 2 Plug the power cord into a power outlet 3 Connect the power adapter to the camcorder s DC IN terminal The CHARGE indicator starts flashing The indicator will s...

Page 11: ...correctly even if the CHARGE indicator is continuously on The battery pack may also not be charged correctly when a power outage occurs during charging Remove the battery pack and attach it back to th...

Page 12: ...up battery to retain the settings 1 Open the backup battery cover 2 Insert the backup battery with the side facing out 3 Close the cover The backup battery has a life span of about a year flashes in r...

Page 13: ...out 3 Press the mark on the cassette compartment until it clicks 4 Wait for the cassette compartment to retract automatically and close the cassette compartment cover Do not interfere with the casset...

Page 14: ...optric adjustment lever Fastening the Grip Belt Adjust the grip belt so that you can reach the zoom lever with your index finger and the start stop button with your thumb Attaching the Shoulder Strap...

Page 15: ...ightness of the LCD screen between normal and bright by pressing the LCD BACKLIGHT button This is useful for outdoor recordings Press the LCD BACKLIGHT button This setting does not affect the brightne...

Page 16: ...r Singapore depending on the region 4 Select your time zone and press To adjust for daylight saving time select the time zone with the next to the area Setting the Date and Time 5 Select the DATE TIME...

Page 17: ...another time zone Just set the time zone to the one of your destination and the camcorder automatically adjusts the clock London GMT UTC Wellington WELLINGTN 12 Paris 1 Samoa 11 Cairo 2 Honolulu 10 M...

Page 18: ...button to begin recording Press the start stop button again to pause the recording When You Have Finished Recording 1 Turn the switch to 2 Close the LCD panel 3 Close the lens cover move the lens cov...

Page 19: ...ank sections between the recordings even if you turn the camcorder off Bright light may make it difficult to use the LCD screen In such case use the viewfinder instead When recording near loud sounds...

Page 20: ...nds and returns to record pause mode Record Search In record pause mode this function allows you to play back the tape forward or reverse to locate the point where you wish to begin recording 1 Set th...

Page 21: ...may not appear Depending on the type of the tape the indication may not be displayed correctly Remaining battery charge The battery symbol indicates the charge status of the battery pack starts flashi...

Page 22: ...d W to zoom out wide angle Move it toward T to zoom in telephoto You can also change the zoom speed 24 Keep at least 1 m to the subject At wide angle you can focus on a subject as close as 1 cm The zo...

Page 23: ...press 3 Select the CAMERA SETUP menu and press Then select the D ZOOM option and press 4 Select either 100x or 800x or 88x or 700x and press to save the changes 5 Press the FUNC button to close the me...

Page 24: ...om 1 Press the FUNC button to open the FUNC menu 2 With the joystick select the icon and press 3 Select the CAMERA SETUP menu and press Then select the ZOOM SPEED option and press 4 Select a setting o...

Page 25: ...lity Lighting When recording outdoors we recommend recording with the sun at your back When using a tripod do not leave the viewfinder exposed to direct sunlight as it may melt due to concentration of...

Page 26: ...ards to play back the tape Push again to pause the playback 6 Push the joystick towards to stop the playback To use the viewfinder close the LCD panel About the screen display During playback the time...

Page 27: ...normal speed forward or reverse During normal playback hold the joystick pushed towards or pushed towards Release the joystick to return to normal playback There is no sound during special playback T...

Page 28: ...be muted when the LCD panel is closed 1 Press the FUNC button to open the FUNC menu 2 With the joystick select the speaker volume icon 3 Adjust the volume as required 4 Press the FUNC button to save t...

Page 29: ...he STV 250N Stereo Video Cable to the camcorder s AV terminal and the audio terminals on the SCART Adapter Connect the white plug to the white AUDIO terminal L left and the red plug to the red AUDIO t...

Page 30: ...terminals on the TV VCR Connect the white plug to the white audio terminal L left the red plug to the red audio terminal R right and the yellow plug to the yellow video terminal VIDEO 3 If connecting...

Page 31: ...6 9 aspect ratio NORMAL TV TV sets with 4 3 aspect ratio 5 Press the FUNC button to close the menu Playing back recordings made in the widescreen mode on a normal TV If the TV type is set to NORMAL TV...

Page 32: ...con and press 3 Select the AUDIO SETUP menu and press Then select the OUTPUT CH option and press 4 Select a setting option and press to save the changes L R Stereo L R channels Bilingual Main Sub L L...

Page 33: ...elections with the joystick In such cases a joystick icon next to the bottom bar or small arrows around the setting option will be displayed as an additional operation guide 4 Press the FUNC button to...

Page 34: ...R SPEED AUTO 1 50 1 120 1 250 1 500 1 1000 1 2000 45 A SL SHUTTER ON OFF 46 D ZOOM 23 OFF 100x 800x OFF 88x 700x ZOOM SPEED VARIABLE SPEED 3 SPEED 2 SPEED 1 24 IMG STAB ON OFF 61 VCR SETUP REC MODE ST...

Page 35: ...UDIO STEREO1 STEREO2 MIX FIXED MIX VAR 58 MIX BALANCE 58 AUDIO MODE 16bit 12bit 49 DISPLAY SETUP BRIGHTNESS 60 TV SCREEN ON OFF 68 DISPLAYS ON OFF PLAYBK 68 6SEC DATE ON OFF 56 DATA CODE DATE TIME DAT...

Page 36: ...owever you have the option of adjusting the settings manually Portrait Use this mode to give accent to your subject by blurring the background or foreground The blur effect increases the more you zoom...

Page 37: ...Use this mode to record on a sunny beach It prevents the subject from being underexposed Sunset Use this mode to record sunsets in vibrant colors Spotlight Use this mode to record spotlit scenes Fire...

Page 38: ...e A Auto setting Selecting the Easy Recording Program Set the program selector to appears Program Selector Recording Program Image Stabilizer on Focus A White Balance A Wind Screen A Shutter Speed A A...

Page 39: ...s of the image may change abruptly Portrait Sports mode The picture may not appear smooth when played back Snow Beach mode The subject may become overexposed in dark surroundings Check the image on th...

Page 40: ...djust the brightness of the image as necessary To return to the automatic exposure push the joystick towards EXP once more The exposure adjustment indicator will disappear and EXP will turn white agai...

Page 41: ...ick guide does not appear on screen press to display it 4 Push the joystick towards FOCUS to activate the manual focus FOCUS on the joystick guide will be displayed in light blue and MF appears on the...

Page 42: ...ocus on faraway subjects such as mountains or fireworks 1 In the manual focus mode press to display the joystick guide 2 Keep the joystick pushed towards FOCUS for more than 2 seconds At first MF will...

Page 43: ...ou select SET 5 Point the camcorder at a white object zoom in until it fills the whole screen and press Keep the camcorder zoomed in at the white object until step 6 is completed The icon flashes and...

Page 44: ...rescent lights Selecting an Image Effect You can record with different color saturation and contrast effects 1 Press the FUNC button to open the FUNC menu 2 With the joystick select the image effects...

Page 45: ...nd press Then select the SHUTTR SPEED option and press 6 Select a setting option and press to save the changes 7 Press the FUNC button to close the menu Do not point the camcorder directly at the sun...

Page 46: ...cording in places with insufficient lighting However you can set the camcorder not to use a slow shutter speed 1 Open the FUNC menu select the icon and press 2 Select the CAMERA SETUP menu and press T...

Page 47: ...utton The camcorder starts recording after a 10 second countdown The countdown appears on the screen To cancel the self timer select SELF TIMER OFF in step 2 above Once the countdown has begun you can...

Page 48: ...then close the menu Depending on the nature and usage condition of the tape picture and sound recorded in LP mode may be distorted We recommend using the SP mode for important recordings If you record...

Page 49: ...bit and press to save the changes then close the menu The selected audio mode is displayed for approximately 4 seconds Wind Screen The camcorder reduces the wind noise automatically only when recordin...

Page 50: ...he MIC terminal Use commercially available condenser microphones with their own power supply You can connect almost any stereo microphone equipped with a 3 5 mm plug but the audio level will be differ...

Page 51: ...tions Recording E Using Digital Effects Faders 52 Begin or end scenes with a fade to or from black Fade Trigger FADE T Wipe WIPE Corner Wipe CORNER Jump JUMP Flip FLIP Puzzle PUZZLE Zigzag ZIGZAG Beam...

Page 52: ...icon 2 Select the FADER option and press 3 Select a setting option press and close the menu The symbol of the selected fader will appear on screen 4 Fade in In record pause mode press the D EFFECTS bu...

Page 53: ...elector to Not available if the TV type is set to NORMAL TV 1 Open the FUNC menu and select the digital effects icon 2 Select the EFFECT option and press 3 Select a setting option press and close the...

Page 54: ...y normally video in 4 3 aspect ratio will appear with black side bars On the viewfinder screen Widescreen video will appear in letterbox display video in 4 3 aspect ratio will display normally Playing...

Page 55: ...d area To further enlarge the image move the zoom lever toward T To shrink the image below 2 times magnification move the zoom lever toward W 2 Select the magnified area with the joystick To cancel th...

Page 56: ...isplay the data code during playback Press the DATA CODE button The data code will not display the next time you turn on the camcorder Six Second Auto Date Date and time appear for 6 seconds when you...

Page 57: ...d search icon and press 2 Select EXECUTE and press to start the search END SEARCH appears The camcorder rewinds fast forwards the tape plays back the last few seconds of the recording and stops the ta...

Page 58: ...IXED Plays back Stereo 1 and Stereo 2 in the same level MIX VAR Plays back Stereo 1 and Stereo 2 The mix balance can be adjusted If you select an audio setting other than MIX VAR close the menu To adj...

Page 59: ...mark next to the menu item to change the setting The display FUNC at the bottom of the screen refers to the button s name on the camcorder and will not change when you change the language Changing the...

Page 60: ...nd press Then select the BEEP option and press 3 Set it to OFF and press to save the changes then close the menu Adjusting the Brightness of the LCD Screen 1 Open the FUNC menu select the icon and pre...

Page 61: ...s The image stabilizer cannot be turned off when the program selector is set to The image stabilizer is designed to compensate a normal degree of camcorder shake The image stabilizer might not be as e...

Page 62: ...ou can set the camcorder not to start the demonstration mode To deactivate the demonstration mode 1 Open the FUNC menu select the icon and press 2 Select the DISPLAY SETUP menu and press Then select t...

Page 63: ...Digital Video Device Use the optional CV 150F 4 pin 4 pin or CV 250F 4 pin 6 pin DV Cable Refer also to the instruction manual of the digital video device Recording 1 Set the camcorder to mode and lo...

Page 64: ...l be slightly lower than that of the original When connecting a digital video device If the picture does not appear reconnect the DV cable or turn the camcorder off and back on again Proper operation...

Page 65: ...ay back the tape or disc 7 If the joystick guide does not appear on screen press to display it 8 Push the joystick towards when the scene you wish to record appears Recording starts Push the joystick...

Page 66: ...tains copyright control signals for protection of software COPYRIGHT PROTECTED PLAYBACK IS RESTRICTED appears for a few seconds and the camcorder displays a blank blue screen You cannot playback the c...

Page 67: ...than Mac OS 9 and will be installed automatically Use the optional CV 150F 4 pin 4 pin or CV 250F 4 pin 6 pin DV Cable Operation may not work correctly depending on the software and the specification...

Page 68: ...rned on The displays appear while a playback image is magnified or a digital effect is activated Tape operation displays appear for 2 seconds Hiding Showing the Displays on the TV Screen When you conn...

Page 69: ...operation Time code 21 Remaining tape 21 Operating mode 4 Zoom 22 Exposure adjustment 41 Widescreen mode 54 Wind screen 49 Recording program 36 Audio mode 49 White balance 43 Condensation warning 72...

Page 70: ...digital device is turned off 65 CONDENSATION HAS BEEN DETECTED Condensation has been detected in the camcorder 72 CONDENSATION HAS BEEN DETECTED REMOVE THE CASSETTE Condensation has been detected in...

Page 71: ...consult qualified service personnel Handle the camcorder with care Do not subject the camcorder to shocks or vibration as this may cause damage Avoid sudden changes in temperature Moving the camcorde...

Page 72: ...et type cleaning cassettes as this may damage the camcorder Condensation Moving the camcorder rapidly between hot and cold temperature may cause condensation water droplets to form on its internal sur...

Page 73: ...erminals may cause a poor contact between the battery pack and the camcorder Wipe the terminals with a soft cloth Since storing a charged battery pack for a long time about 1 year can shorten its life...

Page 74: ...cassette in the camcorder after use Do not use spliced tapes or nonstandard cassettes as they may damage the camcorder Do not use tapes that have been jammed as video heads may become dirty Do not in...

Page 75: ...country with power supply between 100 and 240 V AC 50 60 Hz Consult the Canon Service Center for information on plug adapters for overseas use Playback on a TV Screen You can only play back your reco...

Page 76: ...or charge the battery pack 10 The camcorder malfunctions Consult a Canon Service Center LCD viewfinder switches on and off Battery pack is exhausted Replace or charge the battery pack 10 Battery pack...

Page 77: ...the tape or replace the cassette 13 Cassette is protected flashes on the screen Change the position of the protect switch 75 Camcorder is set to a mode other than the mode Set the camcorder to mode 1...

Page 78: ...on the screen Rewind the tape 26 Tape is running but image will not appear on the TV screen TV VIDEO selector on the TV is not set to VIDEO Set the selector to VIDEO 29 Video heads are dirty Clean th...

Page 79: ...rger CBC NB2 Car Battery Charger STV 250N Stereo Video Cable CA 570 Compact Power Adapter CV 150F CV 250F DV Cable SC 2000 Soft Carrying Case WS 20 Wrist Strap Shoulder Strap TV VCR Digital Device Min...

Page 80: ...ap Use this for extra additional protection for active shooting Use of genuine Canon accessories is recommended This product is designed to achieve excellent performance when used with genuine Canon a...

Page 81: ...g Case A handy camcorder bag with padded compartments and plenty of space for accessories This mark identifies genuine Canon video accessories When you use Canon video equipment we recommend Canon bra...

Page 82: ...ectret condenser microphone Lens f 2 6 65 mm F 1 8 4 4 25x power zoom 35 mm equivalent Tape 16 9 with image stabilizer 43 6 1090 mm 16 9 no image stabilizer 41 0 1025 mm 4 3 recording 49 8 1245 mm f 2...

Page 83: ...LCD screen in normal brightness Operating temperature 0 40 C Dimensions W x H x D 49 x 92 x 115 mm excluding protrusions Weight camcorder body only 375 g Power supply 100 240 V AC 50 60 Hz Power cons...

Page 84: ...e 62 Digital effects 51 Digital zoom 23 DV dubbing 65 DV terminal 63 67 E Easy mode 36 Effects 52 End search 57 Exposure 40 F Faders 51 Fireworks recording program 37 Focus 41 G Grip belt 14 H Handlin...

Page 85: ...am 36 SP mode 48 Speaker volume 28 Sports recording program 36 Spotlight recording program 37 Start up image 61 Sunset recording program 37 T Time zone 16 Transferring video to a computer 67 Tripod 25...

Page 86: ...on New Zealand Ltd Customer Care 09 489 0470 www canon co nz Canon Singapore Pte Ltd 1 HarbourFront Avenue 04 01 Keppel Bay Tower Singapore 098632 Tel 65 6799 8888 Fax 65 6799 8882 Canon Hongkong Comp...

Reviews: