


3.
Click Define Stamp...
The Stamp Settings dialog box opens.
4.
Configure the stamp while viewing the preview window
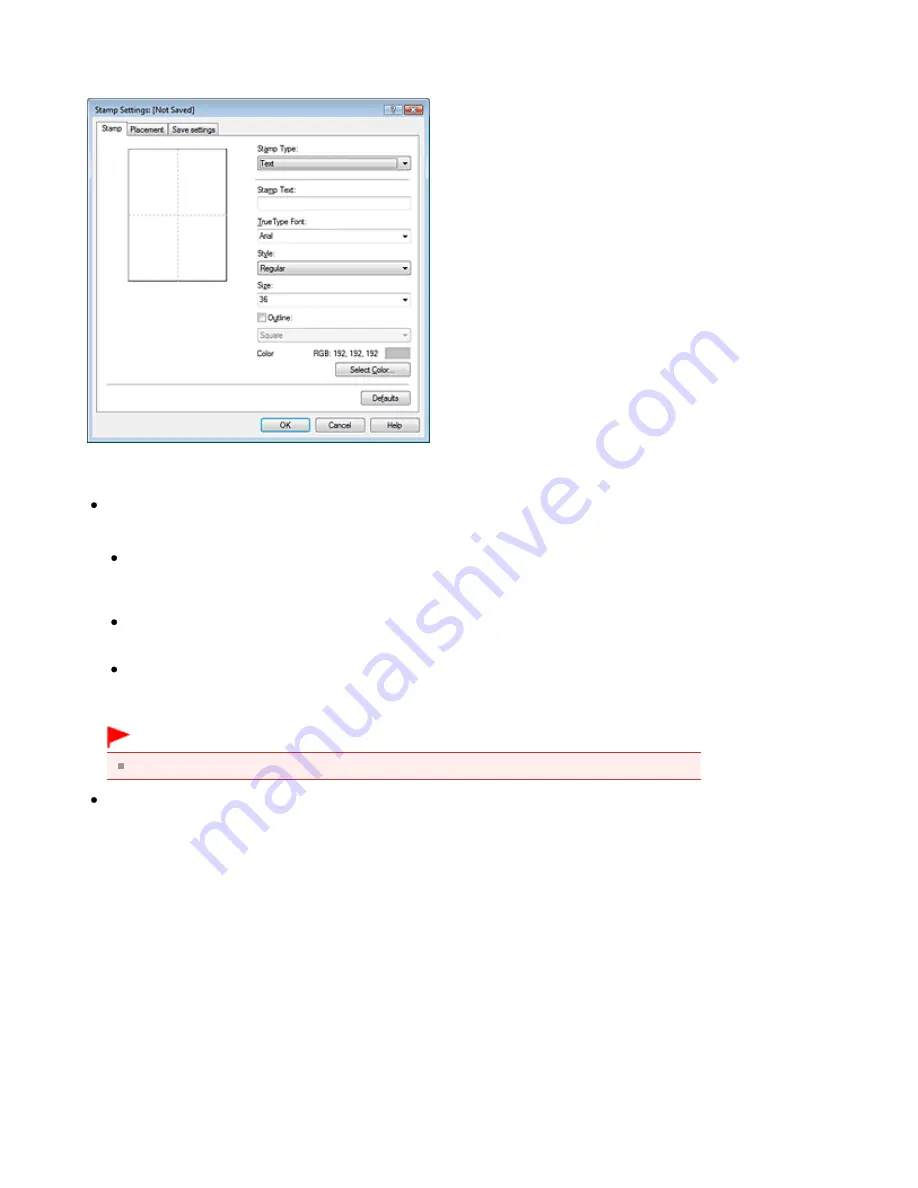
Stamp tab
Select Text, Bitmap, or Date/Time/User Name that matches your purpose for Stamp Type.
For Text registration, the characters must already be entered in Stamp Text. If necessary,
change the TrueType Font, Style, Size, and Outline settings. You can select the color of the
stamp by clicking Select Color....
For Bitmap, click Select File... and select the bitmap file (.bmp) to be used. If necessary,
change the settings of the Size and Transparent white area.
For Date/Time/User Name, the creation date/time and user name of the printed object are
displayed in Stamp Text. If necessary, change the settings of TrueType Font, Style, Size, and
Outline. You can select the color of the stamp by clicking Select Color....
Important
Stamp Text appears grayed out and is unavailable when Date/Time/User Name is selected.
Placement tab
Select the stamp position from the Position list. You can also select Custom from the Position
list and specify coordinates for X-Position and Y-Position.
You can also change the stamp position by dragging the stamp in the preview window.
To change the stamp position angle, type a value in the Orientation box directly.
5.
Save the stamp
Click the Save settings tab and enter a title in the Title box, and then click Save.
Click OK when the confirmation message appears.
6.
Complete the setup
Click OK. The Stamp/Background (Stamp) dialog box opens again.
The registered title appears in the Stamp list.
Changing and Registering Some of Stamp Settings
1.
Select the stamp for which the settings are to be changed
Стор. 273 із 715
Registering a Stamp
Summary of Contents for mp280 series
Page 33: ...На початок сторінки Стор 33 із 715 Друк веб сторінок Easy WebPrint EX ...
Page 134: ...See Help for details on the Edit screen Page top Стор 134 із 715 Editing ...
Page 138: ...Page top Стор 138 із 715 Printing Stickers ...
Page 145: ...See Help for details on the Print Settings screen Page top Стор 145 із 715 Printing ...
Page 147: ...How Can I Move or Copy the Saved File Page top Стор 147 із 715 Printing Layout ...
Page 150: ...Page top Стор 150 із 715 Selecting the Paper and Layout ...
Page 154: ...Page top Стор 154 із 715 Editing ...
Page 206: ...Page top Стор 206 із 715 Cropping Photos Photo Print ...
Page 210: ...Page top Стор 210 із 715 Printing an Index ...
Page 216: ...Page top Стор 216 із 715 Opening Saved Files ...
Page 220: ...Page top Стор 220 із 715 Changing Layout ...
Page 225: ...Page top Стор 225 із 715 Adding Photos ...
Page 233: ...Page top Стор 233 із 715 Printing Dates on Photos ...
Page 247: ...Page top Стор 247 із 715 Setting a Page Size and Orientation ...
Page 254: ...border before printing Page top Стор 254 із 715 Execute Borderless Printing ...
Page 383: ...View Use Window Page top Стор 383 із 715 Classifying Images into Categories ...
Page 409: ...Page top Стор 409 із 715 Navigation Mode Screen ...
Page 445: ...Page top Стор 445 із 715 Send via E mail Dialog Box ...
Page 452: ...Page top Стор 452 із 715 Correct Enhance Images Window ...
Page 465: ...Page top Стор 465 із 715 Scan Settings Dialog Box One click Mode Screen ...
Page 505: ...Related Topic Auto Scan Mode Tab Page top Стор 505 із 715 Scanning in Auto Scan Mode ...
Page 534: ...Related Topic Scanning in Basic Mode Page top Стор 534 із 715 Basic Mode Tab ...
Page 557: ...Page top Стор 557 із 715 Scanner Tab ...
Page 625: ...На початок сторінки Стор 625 із 715 Кольори роздруківок нечіткі ...
Page 699: ...Page top Стор 699 із 715 Installing the MP Drivers ...
Page 704: ...На початок сторінки Стор 704 із 715 Примітка про від єднання шнура живлення ...
Page 710: ...Page top Стор 710 із 715 Restrictions on Printer Sharing ...
Page 713: ...Page top Стор 713 із 715 Using Easy PhotoPrint EX ...


