


•
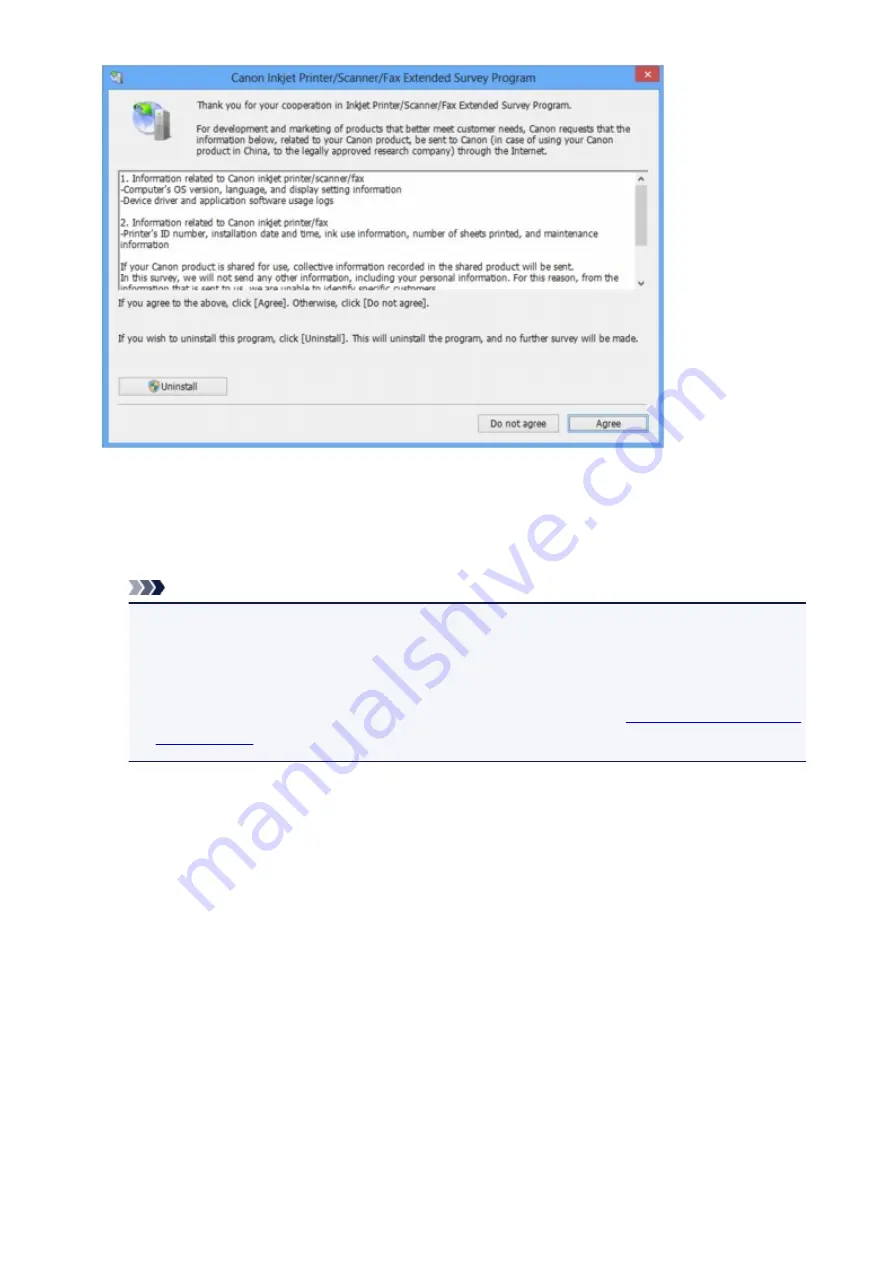
If you agree to participate in the survey program:
Click
Agree
, then follow the on-screen instructions. The printer usage information will be sent via the
Internet. If you have followed the on-screen instructions, the information will be sent automatically
from the second time onward and the confirmation screen will not be displayed again.
Note
• When the information is being sent, a caution screen such as an Internet security screen may be
displayed. In this case, confirm that the program name is "IJPLMUI.exe", then allow it.
• If you deselect the
Send automatically from the next time
check box, the information will not
be sent automatically from the second time onward and a confirmation screen will be displayed at
the time of the next survey. To send the information automatically, see
.
•
If you do not agree to participate in the survey program:
Click
Do not agree
. The confirmation screen will be closed, and the survey at that time is skipped.
The confirmation screen will be displayed again one month later.
•
To uninstall the Inkjet Printer/Scanner/Fax Extended Survey Program:
To uninstall the Inkjet Printer/Scanner/Fax Extended Survey Program, click
Uninstall
, then follow the
on-screen instructions.
•
Changing the confirmation screen setting:
1. Select items as shown below.
◦ In Windows 8.1 or Windows 8, select
Control Panel
from the
Settings
charm on
Desktop
>
Programs
>
Programs and Features
.
◦ In Windows 7, or Windows Vista, select the
Start
menu >
Control Panel
>
Programs
>
Programs and Features
.
◦ In Windows XP, select the
Start
menu >
Control Panel
>
Add or Remove Programs
.
669
Summary of Contents for MG2900 Series
Page 62: ... 8 Display area The display changes based on the menu you select 62 ...
Page 82: ...Safety Guide Safety Precautions Regulatory and Safety Information 82 ...
Page 88: ...Main Components and Basic Operations Main Components About the Power Supply of the Machine 88 ...
Page 89: ...Main Components Front View Rear View Inside View Operation Panel 89 ...
Page 102: ...Loading Paper Originals Loading Paper Loading Originals 102 ...
Page 119: ...Loading Originals Loading Originals on the Platen Glass Originals You Can Load 119 ...
Page 123: ...Replacing a FINE Cartridge Replacing a FINE Cartridge Checking the Ink Status 123 ...
Page 128: ...Important Check if the FINE cartridge is installed correctly 128 ...
Page 169: ...Note The effects of the quiet mode may be less depending on the print quality settings 169 ...
Page 179: ...Information about Network Connection Useful Information about Network Connection 179 ...
Page 225: ...5 Delete Deletes the selected IP address from the list 225 ...
Page 267: ...Information in this guide is subject to change without notice 267 ...
Page 269: ...Printing Printing from a Computer Printing from a Digital Camera 269 ...
Page 285: ...Note Selecting Scaled changes the printable area of the document 285 ...
Page 315: ...Note During Grayscale Printing inks other than black ink may be used as well 315 ...
Page 320: ...Adjusting Brightness Adjusting Intensity Adjusting Contrast 320 ...
Page 402: ...Copying Making Copies Basic Switching the Page Size between A4 and Letter 402 ...
Page 406: ...Scanning Scanning from a Computer 406 ...
Page 474: ...Related Topic Scanning Items Larger than the Platen Image Stitch 474 ...
Page 495: ...495 ...
Page 518: ...Related Topic Scanning in Basic Mode 518 ...
Page 571: ...When scanning is completed the scanned image appears in the application 571 ...
Page 610: ...Problems with Printing Quality Print Results Not Satisfactory Ink Is Not Ejected 610 ...
Page 707: ...5B00 Cause Printer error has occurred Action Contact the service center 707 ...
Page 708: ...5B01 Cause Printer error has occurred Action Contact the service center 708 ...


