


Gutter Shadow Correction
Use this function to correct shadows that appear between pages when scanning open booklets.
When you set the
Gutter Shadow Correction
setting in the preview image, the result will be reflected.
Preview the effects before scanning, as results vary depending on the type of document and how it is
pressed.
Unclear or blurred text/lines caused by curved pages are not corrected.
None
Gutter shadow will not be corrected.
Low
Select this when the effect level is too strong with the medium setting.
Medium
It is recommended that you normally select this setting.
High
Select this when the effect level is too weak with the medium setting.
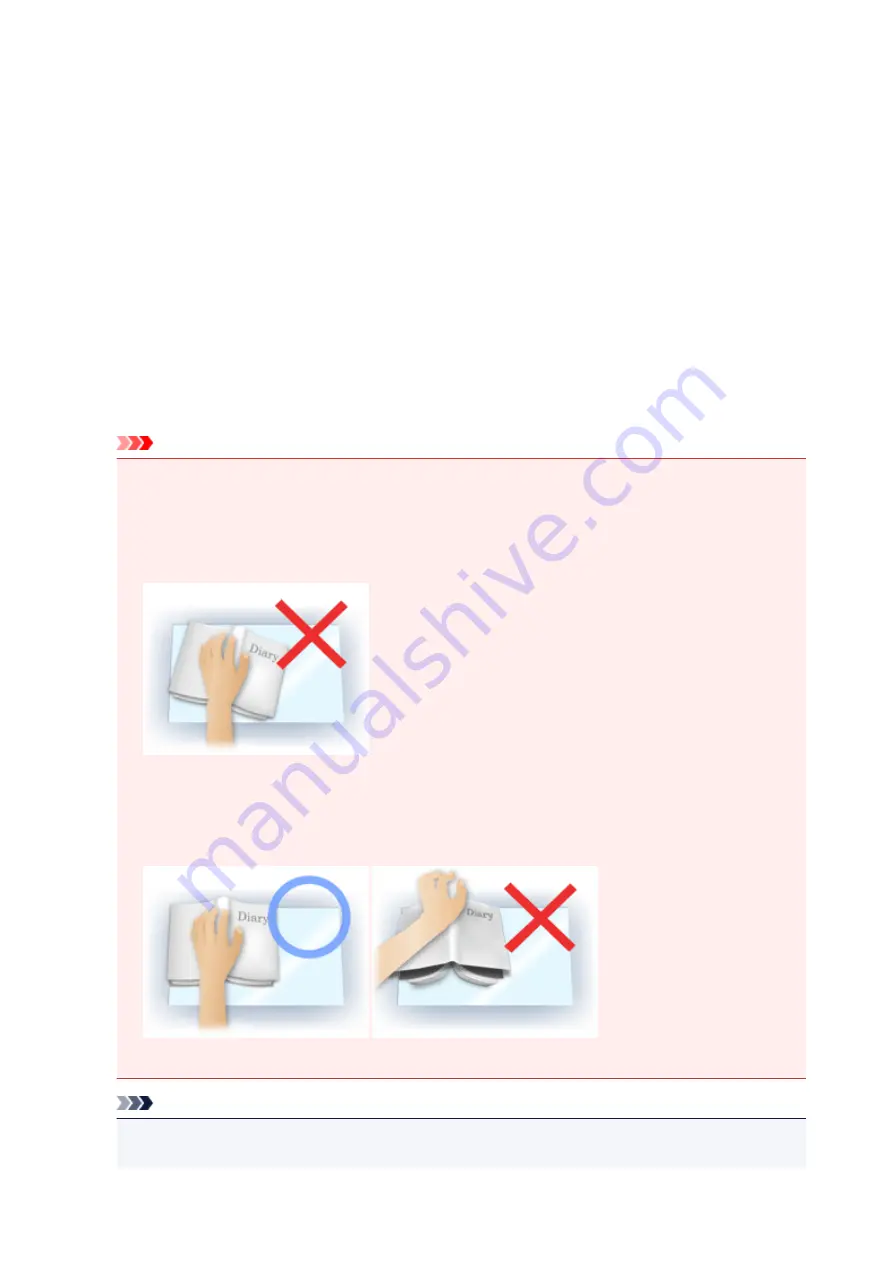
Important
• You can set
Gutter Shadow Correction
after preview.
• Do not place objects that weigh 4.4 lbs (2.0 kg) or more on the platen. Also, do not press on the
document with a force exceeding 4.4 lbs (2.0 kg). If you press heavily, the scanner may not work
correctly or you might break the glass.
• Align the document with the edge of the Platen. If not, the shadow will not be corrected properly.
• Shadows may not be corrected properly depending on the document. If the page background is not
white, shadows may not be detected correctly or may not be detected at all.
• While scanning, press down on the spine with the same amount of pressure you used to preview
the scan. If the binding part is not even, the shadow will not be corrected properly.
• How to place the document depends on your model and the document to be scanned.
Note
• Cover the document with black cloth if white spots, streaks, or colored patterns appear in scan
results due to ambient light entering between the document and the Platen.
534
Summary of Contents for MG2900 Series
Page 62: ... 8 Display area The display changes based on the menu you select 62 ...
Page 82: ...Safety Guide Safety Precautions Regulatory and Safety Information 82 ...
Page 88: ...Main Components and Basic Operations Main Components About the Power Supply of the Machine 88 ...
Page 89: ...Main Components Front View Rear View Inside View Operation Panel 89 ...
Page 102: ...Loading Paper Originals Loading Paper Loading Originals 102 ...
Page 119: ...Loading Originals Loading Originals on the Platen Glass Originals You Can Load 119 ...
Page 123: ...Replacing a FINE Cartridge Replacing a FINE Cartridge Checking the Ink Status 123 ...
Page 128: ...Important Check if the FINE cartridge is installed correctly 128 ...
Page 169: ...Note The effects of the quiet mode may be less depending on the print quality settings 169 ...
Page 179: ...Information about Network Connection Useful Information about Network Connection 179 ...
Page 225: ...5 Delete Deletes the selected IP address from the list 225 ...
Page 267: ...Information in this guide is subject to change without notice 267 ...
Page 269: ...Printing Printing from a Computer Printing from a Digital Camera 269 ...
Page 285: ...Note Selecting Scaled changes the printable area of the document 285 ...
Page 315: ...Note During Grayscale Printing inks other than black ink may be used as well 315 ...
Page 320: ...Adjusting Brightness Adjusting Intensity Adjusting Contrast 320 ...
Page 402: ...Copying Making Copies Basic Switching the Page Size between A4 and Letter 402 ...
Page 406: ...Scanning Scanning from a Computer 406 ...
Page 474: ...Related Topic Scanning Items Larger than the Platen Image Stitch 474 ...
Page 495: ...495 ...
Page 518: ...Related Topic Scanning in Basic Mode 518 ...
Page 571: ...When scanning is completed the scanned image appears in the application 571 ...
Page 610: ...Problems with Printing Quality Print Results Not Satisfactory Ink Is Not Ejected 610 ...
Page 707: ...5B00 Cause Printer error has occurred Action Contact the service center 707 ...
Page 708: ...5B01 Cause Printer error has occurred Action Contact the service center 708 ...


