USB Connection Problems
If the printer connected to the computer via USB is not recognized, check the following items.
The following problems may occur even though the USB connection is recognized.
• Printing (scanning) is slow.
• Hi-Speed USB connection does not work.
• A message such as "
This device can perform faster
" appears. (Windows)
If the above is the case, check the following.
USB Connection Does Not Work Properly
Note
• If your system environment does not support Hi-Speed USB, the printer operates at the slower speed
of Full-Speed or Low-Speed. In this case, the printer works properly but printing (scanning) speed may
slow down due to the communication speed.
USB Connection Not Recognized
Check1
Check that printer is turned on.
Check2
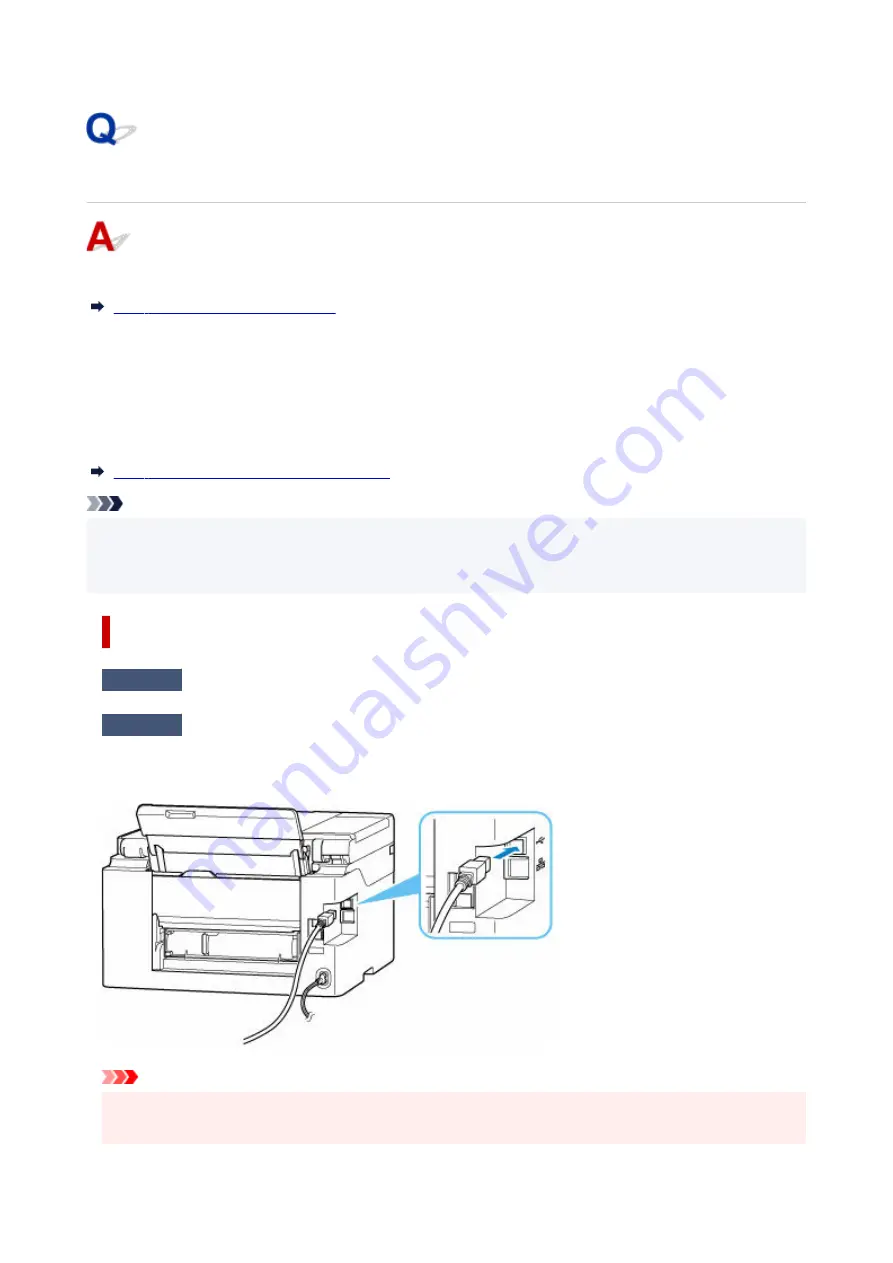
Unplug the USB cable from the printer and the computer, and then connect it
again.
As the illustration below, the USB port is at the back of the printer.
Important
• Check the orientation of the "Type-B" connector and connect to the printer. For details, refer to the
instruction manual supplied with the USB cable.
611
Summary of Contents for MAXIFY GX4000 Series
Page 1: ...GX4000 series Online Manual English ...
Page 15: ...Trademarks and Licenses Trademarks Licenses 15 ...
Page 39: ...Restrictions Notices when printing using web service Notice for Web Service Printing 39 ...
Page 45: ... For macOS Refer to Setup Guide and redo setup 45 ...
Page 71: ... TR9530 series TS3300 series E3300 series 71 ...
Page 77: ...Handling Paper Originals Ink Tanks etc Loading Paper Loading Originals Refilling Ink Tanks 77 ...
Page 101: ...Note To scan the original at optimum quality load it on the platen 101 ...
Page 111: ...Refilling Ink Tanks Refilling Ink Tanks Checking Ink Level Ink Tips 111 ...
Page 148: ...148 ...
Page 151: ...Safety Safety Precautions Regulatory Information WEEE 151 ...
Page 155: ... Do not put the print head or ink bottles into a fire 155 ...
Page 178: ...178 ...
Page 181: ...Main Components and Their Use Main Components Power Supply Using Touch Screen 181 ...
Page 182: ...Main Components Front View Rear View Inside View Operation Panel 182 ...
Page 185: ...O Platen Load an original here 185 ...
Page 212: ...For more on setting items on the operation panel Setting Items on Operation Panel 212 ...
Page 218: ...Preparing for Faxing 218 ...
Page 246: ...4 Select Exit 4 246 ...
Page 280: ...When you perform printing the data will be printed onto the postcard 280 ...
Page 331: ...Printing Using Canon Application Software Easy PhotoPrint Editor Guide 331 ...
Page 343: ...Scanning Scanning in Windows Scanning in macOS Scanning from Operation Panel 343 ...
Page 347: ...Note To set the applications to integrate with see Settings Dialog Box 347 ...
Page 361: ...ScanGear Scanner Driver Screens Basic Mode Tab Advanced Mode Tab Preferences Dialog Box 361 ...
Page 390: ...Note To set the applications to integrate with see Settings Dialog 390 ...
Page 393: ...Scanning Tips Positioning Originals Scanning from Computer 393 ...
Page 425: ...Printing List of Registered Destinations 425 ...
Page 479: ...4 When a confirmation message is displayed click Yes 4 479 ...
Page 492: ...Receiving Faxes Receiving Faxes Changing Paper Settings Memory Reception 492 ...
Page 502: ...Other Useful Fax Functions Document Stored in Printer s Memory 502 ...
Page 582: ... For macOS Set the waiting time using Remote UI Opening Remote UI for Maintenance 582 ...
Page 589: ...Scanning Problems Windows Scanning Problems 589 ...
Page 590: ...Scanning Problems Scanner Does Not Work ScanGear Scanner Driver Does Not Start 590 ...
Page 593: ...Scanning Problems macOS Scanning Problems 593 ...
Page 594: ...Scanning Problems Scanner Does Not Work Scanner Driver Does Not Start 594 ...
Page 604: ...Telephone Problems Cannot Dial Telephone Disconnects During a Call 604 ...
Page 659: ...2 Select Feed settings 2 3 Select Detect paper setting mismatch 3 4 Select Disable 4 659 ...
Page 667: ...4 Select Disable 4 667 ...
Page 673: ...2 Select Feed settings 2 3 Select Detect paper setting mismatch 3 4 Select Disable 4 673 ...


