


For details on valid characters, see "
."
You can send faxes even if only the
Fax Number
is entered.
You can register the recipient you entered to the address book by clicking
Add to Address
Book...
. For details on how to register recipients in the address book, see "
• Add the outside line access number before the fax number as needed.
•
(Example: When the outside line access number is "0" and the fax number is "XXX-XXXX", enter
"0XXX-XXXX".)
7.
Click
Transmit
.
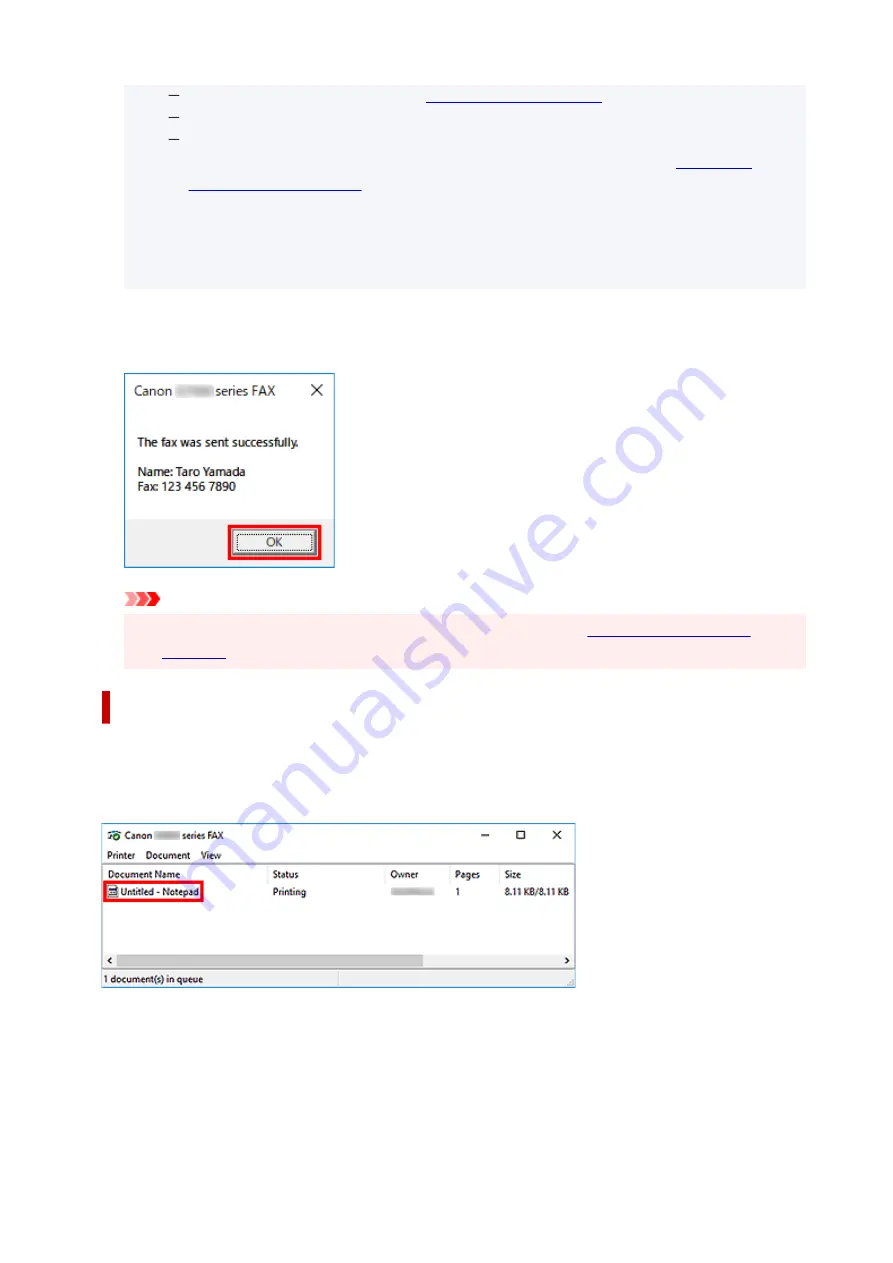
7.
When a confirmation message is displayed, click
OK
.
Important
• If you cannot send a fax due to line failure or other problem, see "
Canceling Transmission
If you click
Transmit
in the
Send Fax
dialog box, the printer icon is displayed in the taskbar. Double-click
this icon to display the list of fax jobs awaiting transmission or being sent.
Right-clicking a job and selecting
Cancel
stops transmission.
472
Summary of Contents for MAXIFY GX4000 Series
Page 1: ...GX4000 series Online Manual English ...
Page 15: ...Trademarks and Licenses Trademarks Licenses 15 ...
Page 39: ...Restrictions Notices when printing using web service Notice for Web Service Printing 39 ...
Page 45: ... For macOS Refer to Setup Guide and redo setup 45 ...
Page 71: ... TR9530 series TS3300 series E3300 series 71 ...
Page 77: ...Handling Paper Originals Ink Tanks etc Loading Paper Loading Originals Refilling Ink Tanks 77 ...
Page 101: ...Note To scan the original at optimum quality load it on the platen 101 ...
Page 111: ...Refilling Ink Tanks Refilling Ink Tanks Checking Ink Level Ink Tips 111 ...
Page 148: ...148 ...
Page 151: ...Safety Safety Precautions Regulatory Information WEEE 151 ...
Page 155: ... Do not put the print head or ink bottles into a fire 155 ...
Page 178: ...178 ...
Page 181: ...Main Components and Their Use Main Components Power Supply Using Touch Screen 181 ...
Page 182: ...Main Components Front View Rear View Inside View Operation Panel 182 ...
Page 185: ...O Platen Load an original here 185 ...
Page 212: ...For more on setting items on the operation panel Setting Items on Operation Panel 212 ...
Page 218: ...Preparing for Faxing 218 ...
Page 246: ...4 Select Exit 4 246 ...
Page 280: ...When you perform printing the data will be printed onto the postcard 280 ...
Page 331: ...Printing Using Canon Application Software Easy PhotoPrint Editor Guide 331 ...
Page 343: ...Scanning Scanning in Windows Scanning in macOS Scanning from Operation Panel 343 ...
Page 347: ...Note To set the applications to integrate with see Settings Dialog Box 347 ...
Page 361: ...ScanGear Scanner Driver Screens Basic Mode Tab Advanced Mode Tab Preferences Dialog Box 361 ...
Page 390: ...Note To set the applications to integrate with see Settings Dialog 390 ...
Page 393: ...Scanning Tips Positioning Originals Scanning from Computer 393 ...
Page 425: ...Printing List of Registered Destinations 425 ...
Page 479: ...4 When a confirmation message is displayed click Yes 4 479 ...
Page 492: ...Receiving Faxes Receiving Faxes Changing Paper Settings Memory Reception 492 ...
Page 502: ...Other Useful Fax Functions Document Stored in Printer s Memory 502 ...
Page 582: ... For macOS Set the waiting time using Remote UI Opening Remote UI for Maintenance 582 ...
Page 589: ...Scanning Problems Windows Scanning Problems 589 ...
Page 590: ...Scanning Problems Scanner Does Not Work ScanGear Scanner Driver Does Not Start 590 ...
Page 593: ...Scanning Problems macOS Scanning Problems 593 ...
Page 594: ...Scanning Problems Scanner Does Not Work Scanner Driver Does Not Start 594 ...
Page 604: ...Telephone Problems Cannot Dial Telephone Disconnects During a Call 604 ...
Page 659: ...2 Select Feed settings 2 3 Select Detect paper setting mismatch 3 4 Select Disable 4 659 ...
Page 667: ...4 Select Disable 4 667 ...
Page 673: ...2 Select Feed settings 2 3 Select Detect paper setting mismatch 3 4 Select Disable 4 673 ...


