Canon Laser Shot LBP3360 User Manual Download Page 37

1-12

Bef

ore Y

ou 

Star

t

1

Optional Accessories

Optional Accessories

The following optional accessories are available in order to use this printer to its full 
extent. Purchase them to fulfill your needs. For the optional accessories, contact 
your local authorized Canon dealer.
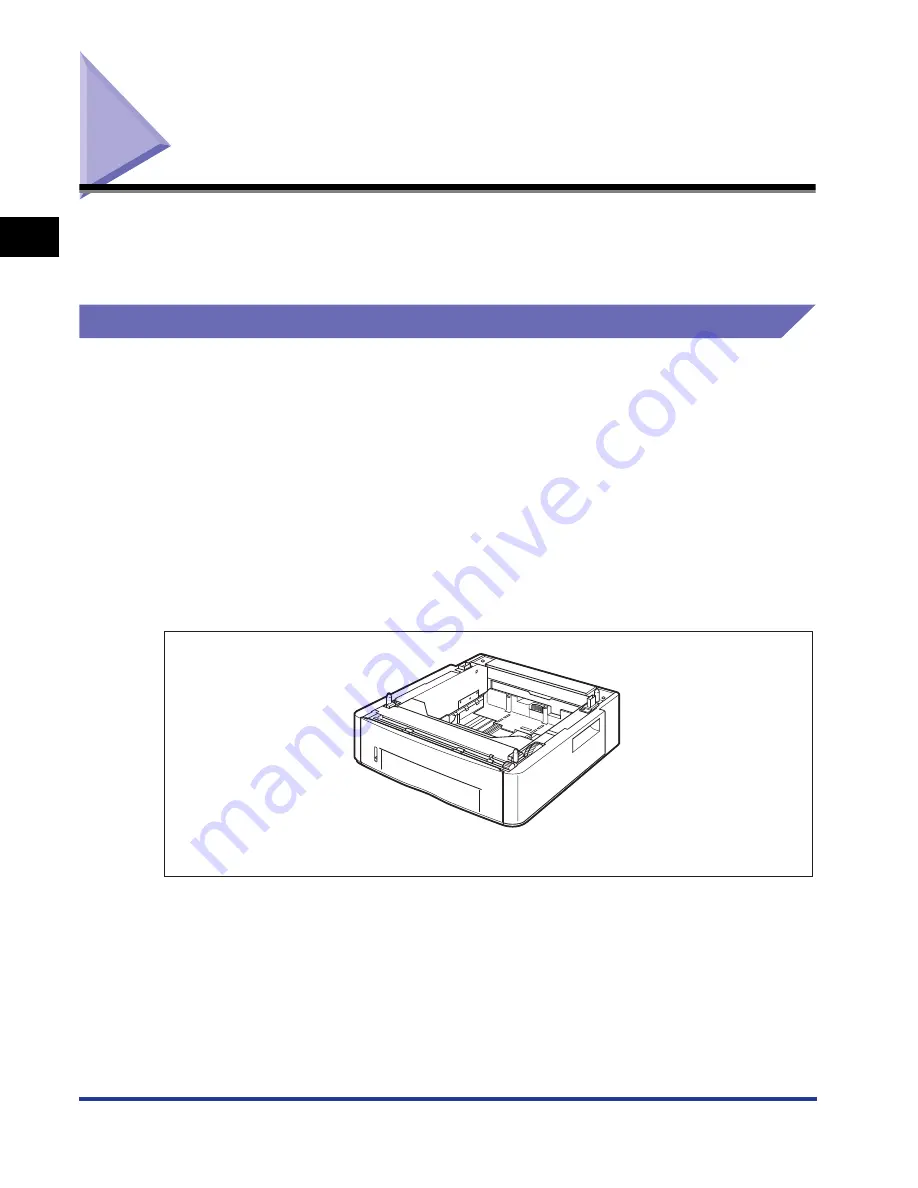
 

Paper Feeder

This printer is supplied with 2 paper sources: the paper cassette and manual feed 
slot. By installing the optional paper feeder, up to 3 paper sources can be used.

The paper feeder unit PF-35P consists of a paper feeder and paper cassette.

The paper cassette can be loaded with up to approximately 250 sheets of plain 
paper (80 g/m

2

) at sizes of A4, B5, A5, Legal, Letter, Executive, and paper of the 

following custom paper sizes.

When loading paper in portrait orientation: Width 148.0 to 215.9 mm; Length 
210.0 to 355.6 mm

When loading paper in landscape orientation (Only when UFR II Printer Driver is 
used): Width 210.0 to 215.9 mm; Length 210.0 to 215.9 mm

Paper Feeder Unit PF-35P

Summary of Contents for Laser Shot LBP3360

Page 1: ...ENG IMPORTANT Read this manual carefully before using your printer Save this manual for future reference User s Guide User s Guide ...

Page 2: ...LBP3360 Laser Printer User s Guide ...

Page 3: ... ROM Installing the Printer Driver Printing a Document Using the Supplied Software Driver Guide CD ROM Setting Up the Network Environment for Printing Managing the Printer in the Network Environment Network Guide CD ROM Operating Setting the Printer from the Web Browser Remote UI Guide CD ROM To view the manuals in PDF format Adobe Reader Adobe Acrobat Reader is required If Adobe Reader Adobe Acro...

Page 4: ...Maintenance Troubleshooting Installing the Optional Accessories Appendix Chapter 1 Chapter 2 Chapter 3 Chapter 4 Chapter 5 Chapter 6 Chapter 7 Chapter 8 Chapter 9 Chapter 10 Considerable effort has been made to ensure that this manual is free of inaccuracies and omissions However as we are constantly improving our products if you need an exact specification please contact Canon ...

Page 5: ...e xiii Trademarks xiii Copyright xiv Disclaimers xv Legal Limitations on the Usage of Your Product and the Use of Images xv Important Safety Instructions xvi Installation xvi Power Supply xviii Handling xix Maintenance and Inspections xx Consumables xxi Others xxi Chapter 1 Before You Start Features and Benefits 1 2 User Manual CD ROM Menu 1 4 System Requirements 1 4 Using The CD ROM Menu 1 5 Part...

Page 6: ...AN Cable 2 23 Using a USB Cable 2 25 Turning the Printer ON and Checking the Printer Operation 2 28 Turning the Printer ON 2 28 Registering a Paper Size 2 29 Checking the Operations with Configuration Page Print 2 30 Printing Configuration Page Print 2 30 Contents of Configuration Page Print 2 31 When the Printer Does Not Operate Properly 2 32 Changing the Language Used in the Display 2 33 Turning...

Page 7: ...Tray 4 18 Printing from the Paper Cassette 4 19 Precautions on Loading Paper 4 20 Loading Paper in the Paper Cassette 4 21 When Loading Standard Size Paper 4 21 When Loading Custom Size Paper 4 27 Specifying the Size of the Paper in the Paper Cassette 4 34 Printing from the Manual Feed Slot 4 37 Loading Paper in the Manual Feed Slot 4 38 When Loading Plain Paper Heavy Paper Transparency Label or I...

Page 8: ...5 11 JOB Menu 5 12 JOB Menu Functions 5 12 Operating Procedure for the JOB Menu 5 12 RESET Menu 5 13 RESET Menu Functions 5 13 Operating Procedure for the RESET Menu 5 13 CANCEL JOB Menu 5 14 CANCEL JOB Menu Functions 5 14 Operating Procedure for the CANCEL JOB Menu 5 14 SELECT FEEDER Menu 5 15 SELECT FEEDER Menu Functions 5 15 Operating Procedure for the SELECT FEEDER Menu 5 15 Initializing the S...

Page 9: ...rinting Position 7 22 Checking the Printing Position 7 22 Adjusting the Printing Position 7 24 Cleaning the Outside of the Printer 7 28 Moving the Printer 7 31 Handling the Printer 7 37 Chapter 8 Troubleshooting When You Have Trouble Printing 8 2 Paper Jams 8 4 Paper Jam Location 8 7 Procedure for Clearing Paper Jams 8 8 Message List 8 27 Service Call Display 8 37 When You Cannot Obtain Appropriat...

Page 10: ...e Operation Mode 10 4 Typeface Samples 10 5 Scalable Fonts PCL 10 5 Bitmapped Fonts PCL 10 6 Symbol Sets Supported 10 7 Character Code Tables 10 7 ISO Substitution Tables 10 26 Specifications 10 30 Hardware Specifications 10 30 Controller Specifications 10 32 Software Specifications 10 33 Dimensions of Each Part 10 34 Index 10 36 ...

Page 11: ...y always pay attention to these warnings CAUTION Indicates a caution concerning operations that may lead to injury to persons or damage to property if not performed correctly In order to use the printer safely always pay attention to these cautions IMPORTANT Indicates operational requirements and restrictions Be sure to read these items carefully in order to operate the printer correctly and to av...

Page 12: ...is manual is the one that can print approximately 2 500 pages Canon Genuine Cartridge Although the names of the indicators or keys are not indicated in the illustrations of the control panel used in this manual the names are indicated on the control panel depending on the country or region ...

Page 13: ...and model names are abbreviated as follows Microsoft Windows 98 operating system Windows 98 Microsoft Windows Millennium Edition operating system Windows Me Microsoft Windows 2000 operating system Windows 2000 Microsoft Windows XP operating system Windows XP Microsoft Windows ServerTM 2003 operating system Windows Server 2003 Microsoft Windows VistaTM operating system Windows Vista Microsoft Windo...

Page 14: ...the product is in conformity with the relevant requirements at nominal mains input 230 V 50 Hz although the rated input of the product is 220 240 V 50 60 Hz Laser Safety 220 240 V model Laser radiation could be hazardous to the human body For this reason laser radiation emitted inside this printer is hermetically sealed within the protective housing and external cover No radiation can leak from th...

Page 15: ... STAR Partner Canon Inc has determined that this product meets the ENERGY STAR Program for energy efficiency The International ENERGY STAR Office Equipment Program is an international program that promotes energy saving through the use of computers and other office equipment The program backs the development and dissemination of products with functions that effectively reduce energy consumption It...

Page 16: ...e according to the WEEE Directive 2002 96 EC and your national law This product should be handed over to a designated collection point e g on an authorized one for one basis when you buy a new similar product or to an authorized collection site for recycling waste electrical and electronic equipment EEE Improper handling of this type of waste could have a possible negative impact on the environmen...

Page 17: ...urisdictions Coronet is a registered trademark of Ludlow Type Foundry Wingdings is a trademark of Microsoft Corporation Albertus Arial and Times New Roman are trademarks of the Monotype Corporation plc and may be registered in some jurisdictions CG Omega is a product of Agfa Corporation and CG Times based on Times New Roman under license from the Monotype Corporation plc is a product of Agfa Corpo...

Page 18: ... your product may be prohibited by law and may result in criminal and or civil liability A non exhaustive list of these documents is set forth below This list is intended to be a guide only If you are uncertain about the legality of using your product to scan print or otherwise reproduce any particular document and or of the use of the images scanned printed or otherwise reproduced you should cons...

Page 19: ...covered under your Limited Warranty Installation WARNING Do not install the printer near alcohol paint thinner or other flammable substances If flammable substances come into contact with electrical parts inside the printer it may result in a fire or electrical shock Do not place the following items on the printer If these items come into contact with a high voltage area inside the printer this ma...

Page 20: ...s this may result in a fire or electrical shock A damp or dusty location A location exposed to smoke and steam such as cookeries and humidifiers A location exposed to rain or snow A location near water faucets or water A location exposed to direct sunlight A location subject to high temperatures A location near open flames When installing the printer gently lower the printer onto the floor or othe...

Page 21: ...he following points on user s own authority If you use extension cords improperly this may result in a fire or electrical shock Do not connect one extension cord to another Make sure that the voltage of the power plug is the one indicated in the rating label attached on the inside of the printer when you use the printer Use an extension cord that allows the current value greater than the necessary...

Page 22: ...e printer If these items come into contact with a high voltage area inside the printer this may result in a fire or electrical shock If these items are dropped or slipped inside the printer immediately turn OFF the printer and computer and disconnect the USB cable if it is connected Then unplug the power plug from the AC power outlet and contact your local authorized Canon dealer When plugging or ...

Page 23: ... with water or a mild detergent diluted with water Do not use alcohol benzene paint thinner or other flammable substances If flammable substances come into contact with electrical parts inside the printer it may result in a fire or electrical shock There are some areas inside the printer which are subject to high voltages When removing jammed paper or when inspecting the inside of the printer do n...

Page 24: ...n When loading paper or removing jammed paper take care not to cut your hands with the edges of the paper When removing a used toner cartridge from the toner cartridge slot remove the cartridge carefully to prevent the toner from scattering and getting into your eyes or mouth If the toner gets into your eyes or mouth wash them immediately with cold water and immediately consult a physician Consuma...

Page 25: ...xxii ...

Page 26: ...features and basic functions of this printer Features and Benefits 1 2 User Manual CD ROM Menu 1 4 System Requirements 1 4 Using The CD ROM Menu 1 5 Parts and Their Functions 1 6 Printer 1 6 Control Panel 1 9 Display 1 11 Optional Accessories 1 12 Paper Feeder 1 12 ...

Page 27: ...bility and Language Switching The printer supports Hewlett Packard s PCL 5e PCL 6 printer languages which enables the printer to work with a wide variety of software applications supporting PCL This printer also supports UFR II UFR II a printing system compatible with the latest operating systems distributes the printing process to a computer and printer achieving a high speed print output Duplex ...

Page 28: ...he printer driver for PCL 5e PCL 6 that supports Windows 98 Me 2000 XP Server 2003 Vista and UFR II Printer Driver that supports Windows 2000 XP Server 2003 Vista and Mac OS X allowing you to print from a various kinds of system environment Also NetSpot Device Installer supplied with LBP3360 simplifies the management and settings of the printer on a network environment IMPORTANT The supplied CD RO...

Page 29: ...ORTANT Depending on the configuration of your computer some functions may not operate correctly If the PDF manual does not open from the CD ROM Menu open the PDF file directly from the english folder on the User Manual CD ROM Windows Macintosh Operating System Windows 98 Windows Me Windows 2000 Service Pack 3 or later Windows XP Service Pack 1a or later Windows Server 2003 Windows Vista Mac OS X M...

Page 30: ...ys the following menu The sample screen shot shown here is for Windows users NOTE For Macintosh users double click the START icon to start the CD ROM Menu The Language Selection screen is displayed a a a a BROWSE MANUAL You can read any of the listed guides by clicking on the desired guide After clicking on the desired guide Acrobat Reader starts and the PDF manual is displayed b b b b RETURN Retu...

Page 31: ...lation slots on the printer The ventilation slots are provided for proper ventilation of working parts inside the printer Blocking the ventilation slots can cause the printer to overheat resulting in a fire Front View The following are the parts on the front side of the printer and their functions NOTE Remove the film attached to the control panel before using the panel a a a a Face down Output Tr...

Page 32: ...ing are the parts on the rear side of the printer and their functions a a a a Pressure Release Levers When a paper jam occurs tilt the lever toward you to release the pressure in the fixing unit See p 8 9 b b b b 100 Indicator Green Comes on when the printer is connected to a network by 100BASE TX c c c c 10 Indicator Green Comes on when the printer is connected to a network by 10BASE T d d d d TX...

Page 33: ...n when using the face up output slot or removing paper jammed in the output area See p 4 18 m m m m Face up Output Slot Outputs paper with the printed side facing up See p 4 16 Inner View The following are the parts inside the printer and their functions a a a a Toner Cartridge Guide When setting the toner cartridge push it while aligning the projections on each side of the toner cartridge with th...

Page 34: ...urred in the printer If the printer has entered Power Save Mode 1 when it is offline only the Message indicator orange and Power indicator green are on Off The printer is in a normal state d d d d Job Key On offline Does not function when the printer is offline On online Displays the JOB menu On menu operation Goes back to the previous menu Goes back up the hierarchy e e e e Settings Key On offlin...

Page 35: ... entered Power Save Mode the Online indicator is off even when the printer is online See p 3 4 j j j j Power Indicator Green On The printer is ON Off The printer is OFF k k k k Paper Source Indicators Green On The indicator for the currently selected paper source comes on Blinking There is no paper in the currently selected paper source or the paper cassette is not set Off No paper source is selec...

Page 36: ...ource Paper Size Field Displays the size of paper in the currently selected paper source using an abbreviation The names of the following paper sizes are indicated by an abbreviation Legal LG Letter LT Executive EX Statement ST Envelope DL DL Envelope COM10 CO Envelope C5 EC5 Envelope Monarch MO Envelope B5 EB5 Index Card IC Custom Size 80 to 99 Custom SizeR 80R to 99R Free Mixed Sizes FR 00 READY...

Page 37: ...nstalling the optional paper feeder up to 3 paper sources can be used The paper feeder unit PF 35P consists of a paper feeder and paper cassette The paper cassette can be loaded with up to approximately 250 sheets of plain paper 80 g m2 at sizes of A4 B5 A5 Legal Letter Executive and paper of the following custom paper sizes When loading paper in portrait orientation Width 148 0 to 215 9 mm Length...

Page 38: ...Installation Site 2 10 Removing the Packing Materials 2 14 Installing the Toner Cartridge 2 19 Loading Paper 2 20 Connecting the Cables 2 21 Connecting the Power Cord 2 21 Connecting to a Computer 2 23 Turning the Printer ON and Checking the Printer Operation 2 28 Turning the Printer ON 2 28 Registering a Paper Size 2 29 Checking the Operations with Configuration Page Print 2 30 When the Printer D...

Page 39: ...hen you do not install the optional accessories skip the procedures indicated with Optional 1 Installing the Paper Feeder See p 9 2 Optional 2 Installing the Printer Unit See p 2 10 3 Installing the Toner Cartridge See p 7 7 4 Loading Paper See p 4 21 4 38 5 Connecting the Power Cord See p 2 21 6 Connecting the Printer Unit to a Computer See p 2 23 ...

Page 40: ...n IMPORTANT Water droplets condensation may form inside the printer under the following circumstances Leave the printer for two hours or more to adjust to the surrounding temperature and humidity before using it When the room where the printer is installed is heated rapidly When the printer is moved from a cool or dry location to a hot or humid location If water droplets form inside the printer th...

Page 41: ...rements Install the printer in the following locations A location where sufficient space can be secured A well ventilated room A flat even surface A sturdy platform that can easily support the weight of the printer and optional accessories WARNING Do not install the printer near alcohol paint thinner or other flammable substances If flammable substances come into contact with electrical parts insi...

Page 42: ... content corrosive gases such as ammonia or toxic gases are contained A platform that may warp from the weight of the printer and optional accessories or the printer is liable to sink such as a carpet or mat Installation Space Select an installation location where you can secure the following amounts of free space around the printer and a surface that can support the weight of the printer The dime...

Page 43: ...urface is 12 mm square The rear feet are 7 8 mm high the left top surface has a rectangular shape of 21 7 mm x 40 mm and the right top surface is 31 7 mm x 40 mm and is L shaped mm 100 100 100 1063 7 500 599 7 200 Paper cassette 555 8 Output selection cover Front cover Front Surface Front Surface mm 26 7 294 40 3 26 7 305 8 28 5 62 7 282 4 54 6 61 9 276 61 8 ...

Page 44: ...t are 7 8 mm high and their top surface is 12 mm square The rear feet are 7 8 mm high the left top surface has a rectangular shape of 21 7 mm x 40 mm and the right top surface is 31 7 mm x 40 mm and is L shaped Front Surface mm 26 7 294 40 3 26 7 305 8 28 5 62 7 282 4 54 6 61 9 276 61 8 ...

Page 45: ...iver for Macintosh that supports this printer from the Canon website If you cannot find the printer driver for Macintosh that supports this printer on the Canon website contact your local authorized Canon dealer USB cable Only for countries and regions of Asia Toner cartridge User Software CD ROM Printer Driver USB class driver Driver Guide Ferrite core User Manual CD ROM Manuals User s Guide Remo...

Page 46: ...that may contain printer components issued by ISO International Organization for Standardization Two types of replacement cartridge are available One is the same type as the included cartridge and the other is the one which has a different lifetime For details on the replacement toner cartridges see Replacing the Toner Cartridge on p 7 2 A USB cable is only supplied with the printer for countries ...

Page 47: ...arry it after pulling out the paper cassette IMPORTANT When installing the optional paper feeder install it at the installation site before carrying the printer to the installation site For details on installing the paper feeder see Installing the Paper Feeder on p 9 2 Secure sufficient space around the printer at the installation site so that you can install the optional accessories and connect c...

Page 48: ...om the front side securely hold the printer by the lift handles located on the lower portion of the printer with both hands CAUTION This printer weighs approximately 11 kg without the paper cassette and the toner cartridge installed Please be careful not to hurt your back or other portions of your body when carrying the printer ...

Page 49: ...ont portion back portion or any portions other than the lift handles If you do so you may drop the printer resulting in personal injury The back portion A of the printer is relatively heavy Be careful not to get off balanced when lifting the printer If you do so you may drop the printer resulting in personal injury A ...

Page 50: ...slot cover and duplex unit cover attached 3 Put the printer down carefully at the installation site CAUTION Put the printer down slowly and carefully Be careful not to hurt your hands 4 Set the paper cassette in the printer Push the paper cassette into the printer firmly until the front side of the cassette is flush with the front surface of the printer CAUTION When setting the paper cassette be c...

Page 51: ...here is any packing material remaining inside the paper cassette this may result in misfeeds or damage to the printer when operating the printer Be sure to remove all the packing materials following the procedure The removed packing materials are required when transporting the printer for relocation or maintenance Keep them where they will not get lost NOTE The packing materials may be changed in ...

Page 52: ...2 15 Installing the Printer 2 Removing the Packing Materials 2 Remove the tape attached to the printer 3 locations 3 Open the manual feed slot cover 4 Remove the tape attached to the printer 3 locations ...

Page 53: ...e Packing Materials 2 16 Installing the Printer 2 5 Close the manual feed slot cover 6 Pull out the paper cassette IMPORTANT Do not touch the black rubber pad A in the paper cassette This may result in misfeeds A ...

Page 54: ...ove the tape that secures the packing material in the paper cassette 2 locations 8 Remove the packing material in the paper cassette IMPORTANT The paper cassette is provided with a packing material Be sure to take out the paper cassette to remove the packing material ...

Page 55: ...r 2 9 Set the paper cassette in the printer Push the paper cassette into the printer firmly until the front side of the paper cassette is flush with the front surface of the printer CAUTION When setting the paper cassette be careful not to catch your fingers ...

Page 56: ...2 19 Installing the Printer 2 Installing the Toner Cartridge Installing the Toner Cartridge For details on the procedure for installing the toner cartridge see Replacing the Toner Cartridge on p 7 7 ...

Page 57: ... for loading paper or installing the optional paper feeder in the printer see the following directions When loading paper in the paper cassette See Loading Paper in the Paper Cassette on p 4 21 When loading paper in the manual feed slot See Loading Paper in the Manual Feed Slot on p 4 38 When installing the optional paper feeder in the printer See Installing the Paper Feeder on p 9 2 When loading ...

Page 58: ...Instructions on p xvi IMPORTANT One AC power outlet should be used exclusively for the printer Do not plug the power plug into the auxiliary outlet on a computer Do not connect this printer to an uninterruptible power source This may cause printer malfunction or breakdown at the occurrence of a power failure 1 Make sure that the power switch of the printer is OFF The printer is OFF when of the pow...

Page 59: ...s 2 22 Installing the Printer 2 2 Plug the supplied power cord into the power socket 3 Plug the power plug into the AC power outlet NOTE The form of the supplied power cord may differ from the one in the above illustration ...

Page 60: ...able Have cables or a hub ready as needed For compatible cables and hubs contact your local authorized Canon dealer CAUTION Before connecting the network cable to the printer be sure to turn the printer OFF and then unplug the power plug from the AC power outlet Failure to observe these steps may result in an electrical shock IMPORTANT If more than one devices are connected to an AppleTalk network...

Page 61: ...nd print server For more details see Network Guide 1 Attach the ferrite core to the LAN cable as shown in the figure Attach the ferrite core at 5 cm or less from the end of the connector connected to the printer NOTE A ferrite core is supplied with the printer 2 Connect the LAN cable to the LAN connector Connect a LAN cable that is compatible with the LAN connector of the network board according t...

Page 62: ...lugging or unplugging the USB cable when the power plug is plugged in an AC power outlet do not touch the metal part of the connector as this may result in electrical shock IMPORTANT Do not plug or unplug the USB cable while the computer and printer are ON as this may result in damage to the printer This printer uses bi directional communication Operation of the printer when connected via unidirec...

Page 63: ... Speed USB 1 1 equivalent Mac OS X 10 3 3 or later USB 2 0 Hi Speed USB Full Speed USB1 1 equivalent When you connect this printer to a computer with a USB cable use a computer with manufacturer s guarantee of USB proper operation A USB cable is only supplied with the printer for countries and regions of Asia In other countries and regions prepare according to the specifications of your computer U...

Page 64: ...ased the computer IMPORTANT The supplied CD ROM does not include the printer driver for Macintosh Download the printer driver for Macintosh that supports this printer from the Canon website If you cannot find the printer driver for Macintosh that supports this printer on the Canon website contact your local authorized Canon dealer Installing the Software After connecting the USB cable install the ...

Page 65: ...ror message appears see When the Printer Does Not Operate Properly on p 2 32 When turning the power ON make sure that no paper is loaded in the manual feed slot If the power is turned ON when any paper is loaded in the manual feed slot this may result in paper jams Be sure to set the paper cassette in the printer before you turn the power ON for the first time after you install the printer Althoug...

Page 66: ...TE1 SIZE or CASSETTE2 SIZE in the FEEDER MENU options in the SETUP menu When loading paper in the manual feed slot you need to register the size of the paper loaded in the manual feed slot in SLOT PAPER SIZE in the FEEDER MENU options in the SETUP menu For more details on the procedure for registering a paper size see the following directions When registering the size of the paper in the paper cas...

Page 67: ...he settings specified by the menu of the printer s control panel are reflected to Configuration Page Print For example when the automatic 2 sided printing function is specified Configuration Page Print will be printed with two pages on both sides of paper However always a sheet of paper is printed regardless of the number of copies Printing Configuration Page Print Configuration Page Print can be ...

Page 68: ...formation such as a list of the setting values specified in the printer function menu the versions of the software and hardware installed on the printer and the number of the total print pages You can check the number of the total print pages using Page Count on the lower right of Configuration Page Print IMPORTANT This is a sample of Configuration Page Print The contents may partially differ from...

Page 69: ...ter is not turned ON Turn the printer ON The printer is in Power Save Mode The printer will be ready to print after you send print data or press any key on the control panel The printer does not operate The printer is offline Press the Online key to turn on the Online indicator The interface cable is disconnected Connect the interface cable firmly to the interface connectors on the computer and pr...

Page 70: ...UAGE using and then press OK Nothing is printed on the paper Multiple sheets of paper were fed at a time Align the paper stack in the paper cassette properly and load it again The toner cartridge was installed with the sealing tape still attached Take the toner cartridge out of the printer pull out the sealing tape and then reinstall the toner cartridge The Message indicator is on and a message is...

Page 71: ...b indicator is on all the print data remaining in the printer memory will be erased If there is any necessary print data remaining in the printer wait until it is output or press the Reset key in the offline state and then select FORM FEED to output the data before turning the printer OFF Do not turn the power OFF when the printer is in any of the following status During printing While the printer...

Page 72: ...2 35 Installing the Printer 2 Turning the Printer ON and Checking the Printer Operation 1 Make sure that the Job indicator is off 2 Press of the power switch on the printer OFF ...

Page 73: ...Turning the Printer ON and Checking the Printer Operation 2 36 Installing the Printer 2 ...

Page 74: ...Saving Power Save Mode 3 2 Online and Offline 3 4 Placing the Printer Online 3 4 Placing the Printer Offline 3 5 Canceling a Job 3 6 Outputting Data Forced Output 3 6 Canceling a Job Cancel Job 3 7 Canceling the Process Currently Being Performed Soft Reset 3 8 Canceling All the Jobs Hard Reset 3 9 ...

Page 75: ...dition NOTE When the printer enters Power Save Mode 1 only the Ready indicator and Power indicator come on However when the printer is offline only the Message indicator and Power indicator come on Power Save Mode 1 can be released when the printer is in any of the following status When any key on the control panel is pressed When an error is occurring When the printer receives data from the compu...

Page 76: ...ower indicator comes on Power Save Mode 2 can be released when the printer is in any of the following status When the Online key on the control panel is pressed When the printer receives data from the computer Only when the printer is online The settings for Utility Menu are specified in the Remote UI The printer does not enter Power Save Mode 2 in the state where a DHCP communication can be done ...

Page 77: ...en the printer is online Placing the Printer Online When printing from the computer the printer has to be online Before printing make sure that the printer is online If not place the printer online using the following procedure The printer comes online automatically after you turn it ON 1 Press the Online key The Online indicator comes on and the printer is ready to print IMPORTANT When an error i...

Page 78: ...e printer so that it does not receive data from the computer or specify the settings for all the items in the SETUP menu place the printer offline using the following procedure 1 Press the Online key The Online indicator goes off allowing you to specify the settings on the control panel IMPORTANT This printer comes online automatically if left in the offline state for five minutes or longer Howeve...

Page 79: ...print data using the following procedure IMPORTANT Print data from PCL UFR II Printer Driver cannot be output If you have output data the data being printed is deleted Print the data from the computer again as needed You cannot output data while the Message indicator is on If you want to delete the received data perform a soft reset See p 3 8 NOTE The Job indicator is on when any print data remain...

Page 80: ...e Job indicator is off The data that has already been processed and is being printed started to be output cannot be canceled In this case the next print data may be canceled When there is any print data sent from a printer driver other than that for this printer multiple data may be canceled NOTE When canceling a job you may not be able to cancel the job even if 03 CANCELING JOB is displayed Cance...

Page 81: ...g printed and the data being received by all the interfaces is deleted Therefore perform printing from the computer again as needed The data that has been already sent to the memory are all deleted even if it is the data of other interface If you are using the printer on a network be careful so this operation does not affect the data from other computers when performing this procedure NOTE Hard re...

Page 82: ... be printed properly The data that has been already sent to the memory are all deleted even if it is the data of other interface If you are using the printer on a network be careful so this operation does not affect the data from other computers when performing this procedure 1 Press the Reset key The RESET menu is displayed 2 Select SOFT RESET using and 3 Hold down OK until HARD RESET is displaye...

Page 83: ...3 10 Canceling a Job Using the Printer 3 ...

Page 84: ...ys 4 15 Output Tray Types 4 15 Paper Capacity of the Output Trays 4 17 Selecting an Output Tray 4 18 Printing from the Paper Cassette 4 19 Precautions on Loading Paper 4 20 Loading Paper in the Paper Cassette 4 21 Specifying the Size of the Paper in the Paper Cassette 4 34 Printing from the Manual Feed Slot 4 37 Loading Paper in the Manual Feed Slot 4 38 Specifying the Size of the Paper in the Man...

Page 85: ...272 mm long or less the safety function that prevents damages caused by heat may slow the print speed down in stages The print speed may be as slow as approximately 4 ppm Paper Size The following shows the paper sizes that can be used with this printer The symbol indicates the paper that can be used for 1 sided printing and automatic 2 sided printing the symbol indicates the paper that can be used...

Page 86: ... Type The following shows the paper types that can be used with this printer The symbol indicates the paper that can be used for 1 sided printing and automatic 2 sided printing the symbol indicates the paper that can be used for only 1 sided printing and the symbol X indicates the paper that cannot be used Envelope Envelope DL 110 0 mm x 220 0 mm x x Envelope COM10 104 7 mm x 241 3 mm x x Envelope...

Page 87: ... and 163 g m2 can be loaded in the manual feed slot Also paper at a size of A4 Legal or Letter that weighs between 91 and 120 g m2 is available for automatic 2 sided printing Transparency This printer can print A4 and Letter size transparencies You can feed a transparency from the manual feed slot Label This printer can print A4 and Letter size labels You can feed a label from the manual feed slot...

Page 88: ...ddress windows Envelopes with adhesive on the surface Wrinkled or creased envelopes Poorly manufactured envelopes in which the glued parts are uneven Irregularly shaped envelopes Before loading the envelopes flatten the stack of envelopes to release any remaining air and press the fold lines along the edges tight Do not print on the reverse side glued side of envelopes When loading an envelope at ...

Page 89: ...o that the envelope is printed from the top the edge with the flap Feeding direction NOTE When printing envelopes they may be creased Abbreviations of Paper Sizes The following shows the abbreviations of paper sizes that are marked on the paper cassette or manual feed slot Paper Size Paper Guides Legal LGL Letter LTR Executive EXEC ...

Page 90: ...of the paper For more details see Help of UFR II Printer Driver Plain Paper Heavy Paper Transparency Label Index Card The printable areas are as follows UFR II Printer Driver PCL5e PCL6 Printer Driver 5 mm 5 mm 4 mm 4 mm C D B A Paper Size A4 B5 A5 Legal Letter Executive Statement 16K Custom Size Index Card A Left Edge 6 1 7 4 7 0 6 4 6 4 7 4 6 4 6 4 6 4 10 0 B Right Edge 6 1 7 4 7 0 6 4 6 4 7 4 6...

Page 91: ...ed paper for ink jet printers etc Labels with backing sheet that is easily peeled off Paper that has already been printed by a copy machine or another laser printer The reverse side of the paper is also unusable Using the manual feed slot however you can perform 2 sided printing manually on the other side of previously printed paper You cannot print on the printed side again Paper with jagged edge...

Page 92: ...ams or deterioration in print quality Observe the following guidelines when storing and handling paper IMPORTANT Store paper away from moisture since paper quality deteriorates in a moist environment Paper wrappers help avoiding moisture and dryness Keep paper in the wrapper until it is ready to be used Store all unused paper in a wrapper Store paper on a flat surface Do not store paper on the flo...

Page 93: ...t when soluble adhesive is used Before using the adhesive test it with paper that is no longer required Make sure that the printed paper is completely dry before placing one over another Toner may melt if they are placed together half dried Store paper on a flat surface Toner may peel when they are folded or creased Avoid storing printouts at high temperatures Otherwise toner may melt and blot Put...

Page 94: ...sed Paper Source Type This printer has the following paper sources A Manual Feed Slot B Cassette 1 C Cassette 2 Optional Paper Level Indicator The paper cassette has a paper level indicator A that shows the amount of paper remaining in the cassette If the cassette is full the paper level indicator is at the top Because the indicator moves down as the amount of paper drops this gives a rough estima...

Page 95: ...in other paper source the paper source is switched automatically and the paper is fed If you want to specify a paper source select the paper source in the printer driver For more details on using the printer driver see Help of the printer driver When printing from DOS or UNIX When you are printing from DOS UNIX or other operating system on which you cannot use the printer driver select a paper sou...

Page 96: ...e manual feed slot or paper cassette IMPORTANT Be sure to turn the printer ON once when loading paper in the paper cassette for the first time after installing the paper feeder When any paper is in the manual feed slot you cannot feed paper from the paper cassette If you are printing from the paper cassette remove any paper loaded in the manual feed slot Do not pull out the paper cassette while th...

Page 97: ...make sure that the printer is not operating and the Message indicator is on before loading the second and subsequent paper If paper is loaded in the manual feed slot while the printer is operating such as when the printer is printing or immediately after outputting paper the loaded paper may be output without being printed or this may result in paper jams If you are printing from Cassette 2 make s...

Page 98: ...rinter is not printing sudden rotation of the roller may catch your hands or clothing resulting in personal injury Face down Output Tray Printed paper is output to the face down output tray with the printed side facing down IMPORTANT Do not touch the paper during automatic 2 sided printing until it is completely output to the face down output tray In automatic 2 sided printing the paper is partial...

Page 99: ...ries depending on the paper type and paper size For more details see Paper Capacity of the Output Trays on p 4 17 Face up Output Slot Printed paper is output to the face up output slot on the rear of the printer unit with the printed side facing up The face up output slot is suitable to print transparencies labels or envelopes which tend to curl since the printed paper is output flattened IMPORTAN...

Page 100: ...slot Paper Capacity of the Output Trays Actual paper capacity varies depending on the installation environment paper type and paper size Paper Type Output Tray Face down Output Tray Face up Output Slot Plain paper 80 g m2 Approx 125 sheets x Heavy paper 91 g m2 Approx 50 sheets x Heavy paper 128 g m2 Approx 30 sheets 1 sheet Transparency Approx 10 sheets 1 sheet Label Approx 10 sheets 1 sheet Inde...

Page 101: ...the Face up Output Slot When switching an output tray to the face up output slot open the output selection cover as shown in the figure Switching to the Face down Output Tray When switching an output tray to the face down output tray close the output selection cover as shown in the figure ...

Page 102: ...and CASSETTE2 SIZE are changed to those in the printer driver by pressing the Online key allowing you to continue printing If you are printing from Cassette 2 make sure that Cassette 1 is set before printing If you print from Cassette 2 when Cassette 1 is not set this will cause paper jams NOTE If you are printing from an operating system on which the printer driver cannot be used previously speci...

Page 103: ...er Plain Paper 75 90 g m2 Heavy Paper 1 Heavy Paper 91 120 g m2 Precautions on Loading Paper Load paper when the printer status is in any of the following When the Job indicator is blinking the printer is printing Do not pull out the paper cassette IMPORTANT Be sure to turn the printer ON once when loading paper in the paper cassette for the first time after installing the paper feeder Be sure not...

Page 104: ...andard Size Paper on p 4 21 Custom Size Paper See When Loading Custom Size Paper on p 4 27 When Loading Standard Size Paper Load standard size paper in the paper cassette using the following procedure Be sure to load standard size paper in portrait orientation when loading it in the paper cassette IMPORTANT For more details on the usable paper see Usable Paper on p 4 2 For details on handling the ...

Page 105: ...nter NOTE Load paper in Cassette 2 Only when the optional paper feeder is installed in the same manner as you load paper in Cassette 1 1 Pull out the paper cassette CAUTION Be sure to take the paper cassette out of the printer before loading paper If paper is loaded while the paper cassette is partially pulled out the paper cassette may drop or the printer may become damaged resulting in personal ...

Page 106: ... the paper guides While holding the lock release lever of the side paper guides slide the guides to the mark for the size of the paper to be loaded The side paper guides move together Align the position of A with the mark for the size of the paper to be loaded NOTE If you are using B5 size paper 182 mm x 257 mm set the paper guide to JIS B5 A ...

Page 107: ...he guide to the size mark for the paper to be loaded Align the position of A with the mark for the size of the paper to be loaded IMPORTANT Do not use the 8 5 x 13 position 3 Load the paper stack so that the rear edge is aligned with the paper guide CAUTION When loading paper take care not to cut your hands with the edges of the paper A ...

Page 108: ...a wrong position this may result in misfeeds If you use paper that has been poorly cut multiple sheets of paper may be fed at once In this case fan the paper thoroughly and then align the edges of the stack on a hard flat surface NOTE To print letterhead paper or paper printed with a logo load the paper so that the printing side is facing down as shown in the following figures Feeding direction ...

Page 109: ...t there is sufficient space between the hooks of the paper guides and the paper stack If there is no sufficient space slightly reduce the amount of paper IMPORTANT The following shows the paper capacity of the paper cassette Be sure that the paper stack does not exceed the load limit marks If the paper stack exceeds the load limit marks this may result in misfeeds Plain paper Approx 250 sheets Ex ...

Page 110: ... following procedure IMPORTANT You can load paper of the following custom sizes When loading paper in portrait orientation Width 148 0 to 215 9 mm Length 210 0 to 355 6 mm When loading paper in landscape orientation Only when UFR II Printer Driver is used Width 210 0 to 215 9 mm Length 210 0 to 215 9 mm For more details on the usable paper see Usable Paper on p 4 2 For details on handling the pape...

Page 111: ...ssette before using the printer However if SPECIAL MODE J is set to ON the printer prints without checking the paper size even when the paper size specified in the printer driver and the size of the paper loaded in the cassette do not match For more details see SPECIAL MODE J on p 6 31 When printing from UFR II Printer Driver you can load paper either in portrait or landscape orientation However w...

Page 112: ... may be fed at once In this case fan the paper thoroughly and then align the edges of the stack on a hard flat surface When you are printing custom size paper from UFR II Printer Driver you can load the paper either in portrait or landscape orientation However load the paper in landscape orientation when the setting for CASSETTE1 SIZE or CASSETTE2 SIZE is set to MIXED SIZES on printing custom size...

Page 113: ...ing from the Paper Cassette 4 NOTE To print letterhead paper or paper printed with a logo when loading paper in portrait orientation load the paper so that the printing side is facing down as shown in the following figures Feeding direction ...

Page 114: ... logo when loading paper in landscape orientation load the paper so that the printing side is facing down as shown in the following figures Feeding direction 3 While holding the lock release lever of the side paper guides slide the guides to the mark for the size of the loaded paper The side paper guides move together ...

Page 115: ...ORTANT Be sure to align the paper guides with the width of the paper If the paper guides are too loose or too tight this may result in misfeeds or paper jams 4 While holding the lock release lever of the rear paper guide slide the guide to the size mark for the loaded paper ...

Page 116: ...t there is sufficient space between the hooks of the paper guides and the paper stack If there is no sufficient space slightly reduce the amount of paper IMPORTANT The following shows the paper capacity of the paper cassette Be sure that the paper stack does not exceed the load limit marks If the paper stack exceeds the load limit marks this may result in misfeeds Plain paper Approx 250 sheets Ex ...

Page 117: ...n you loaded paper in the paper cassette you need to specify the size of the paper loaded in the paper cassette using the control panel When using standard size paper specify its size When loading custom size paper specify CUSTOM SIZE or CUSTOM SIZER The paper size setting for the paper cassette is set to A4 by default Specify the paper size setting for the paper cassette using the following proce...

Page 118: ...nter driver matches the size of the paper loaded in the paper cassette before using the printer However if SPECIAL MODE J is set to ON the printer prints without checking the paper size even when the paper size specified in the printer driver and the size of the paper loaded in the paper cassette do not match For more details see SPECIAL MODE J on p 6 31 When printing from UFR II Printer Driver yo...

Page 119: ...n the left of the paper size and the paper size for the paper cassette is specified When printing from the printer driver on Windows or Macintosh configure the printer driver See Driver Guide When printing from DOS or UNIX specify the settings for STD PAPER SIZE See p 6 15 and STD PAPER TYPE See p 6 17 using the control panel B5 B5 ...

Page 120: ...lot you need to specify the following settings IMPORTANT Match the setting for SLOT PAPER SIZE in the SETUP menu of the printer and that in the printer driver If they do not match the message PC LOAD size appears In this case the setting value for SLOT PAPER SIZE is changed to that in the printer driver by pressing the Online key allowing you to continue printing NOTE If you are printing from an o...

Page 121: ...ansparencies Label Labels Envelope Envelopes Loading Paper in the Manual Feed Slot Load paper in the manual feed slot The paper loading procedure varies depending on the paper type Refer to the respective procedures for each paper type Plain Paper Heavy Paper Transparency Label Index Card See When Loading Plain Paper Heavy Paper Transparency Label or Index Card on p 4 38 Envelope See When Loading ...

Page 122: ...he printer is not operating and the Message indicator is on before loading the second and subsequent paper If paper is loaded in the manual feed slot while the printer is operating such as when the printer is printing or immediately after outputting paper the loaded paper may be output without being printed or this may result in paper jams 1 Open the manual feed slot cover 2 Adjust the paper guide...

Page 123: ...Printer Driver you can load the paper either in portrait or landscape orientation However load the paper in landscape orientation when the setting for SLOT PAPER SIZE is set to MIXED SIZES on printing custom size paper of its long edges 215 9 mm or less When you are not printing from UFR II Printer Driver load the paper in portrait orientation NOTE To print letterhead paper or paper printed with a...

Page 124: ...nual Feed Slot When loading paper at a size of A4 B5 A5 Legal Letter Executive Index Card Statement or 16K or custom size paper in portrait orientation load the paper so that the printing side is facing up as shown in the following figures Feeding direction ...

Page 125: ...scape orientation load the paper so that the printing side is facing up as shown in the following figures Feeding direction 3 Gently insert the paper until it touches the back of the printer while supporting the paper with hands as shown in the figure When the paper is loaded it is sent into the slot a little ...

Page 126: ...ng envelope in the manual feed slot IMPORTANT The manual feed slot can be loaded with only one envelope Make sure that the printer is not operating and the Ready indicator is on when loading an envelope in the manual feed slot When printing multiple copies or multiple pages from the manual feed slot make sure that the printer is not operating and the Message indicator is on before loading the seco...

Page 127: ...he width of the loaded envelope as shown in the figure The paper guides move together IMPORTANT You cannot print on the reverse side glued side of envelopes When loading an envelope at a size of DL COM10 C5 or Monarch load it so that the flap is toward the left of the printer when viewed from the front ...

Page 128: ...om the top the edge with the flap Be sure to align the paper guides with the width of the envelope If the paper guides are too loose or too tight this may result in misfeeds or paper jams 3 Gently insert the envelope until it touches the back of the printer while supporting the envelope with hands as shown in the figure When the envelope is loaded it is sent into the slot a little ...

Page 129: ...ientation CUSTOM SIZE When the paper is loaded in portrait orientation CUSTOM SIZER When you change the paper loaded in the manual feed slot frequently it is convenient if SLOT PAPER SIZE is set to MIXED SIZES If SLOT PAPER SIZE is set to MIXED SIZES you do not need to specify the setting for SLOT PAPER SIZE each time you load the different size paper However observe the following when specifying ...

Page 130: ...Settings key 2 Select FEEDER MENU using and then press OK 3 Select SLOT PAPER SIZE using and then press OK 4 Select the paper size using and then press OK is displayed on the left of the paper size and the paper size for the manual feed slot is specified When printing from the printer driver on Windows or Macintosh configure the printer driver See Driver Guide When printing from DOS or UNIX specif...

Page 131: ...r during automatic 2 sided printing until it is completely output to the face down output tray In automatic 2 sided printing the paper is partially output once after printed on its surface and is fed again to be printed on its reverse side Be sure to close the output selection cover before performing automatic 2 sided printing When performing automatic 2 sided printing be sure to confirm the paper...

Page 132: ... Select FEEDER MENU using and then press OK 3 Select 2 SIDED PRINT using and then press OK 4 Select ON using and then press OK is displayed on the left of ON and 2 sided printing is specified Setting the Paper Size Switch Lever When performing automatic 2 sided printing be sure to confirm the paper size switch lever is set to the appropriate position When the paper size switch lever is not set to ...

Page 133: ...t the center of the duplex unit cover open it gently 2 Set the blue paper size switch lever A to the appropriate position according to the paper size for 2 sided printing For A4 size draw the paper size switch lever toward you For Letter or Legal size push the paper size switch lever into the printer A A ...

Page 134: ... Paper When Performing Automatic 2 sided Printing In automatic 2 sided printing the orientation of the paper you load is opposite to that when performing 1 sided printing because the reverse side of paper is printed first When printing paper such as that with a letterhead in which faces and printing orientation specified load the paper using the following procedure ...

Page 135: ...4 52 Loading and Outputting Paper 2 sided Printing 4 When Feeding Paper from the Paper Cassette Load the paper so that the printing side is facing up as shown in the following figures Feeding direction ...

Page 136: ... 53 Loading and Outputting Paper 4 2 sided Printing When Loading Paper in the Manual Feed Slot Load the paper so that the printing side is facing down as shown in the following figures Feeding direction ...

Page 137: ...sly printed paper you can perform 2 sided printing on paper to which automatic 2 sided printing cannot be applied When printing on the other side of previously printed paper from the manual feed slot load the paper as shown in the following figures Load the paper so that the printing side is facing up as shown in the following figures Feeding direction ...

Page 138: ...Functions 5 2 Menu Functions 5 2 Setting Priority 5 3 Menu Categories 5 3 Printer Status to Enter the Menu Operation 5 4 How to Use the Operation Keys 5 5 How to View the Display 5 7 Menu Structure 5 7 How to View the Display 5 7 Menu Functions and Menu Operation 5 9 SETUP Menu 5 9 UTILITY Menu 5 11 JOB Menu 5 12 RESET Menu 5 13 CANCEL JOB Menu 5 14 SELECT FEEDER Menu 5 15 Initializing the SETUP M...

Page 139: ... variety of settings are classified by purpose There are the following two kinds of procedures for specifying the menu functions Settings Using the Printer s Control Panel Specify the settings by pressing the keys while checking the display on the printer Settings Using the Remote UI Some settings specified by the control panel can be specified by a web browser from your computer NOTE For this sec...

Page 140: ...ter cycling the power of the printer or performing a hard reset Menu Categories There are the following six categories of the menu For the functions and operation procedures see Menu Functions and Menu Operation on p 5 9 For details on each menu see Chapter 6 Printing Environment Settings Application soft Printer driver Priority High Low Control panel Remote UI The most resent setting is effective...

Page 141: ...ready to print when the Ready indicator is on 2 An error is occurring in the printer when the Message indicator is on 3 You cannot specify the settings in the USER MAIN options when the printer is in the online status 4 You cannot specify the settings for FORM FEED When the printer is ready to print 1 When an error is occurring 2 When the printer is online When the printer is offline SETUP Menu 3 ...

Page 142: ...ine and offline The printer is online when the indicator under the key is on and is offline when the indicator is off Indicated as the Online key in the manuals Cancel Job When the printer is online Immediately after placing the printer online While the menu is displayed If pressed when the Job indicator is on or blinking When data is being processed or received cancels the job currently being pro...

Page 143: ...the Job key in the manuals Does not function Displays the item of the next upper hierarchy Indicated as in the manuals Reset Displays the RESET menu Indicated as the Reset key in the manuals Executes the selected item Otherwise goes down the hierarchy Indicated as in the manuals Has the same function as OK Settings Displays the SETUP menu Indicated as the Settings key in the manuals However the US...

Page 144: ... Therefore continuously pressing or displays the first menu again The menus consist of individual loop structures in each hierarchy How to View the Display Up to 16 characters appear in a line in the display After you display a menu by pressing a key the item of the first hierarchy in the menu appears automatically If there is any selectable item in the same hierarchy appears on the right in the d...

Page 145: ...taken after the lowest hierarchy in the menu is displayed the item of the next upper hierarchy and that of the currently selected hierarchy are displayed alternately is displayed on the left in the display for the currently selected setting value POWER SAVE MODE PANEL OFF ...

Page 146: ...nfiguration can be specified only in the SETUP menu of the printer Also you can print using an application in which you cannot specify the print settings or MS DOS command directly When you are printing using them specify the printing environment using the SETUP menu in the printer NOTE For more details on the settings see SETUP Menu Settings on p 6 10 Operating Procedure for the SETUP Menu The SE...

Page 147: ...ss the Settings key The SETUP menu is displayed 3 Select the option Press or When the FEEDER MENU options are selected The target option is displayed 4 Display the item Press OK The selected item is displayed 5 Select the item Press or When SLOT PAPER SIZE is selected The target item is displayed 6 Display the setting value Press OK The selected setting value is displayed 7 Select the setting valu...

Page 148: ...target options in each hierarchy Exclusive Utilities are displayed only when PCL UTILITY is displayed in the hierarchy of Common Utilities This section describes the procedure for printing FONTS LIST in PCL UTILITY as an example Start the key operation from Step 1 Operation Procedure Key Operation 1 Make sure that the printer is online If the printer is not online press the Online key 2 Display th...

Page 149: ...ou to print a variety of log lists NOTE For more details on the settings see JOB Menu Settings on p 6 40 Operating Procedure for the JOB Menu This section describes the procedure for printing JOB LOG LIST Start the key operation from Step 1 5 Select the Exclusive Utility Press or When FONTS LIST is selected The target Exclusive Utility is displayed 6 Confirm the selected option Press OK A fonts li...

Page 150: ...n the settings see RESET Menu Settings on p 6 41 Operating Procedure for the RESET Menu This section describes the procedure for executing SOFT RESET as an example Start the key operation from Step 1 3 Select the item that you want to print Press or When JOB LOG LIST is selected The target item is displayed 4 Print JOB LOG LIST Press OK JOB LOG LIST is printed Operation Procedure Key Operation 1 D...

Page 151: ...nceled by pressing the Cancel Job key when the Job indicator is off The data that has already been processed and is being printed started to be fed cannot be canceled In this case the next print data may be canceled When there is any print data sent from a printer driver other than that for this printer multiple data may be canceled NOTE When performing the Cancel Job key you may not be able to ca...

Page 152: ...ing Value Select the target items in each hierarchy As an example of the setting procedure this section describes the procedure for setting SLOT PAPER SIZE to B5 Start the key operation from Step 1 2 Execute the job cancel process Press OK Pressing OK starts the job cancel process When not executing the cancel job process press any key other than OK After completing the job cancel the printer is r...

Page 153: ... The Printing Environment 5 Menu Functions and Menu Operation 4 Select the setting value Press or When B5 is selected The target setting value is displayed 5 Determine the selected setting value Press OK B5 ...

Page 154: ...lized Do not turn the printer OFF during the initialization The printer memory may be damaged Some settings do not become effective unless you cycle the power of the printer or perform a hard reset after initializing the SETUP menu Operation Procedure Key Operation 1 Display the SETUP menu Press the Settings key The SETUP menu is displayed 2 Select INITIALIZE MENU Press or 3 Initialize the SETUP m...

Page 155: ... Online key during the setting the setting is canceled However you cannot cancel the setting when INITIALIZING is displayed even if you press the Online key ADJ START POS in the USER MAIN options and NETWORK MENU in the INTERFACE MENU options in the SETUP menu cannot be initialized ...

Page 156: ...OB Menu 6 8 RESET Menu 6 8 SELECT FEEDER Menu 6 9 SETUP Menu Settings 6 10 CONTROL MENU Options 6 10 FEEDER MENU Options 6 12 LAYOUT MENU Options 6 19 QUALITY MENU Options 6 23 INTERFACE MENU Options 6 25 USER MAIN Options 6 30 PCL SETUP Options 6 32 UFR II SETUP Options 6 37 UTILITY Menu Settings 6 38 JOB Menu Settings 6 40 RESET Menu Settings 6 41 SELECT FEEDER Menu Settings 6 43 ...

Page 157: ...NGUAGE ENGLISH FRENCH GERMAN ITALIAN SPANISH p 6 12 SHOW WARNINGS CASSETTE EMPTY ON OFF p 6 12 Item Setting Value Applicable Page SLOT PAPER SIZE A4 LTR LGL EXEC MIXED SIZES CUSTOM SIZE CUSTOM SIZER ENV ISO C5 ENV COM10 ENV MONARCH ENV DL ENV ISO B5 INDEX CARD STMT 16K A5 B5 p 6 12 CASSETTE1 SIZE A4 LTR LGL EXEC MIXED SIZES CUSTOM SIZE CUSTOM SIZER A5 B5 p 6 13 CASSETTE2 SIZE 1 A4 LTR LGL EXEC MIX...

Page 158: ... CASSETTE 2 1 ON OFF p 6 16 STD PAPER TYPE PLAIN PAPER PLAIN PAPER L HEAVY PAPER 1 HEAVY PAPER 2 HEAVY PAPER H TRANSPARENCIES ENVELOPE LABEL p 6 17 2 SIDED PRINT OFF ON p 6 18 Item Setting Value Applicable Page COPIES 1 to 9999 1 p 6 19 OFFSET Y 50 0 to 50 0 0 0 mm p 6 19 OFFSET X 50 0 to 50 0 0 0 mm p 6 19 BIND LOCATION LONG EDGE SHORT EDGE p 6 20 GUTTER 50 0 to 50 0 0 0 mm p 6 21 ALT METHOD ON O...

Page 159: ...SOLUTION GRADATION COLOR TONE HIGH RESOL GRAPHICS COLOR TONE HIGH RESOL RESOLUTION GRADATION IMAGE COLOR TONE HIGH RESOL RESOLUTION GRADATION p 6 24 QUALITY CHANGE CONT PRINTING STOP PRINTING p 6 25 Item Setting Value Applicable Page I F CONNECTION USB ON OFF NETWORK ON OFF p 6 25 MODE TIMEOUT OFF 5 to 300 seconds 15 seconds p 6 26 ...

Page 160: ...F FTP FTP PRINT ON OFF FTP SETTINGS ON OFF LPD PRINT ON OFF RAW PRINT ON OFF IPP PRINT ON OFF HTTP ON OFF RESPONSE ON OFF IP ADD RANGE REJECT RX PRT OFF ON REJECT ADD SET 1 REJ IP 1 to 8 PERMIT RX PRT OFF ON PERMIT ADD SET 1 PER IP 1 to 8 REJ SET BROWSE OFF ON REJECT ADD SET 1 REJ IP 1 to 8 PMT SET BROWSE OFF ON PERMIT ADD SET 1 PER IP 1 to 8 MAC ADDRESS SET PERMIT RECEIVE OFF ON PERMIT ADD SET 1 ...

Page 161: ... 6 29 ETHERNET DRIVER AUTO DETECT ON OFF COMM MODE 1 HALF DUPLEX FULL DUPLEX ETHERNET TYPE 1 10 BASE T 100 BASE TX MAC ADDRESS Display only p 6 29 INIT N W SET p 6 29 CONNECT RECOG ON OFF p 6 29 Item Setting Value Applicable Page ADJ START POS OFFSET Y SLOT 5 0 to 5 0 0 0 mm OFFSET X SLOT 5 0 to 5 0 0 0 mm OFFSET Y CASS1 5 0 to 5 0 0 0 mm OFFSET X CASS1 5 0 to 5 0 0 0 mm OFFSET Y CASS2 1 5 0 to 5 ...

Page 162: ...TCH 1 0 44 to 99 99 cpi 10 00 cpi p 6 33 FORM LINES 5 to 128 lines 64 lines p 6 33 SYMBOL SET PC8 ROMAN8 ROMAN9 ISOL1 ISOL2 ISOL5 ISOL6 ISOL9 PC775 PC8DN PC850 PC852 PC858 PC8TK PC1004 WINL1 WINL2 WINL5 WINBALT DESKTOP PSTEXT LEGAL ISO4 ISO6 ISO11 ISO15 ISO17 ISO21 ISO60 ISO69 WIN 30 MCTEXT p 6 34 CUSTOM SIZE DO NOT SET SET p 6 34 UNIT OF MEASURE 1 Millimeters Inches p 6 34 X DIMENSION 1 76 2 to 2...

Page 163: ...ting Value Applicable Page CONFIG PAGE p 6 38 PCL UTILITY FONTS LIST p 6 38 CLEANING p 6 38 NW STATUS PRINT p 6 39 PRNTPOSNPRINT p 6 39 Item Setting Value Applicable Page JOB LOG LIST p 6 40 REPORTLOG LST p 6 40 Item Setting Value Applicable Page SOFT RESET HARD RESET p 6 41 FORM FEED p 6 41 ...

Page 164: ...lue Applicable Page PAPER SOURCE AUTO CASSETTE 1 CASSETTE 2 1 MANU FEED SLOT p 6 43 SLOT PAPER SIZE A4 LTR LGL EXEC MIXED SIZES CUSTOM SIZE CUSTOM SIZER ENV ISO C5 ENV COM10 ENV MONARCH ENV DL ENV ISO B5 INDEX CARD STMT 16K A5 B5 p 6 44 CASSETTE1 SIZE A4 LTR LGL EXEC MIXED SIZES CUSTOM SIZE CUSTOM SIZER A5 B5 p 6 44 CASSETTE2 SIZE 1 A4 LTR LGL EXEC MIXED SIZES CUSTOM SIZE CUSTOM SIZER A5 B5 p 6 44...

Page 165: ...Mode consumes less power during the sleep state While the printer is in Power Save Mode the display on the control panel is off and the following indicators are on NOTE For details on Power Save Mode see Power Saving Power Save Mode on p 3 2 Setting Value Power Save Mode the Printer Can Enter PANEL OFF Power Save Mode 1 the Panel Off mode DEEP SLEEP Power Save Mode 1 the Panel Off mode Power Save ...

Page 166: ...180 minutes 5 minutes Specifies the time interval until the printer enters Power Save Mode 1 the Panel Off mode NOTE If the printer is in any of the following status the printer does not enter Power Save Mode the Panel Off mode even when the specified time has elapsed An error is occurring in the printer when the Message indicator is on or the number in the message blinks and PWR SAVE IN ERR is se...

Page 167: ...hould blink when the printer is in the following Warning status NOTE The printer prints when either ON or OFF is specified FEEDER MENU Options SLOT PAPER SIZE A4 LTR LGL EXEC MIXED SIZES CUSTOM SIZE CUSTOM SIZER ENV ISO C5 ENV COM10 ENV MONARCH ENV DL ENV ISO B5 INDEX CARD STMT 16K A5 B5 Specifies the size of the paper loaded in the manual feed slot IMPORTANT When you change the paper loaded in th...

Page 168: ... envelope If you have selected the Print with Upper Left of Sheet as Starting Point check box in Finishing Details in UFR II Printer Driver you can extend the printable area to near the edges of the paper For more details see Help of UFR II Printer Driver You can obtain the same result by specifying the setting for SLOT PAPER SIZE in the SELECT FEEDER menu CASSETTE1 SIZE A4 LTR LGL EXEC MIXED SIZE...

Page 169: ...e the following when specifying MIXED SIZES Make sure that the size of the paper loaded in the paper cassette matches the paper size specified in the printer driver before printing If they do not match the printer may stop printing displaying the message 41 CHK PAPER SZE or a paper jam may occur Be sure to check if the paper size specified in the printer driver matches the size of the paper loaded...

Page 170: ...r size of the received data in the following order Cassette 1 Cassette 2 1 Manual Feed Slot If ON is specified the printer detects if the size of the paper in a paper source matches the paper size of the received data in the following order starting with the manual feed slot Manual Feed Slot Cassette 1 Cassette 2 1 1 Only when the optional paper feeder is installed IMPORTANT When any paper is in t...

Page 171: ...aper size of the received data a message that prompts you to replace the paper in the manual feed slot appears and the printer stops printing When no paper is loaded in the manual feed slot a message that informs you of the slot s paper out condition appears and the printer stops printing IMPORTANT When any paper is in the manual feed slot you cannot feed paper from the paper cassette If you are p...

Page 172: ...he setting for automatic paper selection in PAPER SOURCE See p 6 43 in the SELECT FEEDER menu STD PAPER TYPE PLAIN PAPER PLAIN PAPER L HEAVY PAPER 1 HEAVY PAPER 2 HEAVY PAPER H TRANSPARENCIES ENVELOPE LABEL Specifies the default paper type This printer internally applies the optimum print mode for the paper type specified in this item Each print mode supports the following paper types PLAIN PAPER ...

Page 173: ...cify 2 sided printing specify the setting in this item NOTE You can perform automatic 2 sided printing only on plain paper 60 to 90 g m2 and heavy paper 91 to 120 g m2 at sizes of A4 Legal and Letter For more details see Paper Requirements on p 4 2 When performing automatic 2 sided printing on paper with a logo load the paper as the following When printing from the paper cassette load the paper wi...

Page 174: ... decreases the gutter width in the Y direction decreases OFFSET X As the value increases the gutter width in the X direction increases As the value decreases the gutter width in the X direction decreases IMPORTANT If any part of the print image lies outside the printable area after adjusting the printing position the part will be missing in the print result NOTE Each time you press the value incre...

Page 175: ...DGE is specified the binding location is created on the long edge of the paper If SHORT EDGE is specified the binding location is created on the short edge of the paper NOTE You cannot create a gutter only by specifying this item A gutter can be created only after specifying this item in combination with the setting for GUTTER Gutter Front Back Gutter Front Back 2 sided printing in portrait orient...

Page 176: ... created depends on the setting for BIND LOCATION and which value or is specified for this item IMPORTANT If any part of the print image lies outside the printable area after creating a gutter the part will be missing in the print result NOTE Each time you press the value increases in 0 5 mm increments and each time you press the value decreases in 0 5 mm increments If you keep holding down or the...

Page 177: ...printer prints on the upper side of the loaded paper If OFF is specified the printer prints on the underside of the loaded paper Settings for BIND LOCATION and GUTTER Specify BIND LOCATION and GUTTER referring to the following finishing image Specify whether you print in portrait orientation or landscape orientation in an application BIND LOCATION LONG EDGE GUTTER direction ABC BIND LOCATION LONG ...

Page 178: ...ecified the printer prints without using Image Refinement NOTE The effect of Image Refinement varies depending on the pattern of text or graphics diagrams charts graphs etc If GRADATION LEVEL See the next item is set to HIGH the setting for this item is ignored and the printer prints in the same way as when OFF is specified GRADATION LEVEL STANDARD HIGH Specifies the gradation level for data STAND...

Page 179: ...n dots Fine gradations edges and shades are expressed by using dither patterns which are groups of dots This is called halftone processing For example using a pattern that sharpens character and line edges or a pattern that smoothens image and graph gradation enables you to obtain the most suitable texture If RESOLUTION is selected you can print text with distinct outlines which is best to print t...

Page 180: ...ARD If you do so however the printer prints with the gradation level of the data being lowered INTERFACE MENU Options I F CONNECTION USB ON OFF NETWORK ON OFF Specifies the settings for the interfaces used for communication with the computer etc You can specify ON or OFF for each interface Even if multiple interfaces are set to ON the printer automatically switches to the one that received the dat...

Page 181: ...en data is remaining in the printer because of an application not sending the command to output paper When OFF is specified the printer does not use the function to finish a job automatically IMPORTANT If the function to finish a job automatically is specified the job may be finished in the middle of the process when the computer takes a long time to process the data In this case adjust the time t...

Page 182: ...T 2 REJ IP 1 to 8 PERMIT RX PRT OFF ON PERMIT ADD SET 2 PER IP 1 to 8 REJ SET BROWSE OFF ON REJECT ADD SET 2 REJ IP 1 to 8 PMT SET BROWSE OFF ON PERMIT ADD SET 2 PER IP 1 to 8 MAC ADDRESS SET PERMIT RECEIVE OFF ON PERMIT ADD SET 2 PER MAC ADD 1 to 50 1 PROTOCOL is displayed only when IP MODE is set to AUTO 2 REJECT ADD SET and PERMIT ADD SET are displayed only when REJECT RX PRT PERMIT RX PRT REJ ...

Page 183: ...displayed only when NETWORK in the I F CONNECTION options is set to ON APPLETALK OFF ON Specifies whether the printer should use AppleTalk NOTE For more details on AppleTalk see Chapter 4 Using the Printer on an AppleTalk Network Macintosh in Network Guide This item is displayed only when NETWORK in the I F CONNECTION options is set to ON SMB SMB SERVER OFF ON Specifies whether the printer should ...

Page 184: ...is item you can reset the network settings to the default settings The network settings can be initialized using the following procedure 1 Press the Settings key 2 Select INTERFACE MENU using and then press OK 3 Select NETWORK MENU using and then press OK 4 Select INIT N W SET using and then press OK 5 OK is displayed The initialization starts by pressing OK If you press the Online key without pre...

Page 185: ... OFFSET Y DUP and OFFSET X DUP allow you to specify the printing position of the first page of 2 sided printing The second page of 2 sided printing follows the settings for each paper source IMPORTANT If any part of the print image lies outside the printable area after adjusting the printing position the part will be missing in the print result NOTE Each time you press the value increases in 0 1 m...

Page 186: ...is output automatically You can also continue printing by pressing the Online key However the data may not be printed properly or a paper jam may occur If ON is specified the printer prints without performing a print check even when the paper size specified in the application is different from the size of the paper loaded in the manual feed slot or paper cassette However the printing speed may dro...

Page 187: ...no data existing between two Form Feed codes sent from an application If ON is specified the printer does not output the blank page If OFF is specified the printer outputs the blank page If you use this function you can save paper because the blank pages are not output ORIENTATION PORTRAIT LANDSCAPE Enables you to set the paper orientation If PORTRAIT is selected the print image is printed in port...

Page 188: ...s option appears in the PCL SETUP options It enables you to specify a point size for the default font The point size can be adjusted in increments of 0 25 pts PITCH 0 44 to 99 99 cpi 10 00 cpi If the number selected in FONT NUMBER is that of a fixed pitch scalable font Pitch appears in the PCL SETUP options It enables you to specify the pitch for the default font The pitch can be adjusted in incre...

Page 189: ...NIT OF MEASURE Millimeters Inches Enables you to specify the unit of measurement you would like to use to specify your custom paper size NOTE This item is displayed only when CUSTOM SIZE is set to SET X DIMENSION 76 2 to 215 9 mm 215 9 mm 3 00 to 8 50 inches 8 50 inches Enables you to specify the X dimension of the custom paper The X dimension can be adjusted between 76 2 mm 3 00 and 215 9 mm 8 50...

Page 190: ...Make sure you do not increase the Y dimension beyond the actual size of the paper you are using for printing NOTE This item is displayed only when CUSTOM SIZE is set to SET APPEND CR TO LF NO YES Enables you to specify whether to append a carriage return CR when line feed code LF is received If YES is selected the print head moves to the beginning of the next line when line feed code is received I...

Page 191: ... available for printing on A4 paper Only the width increases If OFF is selected all the area on a page 4 23 mm 1 6 from the top bottom left and right edges is available for printing on A4 paper NOTE This setting is applicable for A4 paper only This setting is applicable for portrait orientation only Settings ON OFF A Length 288 54 mm 11 1 3 B Width 203 22 mm 8 201 54 mm 7 7 8 C Left and right edge...

Page 192: ...e printer outputs the blank page that can be created due to no data existing in the page data sent from an application If ON is specified the printer does not output the blank page If OFF is specified the printer outputs the blank page If you use this function you can save paper because the blank pages are not output ...

Page 193: ... operation mode NOTE CONFIG PAGE is designed to be printed on A4 size paper Load a sheet of A4 size paper in the paper cassette or manual feed slot PCL UTILITY FONTS LIST Prints internal information of the printer in the PCL mode FONTS LIST A list of the fonts that can be used in the PCL mode is printed CLEANING The printer cleans the fixing roller by printing a cleaning page If CLEANING is execut...

Page 194: ...9 NW STATUS PRINT Prints the version number and the settings of the print server equipped with this printer PRNTPOSNPRINT The printing position adjusted in ADJ START POS See p 6 30 is printed Check the printout results to confirm the setting for ADJ START POS NOTE For adjusting the printing position see Adjusting the Printing Position on p 7 22 ...

Page 195: ...inted on the job log list NOTE If the printer has no job log nothing is printed Up to 48 job logs are printed on the job log list REPORTLOG LST Prints the job logs of the printed CONFIG PAGE or NW STATUS PRINT Print dates etc are printed on the report log list NOTE If the printer has no job log nothing is printed Up to 16 job logs are printed on the report log list ...

Page 196: ...all the interfaces is deleted Therefore perform printing from the computer again as needed If you perform a soft reset or hard reset the data that has been already sent to the memory are all deleted even if it is the data of other interface If you are using the printer on a network be careful so that this operation does not affect the data from other computers when resetting the printer If you per...

Page 197: ... when no print data remains in the printer but a job has not yet been completed If MODE TIMEOUT for a job is specified data less than one page is also output automatically when the specified time has elapsed Data from PCL UFR II Printer Driver is not output MODE TIMEOUT for a job is set to 15 seconds in the default settings If the Job indicator does not go off even after outputting the data perfor...

Page 198: ...hen the printer feeds paper automatically However you can except them from the target paper source If paper of the same size is loaded in 2 or more paper sources when the paper source setting is specified to be selected automatically paper is fed from the upper paper source regardless of the status of the Paper Source indicators When the paper source runs out of paper the paper source switches to ...

Page 199: ...nter unit Cassette 1 You can specify the same setting in CASSETTE1 SIZE in the FEEDER MENU options in the SETUP menu For more details see CASSETTE1 SIZE on p 6 13 CASSETTE2 SIZE A4 LTR LGL EXEC MIXED SIZES CUSTOM SIZE CUSTOM SIZER A5 B5 Specifies the size of the paper loaded in the paper cassette of the paper feeder Cassette 2 You can specify the same setting in CASSETTE2 SIZE in the FEEDER MENU o...

Page 200: ...cing the Toner Cartridge 7 2 Replacing the Toner Cartridge 7 7 Precautions for Handling Toner Cartridges 7 14 Storing Toner Cartridges 7 16 Adjusting the Print Density 7 18 Cleaning the Fixing Roller 7 19 Adjusting the Printing Position 7 22 Checking the Printing Position 7 22 Adjusting the Printing Position 7 24 Cleaning the Outside of the Printer 7 28 Moving the Printer 7 31 Handling the Printer...

Page 201: ...e of documents printed If your average document contains a lot of diagrams charts or graphs the life of the toner cartridge will be shorter as they consume more toner ISO IEC 19752 is the global standard related to Method for the determination of toner cartridge yield for monochromatic electrophotographic printers and multi function devices that may contain printer components issued by ISO Interna...

Page 202: ... Toner Cartridge NOTE For details on handling toner cartridges see Precautions for Handling Toner Cartridges on p 7 14 1 Open the front cover Holding the opening of the front cover open it gently 2 Remove the toner cartridge from the printer ...

Page 203: ...he toner cartridge as shown in the figure and shake it gently 5 or 6 times to evenly distribute the toner inside the cartridge Be careful not to spill the toner IMPORTANT If toner is not distributed evenly this may result in deterioration in print quality Be sure to carry out this procedure properly Be sure to shake the toner cartridge gently If you do not shake the cartridge gently toner may spil...

Page 204: ...7 5 Routine Maintenance 7 Replacing the Toner Cartridge 4 Hold the toner cartridge properly with the arrowed side facing up as shown in the figure ...

Page 205: ...7 Replacing the Toner Cartridge 5 Push the toner cartridge into the printer until it touches the back of the printer while aligning A on both sides of the toner cartridge with the toner cartridge guides inside the printer A A ...

Page 206: ...placing the Toner Cartridge Replace the toner cartridge with a new one using the following procedure WARNING Do not throw a used toner cartridge into open flames as this may cause the toner remaining inside the cartridge to ignite resulting in burns or a fire CAUTION Take care not to allow the toner to come into contact with your hands or clothing as this will dirty your hands or clothing If they ...

Page 207: ...ridges see Precautions for Handling Toner Cartridges on p 7 14 The packing materials may be changed in form or position to be placed or may be added or removed without notice 1 Open the front cover Holding the opening of the front cover open it gently 2 Remove the toner cartridge from the printer ...

Page 208: ...w toner cartridge out of the protective bag after taking it out of the package There is a cut near the arrow on the protective bag so you can open it by hand However if you cannot open it by hand use scissors to open the protective bag so as not to damage the toner cartridge IMPORTANT Keep the protective bag for the toner cartridge It may be required after taking out the toner cartridge for printe...

Page 209: ...bag for the supplied toner cartridge so you can open it by hand 4 Hold the toner cartridge as shown in the figure and shake it gently 5 or 6 times to evenly distribute the toner inside the cartridge IMPORTANT If toner is not distributed evenly this may result in deterioration in print quality Be sure to carry out this procedure properly Be sure to shake the toner cartridge gently If you do not sha...

Page 210: ...traight in the direction of the arrow CAUTION If the sealing tape is pulled out forcefully or stopped at midpoint toner may spill out If the toner gets into your eyes or mouth wash them immediately with cold water and immediately consult a physician IMPORTANT Do not pull the sealing tape diagonally upwards or downwards If the tape is severed it may become difficult to pull out completely Pull out ...

Page 211: ...r Cartridge When pulling out the sealing tape be careful not to touch the toner cartridge memory A or hold the drum protective shutter B with your hands 6 Hold the toner cartridge properly with the arrowed side facing up as shown in the figure A B ...

Page 212: ... 7 Replacing the Toner Cartridge 7 Push the toner cartridge into the printer until it touches the back of the printer while aligning A on both sides of the toner cartridge with the toner cartridge guides inside the printer A A ...

Page 213: ... toner cartridge or deterioration in print quality Be careful of the following points when removing or installing the toner cartridge WARNING Do not throw a used toner cartridge into open flames as this may cause the toner remaining inside the cartridge to ignite resulting in burns or a fire CAUTION Take care not to allow the toner to come into contact with your hands or clothing as this will dirt...

Page 214: ...n damage to the cartridge Print quality may deteriorate if you touch or damage the photosensitive drum inside the toner cartridge Be sure not to touch or open the drum protective shutter B Be careful not to hold or touch areas that are not specified in this procedure such as the electrical contacts C This may result in damage to the cartridge A B C ...

Page 215: ...dge away from products that generate magnetic waves such as a display or computer A toner cartridge is a magnetic product Keep the toner cartridge away from products that may be damaged by magnetic waves such as a floppy disk or disk drive This may lead to damage to data Storing Toner Cartridges Be careful of the following points when storing a new toner cartridge or handling a toner cartridge tha...

Page 216: ...erated or where a considerable amount of salt is contained in the air or where there is a lot of dust Keep the toner cartridge out of the reach of small children Keep the toner cartridge away from products that may be damaged by magnetic waves such as a floppy disk or disk drive Condensation Even within the storable humidity range water droplets may develop both inside and outside of the toner car...

Page 217: ... 1 Press the Settings key 2 Select QUALITY MENU using and then press OK The item for QUALITY MENU is displayed 3 Select DENSITY using and then press OK The setting value for DENSITY is displayed 4 Specify the target numeric value using and then press OK Pressing decreases the value and the print density becomes lighter Pressing increases the value and the print density becomes denser is displayed ...

Page 218: ...ANT The cleaning paper cannot be printed on any paper other than A4 Be sure to use A4 size paper To print a cleaning paper load a sheet of A4 size paper in the manual feed slot 1 Make sure that the printer is online If the printer is not online press the Online key 2 Press the Utility key 3 Select CLEANING using and then press OK CLEANING PAPER appears in the display and the printer waits to print...

Page 219: ...7 20 Routine Maintenance 7 Cleaning the Fixing Roller 4 Load a sheet of A4 size paper in the manual feed slot then press the Online key The cleaning paper is printed CLEANING PAPER 01 CLEANING CLEANING ...

Page 220: ...tarts cleaning the fixing roller NOTE Cleaning takes approximately 90 seconds The cleaning process cannot be canceled Please wait until it is completed When the front or back of the printed paper has smudge marks even after performing the procedure above perform the cleaning again When doing so do not use the cleaning paper output in Step 4 above but load A4 size blank paper in the manual feed slo...

Page 221: ...nting position for 2 sided printing the orientation of the images on the reverse pages varies depending on the printing orientation or setting for BIND LOCATION Checking the Printing Position Perform the Printing Position Adjustment Print and check the position and direction to be adjusted IMPORTANT When adjusting the printing position for 2 sided printing set 2 SIDED PRINT See p 6 18 to ON previo...

Page 222: ...osition using and then press OK 4 Press the Online key 5 Make sure that the printer is online If the printer is not online press the Online key 6 Press the Utility key 7 Select PRNTPOSNPRINT using and then press OK CASSETTE 1 CASSETTE 1 PAPER SOURCE PAPER SOURCE 00 READY A4 UTILITY MENU CONFIG PAGE PRNTPOSNPRINT EXECUTING ...

Page 223: ...justed in Adjusting the Printing Position See the next item Adjusting the Printing Position Next check the printout results of the Printing Position Adjustment Print and specify the direction and position to be adjusted The measurements of printed on paper are as the following This section describes the setting procedure for the following Printing Position Adjustment Print printed with Cassette 1 ...

Page 224: ...ng The second page of 2 sided printing follows the settings for each paper source NOTE The printing position can be adjusted within a range from 5 0 to 5 0 mm 1 Press the Online key The Online indicator goes off allowing you to specify the settings on the control panel 2 Press the Settings key 3 Select USER MAIN using and then press OK The item for USER MAIN is displayed Top Feeding direction SETU...

Page 225: ...ults of the Printing Position Adjustment Print and select the numerical value to adjust the position Each time you press the value increases in 0 1 mm increments and each time you press the value decreases in 0 1 mm increments If you keep holding down or the speed of the value changing is increased is displayed on the left of the value and the printing position is specified 7 Press the Online key ...

Page 226: ... 9 Select PRNTPOSNPRINT using and then press OK The printing position adjustment print in which the setting is changed is printed Check the printout results to confirm the printing position To make further adjustment repeat Step 1 to 9 PRNTPOSNPRINT EXECUTING ...

Page 227: ... unplug the power plug Failure to observe these steps may result in a fire or electrical shock Do not use alcohol benzene paint thinner or other flammable substances If flammable substances come into contact with electrical parts inside the printer it may result in a fire or electrical shock IMPORTANT Be careful not to use a cleaning agent other than water or a mild detergent diluted with water as...

Page 228: ...e USB cable b b b b and then disconnect the power plug from the AC power outlet c c c c 2 Firmly wring a soft cloth dampened with water or a mild detergent diluted with water and wipe off the dirt If you use a mild detergent for cleaning be sure to wipe away the detergent with a soft cloth dampened with water a a c b ...

Page 229: ...enance 7 Cleaning the Outside of the Printer 3 After wiping off the dirt wipe the printer with a dry cloth 4 When the printer is completely dry plug the power plug into the AC power outlet and then connect the USB cable ...

Page 230: ... printer NOTE For details on the installation site see Environments on p 2 3 1 Turn the printer and computer OFF a a a a remove the USB cable b b b b and then disconnect the power plug from the AC power outlet c c c c WARNING Be sure to turn the printer and computer OFF unplug the power plug and then disconnect all the interface cables from the printer before moving the printer Otherwise the power...

Page 231: ...7 32 Routine Maintenance 7 Moving the Printer 2 Remove all the interface cables and the power cord from the printer 3 Pull out the paper cassette ...

Page 232: ...the front side securely hold the printer by the lift handles located on the lower portion of the printer with both hands CAUTION This printer weighs approximately 11 8 kg without the paper cassette installed Please be careful not to hurt your back or other portions of your body when carrying the printer ...

Page 233: ...so you may drop the printer resulting in personal injury The back portion A of the printer is relatively heavy Be careful not to get off balanced when lifting the printer If you do so you may drop the printer resulting in personal injury Do not carry the printer with the paper cassette attached If you do so the paper cassette may drop resulting in personal injury A ...

Page 234: ...der on the new installation site before carrying the printer to the site For details on the procedure for installing the paper feeder see Installing the Paper Feeder on p 9 9 5 Put the printer down carefully at the new installation site CAUTION Put the printer down slowly and carefully Be careful not to hurt your hands IMPORTANT Secure sufficient space around the printer at the installation site s...

Page 235: ...cables except for the USB cable and connect the power cord 8 Connect the USB cable Transporting the Printer When transporting the printer for reasons such as relocating remove the toner cartridge and store the printer and the parts in the package that they came in with the packing materials attached in order to prevent them from being damaged while being transported If the original package and pac...

Page 236: ...fety Instructions See p xvi Do not place any heavy objects on the printer trays or covers This may result in damage to the printer Do not leave the front cover open longer than required Exposing the printer to direct sunlight or strong light may result in deterioration in print quality Avoid vibration while the printer is printing This may result in deterioration in print quality Be sure not to op...

Page 237: ...printer to cool down sufficiently before covering the printer If you do not plan to use the printer for a long period of time unplug the power plug from the AC power outlet Do not use or store the printer in a room where chemicals are used The surroundings of the face down output tray and face up output slot are hot during printing or immediately after printing When taking out of the paper or remo...

Page 238: ... When You Have Trouble Printing 8 2 Paper Jams 8 4 Paper Jam Location 8 7 Procedure for Clearing Paper Jams 8 8 Message List 8 27 Service Call Display 8 37 When You Cannot Obtain Appropriate Printout Results 8 39 Problems with the Power or Printer Operation 8 39 Problems with the Printout Results 8 42 Print Quality Problems 8 46 ...

Page 239: ...rint setting in the application is inappropriate See the instruction manual supplied with your application The process has been changed due to insufficient memory See Message List on p 8 27 Paper that cannot be used with this printer is being used See Paper Requirements on p 4 2 The toner cartridge needs to be replaced soon See Replacing the Toner Cartridge on p 7 2 Miscellaneous Problems See Mess...

Page 240: ...e The printer is OFF See Turning the Printer ON on p 2 28 The printer is offline See Online and Offline on p 3 4 The cable is not connected properly See Connecting the Cables on p 2 21 NO size PAPER is being displayed See Printing from the Paper Cassette on p 4 19 See Printing from the Manual Feed Slot on p 4 37 PAPER JAM is being displayed See Paper Jams on p 8 4 A service call is being displayed...

Page 241: ... stains When removing paper jammed inside the printer remove the jammed paper gently to prevent the toner on the paper from scattering and getting into your eyes or mouth If the toner gets into your eyes or mouth wash them immediately with cold water and immediately consult a physician When removing jammed paper take care not to cut your hands with the edges of the paper Keep your hands or clothin...

Page 242: ...Be sure not to touch the high voltage contacts A or electrical contact B shown in the figure as this may result in damage to the printer Be sure not to touch the transfer roller C This may result in deterioration in print quality A B C ...

Page 243: ...f the face down output tray and face up output slot are hot during printing or immediately after printing When taking out of the paper or removing jammed paper be careful not to touch the surroundings of the face down output tray or face up output slot ...

Page 244: ...nsport area DUPLEX UNIT b Face up output slot S OUTPUT AREA c Inside the front cover FRONT COVER d Manual feed slot MF SLOT AREA e Cassette 1 CASS 1 AREA f Cassette 2 Only when the paper feeder is installed CASS 2 AREA a b c d e f Manual Feed Slot Cassette 1 Cassette 2 Optional Face up Output Slot Face down Output Tray Duplex Unit Paper flow for 1 sided printing Paper flow for 2 sided printing ...

Page 245: ...med paper using the following procedure 1 Confirm all the messages that appear in the display Messages appear one at a time Confirm all of them As the messages disappear when the cover is open take a note of them if required 2 Open the output selection cover 13 PAPER JAM FRONT COVER ...

Page 246: ...re release levers on both sides of the fixing unit towards you to release the pressure in the fixing unit Even if paper is jammed here do not remove it but proceed to the next step 4 Open the front cover Holding the opening of the front cover open it gently ...

Page 247: ...e into the protective bag 7 If you see the top of the jammed paper inside the front cover simply pull out the paper to remove it Remove the jammed paper gently to prevent unfixed toner from spilling IMPORTANT If you pull the jammed paper obliquely upward unfixed toner may spill When removing the jammed paper pull it as horizontally as possible Dirt inside the printer may cause deterioration in pri...

Page 248: ...t guide then tilt it toward you Holding the green tab raise the transport guide then tilt it toward you CAUTION Do not take your hands off the transport guide The transport guide may snap back to its original position and this may result in personal injury ...

Page 249: ...8 12 Troubleshooting 8 Paper Jams 9 Remove any jammed paper by pulling it in the direction of the arrow Remove the jammed paper gently to prevent unfixed toner from spilling ...

Page 250: ...rcefully but proceed to the next step 10 Gently move the transport guide back to its original position CAUTION Do not take your hands off the transport guide until the transport guide moves back to its original position The transport guide may snap back to its original position and this may result in personal injury ...

Page 251: ...8 14 Troubleshooting 8 Paper Jams 11 Remove any jammed paper on the face down output tray or face up output slot side by pulling it in the direction of the arrow ...

Page 252: ...bleshooting 8 Paper Jams When you have been performing automatic 2 sided printing 12 Move the green pressure release levers of the fixing unit back to their original positions 13 Close the output selection cover ...

Page 253: ... automatic 2 sided printing proceed to Step 17 14 Open the duplex unit cover 15 Remove any jammed paper by pulling it in the direction of the arrow IMPORTANT If the jammed paper cannot be removed easily do not try to remove it forcefully but proceed to the next step ...

Page 254: ...8 17 Troubleshooting 8 Paper Jams 16 Close the duplex unit cover 17 Close the front cover Holding the opening of the front cover close it gently ...

Page 255: ...8 18 Troubleshooting 8 Paper Jams 18 If you are using the manual feed slot remove any paper jammed in the manual feed slot 19 Pull out the paper cassette ...

Page 256: ...oubleshooting 8 Paper Jams If the paper feeder is installed pull out the paper cassette of the paper feeder also 20 Remove any jammed paper while pushing it downward to some extent In case of the printer unit ...

Page 257: ... In case of the paper feeder If you have not been performing 2 sided printing proceed to Step 24 IMPORTANT Do not touch the feed rollers A in the printer unit and paper feeder This may result in damage to the printer or printer error A ...

Page 258: ...roubleshooting 8 Paper Jams 21 Open the duplex print transport guide Holding the green tab push the duplex print transport guide downward 22 Remove any jammed paper by pulling it in the direction of the arrow ...

Page 259: ... IMPORTANT Make sure that the duplex print transport guide is closed completely If the duplex print transport guide is not closed completely this may result in misfeeds or paper jams 24 Set the paper cassette in the printer Push the paper cassette into the printer firmly until the front side of the paper cassette is flush with the front surface of the printer ...

Page 260: ...alled set the paper cassette of the paper feeder also CAUTION When setting the paper cassette be careful not to catch your fingers 25 Open the front cover Holding the opening of the front cover open it gently 26 Take the toner cartridge out of the protective bag ...

Page 261: ...8 24 Troubleshooting 8 Paper Jams 27 Hold the toner cartridge properly with the arrowed side facing up as shown in the figure ...

Page 262: ...hooting 8 Paper Jams 28 Push the toner cartridge into the printer until it touches the back of the printer while aligning A on both sides of the toner cartridge with the toner cartridge guides inside the printer A A ...

Page 263: ...se it gently IMPORTANT If you cannot close the front cover check if the toner cartridge is installed properly If you try to close the front cover forcefully this may result in damage to the printer or toner cartridge Do not leave the front cover open for a long time after installing the toner cartridge ...

Page 264: ...ppears when the printer is in a warning status the printer does not stop printing For a message with the Auto Error Skip mark you can skip the error by pressing the Online key and continue printing However part of the print data may be missing or it may not be printed properly When you want to stop the process perform a soft reset to eliminate the cause of the error press the Online key and then p...

Page 265: ...or removed when the printer is ON Remedy Turn the power OFF install or remove the paper feeder then turn the printer ON again Cause 3 The connector of the optional paper feeder is disconnected Remedy Turn the printer OFF unplug the power plug from the AC power outlet and contact your local authorized Canon dealer Cause 4 A paper feeder that is not for this printer is installed Remedy Turn the powe...

Page 266: ...ize or type that cannot be fed from the manual feed slot or paper cassette is specified Remedy 1 If a paper source is specified press the Feeder Selection key then set PAPER SOURCE to AUTO Remedy 2 Press the Feeder Selection key select a paper source from which paper of the specified size or type can be fed then load paper Remedy 3 Specify the settings for STD PAPER SIZE and STD PAPER TYPE in the ...

Page 267: ...sing the following procedure register the data again and then print again Perform a hard reset or cycle the power of the printer Be aware that all the data in the memory will be deleted 26 SYS MEM FULL Auto Error Skip Cause The work memory required for the printer process has run out while the system is processing the data mainly the graphics data and text data Remedy 1 The printer continues print...

Page 268: ...cannot be secured Remedy 1 The printer continues printing by pressing the Online key However the data with which an error has occurred is not printed properly IMPORTANT When you continue printing by pressing the Online key be aware that the data of macro that is already registered may be deleted Remedy 2 Perform a soft reset in the RESET menu increase the free space of RAM using the following proc...

Page 269: ...pecify OFF and then print again Remedy 5 Change the setting for HALFTONES See p 6 24 in the QUALITY MENU options in the SETUP menu and then print again 41 CHK PAPER SZE Cause 1 The size of the paper loaded in the manual feed slot or paper cassette is different from the setting for SLOT PAPER SIZE CASSETTE1 SIZE or CASSETTE2 SIZE specified from the computer or control panel Remedy Match the size sp...

Page 270: ... data for which a stored job print is specified is sent from a printer driver that is not for LBP3360 Remedy Press the Online key to cancel the job 58 JOB MEM FULL Auto Error Skip Cause There is not sufficient free RAM space to process jobs Remedy 1 If you are processing multiple jobs at once press the Online key to cancel printing wait for other jobs complete and then print again Remedy 2 If the ...

Page 271: ... the message appears even after cycling the power of the printer note down the message in the display and contact your local authorized Canon dealer D7 nn ERROR nn represents two digit alphanumeric characters Cause A problem has occurred and the printer does not operate properly Remedy Cycle the power of the printer If the message appears even after cycling the power of the printer note down the m...

Page 272: ...essage in the display and contact your local authorized Canon dealer F9 nn PWR OFF ON nn represents two digit alphanumeric characters Cause A problem has occurred while the printer is processing print data Remedy Cycle the power of the printer If the message appears even after cycling the power of the printer note down the message in the display and contact your local authorized Canon dealer FF FO...

Page 273: ...rinting from the Paper Cassette on p 4 19 Remedy 2 If you are using the manual feed slot check SLOT PAPER SIZE and when the paper size does not match the size specified in the application specify the setting properly See Printing from the Manual Feed Slot on p 4 37 Remedy 3 Press the Feeder Selection key then select the paper cassette in which the paper of the matched size is loaded See Selecting ...

Page 274: ...lem has occurred inside the printer Cycle the power of the printer using the following procedure If the message does not disappear after cycling the power of the printer several times contact your local authorized Canon dealer n represents a number A problem has occurred with the fixing unit of the printer Perform the following procedures from the Step 2 to contact your local authorized Canon deal...

Page 275: ...ge in the display 3 Turn the printer OFF a a a a remove the USB cable b b b b and then disconnect the power plug from the AC power outlet c c c c 4 Contact your local authorized Canon dealer When contacting your Canon dealer please report the problems and code number that you have noted a a c b ...

Page 276: ... or Printer Operation The printer cannot be turned ON Cause 1 The power plug is unplugged from the AC power outlet Remedy Plug the power plug into the AC power outlet Cause 2 The printer is plugged to an extension cord or multiple power strip Remedy Plug the power plug of the printer directly into the AC power outlet on the wall Cause 3 The breakers have tripped Remedy Reset the breakers on the sw...

Page 277: ...ause 1 The LAN cable is not connected properly or broken Remedy 1 Remove the LAN cable once then connect it again Remedy 2 Replace the LAN cable with another one then connect it Cause 2 The cable is connected to the UP LINK cascade port on the hub Remedy 1 Connect the LAN cable to a port with a X mark Remedy 2 If the hub has a UP LINK cascade switch switch to X Cause 3 A cross LAN cable is being u...

Page 278: ... on the control panel do not function Cause There is data remaining in the memory the Job indicator is on Remedy Press the Online key to place the printer offline then select FORM FEED in the RESET menu See Canceling a Job on p 3 6 A paper jam occurs each time you print Cause 1 The amount of the paper loaded in the paper cassette exceeds the load limitation Remedy Reduce the amount of paper to wit...

Page 279: ...cters are printed Cause 1 The data is printed from Windows without the supplied printer driver installed for Windows Remedy Install the supplied printer driver for Windows then print again See Driver Guide Cause 2 The printer setting in the DOS application is not appropriate Remedy Specify the printer setting in the DOS application to the one that is compatible with this printer See Driver Guide A...

Page 280: ...medy Load the paper properly and print again See Printing from the Paper Cassette on p 4 19 Printing from the Manual Feed Slot on p 4 37 Cause 5 A document with no margins was printed Remedy 1 Secure a margin around the data so that it fits within Printable Area See p 4 7 then print again Remedy 2 If you select the Print with Upper Left of Sheet as Starting Point check box in the Finishing Details...

Page 281: ...ify the settings for Line Spacing and Lines Page in the application so that data fits in one page and print again See the instruction manual supplied with your application Data is printed with its size reduced Cause The printer is set to reduce the print size Remedy Confirm the setting for Manual Scaling in the printer driver See Driver Guide Paper comes out wrinkled Cause 1 Paper is loaded in the...

Page 282: ...ling tape and reinstall the toner cartridge See Replacing the Toner Cartridge on p 7 2 Cause 2 Multiple sheets of paper were fed at a time Remedy Align the paper stack in the paper cassette properly and load it again See Printing from the Paper Cassette on p 4 19 Cause 3 A problem has occurred inside the printer Remedy 1 If Ennn nnnn is displayed in the display turn the power OFF wait for 10 secon...

Page 283: ...ve white specks Cause 1 Appropriate paper is not being used Remedy Replace the paper with one that can be used and print again See Paper Requirements on p 4 2 Cause 2 Paper is damp since the paper has been stored in unsuitable condition Remedy Replace the paper with new one and print again See Paper Requirements on p 4 2 Cause 3 The drum in the toner cartridge has deteriorated Remedy Replace the t...

Page 284: ...dge If this does not solve the problem replace the toner cartridge with a new one See Replacing the Toner Cartridge on p 7 2 Cause 2 Paper is too moist or too dry Remedy Replace the paper with appropriate one and print again See Paper Requirements on p 4 2 Cause 3 The toner cartridge has deteriorated or is damaged Remedy Replace the toner cartridge with a new one See Replacing the Toner Cartridge ...

Page 285: ...e 3 A document with no margins was printed Remedy Secure a margin around the data so that it fits within Printable Area See p 4 7 then print again The paper is printed completely black Cause The drum in the toner cartridge has deteriorated Remedy Replace the toner cartridge with a new one See Replacing the Toner Cartridge on p 7 2 Toner does not fix well Cause Paper is inappropriate Remedy Replace...

Page 286: ...tional Accessories This chapter describes the procedures for installing the optional accessories on the printer Installing the Paper Feeder 9 2 Removing the Packing Materials 9 2 Moving the Printer 9 5 Installing the Paper Feeder 9 9 ...

Page 287: ...rom Cassette 2 make sure that Cassette 1 is installed before printing If you print from Cassette 2 when Cassette 1 is not installed this will cause paper jams Removing the Packing Materials The paper feeder is provided with tape and a packing material to be protected from excessive vibrations and shocks during delivery Remove the tape and packing material before installing the paper feeder on the ...

Page 288: ...Accessories 9 NOTE The packing materials may be changed in form or position to be placed or may be added or removed without notice 1 Pull out the paper cassette IMPORTANT Do not touch the black rubber pad A in the paper cassette This may result in misfeeds A ...

Page 289: ...move the tape that is securing the packing material in the paper cassette 2 locations 4 3 Remove the packing material in the paper cassette 4 IMPORTANT The paper cassette is provided with a packing material Be sure to take out the paper cassette to remove the packing material ...

Page 290: ...When installing the paper feeder in the printer after installing the printer move the printer to an appropriate location temporarily using the following procedure WARNING Be sure to turn the printer and computer OFF unplug the power plug and then disconnect all the interface cables from the printer before moving the printer Otherwise the power cord or interface cables may be damaged resulting in a...

Page 291: ...tional Accessories 9 1 Turn the printer and computer OFF a remove the USB cable b and then disconnect the power plug from the AC power outlet c 2 Remove all the interface cables and the power cord from the printer 3 Pull out the paper cassette a a c b ...

Page 292: ...n site From the front side securely hold the printer by the lift handles located on the lower portion of the printer with both hands CAUTION This printer weighs approximately 11 8 kg without the paper cassette installed Please be careful not to hurt your back or other portions of your body when carrying the printer ...

Page 293: ... portion back portion or any portions other than the lift handles If you do so you may drop the printer resulting in personal injury The back portion A of the printer is relatively heavy Be careful not to get off balanced when lifting the printer If you do so you may drop the printer resulting in personal injury A ...

Page 294: ...be installed at the bottom of the printer unit CAUTION Put the printer or paper feeder down slowly and carefully Be careful not to hurt your hands Do not carry the printer with the paper cassette attached If you do so the paper cassette may drop resulting in personal injury Do not carry the printer with the paper feeder installed If you do so the paper feeder may drop resulting in personal injury ...

Page 295: ...TANT Do not touch the connector A in the paper feeder This may result in damage to the printer or misfeeds Do not install the paper feeder on a platform that may warp from the weight of the printer and optional accessories or where the printer is liable to sink such as a carpet or mat Secure sufficient space around the paper feeder so that you can install the printer and connect cords such as the ...

Page 296: ...ositioning pins A and connector B when setting the printer unit IMPORTANT If the printer unit cannot be placed on the paper feeder properly lift the printer unit once hold it horizontally and place it again If you try to set the printer unit forcefully without lifting it the connector and positioning pins may be broken 4 Set the paper cassette in the printer unit and paper feeder CAUTION When sett...

Page 297: ...feeder you have to specify the settings for the optional accessories in the Configuration Device Settings sheet in the printer driver You can obtain information about the status of the optional accessories automatically by clicking Get Device Status in the Configuration Device Settings sheet If you cannot obtain the status of the optional accessories of the printer automatically select the install...

Page 298: ...0 2 The Lists Common to Certain Settings in the Operation Mode 10 4 Typeface Samples 10 5 Scalable Fonts PCL 10 5 Bitmapped Fonts PCL 10 6 Symbol Sets Supported 10 7 Character Code Tables 10 7 ISO Substitution Tables 10 26 Specifications 10 30 Hardware Specifications 10 30 Controller Specifications 10 32 Software Specifications 10 33 Dimensions of Each Part 10 34 Index 10 36 ...

Page 299: ...he operation mode IMPORTANT The following lists are samples The contents may partially differ from the lists printed by your printer Configuration Page The capacity of the built in RAM and the settings for the common printing environment are printed 1 Make sure that the printer is online 2 Press the Utility key to display the UTILITY menu 3 Press to display CONFIG PAGE 4 Press OK to output the pag...

Page 300: ...ustment Print Displays the current printing positions of each paper source Adjust the printing positions referring to this print For more details see Adjusting the Printing Position on p 7 22 1 Press the Feeder Selection key 2 Select PAPER SOURCE using and then press OK 3 Select the paper source that you want to check the printing position using and then press OK 4 Make sure that the printer is on...

Page 301: ...ORTANT The following list is a sample The contents may partially differ from the lists printed by your printer PCL Fonts List A list of the fonts that can be used in the PCL mode is printed 1 Make sure that the printer is online 2 Press the Utility key to display the UTILITY menu 3 Press to display PCL UTILITY 4 Press OK to display Exclusive Utilities for PCL 5 Press to display FONTS LIST 6 Press ...

Page 302: ...onts PCL Courier CG Times CG Times Bold CG Times Italic CG Times Bold Italic CG Omega CG Omega Bold CG Omega Italic CG Omega Bold Italic Coronet Clarendon Condensed Bold Univers Medium Univers Bold Univers Medium Italic Univers Bold Italic Univers Condensed Medium Univers Condensed Bold Univers Condensed Medium Italic Univers Condensed Bold Italic Antique Olive Antique Olive Bold Antique Olive Ita...

Page 303: ...c Times New Roman Times New Roman Bold Times New Roman Italic Times New Roman Bold Italic Symbol Wingdings Courier Bold Courier Italic Courier Bold Italic Letter Gothic Letter Gothic Bold Letter Gothic Italic Line Printer 10U Line Printer 8U Line Printer 0N Line Printer 11U Line Printer 12U Line Printer 1U Line Printer 2N Line Printer 5N Line Printer 6N Line Printer 9N ...

Page 304: ...Symbol Sets Supported 10 7 Appendix 10 Symbol Sets Supported This section provides a list to the character code tables for the characters in each symbol set Character Code Tables Roman 8 8U ...

Page 305: ...Symbol Sets Supported 10 8 Appendix 10 Roman 9 4U ISO 8859 1 Latin 1 0N ...

Page 306: ...Symbol Sets Supported 10 9 Appendix 10 ISO 8859 2 Latin 2 2N ISO 8859 9 Latin 5 5N ...

Page 307: ...Symbol Sets Supported 10 10 Appendix 10 ISO 8859 15 Latin 9 9N PC 8 Code Page 437 10U ...

Page 308: ...Symbol Sets Supported 10 11 Appendix 10 PC 8 D N Danish Norwegian 11U PC 850 Multilingual 12U ...

Page 309: ...Symbol Sets Supported 10 12 Appendix 10 PC 858 Multilingual with Euro 13U PC 852 Latin 2 17U ...

Page 310: ...Symbol Sets Supported 10 13 Appendix 10 PC Turkish 9T Windows 3 1 Latin 1 19U ...

Page 311: ...Symbol Sets Supported 10 14 Appendix 10 Windows 3 1 Latin 2 9E Windows 3 1 Latin 5 5T ...

Page 312: ...Symbol Sets Supported 10 15 Appendix 10 DeskTop 7J PS Text 10J ...

Page 313: ...Symbol Sets Supported 10 16 Appendix 10 Ventura International 13J Ventura US 14J ...

Page 314: ...Symbol Sets Supported 10 17 Appendix 10 Microsoft Publishing 6J Math 8 8M ...

Page 315: ...Symbol Sets Supported 10 18 Appendix 10 PS Math 5M Ventura Math 6M ...

Page 316: ...Symbol Sets Supported 10 19 Appendix 10 PI Font 15U Legal 1U ...

Page 317: ...Symbol Sets Supported 10 20 Appendix 10 Windows 3 0 Latin 1 9U ISO 8859 10 Latin 6 6N ...

Page 318: ...Symbol Sets Supported 10 21 Appendix 10 PC 775 26U PC 1004 9J ...

Page 319: ...Symbol Sets Supported 10 22 Appendix 10 Windows Baltic 19L MC Text 12J ...

Page 320: ...Symbol Sets Supported 10 23 Appendix 10 Symbol 19M Wingdings 579L ...

Page 321: ...Symbol Sets Supported 10 24 Appendix 10 Dingbats 14L PC 860 Portugal 20U ...

Page 322: ...Symbol Sets Supported 10 25 Appendix 10 PC 865 Norway 25U PC 8 Greek Alternate Code Page 437 14G ...

Page 323: ...Symbol Sets Supported 10 26 Appendix 10 ISO 6 ASCII 0U ISO Substitution Tables ISO 4 United Kingdom 1E ...

Page 324: ...Symbol Sets Supported 10 27 Appendix 10 ISO 11 Swedish 0S ISO 60 Danish Norwegian 0D ...

Page 325: ...Symbol Sets Supported 10 28 Appendix 10 ISO 21 German 1G ISO 69 French 1F ...

Page 326: ...Symbol Sets Supported 10 29 Appendix 10 ISO 15 Italian 0I ISO 17 Spanish 2S ...

Page 327: ... the settings of the fixing mode This is because the safety function that prevents damage caused by heat becomes active Warm up time 20 C 68 F 0 second from standby mode Approximately 7 seconds from power ON May vary depending on the use conditions such as the toner cartridge you are using menu setting availability of the optional accessories and installation environment First print time When prin...

Page 328: ...t Automatic 2 sided printing A4 Legal Letter Paper output Face down Face up Output capacity Face down output tray approx 125 sheets 80 g m2 Face up output slot 1 sheet Noise Declared noise emission in accordance with ISO 9296 Lwad declared A weighted sound power level 1B 10dB During standby Background noise level During operation 6 34 B or less Sound pressure level Bystander position During standb...

Page 329: ...ernational Organization for Standardization Weight Printer unit and included parts Printer excluding the toner cartridge approx 12 kg Toner cartridge approx 0 8 kg Consumables and optional accessories Toner cartridge Canon Genuine Cartridge Number of printable pages approx 2 500 pages approx 0 8 kg Toner cartridge Canon Genuine Cartridge Number of printable pages approx 6 000 pages approx 1 0 kg P...

Page 330: ... can extend the printable area to near the edges of the paper However the data may be printed with the edges missing when a document with no margins is printed even if the Print with Upper Left of Sheet as Starting Point check box is selected In this case specify the scaling factor in UFR II Printer Driver to print smaller so that any data on the document will not miss and then print again C D B A...

Page 331: ...t Printer unit Standard state State with the paper feeder installed Front Surface 383 5 375 7 88 114 2 399 7 267 mm Paper cassette Output selection cover Front cover Front Surface 383 5 375 7 88 114 2 399 7 355 8 mm Paper cassette Output selection cover Front cover ...

Page 332: ...Dimensions of Each Part 10 35 Appendix 10 Paper feeder unit PF 35P 117 4 116 6 399 7 421 1 mm ...

Page 333: ...TTE1 SIZE 4 19 6 13 6 44 CASSETTE2 SIZE 4 19 6 14 6 44 Character Code Tables 10 7 CLEANING 6 38 Cleaning the Fixing Roller 7 19 Clearing Paper Jams 8 8 Condensation 7 17 CONFIG PAGE 6 38 Configuration Page 2 30 10 2 CONNECT RECOG 6 29 CONTROL MENU Options 6 2 Control Panel 1 9 COPIES 6 19 CUSTOM SIZE 6 34 D DENSITY 6 24 Dimensions 10 34 Display 1 11 Changing the Language 2 33 Duplex Unit Cover 1 8...

Page 334: ...nstallation Procedure 2 2 Installation Requirements 2 4 Installation Space 2 5 INTERFACE MENU Options 6 4 INVLDPAPER SLOT 6 16 ISO Substitution Tables 10 26 J Job Indicator 1 9 Job Key 1 9 5 6 JOB LOG LIST 6 40 JOB Menu 5 12 6 8 K Keys 5 5 L Labels 4 4 LAN 2 23 LAN Connector 1 7 Laser Beam xx LAYOUT MENU Options 6 3 Lift Handles 1 7 M Manual Feed Slot 1 7 4 37 Handling 4 13 Loading Paper 4 38 Pape...

Page 335: ... Switch Lever 1 8 PAPER SOURCE 6 43 Paper Source 4 11 Paper Capacity 4 12 Selection 4 12 Paper Source Indicators 1 10 Paper Type 4 3 Parts and Their Functions 1 6 PCL Fonts List 10 4 PCL SETUP Options 6 7 PCL UTILITY 6 38 Peripheral Space Required 2 5 PITCH 6 33 Plain Paper 4 4 POINT SIZE 6 33 Power Cord 2 21 Power Indicator 1 10 POWER SAVE MODE 6 10 POWER SAVE TIME 6 11 Power Saving 3 2 Power Soc...

Page 336: ...ft Reset 3 8 SPECIAL MODE J 6 31 Specifications 10 30 Controller 10 32 Hardware 10 30 Software 10 33 START WAIT TIME 6 28 STD PAPER SIZE 4 19 4 37 6 15 STD PAPER TYPE 4 19 4 37 6 17 Storing Printouts 4 10 SUBSTITUTE SIZE 6 31 SYMBOL SET 6 34 Symbol Sets Supported 10 7 T TCP IP SETTINGS 6 27 Temperature Humidity Conditions 2 3 Toner Cartridge Before Replacing 7 2 Handling 7 14 Replacement 7 2 7 7 S...

Page 337: ...Index 10 40 Appendix 10 ...

Page 338: ...ie 92414 Courbevoie Cedex France CANON U K LTD Woodhatch Reigate Surrey RH2 8BF United Kingdom CANON DEUTSCHLAND GmbH Europark Fichtenhain A10 47807 Krefeld Germany CANON ITALIA S p A Via Milano 8 20097 San Donato Milanese MI Italy CANON LATIN AMERICA INC 703 Waterford Way Suite 400 Miami Florida 33126 U S A CANON AUSTRALIA PTY LTD 1 Thomas Holt Drive North Ryde Sydney N S W 2113 Australia CANON C...

Reviews: