background image

Shooting in Various Conditions

65

V

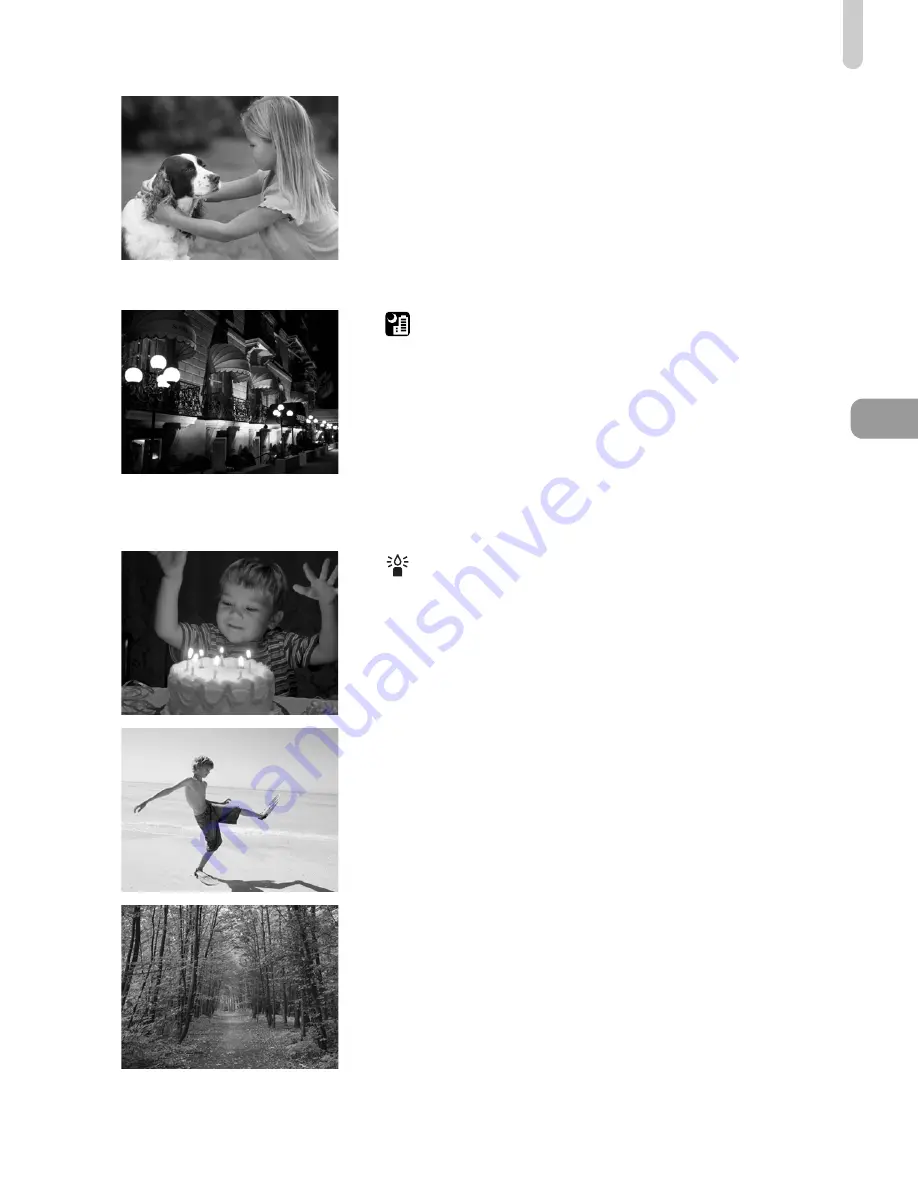
 Take shots of kids and pets 
(Kids&Pets)

z

Lets you capture subjects that move 
around, such as children and pets, without 
missing photo opportunities.

z

Move approximately 1 m (3.3 ft.) or more 
away from your subject and shoot.

Take nightscapes without using a 
tripod (Handheld NightScene)

z

Lets you take beautiful snapshots of city 
nightscenes by combining several 
continuous shots to reduce camera shake 
and noise.

z

When using a tripod, you should shoot in 

A

 mode 

(p. 25)

.

Take shots in low light conditions 
(Low Light)

z

Lets you take shots in dark places with 
reduced camera shake and subject blur.

w

Take shots of people at the beach 
(Beach)

z

Lets you take shots of brightly lit people on 
sandy beaches where the reflected 
sunlight is strong.

O

Take shots of foliage (Foliage)

z

Lets you shoot trees and leaves, such as 
new growth, autumn leaves or blossoms, 
in vivid colors.

Summary of Contents for IXUS310HS

Page 1: ...SH Make sure you read this guide including the Safety Precautions section before using the camera Reading this guide will help you learn to use the camera properly Store this guide safely so that you can use it in the future ...

Page 2: ...e challenging photos Software Guide Read when you want to use the included software A memory card is not included Adobe Reader is required to view the PDF manuals Microsoft Word Word Viewer can be installed to view the Word manuals required only for manuals for the Middle East Checking the Package Contents Battery Charger CB 2LY CB 2LYE Camera Battery Pack NB 6L with Terminal Cover Interface Cable...

Page 3: ...ties by means of a camera or other device may contravene copyright or other legal rights even if the image was shot for personal use Warranty Limitations For information on your camera s warranty please refer to the Canon Warranty System Booklet supplied with your camera For Canon Customer Support contacts please see the Warranty System Booklet LCD Monitor Screen The LCD monitor is produced with e...

Page 4: ... p 66 NightScene p 65 Low Light p 65 Foliage p 65 Fireworks p 66 Fish eyeEffect p 69 Toy Camera Effect p 75 Miniature Effect p 70 Monochrome p 74 Super vivid colors p 68 Poster Effect p 68 Creative Light Effect p 71 Shoot z Focus on faces 25 64 95 z Shoot in places where I cannot use the flash turn off the flash 54 z Take pictures with me in them too self timer 58 59 78 z Insert the date and time ...

Page 5: ...r 34 z Quickly search pictures 120 z Erase pictures 30 139 View E z Shoot movies 31 111 z View movies 33 z Shoot fast moving subjects and play them back in slow motion 114 Shoot View Movies 2 z Easily print pictures 152 Print z Save images to a computer 34 Save 3 z Turn off sounds 49 z Use the camera abroad 16 169 z Understand what is displayed on the screen 187 Other ...

Page 6: ...cessories 38 Separately Sold Accessories 39 Components Guide 42 Screen Display 44 Indicator 45 FUNC Menu Basic Operations 46 MENU Basic Operations 47 Changing the Sound Settings 49 Adjusting the Screen Brightness 50 Returning the Camera to Default Settings 51 Power Saving Function Auto Power Down 52 Turning the Flash Off 54 Zooming in More Closely on Subjects Digital Zoom 55 Inserting the Date and...

Page 7: ...tting the Shutter Speed 108 Setting the Aperture Value 109 Shooting Various Kinds of Movies 112 Shoot Movies That Look Like a Miniature Model Miniature Effect 113 Shooting Super Slow Motion Movies 114 Changing the Image Quality 116 Other Shooting Functions 117 Editing 117 Quickly Searching Images 120 Viewing Images in Filtered Playback 123 Viewing Slideshows 124 Checking the Focus 126 Magnifying I...

Page 8: ...Shooting Function Settings 171 Changing Playback Function Settings 176 Using Household Power 178 Using an Eye Fi Card 179 Troubleshooting 181 List of Messages That Appear on the Screen 184 Information Displayed on the Screen 187 Handling Precautions 191 Functions Available in Each Shooting Mode 192 Menus 196 Playback Mode FUNC Menu 200 Specifications 201 Index 205 9 Printing 151 10Customizing Came...

Page 9: ...reful about Troubleshooting tips Hints for getting more out of your camera Supplemental information p xx Reference pages xx stands for a page number This guide assumes all functions are at their default settings The various types of memory cards that can be used in this camera are collectively referred to as memory cards in this guide Conventions Used in This Guide ...

Page 10: ...anic solvents such as alcohol benzine or thinner to clean the equipment Do not let the product come into contact with water e g sea water or other liquids Do not allow liquids or foreign objects to enter the camera This could result in electrical shock or fire If liquids or foreign objects come into contact with the camera interior immediately turn the camera power off and remove the battery If th...

Page 11: ...ingers or clothing This could result in burns or damage to the flash Avoid using placing or storing the product in the following places Places subject to strong sunlight Places subject to temperatures above 40 C 104 F Humid or dusty areas These could cause leakage overheating or an explosion of the battery resulting in electrical shock fire burns or other injuries High temperatures may cause defor...

Page 12: ...place anything such as cloth on top of the battery charger while it is charging Leaving the unit plugged in for a long period of time may cause it to overheat and distort resulting in fire Do not place the battery near pets Pets biting the battery could cause leakage overheating or explosion resulting in fire or damage Do not sit down with the camera in your pocket Doing so may cause malfunctions ...

Page 13: ...plains how to shoot and view movies and transfer images to a computer Attaching the Strap Holding the Camera Attach the included strap and wrap it around your wrist to avoid dropping the camera during use Keep your arms tight against your body while holding the camera firmly by the sides when shooting Be sure that your fingers do not block the flash or touch the screen 1 Strap ...

Page 14: ...yed location of magnified images Using the Touch Panel Since the camera uses a pressure sensitive touch panel the camera may not recognize touch operations if you install a screen protector What if I cannot perform operations well When touching with your finger does not work well you can use the toggle attached to the strap to perform operations Only use the attached toggle to perform operations D...

Page 15: ...ger into a power outlet z For CB 2LYE Plug the power cord into the charger then plug the other end into a power outlet X The charge lamp lights red and charging starts X The charge lamp will light green when charging has finished Charging takes approx 1 hour and 55 minutes Remove the battery z Unplug the battery charger from the power outlet then remove the battery by sliding it in and up Charging...

Page 16: ...d How to store the battery for long periods Deplete and remove the battery from the camera Attach the terminal cover and store the battery Storing a battery for long periods of time about a year without depleting it may shorten its life span or affect its performance The battery charger can also be used when abroad The charger can be used in regions that have 100 240 V 50 60 Hz AC power If the plu...

Page 17: ... many countries or regions Without approval use of the card is not permitted If it is unclear whether the card has been approved for use in the area please check with the card manufacturer Insert the included battery and a memory card sold separately Check the card s write protect tab z If the memory card has a write protect tab you will not be able to record images if the tab is in the locked pos...

Page 18: ...wn until it locks into place with a click z Be sure the memory card is oriented correctly Inserting the memory card in the wrong direction could damage the camera Close the cover z Close the cover and press downward as you slide it until it clicks into place Terminals Battery lock Terminals What if Memory card locked appears on the screen SD SDHC SDXC memory cards and Eye Fi cards have a write pro...

Page 19: ...lowly release it X The memory card will pop up Number of Shots per Memory Card Values are based on the default settings The number of shots that can be taken will vary depending on camera settings the subject and the memory card used Memory Card 4 GB 16 GB Number of Shots Approx 1231 Approx 5042 Can you check the number of shots that can be taken You can check the number of shots that can be taken...

Page 20: ...o set X op will appear z Touch op to set a value Complete the setting z Touch Ú X Once the date and time have been set the Date Time screen will close z Pressing the ON OFF button will turn off the camera Setting the Date and Time Reappearing Date Time screen Set the correct date and time If you have not set the date and time the Date Time screen will appear each time you turn on the camera Daylig...

Page 21: ...h Ú twice to close the menu Date Time battery The camera has a built in date time battery backup battery that allows the date time settings to be retained for about three weeks after the battery pack has been removed By inserting a charged battery or connecting an AC adapter kit sold separately p 39 the date time battery can be charged in about 4 hours even if the camera is not turned on If the da...

Page 22: ...ge z Touch a display language then touch Ú X Once the display language has been set the settings screen will close Setting the Display Language What if n does not appear When there are images on the memory card touch ø on the lower left of the screen to display n You can also change the display language by touching ø then n Choose the 3 tab in the screen that appears then choose the Language menu ...

Page 23: ...cise adequate caution before formatting the memory card Before formatting an Eye Fi card p 179 be sure to install the software contained on the card to a computer Display the menu z Touch ø then touch n Choose Format z Touch the 3 tab z Drag up or down the screen to choose Format z Touch Format Choose OK z Touch OK X A confirmation screen will appear Format the memory card z Touch OK X The memory ...

Page 24: ...careful not to move the camera Formatting or erasing data on a memory card merely changes the file management information on the card and does not ensure its contents are completely erased Be careful when transferring or disposing of a memory card When disposing of a memory card take precautions such as physically destroying the card to prevent personal information leaks The total capacity of the ...

Page 25: ...ight noise as it determines the scene X The icon for the determined scene will appear in the upper left of the screen X The camera will focus on detected subjects and display frames on them X Black bars will appear on the sides of the screen These areas will not be recorded when shooting Does the length of the shutter sound change Since the time required to shoot differs depending on the scene you...

Page 26: ... focused Several AF frames will appear when the camera focuses on more than one point Shoot z Press the shutter button fully to shoot X The camera will play the shutter sound and shoot The flash will automatically fire in low light conditions X The image will appear on the screen for approximately two seconds z You can take a second picture even while an image is displayed by pressing the shutter ...

Page 27: ...s too far away for the flash to reach The effective flash range is approximately 50 cm 5 0 m 1 6 16 ft at maximum wide angle j and approximately 50 cm 2 0 m 1 6 6 6 ft at maximum telephoto i What if the camera beeps once when the shutter button is pressed halfway Your subject may be too close When the camera is at maximum wide angle j move about 3 cm 1 2 in or more away from your subject and shoot...

Page 28: ...n the screen at the left q will appear and images will display in the reverse order they were taken from the newest image to the oldest z If you touch the right edge of the screen inside frame on the screen at the left r will appear and images will display in the order they were taken from oldest to newest z The images change more quickly if you touch and hold qr z The lens will retract after appr...

Page 29: ... sure to put the strap around your wrist and hold the camera firmly to avoid dropping it Depending on the way you tap the camera images may not switch Active Display Tilt the camera to switch images If you touch and hold q on the left of the screen and tilt the camera as shown while switching through images p 28 the images advance quickly Tilt the camera in the opposite direction while holding r W...

Page 30: ... last image you took will appear Choose an image to erase z Drag across the screen to choose an image Erase the image z After touching ø drag up or down the screen to choose a then touch the menu item again X Erase appears on the screen z Touch Erase X The displayed image will be erased z To exit instead of erasing touch Cancel Erasing Images You can also use Touch Actions to erase images p 131 ...

Page 31: ... to A Compose the shot z Moving the zoom lever toward i will zoom in on your subject making it appear larger Moving the lever toward j will zoom out from your subject making it appear smaller Shoot z Touch X The camera will beep once recording will start and Rec and the elapsed time will appear on the screen z If you change the composition of your shot during shooting the focus brightness and tone...

Page 32: ...rds SD Speed Class 6 or higher memory cards are recommended Microphones Zooming while shooting Pressing the zoom lever while shooting will zoom in on or out from the subject However operation sounds will be recorded When the mode switch is set to A the icon for the determined scene will appear p 188 When Moving icons will not appear however Under certain conditions the icon that appears may not ma...

Page 33: ... screen z Drag up or down the screen during playback to adjust the volume X After the movie finishes appears Viewing Movies How can I play back movies on a computer Install the included software p 35 When watching a movie on a computer frames may drop it may not play smoothly and the audio may stop suddenly depending on the computer s capabilities If you use the supplied software to copy the movie...

Page 34: ...Windows 7 64 bit 2 GB or more Windows 7 32 bit Windows Vista 64 bit 32 bit 1 GB or more still images 2 GB or more movies Windows XP 512 MB or more still images 2 GB or more movies Interface USB Free Hard Disk Space ZoomBrowser EX 200 MB or more CameraWindow 150 MB or more Movie Uploader for YouTube 30 MB or more PhotoStitch 40 MB or more Display 1 024 x 768 pixels or higher OS Mac OS X v10 5 v10 6...

Page 35: ... on screen instructions to proceed with the installation z If the User Account Control window appears follow the on screen instructions to proceed When the installation finishes click Restart or Finish Remove the CD ROM z Remove the CD ROM when your desktop screen appears Macintosh Place the CD in the computer s CD ROM drive z Place the supplied CD ROM DIGITAL CAMERA Solution Disk p 2 into the com...

Page 36: ... the computer Turn on the camera z Press the 1 button to turn on the camera Open CameraWindow Windows z Click Downloads Images From Canon Camera using Canon CameraWindow X CameraWindow will appear z If CameraWindow does not appear click the Start menu and choose All Programs followed by Canon Utilities CameraWindow and CameraWindow Macintosh X CameraWindow will appear when you establish a connecti...

Page 37: ...ram Choose Downloads Images From Canon Camera using Canon CameraWindow and click OK Double click You can transfer images even without using the image transfer function in the included software by simply connecting your camera to a computer There are however the following limitations It may take a few minutes from when you connect the camera to the computer until you can transfer images Images shot...

Page 38: ... Cover Battery Charger CB 2LY CB 2LYE DIGITAL CAMERA Solution Disk Also available for purchase separately USB card reader Windows Macintosh Memory Card Canon Brand PictBridge Compliant Printers TV High Definition TV HDMI Cable HTC 100 Interface Cable IFC 400PCU Stereo AV Cable AVC DC400ST ...

Page 39: ...owering the camera for an extended period of time or when connecting to a computer or printer Cannot be used to charge the camera battery Separately Sold Accessories Using accessories abroad The battery charger and the AC adapter kit can be used in regions that have 100 240 V 50 60 Hz AC power If the plug does not fit the outlet use a commercially available plug adapter Do not use electrical trans...

Page 40: ...rest Canon retailer SELPHY series Inkjet Printers Use of genuine Canon accessories is recommended This product is designed to achieve excellent performance when used with genuine Canon accessories Canon shall not be liable for any damage to this product and or accidents such as fire etc caused by the malfunction of non genuine Canon accessories e g a leakage and or explosion of a battery pack Plea...

Page 41: ...41 Learning More This chapter explains the parts of the camera and what appears on the screen as well as the basic operating instructions 2 ...

Page 42: ...x pp 120 127 Shutter Button p 24 ON OFF button p 20 Mode Switch Lamp pp 58 78 171 Flash pp 54 85 Speaker Tripod Socket DC Coupler Terminal Cover Memory Card Battery Cover p 17 You can leave it to the camera to select settings for fully automatic shooting p 25 You can shoot with the best settings for the scene p 64 or choose settings yourself to take various types of pictures pp 53 83 ...

Page 43: ...Components Guide 43 Screen LCD Monitor pp 44 187 189 Strap Mount p 13 HDMI Terminal p 134 A V OUT Audio Video Output DIGITAL Terminal pp 36 133 152 1 Playback Button pp 28 119 Indicator p 45 ...

Page 44: ...ge information and icons but you can still switch images pp 28 29 Touch the screen to restore the original display You can also switch the display by touching l while the image displays right after shooting However Simple Information Display is not available and image information will not display You can change the first screen that displays by choosing the 4 tab then Review Info p 172 Focus Check...

Page 45: ...nformation Display p 189 is called the histogram The histogram shows the distribution of brightness in an image horizontally and the amount of brightness vertically When the graph approaches the right side the image is bright but when it approaches the left side the image is dark and in this way you can judge the exposure The indicator on the back of the camera p 43 will light or blink depending o...

Page 46: ...on z Drag up or down the menu on the right or touch an item to choose it z You can also choose menu items by dragging on the screen outside of the menu z Touch the menu item you chose again or touch Ú X The item will be set and the original screen will reappear z To choose a different item from the menu on the left touch the appropriate item z In the screen in Step 2 you can also touch items to ch...

Page 47: ...Shooting mode and the Playback mode pp 196 199 Display the menu z Touch ø then touch n Choose a tab z Touch a tab or move the zoom lever p 42 left or right to choose a tab Choose an item z Drag up or down the screen or touch an item to choose it z Some items require you to touch the item to display a submenu in which you change the setting MENU Basic Operations ...

Page 48: ...tion z For items that display qr to the left and right touch qr to change settings z For items that display a bar touch the spot on the bar where you want to make the setting Complete the setting z Touch Ú X The normal screen will reappear ...

Page 49: ...touch n Choose Volume z Touch the 3 tab z Drag up or down the screen to touch Volume Change the volume z Drag up or down the screen to choose an item then touch the point on the bar where you want to change the volume Changing the Sound Settings If you mute camera sounds the sound will also be muted when playing back movies p 33 If you drag up the screen while viewing a movie the sound will turn o...

Page 50: ...lay the menu z Touch ø then touch n Choose LCD Brightness z Touch the 3 tab z Drag up or down the screen to choose LCD Brightness Adjust the brightness z Touch the point on the bar where you want to change the brightness Adjusting the Screen Brightness ...

Page 51: ... X The camera will reset to the default settings Returning the Camera to Default Settings Are there functions that cannot be reset The Date Time p 21 Language p 22 Video System p 133 Time Zone p 169 the image registered in Start up Image p 166 and Calibration p 170 in the 3 tab The recorded custom white balance data p 87 Colors that were chosen in Color Accent p 72 or Color Swap p 73 Shooting mode...

Page 52: ...utes the lens will retract and the power will turn off When the screen has turned off but the lens has not yet retracted pressing the shutter button halfway p 24 turns on the screen and shooting can continue Power Saving during Playback The power will turn off approximately 5 minutes after you stop operating the camera You can turn off the power saving function p 168 You can adjust the time before...

Page 53: ...s chapter explains how to use common functions such as the self timer and how to turn off the flash This chapter assumes that the camera is set to A mode When shooting in another mode check which functions are available in that mode pp 192 195 3 ...

Page 54: ... turn the flash back on follow the steps above to choose Turning the Flash Off What if a flashing appears When you press the shutter button halfway in low light conditions where camera shake is likely a flashing will appear on the screen Attach the camera to a tripod to prevent it from moving You can also choose items by touching in Step 2 ...

Page 55: ... zoom factor without image deterioration The zoom factor will appear on the screen when you release the zoom lever Move it toward i again X The digital zoom will zoom in even further on the subject Zooming in More Closely on Subjects Digital Zoom Zoom Factor Turning off the digital zoom To turn off the digital zoom touch ø then touch n to choose the 4 tab and choose Digital Zoom and the Off option...

Page 56: ...n touch n z Touch the 4 tab z Drag up or down the screen to choose Digital Zoom Choose the setting z Touch qr to choose a zoom factor z Touching Ú restores the settings screen X The view will be enlarged and the zoom factor will appear on the screen z To return to standard digital zoom choose Digital Zoom and the Standard option The respective focal lengths when using 1 5x and 2 0x are approximate...

Page 57: ... settings screen X Once set DATE will appear on the screen Shoot X The shooting date or time will be recorded in the image s lower right corner z To restore to the original setting choose Off in Step 2 Inserting the Date and Time You can insert and print the shooting date in images which do not have an embedded date and time as follows However if you do this for images with an embedded date and ti...

Page 58: ...hen press it fully X When the self timer starts the lamp blinks and the self timer sound plays X Two seconds before the shutter releases the lamp and sound speed up the lamp remains lit when the flash will fire z To cancel shooting with the timer after countdown has started touch the screen z To restore the original setting choose in Step 2 Using the Self Timer You can also choose items by touchin...

Page 59: ...shots Choose z Touch and then immediately touch Settings Choose the settings z Touch qr to choose a value for the desired option z Touch Ú to make the setting z Follow Step 3 on p 58 to shoot What if the number of shots is set to two or more shots Exposure and white balance settings are set with the first shot If the flash fires or you set a high number of shots the shooting interval may take long...

Page 60: ...ear on the screen z To restore to the original setting choose in Steps 1 2 You can choose from the following 2 compression ratios image quality Fine Normal Choose the compression ratio setting z Touch ø then drag up or down the menu on the left to choose Choose an option z Touch an item you want to set z Touch the menu item again to complete the setting X The setting will appear on the screen z To...

Page 61: ...with 4 3 images However since 16 9 images have a setting of 1920 x 1080 pixels their data size will be larger than 4 3 images Approximate Values for Paper Size for 4 3 Aspect Ratios z For sending images as e mail attachments Recording Pixels Compression Ratio Single Image Data Size Approx KB Number of Shots per Memory Card Approx shots 4 GB 16 GB Large 12M 4000x3000 3084 1231 5042 1474 2514 10295 ...

Page 62: ...62 ...

Page 63: ...63 Adding Effects and Shooting in Various Conditions This chapter explains how to add effects and how to shoot in various conditions 4 ...

Page 64: ...ch G z If you touch qr or quickly drag left or right across the screen other Shooting modes will appear z Choose the desired shooting mode X An explanation of the chosen Shooting mode appears on the screen z Touch OK to complete the setting z Touch Ú to restore the Shooting mode selection screen Shoot I Take portraits Portrait z Produces a soft effect when photographing people Shooting in Various ...

Page 65: ...pshots of city nightscenes by combining several continuous shots to reduce camera shake and noise z When using a tripod you should shoot in A mode p 25 Take shots in low light conditions Low Light z Lets you take shots in dark places with reduced camera shake and subject blur w Take shots of people at the beach Beach z Lets you take shots of brightly lit people on sandy beaches where the reflected...

Page 66: ... In t mode attach the camera to a tripod to prevent the camera from moving and blurring the image Additionally you should set IS Mode to Off when shooting with a tripod p 173 In mode the recording pixel setting will be fixed at 1984 x 1488 pixels In V or mode images may appear coarse because the ISO speed p 88 is increased to match the shooting conditions If camera shake is too strong while shooti...

Page 67: ... be recorded Viewing movies made with Movie Digest You can select movies made in mode by date for viewing p 122 Since you are also shooting movies when you shoot still images the battery will be depleted more quickly than in A The image quality will be fixed at for movies shot in mode In the following cases movies will be saved as separate files even if they were shot on the same day with mode If ...

Page 68: ...oot Shoot images with vivid colors Super Vivid z Lets you take shots with vivid intense colors Take posterized shots Poster Effect z Lets you take shots that look like an old poster or illustration Adding Effects and Shooting Since you may not achieve the expected results with images shot in and modes try taking some test shots first ...

Page 69: ...e Effect Lets you shoot with the distorting effect of a fish eye lens Choose z Follow Steps 1 2 on p 64 to choose Choose an effect level z Touch X Effect Level will appear on the screen z Touch qr to choose an effect level then touch Ú X You can check the effect on the screen Shoot ...

Page 70: ...ch the screen or drag the white frame up or down to change the area to keep in focus z Touch then touch or to change the size of the focused area and touch Ú Shoot If you touch in Step 2 the frame will switch to vertical orientation You can change the area to keep in focus by touching the screen or dragging the white frame left or right Touch again to return the frame orientation to horizontal Hol...

Page 71: ...en shooting Choose z Follow Steps 1 2 on p 64 to choose Choose a shape and size z Touch X Select Effect will appear on the screen z Touch the desired shape z Touch op to choose a size then touch Ú Shoot Shooting tips Hold the camera firmly and shoot non moving points of light in as dark a location as possible Make sure your subject is within the range of the flash p 85 Also make sure the subject i...

Page 72: ...efault settings is green Specify the color z Position the center frame so it is filled with the color you want and touch the frame on the lower part of the screen X The specified color will be recorded Specify the range of colors z Touch op to change the range of colors to be retained z Choose a negative value to limit the range of colors Choose a positive value to extend the range of colors to si...

Page 73: ...e color you want and touch the left frame that appears in the lower left of the screen X The specified color will be recorded Specify the target color z Position the center frame so it is filled with the color you want and touch the right frame that appears in the lower left of the screen X The specified color will be recorded Specify the range of colors to be swapped z Touch op to change the rang...

Page 74: ...e Choose a color tone z Touch X Color Tone will appear on the screen z Touch qr to choose an effect then touch Ú X You can check the color tone on the screen Shoot Using the flash may cause unexpected results in this mode Under some conditions the image may appear coarse B W Shoots in black and white Sepia Shoots with sepia tones Blue Shoots in blue and white ...

Page 75: ...e an image shot with a toy camera Choose z Follow Steps 1 2 on p 64 to choose Choose a color tone z Touch X Color Tone will appear on the screen z Touch qr to choose an effect then touch Ú X You can check the color tone on the screen Shoot Standard Images will look like they were shot with a toy camera Warm Gives images a warmer tone than Standard Cool Gives images a cooler tone than Standard ...

Page 76: ... to resume smile detection Detecting a Face and Shooting Smart Shutter Number of shots switching modes pp 77 78 Smile detection On Off What if a smile is not detected Smiles are easier to detect if the subject faces the camera and opens their mouth enough to show some teeth when smiling Changing the number of shots Touch then touch op to choose the number of shots Touch Ú to change the setting You...

Page 77: ...Confirm that a green frame appears around the face of the person who will wink Press the shutter button fully X The camera will enter shooting stand by and Wink to take picture will appear on the screen X The lamp will blink and the self timer sound will play Face the camera and wink X The shutter will release approximately 2 seconds after a wink is detected from the person inside the frame z To c...

Page 78: ...frames appear on other faces Press the shutter button fully X The camera will enter shooting stand by and Look straight at camera to start count down will appear on the screen X The lamp will blink and the self timer sound will play Changing the number of shots After touching on the screen in Step 1 touch op to change the number of shots Touch Ú to complete the setting Shutting both eyes will also...

Page 79: ...ash will fire and two seconds later the shutter will release z To cancel shooting with the timer after countdown has started touch the screen Changing the number of shots After touching in the screen in Step 1 touch op to change the number of shots then touch Ú to complete the setting Even if your face is not detected after joining the subjects the shutter will release approximately 15 seconds lat...

Page 80: ...g conditions camera settings and the zoom position the camera may stop shooting momentarily or the shooting speed may slow down As the number of images increases the shooting speed may slow down If you erase a grouped image p 139 all the images in the group will also be erased Be sure to exercise adequate caution If you want to play back images individually p 128 grouping can be canceled p 129 Pro...

Page 81: ... choose Shoot X When the shutter button is pressed fully the camera takes five continuous shots and saves one picture only Capturing the Best Facial Expressions Best Image Selection The recording pixel setting will be fixed at 1984 x 1488 pixels The focus brightness and white balance will be set with the first shot Depending on the shooting conditions you may not obtain the expected results ...

Page 82: ...82 ...

Page 83: ...gressively advance your shooting skills This chapter assumes that you have set the mode switch to 4 and the camera is in G mode G stands for Program AE Before attempting to shoot using a function explained in this chapter in modes other than G mode check if the function is available in those modes pp 192 197 5 ...

Page 84: ...i Enter G mode z Follow Steps 1 2 on p 64 to choose G Adjust the settings according to your purposes pp 85 105 Shoot Shooting in Program AE What if the shutter speed and aperture value appear in orange If a correct exposure cannot be obtained when pressing the shutter button halfway the shutter speed and aperture value appear in orange Try the following settings to obtain the correct exposure Turn...

Page 85: ...ou can make the flash fire every time you shoot The effective flash range is approximately 50 cm 5 0 m 1 6 16 ft at maximum wide angle j and approximately 50 cm 2 0 m 1 6 6 6 ft at maximum telephoto i Choose h z Touch then touch h z Touch h again to make the setting X Once set h will appear on the screen Adjusting the Brightness Exposure Compensation You can also make settings in the FUNC menu tha...

Page 86: ...pear on the screen Adjusting the White Balance Auto Automatically sets the optimal white balance for the shooting conditions Day Light For shooting outdoors in fine weather conditions Cloudy For shooting in cloudy shady or twilight conditions Tungsten For shooting under tungsten and bulb type 3 wavelength fluorescent lighting Fluorescent For shooting under warm white fluorescent cool white fluores...

Page 87: ...e balance under the light source of the actual scene you will shoot z Follow Step 2 on p 86 to choose z Make sure the entire screen is filled with a plain white colored subject then touch on the right X The tint on the screen will change when white balance data is set If you change camera settings after recording white balance data the tone may not turn out properly ...

Page 88: ...ons Low High For shooting outdoors in fine weather conditions For shooting in cloudy or twilight conditions For shooting nightscapes or in dark interiors Changing the ISO speed Lowering the ISO speed results in sharper images but there may be an increased chance of image blurring in certain shooting conditions Raising the ISO speed results in a faster shutter speed reducing image blurring and lett...

Page 89: ...g in contrast the camera will automatically correct the image for a sharper impression when shooting Choose i Contrast z Touch ø then n to choose the 4 tab Touch i Contrast then touch qr to choose Auto X Once set will appear on the screen Correcting the Brightness and Shooting i Contrast Under some conditions the image may appear coarse or may not be corrected properly You can correct recorded ima...

Page 90: ...e aspect ratio as 35mm film used for printing out 5 x 7 in or postcard sized images The same aspect ratio as standard televisions used for printing images on 3 5 x 5 in to various A sized papers A square shaped aspect ratio The digital zoom p 55 and digital tele converter p 56 are only available in the aspect ratio since Digital Zoom is fixed to Off How can I shoot with the display at full screen ...

Page 91: ...u hold the shutter button down the camera will shoot successive images Continuous Shooting Cannot be used with the self timer pp 58 59 Continuous shooting speed increases in mode p 65 For continuous shooting the focus and exposure are locked when the shutter button is pressed halfway Depending on the shooting conditions and the camera settings the camera may stop shooting momentarily or the shooti...

Page 92: ...age to sepia tones B W Changes the image to black and white Positive Film Combines the effects of Vivid Red Vivid Green and Vivid Blue to produce intense natural appearing colors like those obtained with positive film Lighter Skin Tone Makes skin tones lighter Darker Skin Tone Makes skin tones darker Vivid Blue Emphasizes blue tints Makes the sky ocean and other blue subjects more vivid Vivid Gree...

Page 93: ...et at 5 different levels z Follow Step 2 on p 92 to choose z Touch on the right side of the screen z Touch qr to choose an item then touch the point on the bar where you want to make a setting z The more to the right the stronger darker skin tone the effect gets the more to the left the weaker lighter skin tone the effect gets z Touch Ú to make the setting ...

Page 94: ...r and far you can change the focusing range to focus more reliably on far away subjects approx 3 m 9 8 ft or more from the camera only Choose u z Touch ø then drag up or down the menu on the left to choose z Touch u then touch u again to complete the setting X Once set u will appear on the screen Shooting Close ups Macro How can I take better close ups In macro shooting try attaching the camera to...

Page 95: ...een frames will appear on faces that the camera focuses on Changing the AF Frame Mode If a face is not detected and only gray frames no white frame appear up to 9 green frames will appear on the areas the camera focuses on when the shutter button is pressed halfway If a face is not detected when Servo AF p 100 is set to On the AF frame will appear in the center of the screen when you press the shu...

Page 96: ...n focus and press the shutter button halfway z Confirm that the AF frame on the subject is green Recompose z Keep the shutter button pressed halfway and move the camera to recompose the scene Shoot z Press the shutter button fully You can reduce the AF frame size Touch ø then n to choose the 4 tab then touch AF Frame Size and choose Small The AF frame is set to Normal when using the digital zoom p...

Page 97: ...ed as the main subject will appear magnified X In Fixed frame p 96 the contents of the AF frame will appear magnified Magnifying the Focal Point What if the display does not magnify The display will not appear magnified in Face AiAF if a face cannot be detected or is too big in relation to the screen In Fixed frame it will not appear magnified if the camera cannot focus The magnified display will ...

Page 98: ...To cancel touch Ú Shot z Press the shutter button halfway The frame where the camera focused will change into a green z Press the shutter button fully to shoot Choosing the Subject to Focus On Touch AF The camera may not be able to track the subject if the subject is too small moves too quickly or if the contrast between the subject and the background is too low When shooting in e or u p 94 with t...

Page 99: ...hutter button Lock the focus z Keep the shutter button pressed halfway and touch inside the frame shown on the left X The focus locks and appears on the screen z If you release your finger from the shutter button and touch the screen again AF lock will cancel and will disappear Compose the scene and shoot Shooting with the AF Lock ...

Page 100: ...way Shooting with Servo AF The camera may not be able to focus in some conditions In low light conditions AF frames may not turn blue even after pressing the shutter button halfway In this case you can set the focus and exposure with the AF frame setting If a correct exposure cannot be obtained the shutter speed and aperture value appear in orange Release your finger from the shutter button then p...

Page 101: ...e setting will appear on the screen Changing the Metering Method Evaluative For standard shooting conditions including back lit shots Automatically adjusts the exposure to match the shooting conditions Center Weighted Avg Averages the light metered from the entire frame but gives greater weight to the center Spot Only meters within the Spot AE Point frame that appears at the center of the screen W...

Page 102: ... will cancel and will disappear Compose the scene and shoot Just as with the AE lock p 102 you can lock the exposure for shooting with the flash FE stands for Flash Exposure Choose h p 85 Lock the flash exposure z Point the camera toward the subject and touch the lower part of the screen inside the frame shown on the left while pressing the shutter button halfway X The flash will fire and when app...

Page 103: ...annot reach Choose z Touch then touch z Touch again to make the setting X Once set will appear on the screen Shoot z Even if the flash fires ensure that the main subject does not move until the shutter sound ends Shooting with Slow Synchro Attach the camera to a tripod to prevent the camera from moving and blurring the image Additionally you should set the IS Mode to Off when shooting with a tripo...

Page 104: ... choose the 4 tab and touch Flash Settings Choose the setting z Touch Red Eye Corr then touch qr to choose On X Once set Πwill appear on the screen Red Eye Correction Red eye correction may be applied to areas other than red eyes For example when red make up has been used around eyes You can also correct recorded images p 150 ...

Page 105: ...ouch ø then n to choose the 4 tab Touch Blink Detection then touch qr to choose On Shoot X When a person with shut eyes is detected a frame and appear on the screen Checking for Shut Eyes This function is only available for the last image shot when you have set the camera to 2 or more shots in or mode Not available in W mode ...

Page 106: ...106 ...

Page 107: ...107 Getting More Out of Your Camera This chapter explains how to shoot in M and B modes 6 ...

Page 108: ... Depending on the zoom position some shutter speeds may not be available Setting the Shutter Speed 15 13 10 8 6 5 4 3 2 2 5 2 1 6 1 3 1 0 8 0 6 0 5 0 4 0 3 1 4 1 5 1 6 1 8 1 10 1 13 1 15 1 20 1 25 1 30 1 40 1 50 1 60 1 80 1 100 1 125 1 160 1 200 1 250 1 320 1 400 1 500 1 640 1 800 1 1000 When shutter speeds of 1 3 seconds or slower are used images are processed to eliminate noise after being taken...

Page 109: ... Touch the bar or drag it left or right to choose an aperture value then touch Ú Shoot Available Aperture Values Depending on the zoom position some aperture values may not be available What if the aperture value appears in orange If the aperture value appears in orange when the shutter button is pressed halfway the scene has exceeded the correct exposure limits Adjust the shutter speed until the ...

Page 110: ...exposure limits Adjust the aperture value until the shutter speed appears in white Safety shift can also be used see below Safety Shift In M and B if you touch ø or n side to display the 4 tab and set Safety Shift to On the shutter speed or aperture value is automatically adjusted for the correct exposure when it cannot otherwise be obtained Safety Shift is disabled when the flash is enabled ...

Page 111: ...ies and Viewing Movies sections in Chapter 1 and explains how to use various functions for shooting and viewing movies This chapter assumes that you have set the mode switch to 4 The latter half of the chapter explaining movie playback and editing assumes that you have pressed the 1 button to enter Playback mode 7 ...

Page 112: ... t Fireworks p 66 T Color Accent p 72 iFrame Movie Shoots movies that can be edited with iFrame 1 compatible software 2 or devices Recording pixels are fixed to p 116 Super Slow Motion Movie Shoot fast moving subjects and play them back in slow motion p 114 1 Video type advocated by Apple 2 You can quickly edit and save iFrame movies with version 6 7 2 or later of ZoomBrowser EX or ImageBrowser If...

Page 113: ...t be recorded Choose z Follow Steps 1 2 on p 64 to choose X A white frame the area that will not be blurred appears on the screen Choose the area to keep in focus z Touch the screen to change the area to keep in focus z Touch then touch or to change the size of the focused area and touch Ú Choose a playback speed z Touch then touch or to choose a playback speed and touch Ú Shoot z Touch z To stop ...

Page 114: ...per second then touch the menu item again Speed Playback Time Approx 12 sec Approx 6 sec Approx 3 sec The image quality will be fixed at when an aspect ratio of is chosen and when an aspect ratio of is chosen p 90 If you touch in Step 2 the frame will switch to vertical orientation and you can change the area to keep in focus by touching the screen Touch again to return the frame orientation to ho...

Page 115: ...layback Time 240 fps Approx 4 min 120 fps Approx 2 min Viewing super slow motion movies The movie will play back in slow motion when you follow Steps 1 3 on p 33 You can use the included software to change the playback speed of movies shot in mode Refer to the Software Guide for details The recording pixel setting will be fixed at when shooting in and when shooting in The focus exposure and white ...

Page 116: ...er memory cards are recommended Changing the Image Quality Image Quality RecordingPixels Frame Rate Content Memory Card Capacity 4 GB 16 GB 1920 x 1080 pixels 24 frames sec For shooting full high definition movies Approx 14 min 34 sec Approx 59 min 40 sec 1280 x 720 pixels 30 frames sec For shooting high definition movies Approx 20 min 43 sec 1 Approx 1 hr 24 min 54 sec 2 640 x 480 pixels 30 frame...

Page 117: ...rid Lines p 172 Changing the IS Mode Settings p 173 Changing Icon Order Icon Layout p 174 You can trim the beginnings and ends of recorded movies Choose z Touch the screen during movie playback to display the movie control panel z Touch or the scroll bar to change the displayed frame frames are the basic units that make up a movie X will change to at points where you can edit the movie Touch or X ...

Page 118: ... movie will be saved as a new file z To cancel editing touch Cancel z To reset the editing range touch Ú When Overwrite is chosen in Step 4 the unedited movie is overwritten with the edited movie erasing the original When there is not enough space left on the memory card only Overwrite can be chosen If the battery is depleted partway through saving the edited movie clips may not be saved When edit...

Page 119: ...button to enter Playback mode before operating the camera It may not be possible to play back or edit images that have been edited on a computer have had their file names changed or have been taken on a different camera The edit function pp 145 150 cannot be used if the memory card does not have enough free space available 8 ...

Page 120: ...om lever toward g to display images in an index Move the zoom lever toward k to reduce the number of images Switch the displayed images z If you drag up or down the screen images will switch with the movement of your finger Choose an image z Touch an image to chose it then touch it again to display it in single image playback z You can also drag across the screen to move the orange frame then move...

Page 121: ...layback by dragging across the screen Continuously dragging quickly across the screen will display the screen on the left Scroll Display In this display drag across the screen to choose images z Touching the center image restores single image playback z While in Scroll Display if you quickly drag up or down the screen you can search images by the shooting date To turn off this effect touch ø and t...

Page 122: ... made in mode p 67 by date for viewing Choose z After touching ø drag the menu appearing on the left side of the screen up or down to choose then touch the menu item again Choose a movie date z Touch a date to choose it Play the movie z Touch the date chosen in Step 2 X The movie will play ...

Page 123: ...ages z Touch the desired filter then touch it again except for X Filtered playback starts and a yellow frame appears z If you drag across the screen only the chosen target images will display z If you choose in Step 2 filtered playback will be canceled Search filters Viewing Images in Filtered Playback Favorites Displays the images tagged as favorites p 141 Shot Date Displays the images shot on a ...

Page 124: ...eshow Filtered playback In filtered playback Step 3 you can view filtered images with Quickly Searching Images p 120 Viewing Slideshows p 124 and Magnifying Images p 127 You can process all filtered images at once while performing operations in Protecting Images p 137 Erasing All Images p 139 or Choosing Images for Printing DPOF p 159 by choosing all of the filtered images However if you change th...

Page 125: ... transition effects when switching between images Choose Slideshow z Touch ø then n to choose the 1 tab and touch Slideshow Choose a setting z Touch an item then touch qr to make the setting z If you touch Start the slideshow starts with your settings z Touching the screen during playback will restore the menu screen You cannot change Play Time if Bubble is chosen in Effect ...

Page 126: ...image or move the zoom lever toward k once X The screen shown on the left will appear z Touch to move to a different frame when multiple frames appear Change the magnification level or location z Moving the zoom lever or touching the magnified image on the lower right of the screen or will change the displayed magnification rate z If you drag across the image on the lower right you can move the lo...

Page 127: ... screen you can move the location of the displayed area z Touch Ú to restore single image playback z You can also tap the side of the camera gently p 29 to switch between images at the same zoom factor Active Display Magnifying Images Approximate Location of Displayed Area If you move the zoom lever toward k the display will zoom in on the image and if you continue to hold the zoom lever it will c...

Page 128: ...es in the group will be displayed z Touch Ú to exit group playback Viewing Each Image in a Group Group playback In group playback Step 2 above you can use the FUNC menu functions that appear when you touch ø as well as search p 120 and magnify p 127 images You can process all the images in a group at once while performing operations in Protecting Images p 137 Erasing All Images p 139 or Choosing I...

Page 129: ...and then n to choose Group Images in the 1 tab Choose a setting z Touch qr to choose Off z Touch Ú to complete the setting and restore single image playback X Grouped images taken in mode are ungrouped and appear individually z To regroup the images follow the steps above and select On Grouping cannot be canceled while viewing images individually p 128 ...

Page 130: ... you want to view next X The chosen image will be displayed in the middle and the next four possibilities will appear z If you touch the image in the center of the screen it will display full screen Touch the screen to restore the original display z Touch Ú to return to single image view Displaying Various Images Smart Shuffle Only still images shot with this camera will play back in Smart Shuffle...

Page 131: ... quickly and easily call up functions that have been registered to each of four set dragging patterns Touch Actions Use a Function Registered to z Drag across the screen as shown X The function registered to will be called up z By dragging across the screen as shown you can also call up the functions registered to and z You can change the functions registered to Touch Actions Changing Image Transi...

Page 132: ...drag pattern z Touch qr to choose the function to register Functions that Can be Registered Favorites Tag or untag images as favorites Next Favorite Switch to the next image tagged as a favorite Previous Favorite Switch to the previous image tagged as a favorite Next Date Switch to first image with the next shooting date Previous Date Switch to first image with the previous shooting date Smart Shu...

Page 133: ...ls as shown in the illustration Turn on the TV and switch it to the input the cable is connected to The following functions are available when you perform operations with the camera Switching images Drag across the screen or tap the camera lightly with your finger pp 28 29 Movie playback p 33 Magnification p 127 Move the zoom lever toward k Group playback p 128 Touch Actions p 131 Smart Shuffle an...

Page 134: ... control the camera Turn off the camera and TV Connect the camera to the TV z Open the camera s terminal cover and fully insert the cable plug into the camera s terminal z Fully insert the cable plug into the TV s HDMI input Display images z Follow Steps 3 and 4 on p 133 to display the images What if the images don t display correctly on the TV Images will not display correctly if the camera s vid...

Page 135: ...uch ø and then n to choose Ctrl via HDMI in the 3 tab then touch qr to choose Enable Connect the camera to the TV z Follow Steps 1 2 on p 134 to connect the camera to the TV Display images z Turn on the TV and press the camera s 1 button X The image will appear on the TV nothing will appear on the screen of the camera Use the TV s remote control z Press the remote control s qr buttons to choose an...

Page 136: ... when a movie is chosen Slideshow Plays back images automatically During playback you can press the remote control s qr buttons to switch images Index playback Displays images in an index If you move the zoom lever and change the display you will not be able to control the camera with the TV s remote control unit you return to single image playback Some TVs may not be able to control the camera pr...

Page 137: ...touch ø again then drag up or down the screen to choose Using the Menu Choose Protect z Touch ø then n to choose the 1 tab and touch Protect Choose a selection method z Touch a selection method z Touch Ú to return to the menu screen Protecting Images If you format the memory card pp 23 165 protected images will also be erased Protected images cannot be erased with the camera s erase function To er...

Page 138: ...e screen again deselects the image and disappears z To choose multiple images repeat the above operation Protect the image z If you touch Ú a confirmation screen will appear z Touch OK X The images will be protected If you switch to Shooting mode or turn off the power before performing the operations in Step 3 images will not be protected To choose multiple images touch in the upper left of the sc...

Page 139: ...e erased images cannot be recovered exercise adequate caution before erasing Protected images p 137 cannot be erased Choose a Selection Method Choose Erase z Touch ø then n to choose the 1 tab and touch Erase Choose a selection method z Touch a selection method z Touch Ú to return to the menu screen You can unlock groups of protected images if you choose Unlock in Step 2 Erasing All Images ...

Page 140: ...ill appear on the screen z Touching the screen again deselects the image and disappears z To choose multiple images repeat the above operation Erase z If you touch Ú a confirmation screen will appear z Touch OK Choose All Images Choose All Images z Follow Step 2 on p 139 touch All Images Erase z Touch OK To choose multiple images touch in the upper left of the screen and touch the images you want ...

Page 141: ...ppear on the screen z To unlock an image touch ø again then drag up or down the menu to the left to choose Using the Menu Choose Favorites z Touch ø then n to choose the 1 tab and touch Favorites Choose an image z Drag across the screen to choose an image then touch the screen X Once set will appear on the screen z Touching the screen again deselects the image and disappears z To choose multiple i...

Page 142: ...fore completing the setting in Step 3 images will not be tagged as favorites If you use Windows 7 or Windows Vista and transfer tagged images to the computer they will be given a star rating of 3 except for movies You can also use Touch Actions to tag images as favorites p 131 To choose multiple images touch in the upper left of the screen and touch the images you want ...

Page 143: ...r right across the screen to choose an image z Touch the desired category X The chosen category will appear in orange z Touch the category again to cancel and it will turn white z To choose multiple images repeat the above operation Images are automatically categorized by shooting condition as they are shot Images with detected faces or images shot in I or V Images detected as or in A mode or imag...

Page 144: ...r and the image will rotate in the chosen direction in 90 increments z Touch Ú to accept the setting If you switch to Shooting mode or turn off the power before completing the setting in Step 3 images will not be tagged as My Category Rotating Images Movies shot at or cannot be rotated In the screen in Step 2 if you touch ø then n you can change the icon order by choosing the 1 tab and Rotate Imag...

Page 145: ...mage then touch OK Choose an image size z Touch or then touch OK X Save new image will appear on the screen Save the new image z Touch OK X The image will be saved as a new file Display the new image z If you touch Ú Display new image will appear z Touch Yes X The saved image will be displayed Resizing Images You cannot resize an image to a larger size Images saved as in Step 3 cannot be edited Mo...

Page 146: ...you move the zoom lever touch or the image on the lower right of the screen you can change the frame size z If you drag on the image at the upper left or the image on the lower right you can move the frame z If you touch you can change the frame orientation z In an image with detected faces gray frames appear around the faces located in the upper left image The frames can be used for trimming You ...

Page 147: ...g of p 61 or images resized to p 145 cannot be edited Images that can be trimmed will have the same width and height ratio after trimming The number of recorded pixels in a trimmed image will be smaller than before trimming Movies cannot be edited ...

Page 148: ...ion z Touch qr to display other available options z Touch OK X The Save new image screen will appear Save as a new image and display z Follow Steps 4 and 5 on p 145 Adding Effects with the My Colors Function If you repeatedly change the color of the same image the quality will gradually deteriorate and you may not achieve the expected color The color of images changed with this function may vary f...

Page 149: ... tab and touch i Contrast Choose an image z Drag across the screen to choose an image then touch OK Choose an option z Touch qr to choose an item and touch OK X The Save new image screen will appear Save as a new image and display z Follow Steps 4 and 5 on p 145 Correcting the Brightness i Contrast Under some conditions the image may appear coarse or not be corrected properly Repeatedly adjusting ...

Page 150: ...rame will appear around the corrected portion z You can magnify or reduce the size of the image using the procedures in Magnifying Images p 127 Save as a new image and display z Touch New File X The image will be saved as a new file z Follow Step 5 on p 145 Correcting the Red Eye Effect Some images may not be corrected properly When Overwrite in Step 3 is chosen the uncorrected image is overwritte...

Page 151: ...rand PictBridge compliant printer sold separately Canon Brand PictBridge Compliant Printers This chapter uses Canon brand SELPHY CP series printers in the explanations The displayed screens and available functions will differ depending on the printer Please also refer to the Printer User Guide 9 ...

Page 152: ...e cover and insert the cable s small plug firmly into the camera terminal in the direction shown z Insert the cable s large plug into the printer For connection details refer to the user guide provided with the printer Turn on the printer Turn on the camera z Press the 1 button to turn on the camera Choose an image z Drag across the screen to choose an image Choose 2 z Touch ø then drag up or down...

Page 153: ...at Steps 5 and 6 after printing has completed z After printing has completed turn off the camera and printer and unplug the interface cable Refer to p 40 for Canon brand PictBridge compliant printers sold separately Index printing is not available on certain Canon brand PictBridge compliant printers sold separately ...

Page 154: ...ate Prints the date File No Prints the file number Both Prints both the date and file number Off Default Follows the printer s settings Off On Uses shooting information to optimize print settings Red Eye1 Corrects red eye Red Eye2 Uses NR Face and Red Eye1 to correct the image Vivid Greens in trees and blues in the sky and ocean are enhanced to be more vivid NR Reduces image noise Vivid NR Uses bo...

Page 155: ...e image to be trimmed Choose the trimming area z If you move the zoom lever you can change the frame size z Drag the frame to change its position z Touch to rotate the frame z Touch OK to complete the setting Print images z Follow Step 7 on p 153 to print You may not be able to trim images depending on the aspect ratio or if they are too small Trimming photos with embedded dates may not show the d...

Page 156: ... 154 to choose Paper Settings Choose a paper size z Touch an option to choose it then touch Next Choose the paper type z Touch an option to choose it then touch Next Choose the layout z Drag up or down the screen to choose a layout z Touch qr to set the number of prints when N up is chosen z Touch OK Print images ...

Page 157: ...rea z Follow Step 2 on p 155 to choose the printing area Print images Default Follows the printer s settings Bordered Prints with a border Borderless Prints without a border N up Selects how many copies of an images are printed on a sheet ID Photo Prints ID photos Only images with the same resolution as the camera s L Large recording pixel setting and a 4 3 aspect ratio can be chosen Fixed Size Ch...

Page 158: ...Methods for Movies Single Prints currently displayed scene as a still image Sequence Prints a sequence of images from a specified scene on a single sheet of paper If Caption is set to On you can print the folder number file number and the elapsed time for the frame at the same time Touching Stop during printing will cancel printing ID Photo and Sequence cannot be chosen on Canon brand PictBridge c...

Page 159: ...nt List with the FUNC Menu You can add images to the print list DPOF directly after shooting or during playback in the FUNC menu Choose an image z Drag left or right across the screen to choose an image Choose 2 movies will be excluded z After touching ø drag the menu appearing on the left side of the screen up or down to choose 2 then touch the menu item again Add images to the print list z Touch...

Page 160: ...ts both standard and index formats Date On Prints the shooting date Off File No On Prints the file number Off Clear DPOF data On Removes all print settings after printing Off Some printers or photo developer services may not be able to reflect all of the settings in the prints may appear when using a memory card with print settings set by a different camera If you change the settings using this ca...

Page 161: ... number of print copies z For Index touch the screen Once chosen will appear If you touch inside the frame again will disappear Set the number of prints z Touch op to set the number of prints maximum 99 z Repeat Steps 2 and 3 to choose other images and the number of prints for each z You cannot set the number of copies for index prints You can only choose which images to print as shown in Step 2 z...

Page 162: ... Follow Step 1 on p 161 to touch Clear All Selections All selections will be cleared z Touch OK Printing chosen images DPOF When there are images added to the print list pp 159 162 the screen on the left will appear when you connect the camera to a PictBridge compliant printer Touch Print now to easily print images added to the print list If you stop the printer during printing and start again it ...

Page 163: ...can customize various settings to suit your shooting preferences The first part of this chapter explains convenient and commonly used functions The latter part explains how to change shooting and playback settings to suit your purposes 10 ...

Page 164: ...se an option then touch qr to choose a setting Turning Off Hints Tips You can turn off this function However hints and tips for menus p 47 will always display z Choose Hints Tips then touch qr to choose Off Changing Camera Settings 1 Preset sounds cannot be modified 2 Preset sounds You can use the included software to change the sounds p 2 Even if you change the shutter sound it will have no effec...

Page 165: ...rmat screen z Follow Steps 1 and 2 on p 23 Start the low level format z Touch the frame to the left of Low Level Format to display a z Touch OK X A confirmation screen will appear z Touch OK X Low level formatting starts X When low level formatting ends Memory card formatting complete will appear on the screen z Touch OK Low level formatting may take longer than standard formatting p 23 since all ...

Page 166: ...z Drag across the screen to choose an image then touch OK X The Register screen will appear z Touch OK No start up image 1 Preset images cannot be modified 2 Preset images You can set recorded images and use the included software to change the images Any previously registered start up image will be overwritten when registering a new start up image Register the start up image or sounds with the inc...

Page 167: ...ntinuous Even if you shoot using a new memory card the file numbers are assigned consecutively until an image with the number 9999 is taken saved Auto Reset If you replace the memory card with a new one or a new folder is created file numbering begins with 0001 again If you use a memory card already containing images the newly assigned file numbers may continue the existing numbering for both Cont...

Page 168: ...out 1 minute after pressing the 1 button when in a Shooting mode p 28 If you want the lens to retract immediately when you press the 1 button set the retract time to 0 sec z Choose Lens Retract then touch qr to choose 0 sec Turning Off the Power Saving Function You can set the power saving function p 52 to Off Setting it to On is recommended to save battery power z Touch Power Saving z Drag up or ...

Page 169: ...ith local dates and times simply by switching the time zone setting If you pre register the destination time zones you can enjoy the convenience of not having to switch the Date Time settings Set the home time zone z Touch Time Zone z When setting this for the first time check the information that displays on the screen on the left then touch Time Zone z Touch qr to choose the home time zone Touch...

Page 170: ...o calibrate the touch panel accurately z Touch Calibration z Use the toggle attached to the strap to touch that appears on the screen p 14 z Follow the on screen instructions and touch the screen four times in the following order in the upper left lower left lower right and upper right parts of the screen If you change the date or time in the setting p 20 your Home time and date will automatically...

Page 171: ...r to choose Off Turning Off the Red Eye Reduction Function The red eye reduction lamp lights in order to reduce the red eye effect that occurs when shooting in dark conditions with the flash You can turn off this function z Touch Flash Settings z Drag up or down the screen to choose Red Eye Lamp then touch qr to choose Off Before attempting to shoot using a function explained in this section in mo...

Page 172: ... Info then touch qr to choose an option Displaying Grid Lines You can display grid lines on the screen for vertical and horizontal guidance while shooting z Choose Grid Lines then touch qr to choose On 2 10 sec Displays images for the set time Hold The image displays until you press the shutter button halfway Off Images will not display Off Displays the image only Detailed Displays detailed inform...

Page 173: ...camera shake for example when walking Dynamic mode Shoot Only Image stabilization is only active at the moment of shooting Panning Image stabilization only counters up and down motion This option is recommended for shooting objects moving horizontally Off Setting changes to Continuous when shooting movies If camera shake is too strong attach the camera to a tripod You should also set the IS Mode t...

Page 174: ...l appear Add an icon z Drag the desired icon that appears in the center of the screen in Step 1 to the position you want z When you drag the icon near a position where it can be placed an orange frame appears Lift your finger off the screen to add the icon there The icon will exchange places with any existing icon in that position z Positions with grayed out icons are unavailable Complete the sett...

Page 175: ...enter and then to that will appear on the lower part of the screen z If you drag an icon that cannot be removed will not appear Preset Layouts You can choose from 3 preset icon layouts Only default icons will be displayed Added icons will not appear z Touch Preset Layouts in the layout screen in Step 1 on p 174 z Touch the desired icon arrangement then touch OK z If you touch Cancel the layout wil...

Page 176: ...n When you play back images on the camera images shot in vertical orientation automatically rotate and display vertically You can turn off this function z Select Auto Rotate then touch qr to select Off Changing Playback Function Settings Last seen Resumes with the image last viewed Last shot Resumes with the most recently shot image Images cannot be rotated p 144 if you have set Auto Rotate to Off...

Page 177: ...7 Useful Information This chapter introduces how to use the AC adapter kit and Eye Fi card both sold separately troubleshooting tips and contains lists of functions and items that appear on the screen 11 ...

Page 178: ...on p 18 to close the cover Plug the cord into the coupler z Open the cover and fully insert the plug into the coupler Connect the power cord z Connect the power cord to the compact power adapter then plug the other end into a power outlet z Turn the camera on to use it z After you finish turn off the camera and unplug the power cord from the power outlet Using Household Power Terminal Do not unplu...

Page 179: ... Eye Fi trans to Disable p 180 the Eye Fi card may transmit radio waves Be sure to remove the Eye Fi card from the camera before entering areas that prevent unauthorized transmission of radio waves such as hospitals and airplanes If you have trouble transferring images check the card or computer settings For details refer to the user guide supplied with the card Depending on the connection status ...

Page 180: ...nd touch Eye Fi Settings z Choose Eye Fi trans then touch qr to choose Disable The power saving function does not work while transferring images p 52 Choosing will interrupt the Eye Fi connection Choosing another Shooting mode or entering Playback mode will reopen the Eye Fi connection but movies made with may be transferred again What if Eye Fi Settings does not appear Eye Fi Settings will not ap...

Page 181: ...t retract Do not open the memory card battery cover while the power is on After closing the memory card battery cover turn the power on then back off p 18 TV Output Image is distorted or not showing on TV p 134 Shooting Cannot shoot When in Playback mode p 22 press the shutter button halfway p 24 Screen does not display properly in dark places p 45 Screen does not display properly while shooting P...

Page 182: ...t metering or AE Lock to shoot pp 101 102 Reduce the light illuminating the subject Image is dark even though the flash fired p 27 Shoot within an appropriate distance for flash photography p 85 Increase the ISO speed p 88 Image taken using the flash is too bright overexposed Shoot within an appropriate distance for flash photography p 85 Set the flash to p 54 White dots appear on the image when s...

Page 183: ...setting p 116 Use a memory card capable of recording at high speeds p 116 Subject appears distorted The subject may appear distorted if it passes quickly in front of the camera while shooting Playback Cannot play back images or movies If the file name or folder structure is changed on a computer you may not be able to play back images or movies Refer to the Software Guide for information regarding...

Page 184: ...e Fi card s write protect tab is set to LOCK Unlock the write protect tab p 17 Cannot record You attempted to shoot an image without a memory card Install the memory card in the correct direction to shoot p 18 Memory card error p 165 If the same message appears even when a formatted memory card is installed in the correct direction contact a Canon Customer Support Help Desk p 18 Insufficient space...

Page 185: ...e magnified played back in Smart Shuffle tagged as favorites rotated edited registered to the start up screen categorized or added to a print list Movies cannot be magnified p 127 played back in Smart Shuffle p 130 edited pp 145 150 added to a print list p 159 or registered to the start up screen p 166 Exceeded selection limit You chose more than 998 images in print settings Choose less than 998 i...

Page 186: ...r taking a picture the shot may not have been recorded Check the image in Playback mode If this error code reappears note the Error number Exx and contact a Canon Customer Support Help Desk as there may be a problem with the camera File Error Photos from other cameras or images that have been altered using computer software may not be printable Print error Check the paper size settings If this mes...

Page 187: ...pensation Amount p 85 Camera Shake Warning p 26 FUNC Function p 46 Battery Charge Indicator p 16 Compression Image Quality p 60 Recording Pixels pp 60 116 Eye Fi Connection Status p 179 Recordable Shots p 61 Image Quality Movies p 116 AF Frame p 95 Remaining Time p 116 Spot AE Point Frame p 101 Focusing Range p 94 AF Lock p 99 DigitalZoomMagnification p 55 Digital Tele converter p 56 Shooting Movi...

Page 188: ...e optimum settings for subject brightness and color Appears when the scene is dark and the camera is attached to a tripod Subject People Non Human Subjects Icon Background Color Background When Moving With Strong Facial Shadows When Moving When Close Bright Gray Backlit Including Blue Skies Light Blue Backlit Sunsets Orange Spotlights Dark Blue Dark When Using Tripod ...

Page 189: ...r p 16 Metering Method p 101 Folder Number File Number p 167 Displayed image number Total number of images No Information Display p 44 Shutter Speed Still Images p 108 Image Quality Frame Rate Movies p 116 Aperture Value p 109 Exposure Compensation Amount p 85 Flash p 85 Focusing Range p 94 i Contrast pp 89 149 File Size pp 61 116 DISP Display p 44 Compression Image Quality p 60 Group Playback p 1...

Page 190: ...l appear Playback Skip backward Continues to skip backward if you keep touching the screen Previous frame Slow rewind if you touch and hold the icon Next frame Slow advance if you touch and hold the icon Skip forward Continues to skip forward if you keep touching the screen Edit p 117 You can skip forward or backward if you lightly tap the camera p 29 while viewing a movie Active Display Touch the...

Page 191: ...Use a commercially available blower brush to remove dust from the lens For stubborn dirt contact a Canon Customer Support Help Desk as listed in your Warranty System Booklet When you move the camera rapidly from cold to hot temperatures condensation may form on the internal or external surfaces of the camera To avoid condensation put the camera in an airtight resealable plastic bag and let it adju...

Page 192: ...Touch AF p 98 6 6 6 Screen Display p 44 Information No Information 1 Not selectable but switches to depending on the circumstances 2 Not selectable but switches to when the flash fires 3 Cannot be set to 0 seconds when in modes where the number of shots cannot be set 4 Fixed to 1 shot when in modes where the number of shots cannot be set 5 FE Lock not available when set to 6 Only available when a ...

Page 193: ...Functions Available in Each Shooting Mode 193 4 T Y w O P t 2 Selectable or set automatically Not selectable ...

Page 194: ... 2 White Balance p 86 ISO Speed p 88 Focusing Range p 94 Drive Mode p 91 Aspect Ratio Still Images p 90 Recording Pixels p 60 Compression Ratio p 60 Image Quality Movies pp 114 116 1 White balance is not selectable 2 Contrast sharpness color saturation red green blue and skin tone can be set in 5 levels 3 Only and are available e u W ...

Page 195: ...Functions Available in Each Shooting Mode 195 4 T Y w O P t FUNC Menu 3 Selectable or set automatically Not selectable ...

Page 196: ...04 171 Red Eye Corr On Off Red Eye Lamp On Off i Contrast p 89 Auto Off Safety Shift p 110 On Off Review p 172 Off 2 10 sec Hold Review Info p 172 Off Detailed Focus Check Blink Detection p 105 On Off Grid Lines p 172 On Off Icon Layout p 174 IS Mode p 173 Off Continuous Shoot Only Panning Date Stamp p 57 Off Date Date Time 1 Operation differs depending on the shooting mode when faces are not dete...

Page 197: ...Menus 197 4 T Y w O P t Selectable or set automatically Not selectable ...

Page 198: ...ll data pp 23 165 File Numbering Continuous Auto Reset p 167 Create Folder Monthly Daily p 168 Lens Retract 1 min 0 sec p 168 Power Saving Auto Power Down On Off Display Off 10 20 or 30 sec 1 2 or 3 min pp 52 168 169 Time Zone Home World p 169 Date Time Date and time settings p 21 Video System NTSC PAL p 134 Ctrl via HDMI Enable Disable p 135 Calibration Calibrates the touch panel p 170 Eye Fi Set...

Page 199: ...l images p 146 Resize Resizes and saves still images p 145 My Colors Adjusts colors in still images p 148 Active Display On Off p 176 Scroll Display On Off p 121 Group Images On Off p 129 Auto Rotate On Off p 176 Resume Last seen Last shot p 176 Transition Fade Scroll Slide Off p 131 Set Touch Actions Register a playback function to a drag pattern p 132 Default setting Item Content Ref Page Print ...

Page 200: ...nlocks displayed image p 137 Favorites Tags untags displayed image as favorites p 141 Erase Erases displayed image p 139 Movie Digest Playback Plays back movies made in the Movie Digest mode p 122 Smart Shuffle Starts Smart Shuffle p 130 Filtered Playback Filters cancels filter for displayed image p 123 Slideshow Plays back images automatically p 124 My Category Categorizes images p 143 Playback M...

Page 201: ...trol System Autofocus Single Continuous in Auto mode Servo AF Servo AE Touch AF AF Frame Face AiAF Fixed frame Metering System Evaluative Center weighted average Spot Exposure Compensation Still Images Exposure Shift Movies 2 stops in 1 3 stop increments ISO Speed Standard Output Sensitivity Recommended Exposure Index Auto ISO 100 200 400 800 1600 3200 White Balance Auto Day Light Cloudy Tungsten ...

Page 202: ...rter Continuous Shooting Mode Normal Speed Normal Approx 3 4 shots sec In P mode Approx 8 2 shots sec In High speed Burst mode Number of Shots Approximate CIPA compliant Approx 180 Recording Media SD memory card SDHC memory card SDXC memory card MultiMediaCard MMCplus card HC MMCplus card File Format Design rule for Camera File system DPOF Version 1 1 compliant Data Type Still Images Exif 2 3 JPEG...

Page 203: ...ate is 119 88 fps 2 Actual frame rate is 29 97 fps 3 Actual frame rate is 239 76 fps 4 Shooting 6 fps 3 fps 1 5 fps Playback 30 fps 2 5 Actual frame rate is 23 976 fps Interface Hi Speed USB HDMI output Analog audio output stereo Analog video output NTSC PAL Direct Print Standard PictBridge Power Source Battery Pack NB 6L Compact Power Adapter CA DC10 when used with DC Coupler DR 40 Dimensions CIP...

Page 204: ...rox 0 74 oz Battery Charger CB 2LY CB 2LYE Rated Input 100 V 240 V AC 50 60 Hz 0 085 A 100 V 0 05 A 240 V Rated Output 4 2 V DC 0 7 A Charge Time Approx 1 hour 55 min when using NB 6L Operating Temperatures 0 40 C 32 104 F Dimensions 58 6 x 86 4 x 24 1 mm 2 31 x 3 40 x 0 95 in Weight Approx 70 g Approx 2 47 oz CB 2LY Approx 61 g Approx 2 15 oz CB 2LYE excluding power cord All data is based on test...

Page 205: ...rst 80 Creative Light Effect Shooting Mode 71 Custom White Balance 87 D Date and Time J Date Time Date Time Adding to Image 57 Changing 21 Setting 20 World Clock 169 Default Settings 51 DIGITAL CAMERA Solution Disk 2 Digital Tele Converter 56 Digital Zoom 55 Display Language 22 DPOF 159 Drag 14 Drive Mode 91 Dynamic Mode 173 E Editing i Contrast 149 My Colors 148 Red Eye Correction 150 Resizing Ma...

Page 206: ...able 2 36 152 ISO Speed 88 187 K Kids Pets Shooting Mode 65 L Lamp 42 171 LCD Monitor J Screen Low Light Shooting Mode 65 M Macro Focus Mode 94 Magnified Display 127 Memory Cards 17 Available Shots 19 61 Formatting 23 165 Shooting Time 32 Menu Basic Operations 47 List 196 Metering Method 101 Miniature Effect Shooting Mode 70 113 Monochrome Shooting Mode 74 Movie Digest Shooting Mode 67 Movies Edit...

Page 207: ...hooting Mode 76 Snow Shooting Mode 66 Software DIGITAL CAMERA Solution Disk 2 Installation 35 Software Guide 2 Transferring Images to a Computer for Viewing 34 Sound Settings 49 Stereo AV Cable 2 133 Strap 2 13 14 Super Slow Motion Shooting Mode 114 Super Vivid Shooting Mode 68 T Tag Images as Favorites 141 Terminal 36 133 134 152 178 Toggle 14 Touch 14 Touch Actions 131 132 Touch AF 28 98 Touch P...

Page 208: ...d Canon reserves the right to change the contents of this guide at any time without prior notice Illustrations and screenshots in this guide may differ slightly from the actual equipment The above items notwithstanding Canon accepts no liability for damages due to mistaken operation of the products The iFrame logo and the iFrame symbol are trademarks of Apple Inc ...

Reviews: