50
Replacement Parts
01
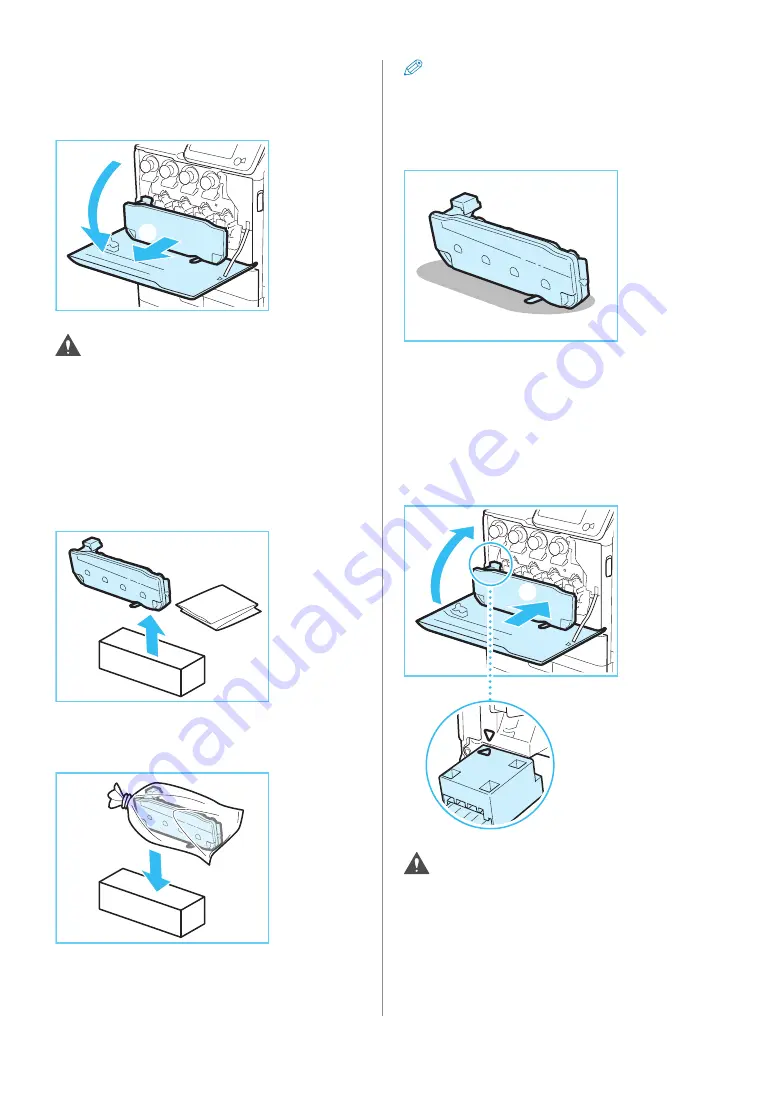
Remove the waste toner container.
1. Open the front cover of the main unit.
2. Pull out the waste toner container.
1
2
CAUTION
When removing the waste toner container, do not tilt
it. If you tilt the waste toner container, toner will spill
out.
02
Prepare a new waste toner container,
and store the removed waste toner
container.
1. Take the new waste toner container out of the box.
2. Insert the removed waste toner container into a bag,
close and tie the bag so that the toner does not spill
out, and then put the bag in a box.
NOTE
)
Use the bag in the box for the new waste toner
container.
)
Place the removed waste toner container on a level
surface. If the waste toner container is tilted too far,
toner may spill out.
03
Insert the new waste toner container
into the main unit.
1. Align the mark on the waste toner container and
the mark on the slot of the main unit, and insert the
waste toner container.
2. Close the front cover of the main unit.
2
1
CAUTION
When closing the front cover of the main unit, be
careful not to get your fingers caught, as this may
result in personal injury.
Summary of Contents for imageRUNNER ADVANCE C250iF
Page 40: ...38 Backing Up Exporting Data ...
Page 58: ...56 Consumables ...
Page 92: ...90 Important Safety Instructions TERMS OF imageWARE REMOTE SERVICE ...
Page 94: ...92 Important Safety Instructions ...
Page 95: ......


