W2200
Part 2 : Troubleshooting
2-21
3.4
Adjustments and Settings After Disassembly and Reassembly
3.4.1
Adjustments and setting list
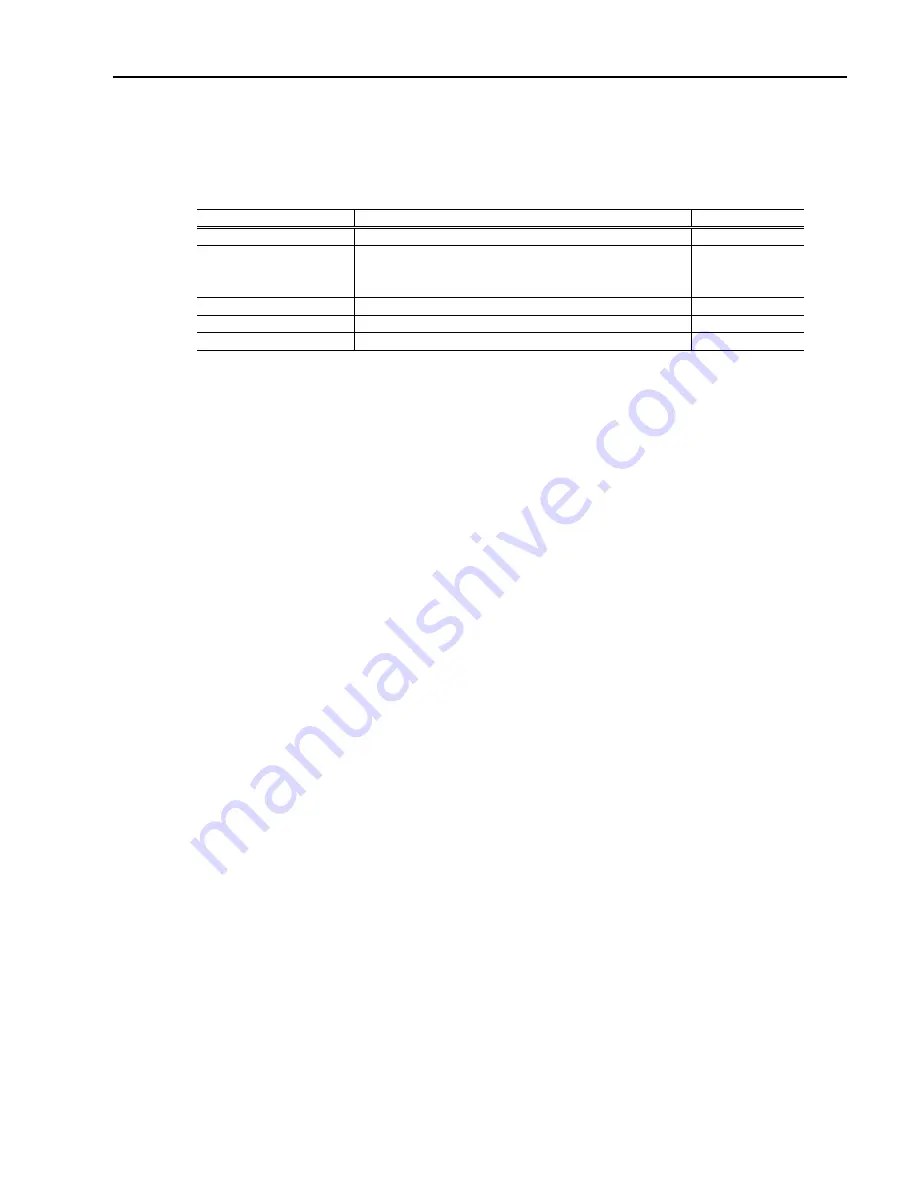
Positions for necessary adjustment or resetting have been described below after a service
personnel disassembles or reassembles the printer parts.
Replacement parts
Replacement parts
Replacement parts
Replacement parts Adjustment
/
settings
Adjustment / settings
Adjustment / settings
Adjustment / settings Mode
Mode
Mode
Mode
Print head
Print adjustment
User mode
Control board
EEPROM initialization
Waste ink absorber counter clear
Destination setting
Service mode
NIC board
IP address settings
User mode
Waste ink absorber
EEPROM waste ink counter clear (Control board) Service mode
Carriage unit
Print adjustment
User mode
3.4.2
Print Adjustment
i) Print head adjustment
i) Print head adjustment
i) Print head adjustment
i) Print head adjustment
1) When the printer is ON, make it offline and press the
set up
key.
2) When “Ext. Features” is displayed, press
㧪
㧪
㧪
㧪
key to select “Adjust Printer”, and then
display “Adjust Printhead”.
3) When “Adjust Printhead / Print Pattern
!
” is displayed, press
щ
щ
щ
щ
key.
4) Print adjustment pattern.
5) After printing is completed, press
㧪
㧪
㧪
㧪
key until “Adjust Printhead / Adj. Setting A
!
”
appears on the display.
6) When the above appears, if
щ
щ
щ
щ
key is pressed, the current adjustment value is displayed.
From the printed adjustment pattern, select the optimal value and press
щ
щ
щ
щ
key to
execute.
7) As for other settings B, C and D, return to 5) and press
㧪
㧪
㧪
㧪
key to select the setting and
щ
щ
щ
щ
key to execute. Press
㧪
㧪
㧪
㧪
key to select the optimal value and
щ
щ
щ
щ
key to execute.
8) Next, adjust the band process which is used during one pass printing.
9) Display “Band Adjust / Print Pattern” and press
щ
щ
щ
щ
key.
10) After band adjustment pattern printing is completed, display “Band Adjust / Adj. Setting G
!
” and press
щ
щ
щ
щ
key. The current adjustment value will be displayed.
11) From the printed adjustment pattern, set the optimal value by pressing
㧪
㧪
㧪
㧪
key, and press
щ
щ
щ
щ
key to execute.
ii) LF adjustment
ii) LF adjustment
ii) LF adjustment
ii) LF adjustment
1) When the printer is ON, make it offline and press the
set up
key.
2) When “Ext. Features” is displayed, press
㧪
㧪
㧪
㧪
key to select “Adjust Printer”, and then
display “LF Adjust”.
3) When “LF Adjust / Print Pattern
!
” is displayed, press
щ
щ
щ
щ
key.
4) Print adjustment pattern.
Summary of Contents for imagePROGRAF W2200
Page 1: ...2002 JUL CANON INC W2200 SERVICE MANUAL ...
Page 2: ......
Page 4: ......
Page 7: ...iii Page Part4㧦APPENDIX 1 PRINT HEAD 4 1 2 2 CONTROL BOARD CONNECTOR 4 3 ...
Page 8: ......
Page 9: ...Part 1 PRODUCT SPECIFICATIONS ...
Page 10: ......
Page 17: ...Part 2 TROUBLESHOOTING ...
Page 18: ......
Page 51: ...Part 3 TECHNICAL REFERENCE ...
Page 52: ......
Page 62: ......
Page 63: ...Part 4 APPENDIX ...
Page 64: ......
Page 76: ......


