Csak az Európai Unió és az EGT (Norvégia, Izland és Liechtenstein)
országaiban
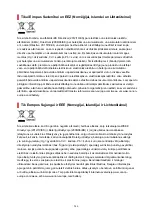
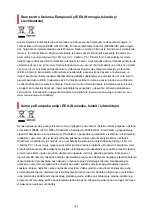
Ezek a szimbólumok azt jelzik, hogy a termék hulladékkezelése a háztartási hulladéktól különválasztva,
az elektromos és elektronikus berendezések hulladékairól (WEEE) szóló (2012/19/EU) irányelvnek és az
elemekről és akkumulátorokról, valamint a hulladék elemekről és akkumulátorokról szóló (2006/66/EK)
irányelvnek megfelelően és/vagy ezen irányelveknek megfelelő helyi előírások szerint történik.
Amennyiben a fent feltüntetett szimbólum alatt egy vegyjel is szerepel, az elemekről és akkumulátorokról
szóló irányelvben foglaltak értelmében ez azt jelzi, hogy az elem vagy az akkumulátor az irányelvben
meghatározott határértéknél nagyobb mennyiségben tartalmaz nehézfémet (Hg = higany, Cd = kadmium,
Pb = ólom). E terméket az arra kijelölt gyűjtőhelyre kell juttatni – pl. hasonló termék vásárlásakor
a régi becserélésére vonatkozó hivatalos program keretében, vagy az elektromos és elektronikus
berendezések (EEE) hulladékainak gyűjtésére, valamint a hulladék elemek és hulladék akkumulátorok
gyűjtésére kijelölt hivatalos gyűjtőhelyre. Az ilyen jellegű hulladékok nem előírásszerű kezelése az
elektromos és elektronikus berendezésekhez (EEE) általánosan kapcsolható potenciálisan veszélyes
anyagok révén hatással lehet a környezetre és az egészségre. E termék megfelelő leselejtezésével
Ön is hozzájárul a természeti források hatékony használatához. A termék újrahasznosítását illetően
informálódjon a helyi polgármesteri hivatalnál, a helyi közterület-fenntartó vállalatnál, a hivatalos
hulladéklerakó telephelyen vagy a háztartási hulladék begyűjtését végző szolgáltatónál, illetve látogasson
el a www.canon-europe.com/weee, vagy www.canon-europe.com/battery internetes oldalra.
Tylko dla krajów Unii Europejskiej oraz EOG (Norwegia, Islandia i
Liechtenstein)
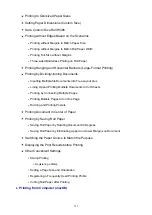
Te symbole oznaczają, że produktu nie należy wyrzucać razem z odpadami gospodarstwa domowego,
zgodnie z dyrektywą WEEE w sprawie zużytego sprzętu elektrycznego i elektronicznego (2012/19/UE)
lub dyrektywą w sprawie baterii (2006/66/WE) bądź przepisami krajowymi wdrażającymi te dyrektywy.
Jeśli pod powyższym symbolem znajduje się symbol chemiczny, zgodnie z dyrektywą w sprawie
baterii oznacza to, że bateria lub akumulator zawiera metal ciężki (Hg = rtęć, Cd = kadm, Pb
= ołów) w stężeniu przekraczającym odpowiedni poziom określony w dyrektywie w sprawie baterii.
Użytkownicy baterii i akumulatorów mają obowiązek korzystać z dostępnego programu zwrotu, recyklingu
i utylizacji baterii oraz akumulatorów. Niewłaściwe postępowanie z tego typu odpadami może mieć
wpływ na środowisko i zdrowie ludzi ze względu na substancje potencjalnie niebezpieczne, związane
ze zużytym sprzętem elektrycznym i elektronicznym. Państwa współpraca w zakresie właściwej utylizacji
tego produktu przyczyni się do efektywnego wykorzystania zasobów naturalnych. W celu uzyskania
informacji o sposobie recyklingu tego produktu prosimy o kontakt z właściwym urzędem miejskim
lub zakładem gospodarki komunalnej bądź zapraszamy na stronę www.canon-europe.com/weee, lub
www.canon-europe.com/battery.
544
Summary of Contents for imagePROGRAF TX-4100
Page 1: ...TX 4100 TX 3100 TX 2100 TX 5410 TX 5310 TX 5210 Online Manual English ...
Page 42: ...Printer Parts Front Back Top Cover Inside Carriage Ink Tank Cover Inside Operation Panel 42 ...
Page 45: ...Back TX 4100 TX 5410 TX 3100 TX 2100 TX 5310 TX 5210 45 ...
Page 72: ...4 Send the print job 4 Printing in Windows Printing from macOS Start printing 72 ...
Page 80: ...Note The screen may differ slightly depending on the model you are using 80 ...
Page 82: ...Pausing Printing Pausing Printing 82 ...
Page 117: ...3 Check the entered length and tap OK 3 117 ...
Page 145: ...After the roll paper is cut it is rewound automatically 145 ...
Page 149: ...5 Tap Cut dust reduction 5 6 Tap ON 6 149 ...
Page 162: ...6 Lower release lever 6 162 ...
Page 163: ...Basket Using the Basket Example Basket Configurations Storing the Basket 163 ...
Page 174: ...174 ...
Page 175: ...Stacker Using the Stacker Example Stacker Configurations 175 ...
Page 178: ...2 Pull out the stacker toward you to remove the stacker from the printer 2 178 ...
Page 182: ...182 ...
Page 189: ...8 Change Roll Holder Lock switch on roll unit to lock direction 8 189 ...
Page 200: ...11 Remove printed material that has been taken up from roll holder for each paper core 11 200 ...
Page 239: ...Preparing to Transfer the Printer 239 ...
Page 271: ...HP GL 2 Settings Menus on HP GL 2 print settings Menu Setting Combinations 271 ...
Page 273: ...Print color list for palettes Warning display Detect image size Frame control 273 ...
Page 283: ...F Range which cannot be printed G Paper for printing 283 ...
Page 285: ...285 ...
Page 288: ... Even if the image runs off the edge of the paper it is rotated to expand the print range 288 ...
Page 291: ...A Output object area B Fit to long side post processing size 291 ...
Page 293: ... ON is selected when printing on roll 293 ...
Page 295: ...A Position of cut when OFF B Position of cut when ON 295 ...
Page 299: ... When Enable is selected 299 ...
Page 309: ...15 12 0 110 168 0 115 No setting No setting Miter 309 ...
Page 314: ...314 ...
Page 323: ...Printed without upper lower blank area 323 ...
Page 329: ... Printed image after reduced A Position of cut for A3 size 329 ...
Page 369: ...3 Select OK 3 The resending setting is completed 369 ...
Page 405: ... XX represents alphanumeric characters 405 ...
Page 430: ...Adjusting Feed Amount Adjusting Feed Amount Adjusting Vacuum Strength 430 ...
Page 434: ...A test pattern is printed for adjustment and adjustment is finished 434 ...
Page 459: ...Note If the ink lamp is not lit reload the tank 7 Close ink tank cover 7 459 ...
Page 466: ...Cleaning the Print Head 466 ...
Page 483: ...483 ...
Page 486: ...Cutter Blade Cutter Blade Replacing the Cutter Blade 486 ...
Page 505: ...505 ...
Page 521: ...Specifications Specifications Print Area 521 ...
Page 611: ...Note When using applications that allow you to set margins set margins to 0 mm 611 ...
Page 614: ...Note When using applications that allow you to set margins set margins to 0 mm 614 ...
Page 640: ...Printing from Printer Printing Data Saved on USB Flash Drive 640 ...
Page 660: ...Printer Driver Windows Printer Driver macOS Printer Driver 660 ...
Page 677: ...Adjusting Brightness Adjusting Contrast 677 ...
Page 710: ...3 Select Save in Job Box in Output Method 3 710 ...
Page 711: ...711 ...
Page 723: ...5 In the list select the target job 5 6 Select Edit 6 7 Select Delete 7 8 Select Yes 8 723 ...
Page 782: ...4913 782 ...
Page 793: ...Check 9 Is the output guide clean Clean the output guide Cleaning the Printer Exterior 793 ...
Page 863: ... A000 to ZZZZ B20A B510 863 ...
Page 891: ...1201 Cause The ink tank cover is open What to Do Close the ink tank cover 891 ...
Page 892: ...1210 Cause The ink tank cover is open What to Do Close the ink tank cover 892 ...
Page 924: ...1500 Cause The ink in the ink tank is running low What to Do Prepare a new ink tank 924 ...


