


2.
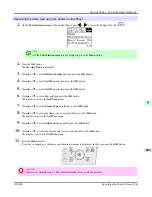
Enter a desired name in
Print Server Name
. To use an existing print server, click the button at right and
choose the name from the list.
3.
Enter a desired printer name in
Name
.
4.
To use the printer in queue server mode, choose
Other/Unknown
in
Type
. To use the printer in remote printer
mode, choose
Parallel
in
Type
, click
Communications
, and set
Ports
to
LPT1
and
Connection Type
to
Manual Load
.
5.
Enter a desired queue name in
Name
.
6.
In
Volume
, enter the volume object (that is, the object representing the physical volume on the network) where
the print queue will be created. Click the button at right to choose from a list.
7.
Complete other settings as needed and click
OK
.
Note
•
The print server name will be required when configuring the printer's protocol settings. Write down
the print server name for future reference.
•
When running Quick Setup, the printer is assigned printer number 0. When using the printer in queue
server mode, do not change the printer number from 0.
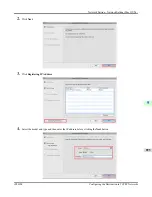
3.
Set a password.
1.
Right-click the print server created in step 2 and choose
Details
.
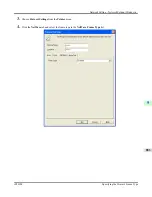
2.
Click
Change Password
to open the password input dialog box. Enter the password.
3.
Click
OK
to close the password input dialog box.
4.
Click
OK
or
Cancel
to close the details dialog box.
4.
To use the printer in remote printer mode, start the print server.
To use the NetWare file server as the print server, enter
LOAD PSERVER.NLM
at the file server and press the
Enter key.
Note
•
This procedure is not required when using queue server mode.
Use PCONSOLE to set up the print server if bindery queue server mode or remote printer mode is used.
1.
Log into NetWare as Admin and start PCONSOLE.
2.
Switch to bindery mode.
3.
If the print server has not been created, create it.
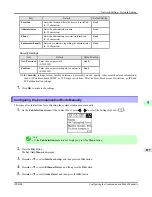
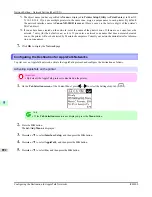
1.
In
Available Options
, select
Quick Setup
, and press the Enter key.
2.
Enter the name of the new print server, the new printer, and the queue.
Note
•
The print server name will be required when configuring the printer's protocol settings. Write down
the print server name for future reference.
Network Setting
>
Network Setting (Windows)
>
iPF6300
Specifying NetWare Print Services
9
887
Summary of Contents for imagePROGRAF iPF6300
Page 18: ......
Page 770: ...Handling Paper Handling sheets Loading Sheets in the Feed Slot iPF6300 6 752 ...
Page 779: ...Handling Paper Output Stacker iPF6300 Using the Output Stacker 6 761 ...
Page 1020: ...Appendix How to use this manual 1003 Disposal of the product 1013 Appendix iPF6300 13 1002 ...
Page 1031: ...Disposal of the product WEEE Directive 1014 Appendix Disposal of the product iPF6300 13 1013 ...
Page 1032: ...WEEE Directive Appendix Disposal of the product WEEE Directive iPF6300 13 1014 ...
Page 1033: ...Appendix Disposal of the product iPF6300 WEEE Directive 13 1015 ...
Page 1034: ...Appendix Disposal of the product WEEE Directive iPF6300 13 1016 ...
Page 1035: ...Appendix Disposal of the product iPF6300 WEEE Directive 13 1017 ...
Page 1036: ...Appendix Disposal of the product WEEE Directive iPF6300 13 1018 ...
Page 1037: ...Appendix Disposal of the product iPF6300 WEEE Directive 13 1019 ...
Page 1038: ...Appendix Disposal of the product WEEE Directive iPF6300 13 1020 ...
Page 1039: ...Appendix Disposal of the product iPF6300 WEEE Directive 13 1021 ...
Page 1040: ...Appendix Disposal of the product WEEE Directive iPF6300 13 1022 ...
Page 1042: ...V Vacuum Strength 780 W When to replace 911 ...
Page 1043: ......
Page 1044: ... CANON INC 2010 ...