


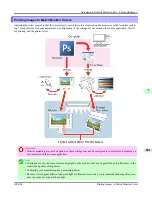


Monitor Matching
The sequence in monitor matching is as follows.
1.
Calibrate the printer.
Calibration improves color consistency by compensating for slight differences in how color appears due to individu-
al variation among printheads or conditions in various printing environments.
(See "
Using Color Calibration for Color Adjustment
.")
→P.781
2.
Calibrate the monitor.
Normally, you can use a colorimeter such as the
i1-Display
.
Set the
white point
to
6500 K
or
5000 K
, the
gamma
to
2.2
, and the
brightness
to
120 cd
, and activate light source
measurement.
The exact procedure varies depending on your monitor and measurement device.
3.
Open the file to print and configure settings in the source application.
Display the file in the sRGB or Adobe RGB color space.
Configure settings to prevent color conversion by the application.
In Photoshop CS3, for example, select
Color Management
in the
dialog box, and then select
No Color Man-
agement
in
Color Handling
.
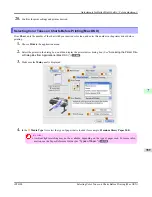
4.
Configure and adjust printer driver settings.
Select
Monitor Matching
in
Matching Method
. Specify the
Monitor White Point
set during monitor calibration
and the
Color Temperature
and
Illuminance
measured in the ambient light.
In
Color Space
, select the color space used when displaying the file in the source application.
If you own an
i1-Pro
, using Light Source Measure Tool enables more precision measurement of the ambient light.
Note
•
If you will print repeatedly using the settings values you set this one time, we recommend completing
the settings by accessing the printer driver dialog box from the operating system menu. (See "
Ac-
cessing the Printer Driver Dialog Box from the Operating System Menu (Windows)
→P.207
")
For instructions on configuring printer driver settings for monitor matching, refer to the following topic, as appropriate for
your computer and operating system.
•
Printing Images to Match Monitor Colors (Windows)
→P.802
•
Printing Images to Match Monitor Colors (Mac OS X)
→P.805
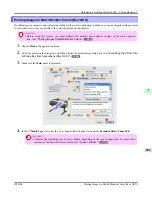
Printing Images to Match Monitor Colors (Windows)
By calibrating your monitor and configuring settings in the source application in advance, you can complete settings to print
in colors that are as close as possible to the colors displayed on the monitor.
Important
•
Before using this feature, you must calibrate the monitor and configure settings in the source application.
(See "
Printing Images to Match Monitor Colors
→P.801
")
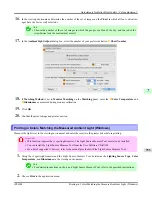
1.
Choose
in the application menu.
2.
Select the printer in the dialog box, and then display the printer driver dialog box. (See "
Accessing the Printer Driv-
er Dialog Box from Applications (Windows)
→P.205
")
Adjustments for Better Print Quality
>
Color adjustment
>
Printing Images to Match Monitor Colors (Windows)
iPF6300
7
802
Summary of Contents for imagePROGRAF iPF6300
Page 18: ......
Page 770: ...Handling Paper Handling sheets Loading Sheets in the Feed Slot iPF6300 6 752 ...
Page 779: ...Handling Paper Output Stacker iPF6300 Using the Output Stacker 6 761 ...
Page 1020: ...Appendix How to use this manual 1003 Disposal of the product 1013 Appendix iPF6300 13 1002 ...
Page 1031: ...Disposal of the product WEEE Directive 1014 Appendix Disposal of the product iPF6300 13 1013 ...
Page 1032: ...WEEE Directive Appendix Disposal of the product WEEE Directive iPF6300 13 1014 ...
Page 1033: ...Appendix Disposal of the product iPF6300 WEEE Directive 13 1015 ...
Page 1034: ...Appendix Disposal of the product WEEE Directive iPF6300 13 1016 ...
Page 1035: ...Appendix Disposal of the product iPF6300 WEEE Directive 13 1017 ...
Page 1036: ...Appendix Disposal of the product WEEE Directive iPF6300 13 1018 ...
Page 1037: ...Appendix Disposal of the product iPF6300 WEEE Directive 13 1019 ...
Page 1038: ...Appendix Disposal of the product WEEE Directive iPF6300 13 1020 ...
Page 1039: ...Appendix Disposal of the product iPF6300 WEEE Directive 13 1021 ...
Page 1040: ...Appendix Disposal of the product WEEE Directive iPF6300 13 1022 ...
Page 1042: ...V Vacuum Strength 780 W When to replace 911 ...
Page 1043: ......
Page 1044: ... CANON INC 2010 ...