


Adjusting the Printhead
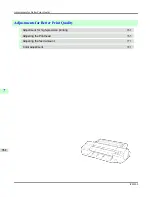
Adjusting the Printhead ...................................................................................................................................
765
Automatic Adjustment to Straighten Lines and Colors (Head Posi. Adj.) ....................................................
765
Manual Adjustment to Straighten Lines and Colors (Head Posi. Adj.) ........................................................
767
Troubleshooting Paper Abrasion and Blurry Images (Head Height) ...............................................................
769
Adjusting the Printhead
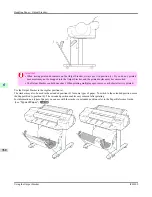
If printed documents are affected by the following problems, try adjusting the printhead.
•
Printing is faint or affected by banding in different colors
Execute
Nozzle Check
to check for printhead nozzle clogging.
For instructions,
see "
Checking for Nozzle Clogging
."
→P.909
•
Printed vertical lines are warped or colors are out of alignment
Execute
Head Posi. Adj.
to adjust the printhead position.
Normally, execute
Auto(Standard)
,
Auto(Advanced)
, or
Auto(Expansion)
. However, when using special paper or if
printing is not improved after executing
Auto(Advanced)
, try
Manual
.
(See "
Automatic Adjustment to Straighten Lines and Colors (Head Posi. Adj.)
.")
→P.765
(See "
Manual Adjustment to Straighten Lines and Colors (Head Posi. Adj.)
.")
→P.767
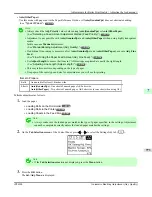
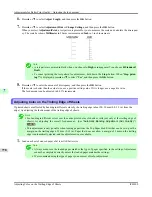
•
Paper rubs against the printhead, or image edges are blurred
Executing
Head Height
to adjust the printhead height may improve printing results.
(See "
Troubleshooting Paper Abrasion and Blurry Images (Head Height)
.")
→P.769
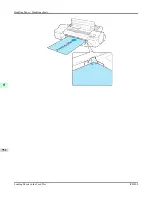
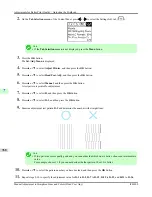
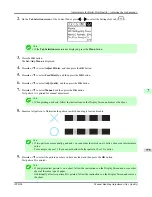
Automatic Adjustment to Straighten Lines and Colors (Head Posi. Adj.)
If vertical lines in printed documents are warped or colors are out of alignment, execute
Head Posi. Adj.
. The printer will
print and read a test pattern, and the Printhead position will be adjusted automatically.
There are three modes for automatic Printhead adjustment:
Auto(Standard)
,
Auto(Advanced)
and
Auto(Expansion)
.
• Auto(Standard)
Fixes slight distortion and color misalignment.
• Auto(Advanced)
Try adjustment in this mode if
Auto(Standard)
does not improve printing.
• Auto(Expansion)
Try adjustment in this mode if vertical lines are warped or colors are out of alignment when the printer driver option
High-Precision Photographs
or
High-Precision Text and Fine Lines
is selected.
Adjustments for Better Print Quality
>
Adjusting the Printhead
>
iPF6300
Adjusting the Printhead
7
765
Summary of Contents for imagePROGRAF iPF6300
Page 18: ......
Page 770: ...Handling Paper Handling sheets Loading Sheets in the Feed Slot iPF6300 6 752 ...
Page 779: ...Handling Paper Output Stacker iPF6300 Using the Output Stacker 6 761 ...
Page 1020: ...Appendix How to use this manual 1003 Disposal of the product 1013 Appendix iPF6300 13 1002 ...
Page 1031: ...Disposal of the product WEEE Directive 1014 Appendix Disposal of the product iPF6300 13 1013 ...
Page 1032: ...WEEE Directive Appendix Disposal of the product WEEE Directive iPF6300 13 1014 ...
Page 1033: ...Appendix Disposal of the product iPF6300 WEEE Directive 13 1015 ...
Page 1034: ...Appendix Disposal of the product WEEE Directive iPF6300 13 1016 ...
Page 1035: ...Appendix Disposal of the product iPF6300 WEEE Directive 13 1017 ...
Page 1036: ...Appendix Disposal of the product WEEE Directive iPF6300 13 1018 ...
Page 1037: ...Appendix Disposal of the product iPF6300 WEEE Directive 13 1019 ...
Page 1038: ...Appendix Disposal of the product WEEE Directive iPF6300 13 1020 ...
Page 1039: ...Appendix Disposal of the product iPF6300 WEEE Directive 13 1021 ...
Page 1040: ...Appendix Disposal of the product WEEE Directive iPF6300 13 1022 ...
Page 1042: ...V Vacuum Strength 780 W When to replace 911 ...
Page 1043: ......
Page 1044: ... CANON INC 2010 ...