Test Print
Engine Test Print
This machine has an engine test print function to check whether the printer engine is operating normally.
NOTE:
In the case of engine test print, a test print can be performed by using only the Engine Controller.
CAUTION:
When performing an engine test print, use A4/LTR size paper.
1. Place the paper on the Pickup Tray.
2. 1-sided print is executed when the Toner Cover is opened and closed for 4 times in 5 seconds. Open/close the Toner
Cover 4 times or more within 5 seconds to execute 2-sided print.
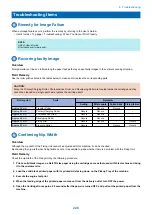
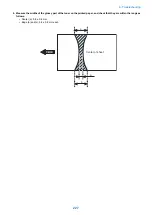
3. An engine test print is executed, and the test pattern as shown below is printed.
Table of Report
Name
Output Procedure
Description
Counter report
COPIER > FUNCTION > MISC-P > OUTPUT > CNTR To output number of printed and/or scanned
sheet and number of jam occurrence.
JAM/ERR HISTORY RE-
PORT
COPIER > FUNCTION > MISC-P > OUTPUT > ERR-
LOG
To output jam log and error (error code) log.
Spec report
COPIER > FUNCTION > MISC-P > OUTPUT > SPEC To output the current machine specifications in-
cluding country, model information, ROM ver-
sion.
Cartridge Log Report
COPIER > FUNCTION > MISC-P > OUTPUT > CRG-
LOG
To output logs such as types and replacement
history of the Toner Cartridge and the Drum Car-
tridge.
Cartridge Log Report
Logs such as history of cartridge replacement are output as a report.
6. Troubleshooting
223
Summary of Contents for imageCLASS MF264dw
Page 13: ...Product Overview 1 Product Lineup 6 Features 8 Specifications 9 Parts Name 14 ...
Page 67: ...Consumable Parts Consumable parts are not required in this machine 3 Periodical Service 59 ...
Page 68: ...Periodical Service No periodic services are required to this machine 3 Periodical Service 60 ...
Page 89: ...3 80 mm 80 mm 4 Parts Replacement and Cleaning 81 ...
Page 92: ... If the Fax is not installed 3x 2x 1x 2 60 mm 3 4 Parts Replacement and Cleaning 84 ...
Page 96: ...3 4 Parts Replacement and Cleaning 88 ...
Page 97: ...4 5 4 Parts Replacement and Cleaning 89 ...
Page 105: ...2 3 1x 4 Parts Replacement and Cleaning 97 ...
Page 110: ...5 6 4x 1x 1x 7 4 Parts Replacement and Cleaning 102 ...
Page 115: ...3 4 5 4 Parts Replacement and Cleaning 107 ...
Page 116: ...6 4 Parts Replacement and Cleaning 108 ...
Page 122: ...2 3 4 4 Parts Replacement and Cleaning 114 ...
Page 124: ...1 2 2x 3 4 4 Parts Replacement and Cleaning 116 ...
Page 127: ...2 3 4 2x 1x 5 4 Parts Replacement and Cleaning 119 ...
Page 129: ...3 4 2x 1x 5 6 4 Parts Replacement and Cleaning 121 ...
Page 132: ...5 2x 4 Parts Replacement and Cleaning 124 ...
Page 138: ...2 1x 3 1x 4 4 Parts Replacement and Cleaning 130 ...
Page 140: ... Procedure 1 2 4 Parts Replacement and Cleaning 132 ...
Page 144: ... Procedure 1 2 3 2x 4 Parts Replacement and Cleaning 136 ...
Page 146: ...3 4 4 Parts Replacement and Cleaning 138 ...
Page 147: ...5 4 Parts Replacement and Cleaning 139 ...
Page 153: ...1 2 3 4 4 Parts Replacement and Cleaning 145 ...
Page 155: ...1 2 2x 3 4 4 Parts Replacement and Cleaning 147 ...
Page 158: ...2 3 4 2x 1x 5 4 Parts Replacement and Cleaning 150 ...
Page 160: ...3 4 2x 1x 5 6 4 Parts Replacement and Cleaning 152 ...
Page 163: ...5 2x 4 Parts Replacement and Cleaning 155 ...
Page 166: ...2 2x 1x 1x 3 1x 1x 4 Parts Replacement and Cleaning 158 ...
Page 170: ...2 2x 3 4 2x 4 Parts Replacement and Cleaning 162 ...
Page 173: ...2 3 4 2x 1x 5 4 Parts Replacement and Cleaning 165 ...
Page 175: ...3 4 2x 1x 5 6 4 Parts Replacement and Cleaning 167 ...
Page 178: ...5 2x 4 Parts Replacement and Cleaning 170 ...
Page 183: ...2 4x 4 Parts Replacement and Cleaning 175 ...
Page 188: ... If the Fax is not installed 6 2x 1x 7 3x 8 2x 1x 4 Parts Replacement and Cleaning 180 ...
Page 191: ...4 1x 5 1x 6 3x 4 Parts Replacement and Cleaning 183 ...
Page 199: ... Procedure 1 3x 2x 4 Parts Replacement and Cleaning 191 ...
Page 201: ... If the Fax is not installed 2 4x 3 4 Parts Replacement and Cleaning 193 ...
Page 208: ...4 4 Parts Replacement and Cleaning 200 ...
Page 211: ...3 2x 4 1x 4 Parts Replacement and Cleaning 203 ...
Page 213: ...2 3 4x 4 4 Parts Replacement and Cleaning 205 ...
Page 217: ...3 1x 1x 4 5 2x 6 4 Parts Replacement and Cleaning 209 ...
Page 218: ...7 8 9 4 Parts Replacement and Cleaning 210 ...
Page 223: ...4 4 Parts Replacement and Cleaning 215 ...
Page 228: ...Adjustment 5 Adjustment at Parts Replacement 221 ...
Page 230: ...Troubleshooting 6 Test Print 223 Troubleshooting Items 226 Debug Log 228 Version Upgrade 231 ...
Page 242: ...Error Jam Alarm 7 Overview 235 Error Code 238 Jam Code 241 Alarm Code 243 ...
Page 251: ...Alarm Code This machine does not have any Alarm Code 7 Error Jam Alarm 243 ...
Page 287: ...APPENDICES Service Tools 280 General Circuit Diagram 281 Backup Data 283 ...


