background image

Chapter 3

Basic Operation

3-2

IMPORTANT

A document must meet the following criteria to be scannable:

• When scanning a multiple page document, pages of the same size, thickness, and weight 

must be grouped together. Scanning different sizes and types of paper together can cause 

the scanner to jam.

• Scanning documents before the ink is dry can cause problems with the scanner. Always 

make sure that the ink on a document is dry before scanning it.

• Scanning documents that are written in pencil or similar material have a tendency to make 

the rollers and scanning glass dirty, which can lead to smudges in the scanned image and 

transfer the dirt to subsequent documents. Always clean the internal parts of the scanner 

after scanning such documents. 

(See “Cleaning the Sensor Glass and the Rollers,” on p. 4-2.)

• When scanning a two-sided document that is printed on thin paper, the image on the 

opposite side of each page may show through. In this case, adjust the scanning intensity in 

the application software before scanning the document.

• Scanning the following types of documents can cause a paper jam or malfunction. To scan 

such a document, make a photocopy of the document and then scan the photocopy.

• When you scan a batch of NCR (No Carbon Required) documents, make sure that they are 

not stuck together.

• Note that glossy paper or business cards may not be scanned correctly, or functions such 

as paper size detection and deskew may not function properly when scanning these types 

of documets, due to reflected light.

• When scanning business cards, make sure to select the bypass mode and straight path.

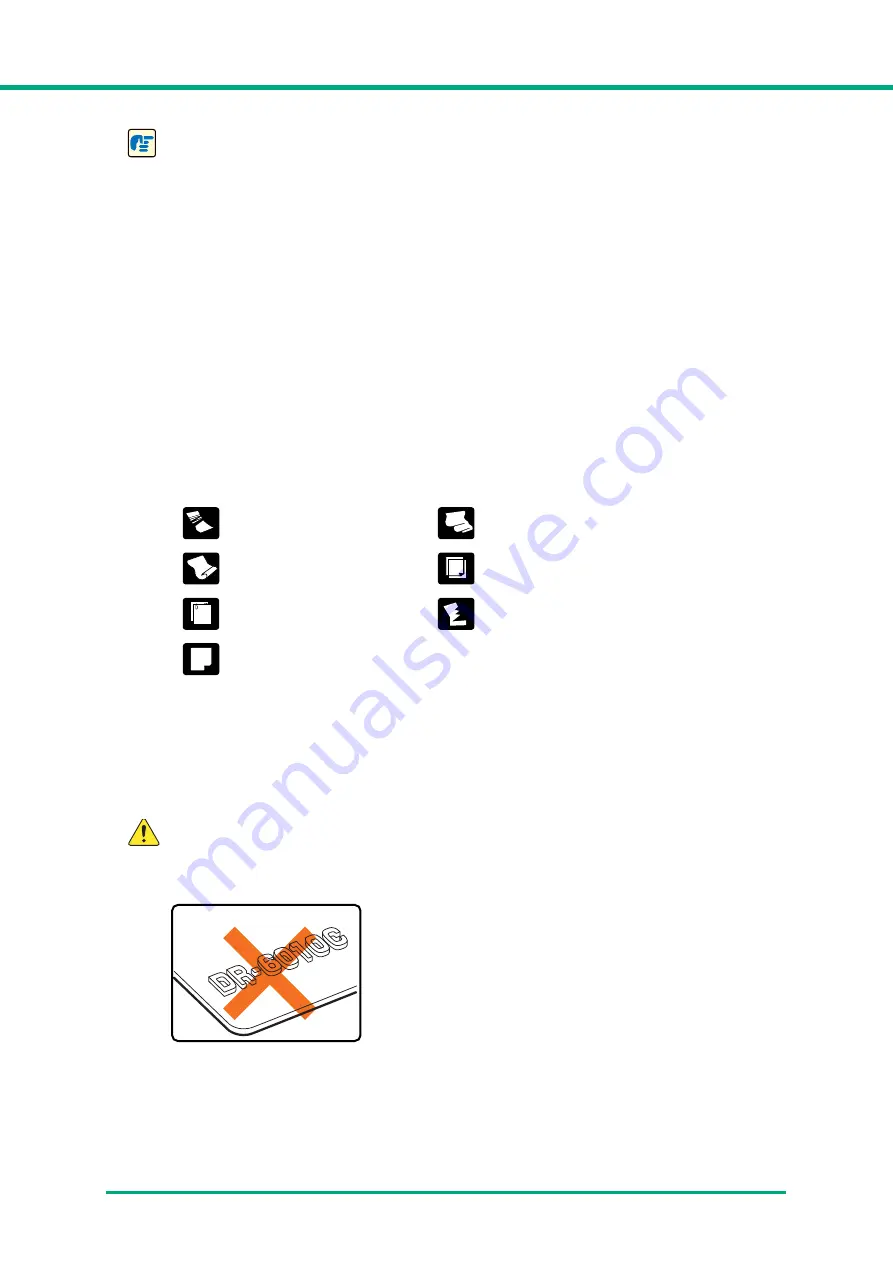
CAUTION

The results of scanning embossed cards are not guaranteed. Scanning embossed 

cards is not recommended, as they may scratch the sensor glass.

Wrinkled or creased 
documents

Extremely thin, translucent 
paper

Curled document

Carbon paper

Documents with paper clips or 
staples

Torn documents

Coated paper

Embossed Card

Summary of Contents for IMAGE FORMULA DR-6010C

Page 1: ...User Manual Please read this manual before operating this scanner After you finish reading this manual store it in a safe place for future reference...

Page 2: ...return and recycling of WEEE products please visit www canon europe com environment EEA Norway Iceland and Liechtenstein Model Names The following names may be provided for the safety regulations in...

Page 3: ...required to use the scanner Hardware Chapter 1 Before Using the Scanner Safety instructions features scanner parts Chapter 2 Setup Scanner operation environment and setup procedures Chapter 3 Basic Op...

Page 4: ...concerning operations that may lead to injury to persons or damage to property if not performed correctly To use the machine safely always pay attention to these cautions IMPORTANT Indicates operation...

Page 5: ...User Manual Hardware...

Page 6: ...3 3 Preparing the Document Feed Tray 3 3 Preparing the Document Eject Tray 3 3 3 3 Placing Documents 3 5 Feeding in the Page Separation Mode 3 5 Feeding in the Bypass Mode 3 7 3 4 Job Function 3 9 Wh...

Page 7: ...ing the Retard Roller 4 11 Chapter5 Troubleshooting 5 1 5 1 Troubleshooting 5 1 5 2 Uninstalling Software 5 6 Uninstalling the ISIS TWAIN Driver 5 7 Uninstalling the Job Registration Tool 5 8 Uninstal...

Page 8: ...pace behind the scanner for documents ejected after being scanned See Preparing the Document Eject Tray on p 3 3 Avoid installing the machine in direct sunlight If this is unavoidable use curtains to...

Page 9: ...is connected Also when using an extension cord make sure that the extension cord is rated for the current requirements of the scanner The power cord may become damaged if it is often stepped on or if...

Page 10: ...not function or other abnormalities occur when you use the machine immediately turn the power switch OFF and disconnect the power plug from the power outlet Then contact your local authorized Canon d...

Page 11: ...Turn OFF the power switch for safety when not using the scanner for a long period of time such as overnight Also turn OFF the power switch and disconnect the power cord from the power outlet for safet...

Page 12: ...t Tray and Eject Tray on p 3 3 Straight Path Documents are ejected to the back of the scanner Note that the ejected documents are stacked in the reverse order from which they were fed See 3 2 Document...

Page 13: ...the contrast and brightness of a prescanned image and then send the adjusted image to the application software without needing to scan the document again Remove Binder Holes This mode erases the blac...

Page 14: ...3 Document Eject Tray Extension Open if the document extends beyond the edge of the eject tray See p 3 3 Document Eject Tray Scanned documents are ejected here See p 3 3 Feed Selection Lever Use this...

Page 15: ...ire Do not connect both a USB cable and a SCSI cable at the same time Doing so may cause a malfunction Document Eject Tray 2 Open this tray to use the scanner in a straight path configuration See p 3...

Page 16: ...e Computer Turning the Power ON IMPORTANT Be sure to install the software before connecting the scanner to the computer If you connect the scanner to the computer before installing the software a wiza...

Page 17: ...the requirements for your computer system contact the store where you purchased the computer or the manufacturer of the computer for more information Do not connect both a USB interface and a SCSI ca...

Page 18: ...reatly reduced and transmission may take a long time Even if the computer satisfies the recommended specifications the scanning speed may vary depending on the scan settings The ISIS TWAIN Drivers pro...

Page 19: ...does not appear use Explorer to access the CD ROM drive and execute the file SETUP EXE Note The Setup disc of the DR 6010C is configured as follows Menu screen Typical Installation Read Manuals Custom...

Page 20: ...ars automatically when you insert the CD ROM into the CD ROM drive If the setup wizard does not start up execute setup exe in the CD ROM 3 Click Typical Installation The Typical Installation screen ap...

Page 21: ...Setup 2 6 4 Click Install Installation of the DR 6010C driver begins 5 Click Next The software license agreement appears 6 Read the license agreement and click Yes to accept it The DR 6010C driver is...

Page 22: ...Chapter 2 Setup 2 7 Next the job tool software is installed 7 The DR 6010C driver installation is complete 8 Click Finish Installation of CapturePerfect 3 0 starts...

Page 23: ...ext The software license agreement appears 10 Read the license agreement and click Yes to accept it The installation location screen appears 11 Click Next CapturePerfect is installed 12 The CapturePer...

Page 24: ...Setup 2 9 13 Click Finish Installation of the User Manual starts 14 Click Next The User Manual is installed 15 The User Manual installation is complete 16 Click Finish The installation completion scre...

Page 25: ...etup 2 10 17 Click Exit Click Back to return to the menu screen 18 After the software installation is complete you can connect the scanner to the computer See 2 4 Connecting the Scanner to the Compute...

Page 26: ...er Select the method that is suitable for your computer environment CAUTION Do not connect a USB cable and SCSI cable at the same time Using a USB Connection 1 Verify that the power switch of the scan...

Page 27: ...uitable for the scanner and for the SCSI connector on the computer The SCSI ID of the scanner is set to SCSI ID 2 by default When using a daisy chain configuration with other SCSI devices set the DIP...

Page 28: ...the power switch is in the ON position push the switch to set it to OFF 3 Plug the supplied power cord into the power connector on the rear of the unit a 4 Connect the power cord into an AC outlet b 5...

Page 29: ...wer OFF wait at least 10 seconds before turning it ON again If you will not be using the scanner for an extended period you should disconnect the power cord from the AC outlet for safety Scanner Recog...

Page 30: ...a and Windows XP a message appears when installation is complete In Windows 2000 no message appears when installation is complete The DR 6010C is installed in Device Manager under Imaging Devices as C...

Page 31: ...e 3 3 Placing Documents on p 3 5 4 When the paper is less than 20 lb bond 0 0039 75 g m2 0 1 mm in weight and documents are 3 54 90 mm or less in length or 2 36 60 mm or less in width scanning may not...

Page 32: ...in paper the image on the opposite side of each page may show through In this case adjust the scanning intensity in the application software before scanning the document Scanning the following types o...

Page 33: ...e document feed tray Doing so may damage the scanner reduce scanning quality or cause the tray to fall off resulting in personal injury or damage to the scanner Preparing the Document Eject Tray The s...

Page 34: ...NT Be sure there is enough space for documents that are ejected at the back of the scanner when using the straight path If there is not enough space for the ejected pages the documents may be damaged...

Page 35: ...nts on thin paper in the page separation mode the pages may become wrinkled or folded and cause a paper jam If this happens scan the document in the bypass mode CAUTION Before you place a document che...

Page 36: ...the edges of the paper 3 Adjust the document guides so that they are wider than the document to be scanned 4 Place the document face up into the feed tray so that the leading edge of the paper touches...

Page 37: ...canner is scanning resolve the problem make sure that the scanned image of the last page that was successfully fed has been stored and then resume scanning the remaining document pages Note that docum...

Page 38: ...ith the bypass mode and you place several documents that are not fastened together into the feed tray at one time they will be fed together CAUTION Very thin or curled documents may not feed properly...

Page 39: ...computer The scanned image data are automatically processed according to instructions that you specify using the Job Registration tool See Job Registration Tool on p 3 10 The follwing functions can be...

Page 40: ...Job Registration Tool Note The following jobs are preset however they can be changed to suit your needs a Start Starts scanning according to the application settings b Stop Stops scanning c Save as fi...

Page 41: ...ning starts 3 When scanning is complete the image data are sent according to the preset conditions The message Sending complete appears on the DR 6010C monitor 4 Click Close to close the DR 6010C moni...

Page 42: ...ll appear Select an application from this dialog box or click Cancel and change the event settings Only applications that support the Windows event function can be started using the Launcher feature o...

Page 43: ...Chapter 3 Basic Operation 3 13 2 Click Hardware and Sound Note Under Windows XP click Printers and Other Hardware 3 Click Scanners and Cameras Note Under Windows 2000 double click Scanners and Cameras...

Page 44: ...or CANON DR 6010C SCSI and click Properties The CANON DR 6010C USB Properties or CANON DR 6010C SCSI Properties window appears 5 Click the Events tab 2 Under Scanner events select the button whose set...

Page 45: ...one application deselect the check boxes for all other applications Then click Apply IMPORTANT If the Disable device events check box is selected the Job Function cannot be used Make sure that this ch...

Page 46: ...Batch to File Documents are scanned with the preset scanning conditions and the scanned image data is saved to a specified folder Scan Batch to Print Documents are scanned with the preset scanning co...

Page 47: ...plex at 300 dpi resolution and save the file in the folder Pictures under the folder Documents Binary Document Scan the document in black and white simplex at 200 dpi resolution and save the file in t...

Page 48: ...d here as an example For details see the CapturePerfect 3 0 Operation Guide and CapturePerfect Online Help 1 Click the Windows Start button click Programs All Programs for Windows XP CapturePerfect 3...

Page 49: ...ISIS TWAIN driver See 2 3 Installing the Software on p 2 4 3 Set the Default Page Size and click OK Note This dialog box is displayed only when you select Canon DR 6010C for the first time and click...

Page 50: ...scan documents see the CapturePerfect 3 0 Operation Guide and CapturePerfect Online Help 7 Specify the file name and the file type for saving the image data and click Save to start scanning For detail...

Page 51: ...g resumes when the scanner detects the document Alternatively press job button b Stop to stop scanning Feeding Option is set to Panel Feeding Place the next document and press job button a Start to re...

Page 52: ...nctions are not assigned to the job buttons In this case you should use the Start and Stop buttons on the Scan Panel d Batch separation button After selecting Panel as the batch separation setting on...

Page 53: ...supports separating files by patchcode patterns Patchcode sheets cannot be used when the MultiStream function See MultiStream Function on p 3 34 is being used About Patchcode Sheets Patchcode sheets a...

Page 54: ...ould be the same size and print density as the pattern on the original Extremely dark or light copies may not be scanned correctly 2 Insert the patchcode sheet in front of the document that you want t...

Page 55: ...Skip Continue Scanning If Scan Continue Scanning is selected the patchcode sheet image is also saved and scanning continues If Skip Continue Scanning is selected and the PATCH T FILE A pattern is dete...

Page 56: ...eft in the eject tray and close the eject tray guide IMPORTANT If a document stops in the eject tray remove the document before closing the document eject tray extension Attempting to force the docume...

Page 57: ...ve any remaining pieces from inside the scanner 4 Close the upper unit slowly Make sure that the upper unit is completely closed by pushing on both edges with both hands until you hear a click CAUTION...

Page 58: ...curs when Rapid recover system is enabled in the ISIS TWAIN driver settings the image data of the document is not saved and scanning stops This allows you to continue scanning from the document that c...

Page 59: ...ngle image To use this function select Folio as the Scanning Side setting For details see Chapter 7 ISIS TWAIN Driver Settings The scanned image of the front side of the document becomes the left half...

Page 60: ...to detect pages that are fed at the same time as well as the space between pages Scanning stops if a double feed is detected Note Ultrasonic double feed detection works only when the documents overlap...

Page 61: ...ms When scanning long documents make sure to feed them one page at a time with the bypass mode Long Document Mode Settings Follow the procedure below to set the Long Document mode 1 Use the following...

Page 62: ...ck Scanners and Cameras Note Under Windows 2000 double click Scanners and Cameras 4 Select CANON DR 6010C USB or CANON DR 6010C SCSI and click Properties The CANON DR 6010C USB Properties or CANON DR...

Page 63: ...4 Click OK to close CANON DR 6010C USB Properties 5 Turn the scanner OFF and then ON again IMPORTANT If you are using a SCSI connection turn OFF the computer and then turn the scanner OFF and then ON...

Page 64: ...e possible You can set the Primary or Secondary image and Front or Back for the Image Type mode Resolution or Drop Out Color You can change the File Type for the Primary image and the Secondary image...

Page 65: ...organic solvents to clean the scanner Such solvents can damage or discolor the exterior of the scanner or create a risk of fire or electrical shock Cleaning the Scanner To clean the exterior of the sc...

Page 66: ...m periodically 1 Carefully open the upper unit until it stops IMPORTANT When opening the upper unit do not grasp the roller unit in the center Doing so may distort the rollers and lead to feeding erro...

Page 67: ...ipe the rollers of the upper unit while turning them Do not try to turn the rollers in the lower part of the scanner Clean these rollers simply by wiping the exposed part IMPORTANT Do not use detergen...

Page 68: ...the Roller Unit on p 4 10 and Attaching the Retard Roller on p 4 12 8 Make sure that the upper unit is completely closed by pushing on both edges with both hands until you hear a click CAUTION When cl...

Page 69: ...rce when removing or attaching the rollers Doing so many damage them Roller Replacement Cycle When the rollers being used have fed more than 250 000 pages a roller replacement message appears on the c...

Page 70: ...eset the counter 1 Open the Event settings dialog box 1 Click Start Control Panel to open the Control Panel Note Under Windows 2000 click the Start button and select Settings Control Panel to open the...

Page 71: ...Scanners and Cameras Note Under Windows 2000 double click Scanners and Cameras 4 Select CANON DR 6010C USB or CANON DR 6010C SCSI and click Properties The CANON DR 6010C USB Properties or CANON DR 601...

Page 72: ...Chapter 4 Maintenance 4 8 2 Click the Maintenance tab 3 Click the Reset button and then make sure that the counter for the roller being used is set to 0...

Page 73: ...much force may lead to damage or personal injury Removing the Roller Unit 1 Carefully open the upper unit until it stops IMPORTANT When opening the upper unit do not grasp the roller unit in the cent...

Page 74: ...Unit 1 Align the cutout on the roller unit with the shaft pin on the main unit Note If the cutout and pin do not fit rotate the roller until the parts are properly matched 2 Slide the roller lock leve...

Page 75: ...PORTANT Do not force the upper unit to close Doing so may damage the scanner Removing and Attaching the Retard Roller To remove or attach the retard roller proceed as follows CAUTION Do not use excess...

Page 76: ...of the roller cover and remove the cover 3 Move the roller lock lever down and forward a and then slide it to the right b 4 Shift the retard roller to the right to remove it Attaching the Retard Rolle...

Page 77: ...the left and insert it into the retard roller slot 3 Push the roller lock lever towards the back of the scanner to lock the retard roller into place 4 Replace the roller cover 5 Push the center of th...

Page 78: ...nit is completely closed by pushing on both edges with both hands until you hear a click CAUTION When closing the upper unit be careful not to get your fingers caught as this may result in personal in...

Page 79: ...tly Is the power cord inserted into the power outlet For details on connecting the power cord see 2 4 Connecting the Scanner to the Computer on p 2 11 The Scanner Is Not Recognized Connecting via USB...

Page 80: ...or the scanner See p 2 12 Problem The terminator is not set correctly Solution Shut down both the PC and the scanner and then turn the scanner ON first and then the PC See p 2 12 Problem There is a pr...

Page 81: ...mporary files cannot be created in the TEMP folder as there is not enough free space on the hard disk Solution Delete unwanted files on the hard disk to increase free space on the hard disk Problem Th...

Page 82: ...not be opened by other applications Problem The application you are using to open the TIFF file does not support multi page TIFF files Solution Open the file with an application that supports multi pa...

Page 83: ...or dirt appear on the scanned image Problem The scanning glass or rollers inside the scanner are dirty Solution Clean the scanning glass and rollers See p 4 1 If lines still appear on the image even a...

Page 84: ...the DR 6010C setup disc See 2 3 Installing the Software on p 2 4 IMPORTANT Be sure to log on as an administrator when using Windows 2000 Professional or Windows XP 1 Click the Start button Control Pan...

Page 85: ...delete click Uninstall For more information on uninstalling each application see the following Uninstalling the ISIS TWAIN Driver on p 5 7 Uninstalling the Job Registration Tool on p 5 8 Uninstalling...

Page 86: ...nstall procedure is carried out 3 After uninstall is complete click the Finish button to exit the uninstaller Uninstalling the Job Registration Tool 1 From the Programs list in the dialog box select D...

Page 87: ...deletion screen appears Click the Yes button Note Under Windows XP the Add Remove Programs dialog box appears 3 Click the Yes button The uninstall procedure is carried out 4 After uninstall is complet...

Page 88: ...ooting 5 10 Uninstalling CapturePerfect 3 0 1 Select CapturePerfect 3 0 from the list in the dialog box click the Uninstall button 2 The file delete confirmation screen appears Click the Yes button Un...

Page 89: ...Chapter 5 Troubleshooting 5 11 3 After uninstallation is complete click the Finish button to exit the uninstaller...

Page 90: ...ly during continuous feed Business cards are supported 2 Size Thickness 2 12 3 37 53 9 mm 85 5 mm 0 03 0 76 mm 2 Only when using straight path bypass feed mode Scanning embossed cards is not guarantee...

Page 91: ...lity priority 600 600 dpi Speed priority 600 600 dpi Image quality priority 60 pages min 60 pages min 56 pages min 20 pages min 44 pages min 20 pages min 120 images min 120 images min 56 images min 24...

Page 92: ...4 544 mm Document Feed Tray Extension is open 12 5 318 mm 8 9 225 mm 19 3 491 mm Document Feed Tray is open 5 2 131 mm 10 9 278 mm 7 3 185 5 mm 12 9 330 mm Document Eject Guide is open 2 0 51 mm Docum...

Page 93: ...uttons 3 9 Job Function 3 9 Scanning With 3 11 Job Registration Tool 3 10 L Launcher 3 12 Load limit mark 3 6 Long Document Mode 3 30 Settings 3 31 Long document mode 3 1 M Moving the Scanner 1 2 Mult...

Page 94: ...User Manual Software...

Page 95: ...b Registration Tool Settings 8 1 8 1 Starting the Job Registration Tool 8 1 8 2 Job Registration Tool Settings Dialog Box 8 2 Job Registration Tool Dialog Box 8 3 New Editing Dialog Box 8 4 Administra...

Page 96: ...s To use the DR 6010C with an ISIS TWAIN compliant application the DR 6010C must first be selected as the scanner to be used This section describes how to select the scanner using CapturePerfect 3 0 a...

Page 97: ...stall the ISIS TWAIN driver 4 Click the Settings button to set a default page size Note Clicking the Default button in the ISIS driver Properties dialog box causes that setting to be applied here With...

Page 98: ...n Applies settings and closes the dialog box Scan Button TWAIN driver only To control scanning from the properties dialog box when using a TWAIN compatible application program the Scan button is displ...

Page 99: ...irectly and not from another settings dialog box The driver is called directly when using applications that do not have their own scanner setting or scanning dialog boxes such as CapturePerfect and Jo...

Page 100: ...ations on p 7 7 The Text Enhancement modes are good for scanning documents with a background color or design behind text by removing or processing the surrounding background to enhance the text for ea...

Page 101: ...ses where this may be a problem try scanning again after cleaning the scanner glass or select one of the Advanced Text Enhancement or Advanced Text Enhancement II modes instead 256 level Gray Scans do...

Page 102: ...f this occurs select a standard size such as A4 or Letter or click the Area button to create a custom page size See Scan Area Dialog Box on p 7 11 When scanning a page with a dark area at the left or...

Page 103: ...e image is not saved Selecting Skip Blank Page enables the Setting button which opens the Blank Skip Setting dialog box Adjust the Content density setting in the Blank Skip Setting dialog box if blank...

Page 104: ...is selected you can enable Moire reduction if Moire patterns appear in scanned images None No Moire processing is performed High Speed Moire Reduction This mode gives priority to scanning speed and ge...

Page 105: ...setting on the Basic tab sheet becomes Simplex and one page is scanned When High Quality Moire Reduction is selected while Page Size is set to Auto detection Mode is set to 24 bit Color and Scanning S...

Page 106: ...when Advanced Text Enhancement or Advanced Text Enhancement II is selected with Black and White mode For other modes brightness is set on the Brightness tab sheet Contrast This control adjusts contra...

Page 107: ...OK button in the Properties dialog box Page Size This setting is linked to the Page Size setting for selecting the size of document pages to scan Clicking the Custom button opens the Custom Page Size...

Page 108: ...ed images If the edges of documents are missing from scanned images move the slider to the right to expand the scanning area To eliminate the black frame around scanned images reduce the scanning area...

Page 109: ...ng When the Auto check box is selected the slider selects a brightness level to be used for automatic adjustment Contrast Adjusts the contrast of images to be scanned Use Back Side Brightness Check Bo...

Page 110: ...ly Select Select the side and color for custom setting The color bar and color of the sample image are changed to show the specified color Input method Select the setting method for gamma correction F...

Page 111: ...the Gamma Curve Graph to set that point as an output value Drag the mouse on the Gamma Curve Graph to set the output value according to the mouse movement Import Button Clicking this button loads gamm...

Page 112: ...toward Soft to soften image contours or toward Sharp to sharpen image contours Document Orientation This setting selects an angle 0 90 180 or 270 degrees to rotate scanned images for orientation norma...

Page 113: ...Select this to remove the black spots from scanned images when scanning documents with punch holes If punch holes are located within text or graphics in the document they may be misidentified as graph...

Page 114: ...our operating environment affects the colors you specify on screen they may not match those actually dropped out or enhanced that is the colors you specify may not match those processed Others Tab She...

Page 115: ...data is output from the scanner as an uncompressed or JPEG transfer depending on instructions from the ISIS TWAIN driver or application program Uncompressed transfers output raw scanned image data so...

Page 116: ...be unreliable Feeding Option Here you can select the feeding method for document scanning Standard Feeding This feeding method is good for scanning small batches of documents that are loaded one batch...

Page 117: ...en Patchcode is selected the Folio Scanning Side setting on the Basic tab sheet is not available Patchcode Orientation ISIS driver only When Patchcode batch separation is enabled you can select patchc...

Page 118: ...to open the Barcode dialog box and make settings affecting barcode detection in documents For details see the ISIS TWAIN driver Help or contact your supplier Addon Button This button opens the Addon...

Page 119: ...xt or bitmap images to scanned document images The Addon dialog box enables you to make setting for adding text or bitmap images to scanned document images Addon Dialog Box Bitmap Settings for the Add...

Page 120: ...nter with number of characters abbreviation Cx A dialog box appears in which to specify the number of characters of the single counter The specified number of characters of the single counter will be...

Page 121: ...ters However the actual number of characters may be limited by font size If the number of characters to apply exceeds the maximum allowed the Preview panel displays an error When inserting special tex...

Page 122: ...g a bitmap image a message is displayed until scanning begins File name Specify the file name of the image to be applied The bitmap image with the specified file name is rotated 90 degrees when applie...

Page 123: ...er the width of the bitmap image to be applied The bitmap image will be rotated 90 clockwise and compressed to the specified width before it is applied An error message may appear depending on the siz...

Page 124: ...Batch Separation settings on the Others tab sheet See Batch Separation ISIS driver only on p 7 21 Every Page Increments once per page None No counter increment occurs Reset Value Select the initial v...

Page 125: ...the Job Registration Tool The Job Registration Tool is a TWAIN compliant application program that installs with the ISIS TWAIN driver and is started by the following procedure 1 Click the Windows Sta...

Page 126: ...provides access to the New Editing dialog box and the Admin dialog box and the New Edit dialog box provides access to function setting dialog boxes See New Editing Dialog Box on p 8 4 Job Registratio...

Page 127: ...ed settings Clicking on the job buttons a b and c opens the New Editing dialog box See New Editing Dialog Box on p 8 4 Version Button Displays the version of the Job Registration Tool Admin Button Ope...

Page 128: ...ool dialog box The New Editing dialog box appears as follows depending on the function settings registered to the Job buttons Settings Common to Each Function Job Number No 1 to No 3 Shows the selecte...

Page 129: ...etting When the Save as file Print or Attach to E mail function is selected Scanner settings are enabled and you can press the Setting button to make scanner settings Refer to Chapter 7 ISIS TWAIN Dri...

Page 130: ...ng dialog box when the TIFF or PDF file format is selected TIFF Settings Dialog Box Multi tiff setting Select the method for saving image files when scanning multi page documents Select One page to sa...

Page 131: ...d Chinese or Traditional Chinese settings requires a Chinese language environment to display properly Apply OCR Check Box Select this check box to enable recognition of the text within images and to s...

Page 132: ...the scanned documents were larger than the printer paper to resize the images to the printer paper size Buttons OK button Click this button to accept changes and return to the Job Registration Tool d...

Page 133: ...Specify a folder to monitor for available space Warning Size Enter the maximum total size for all files saved to the specified folder When saving to removable storage media such as CD R specify the ma...

Page 134: ...file reg of registered job data to the specified folder Restore Button Restores the job data from a stored backup file reg If the currently registered job number is the same as that of an existing ba...

Page 135: ...k page is selected Increase the Content density in the Blank Skip Setting dialog box If the Content density is set too low for documents with a light background they may not be detected as blank pages...

Page 136: ...To scan only part of the document page You can specify any area on the page in the Scan Area dialog box However scan area settings are ignored when Auto detection is selected as the Page Size See Scan...

Page 137: ...detects documents and starts scanning as they are loaded so continuous scanning is available just by loading the document batches repeatedly The Setting button allows setting a delay time from when a...

Page 138: ...ement as the Mode on the Basic tab sheet The background behind the text is removed or processed so that the text is emphasized for better legibility See Mode on p 7 5 To scan documents with different...

Page 139: ...ages TWAIN driver only Select Reverse Image on the Image processing tab sheet Black and white are reversed in scanned images See Reverse Image Check Box TWAIN driver only on p 7 17 To ignore a particu...

Page 140: ...ove the background from scanned images Select Prevent Bleed Through Remove Background on the Image processing tab sheet Bleed through on thin paper and backgrounds are removed from scanned images See...

Page 141: ...can panel can be magnified for confirmation with the mouse over the preview image left click to magnify and right click to reduce Brightness and contrast adjustments are reflected in the prescan panel...

Page 142: ...ADA CANON EUROPA N V BOVENKERKERWEG 59 61 P O BOX 2262 1180 EG AMSTELVEEN THE NETHERLANDS CANON LATIN AMERICA INC 703 WATERFORD WAY SUITE 400 MIAMI FLORIDA 33126 U S A CANON AUSTRALIA PTY LTD 1 THOMAS...

Reviews: