37
B
a
sic Functions
Re
co
rd
in
g
E
Tips for Better Recording
Holding the Camcorder
For maximum stability, grip the camcorder in your right hand and keep your
right elbow pressed against your body. If necessary, support the camcorder
with your left hand. Be careful that your fingers do not touch the microphone
or lens.
For More Stability
Lighting
When recording outdoors, we
recommend recording with the sun at
your back.
When using a tripod, do not leave the viewfinder exposed to direct sunlight as it
may melt (due to concentration of the light by the lens).
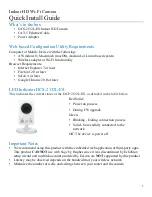
Do not use tripods with fastening screws longer than
5.5 mm (0.2 in.) as it may damage the camcorder.
The camcorder cannot be mounted on tripods with
fixed (non-retractable) camera positioning pins.
Lean against a wall
Put the camcorder on a table
Kneel on one knee
Use a tripod
Lie on your elbow
Camera positioning pin