CANON BJC-4400/QSG, Page 9 - File: 44_QSP9.eps
W. Swanlund UP/Correx> 12 March 1998
9
4400\hdw-fnd.eps
7000\7000_1.eps
Printer Setup for Windows 95
Important!
You must install the BJC-4400 Series Printer Driver for Windows.
The printer driver controls the communication between the printer and your computer.
Installing your printer driver is easy. Use the Canon Creative Disk One and follow these
simple steps. (If you are using Windows 3.1, see page 11.)
Starting Your System
4. Follow the on-screen instructions. Be sure to wait for Windows to complete
each operation.
1. Make sure your computer is turned off.
2. Check that the printer is connected to the computer.
3. Make sure the printer is turned on.
4. Now turn on the computer.
1. Insert the Canon Creative Disk One into your CD drive.
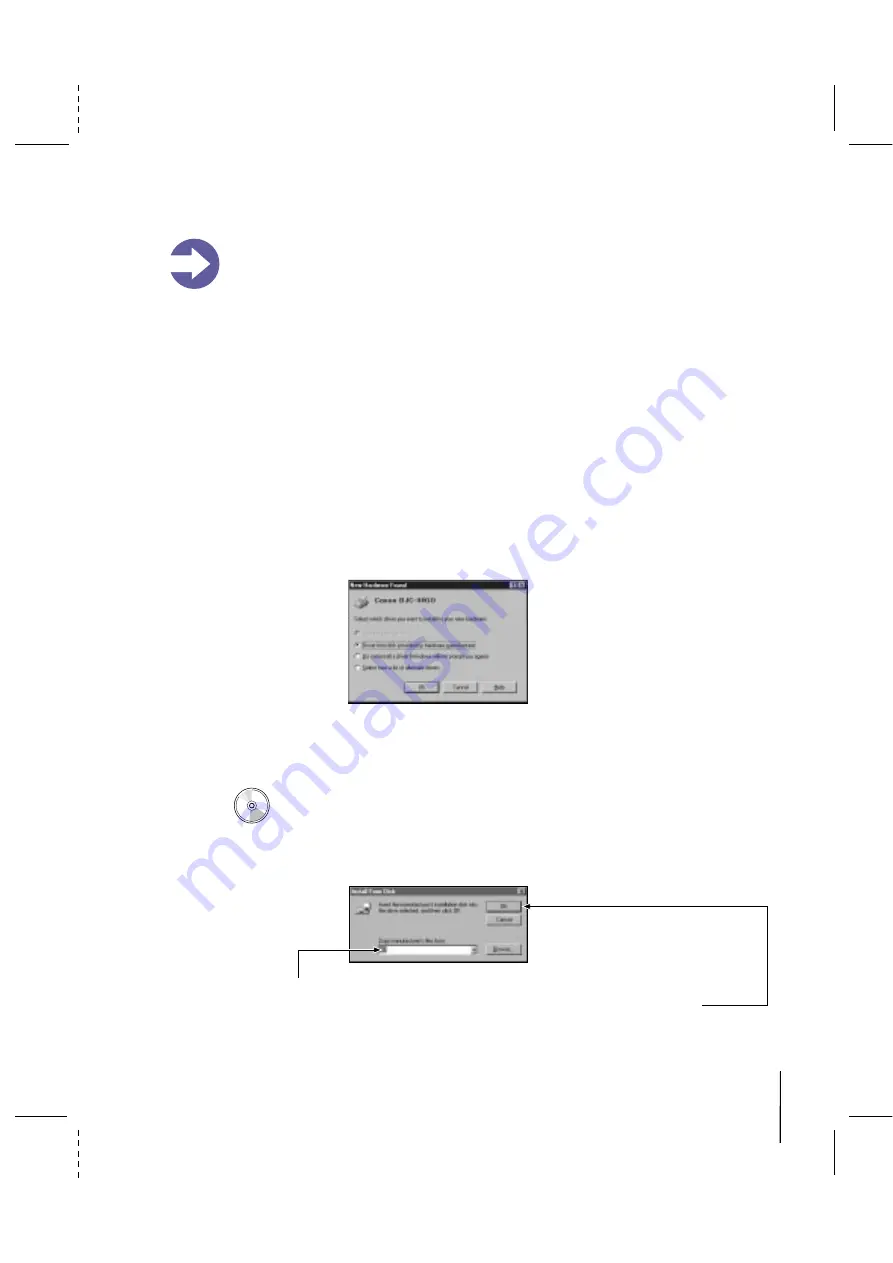
2. Make sure "Driver from disk provided by hardware manufacturer"
is selected and click OK.
3. You see this screen:
If anything is displayed here, replace it by typing
D:\
(where
D:
is your
CD drive... most CD drives are either
D:
or
E:
). Then click OK.
It's important that you start up your system in this order for the Windows 95
Plug and Play feature to work:
Starting Windows 95 and Printer Setup
If you start your system in the order described above, Windows 95 will recognize
your new printer and you will see a screen similar to this:
If your computer does not display this screen, go to page 10.
If you see the New Hardware Found screen, follow these steps:
Summary of Contents for Color Bubble Jet BJC-4400 Series
Page 1: ...Color Bubble Jet Printer BJC 4400 Series ...
Page 5: ...CHAPTER 1 MAJOR CHANGES ...
Page 7: ...CHAPTER 2 SERVICE MANUAL ...
Page 27: ...Part 5 Maintenance 5 33 BJC 4400 Figure 5 11 Logic Board Bottom View ...
Page 34: ...0598 SE 0 50 0 ...
Page 35: ......
Page 39: ......
Page 45: ...A 6 This page intentionally left blank ...
Page 46: ...B 1 1 2 9 3 4 5 6 7 8 FIGURE 1 TRAY B PARTS LAYOUT PARTS LIST ...
Page 48: ...B 3 2 3 1 4 7 6 5 8 FIGURE 2 FRONT COVER ...
Page 52: ...B 7 1 FIGURE 4 REAR COVER ...
Page 54: ...B 9 1 S1 2 SHEET FEEDER UNIT FIGURE 5 ...
Page 56: ...B 11 1 S3 S2 FIGURE 6 ELECTRICAL PARTS ...
Page 60: ...B 15 1 2 FIGURE 8 WASTE INK ABSORBER ...
Page 62: ...B 17 1 2 3 4 7 8 S5 6 5 9 10 FIGURE 9 CARRIAGE PART 1 ...
Page 64: ...B 19 4 3 2 1 FIGURE 10 CARRIAGE PART 2 ...
Page 68: ...B 23 1 3 2 S6 S6 FIGURE 12 MOTORS ...
Page 74: ...B 29 4 5 6 7 1 2 3 FIGURE 15 PRINTER FRAME ...
Page 78: ......
Page 79: ......
Page 87: ...C 2 This page intentionally left blank ...
Page 88: ... 50 FLOIL G311S T3 T1 T2 FIGURE 18 TOOL D 1 D TOOL ...
Page 93: ......
Page 94: ...PRINTED IN JAPAN IMPRIME AU JAPON CANON INC The printing paper contains 70 waste paper ...
Page 95: ......
Page 96: ...0199xx 0 00 O ...
Page 97: ......
Page 99: ......
Page 101: ......
Page 102: ......
Page 104: ...e Page 3 19 3ePage B 23 A 3 ...
Page 105: ......
Page 106: ......
Page 107: ...This page intentionally left blank 9 e_ Ea A 6 ...
Page 108: ...1 5 B l ...
Page 110: ...FIGURE 2 FRONT COVER 7a MIC B 3 ...
Page 114: ......
Page 116: ......
Page 118: ...FIGURE 6 ELECTRICAL PARTS a53 B l 1 ...
Page 122: ......
Page 124: ......
Page 126: ...FiGURE lo CARRIAGE PART 2 epIJ ty 5 2 B 19 ...
Page 130: ......
Page 132: ......
Page 136: ......
Page 138: ......
Page 140: ...LOGIC BOARD COMPONENT FmJRE 17 j Jpy g _ p g 2 L 0 l z n cl TOP View B 33 ...
Page 149: ...This page intentionally left blank ru _ y B 0 c 2 ...
Page 150: ...Tl T2 T3 D l ...
Page 155: ......
Page 248: ...A 6 Specifications Appendix A ...
Page 258: ...I 6 Index ...


