


Scanning Film
13
English
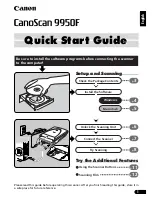
35mm Slides
c
Align the Film Guide’s tab with the FILM symbol on the document glass of the scanner.
d
Place a slide or slides face down (correctly viewed
from below) in the Film Guide as shown in the
diagram to the right.
120 Format Film Strips
c
Open the Film Holder on the Film Guide, place the
film face down and close the Film Holder.
d
Align the Film Guide’s tab with the FILM symbol on
the document glass of the scanner.
• Leave a gap of 0.2” (5 mm) or greater
between film strips when placing two
or more on the document glass of the
scanner.
• Ensure that there is no gap between
the edge of the film and the Film Guide
on the side near the calibration slot.
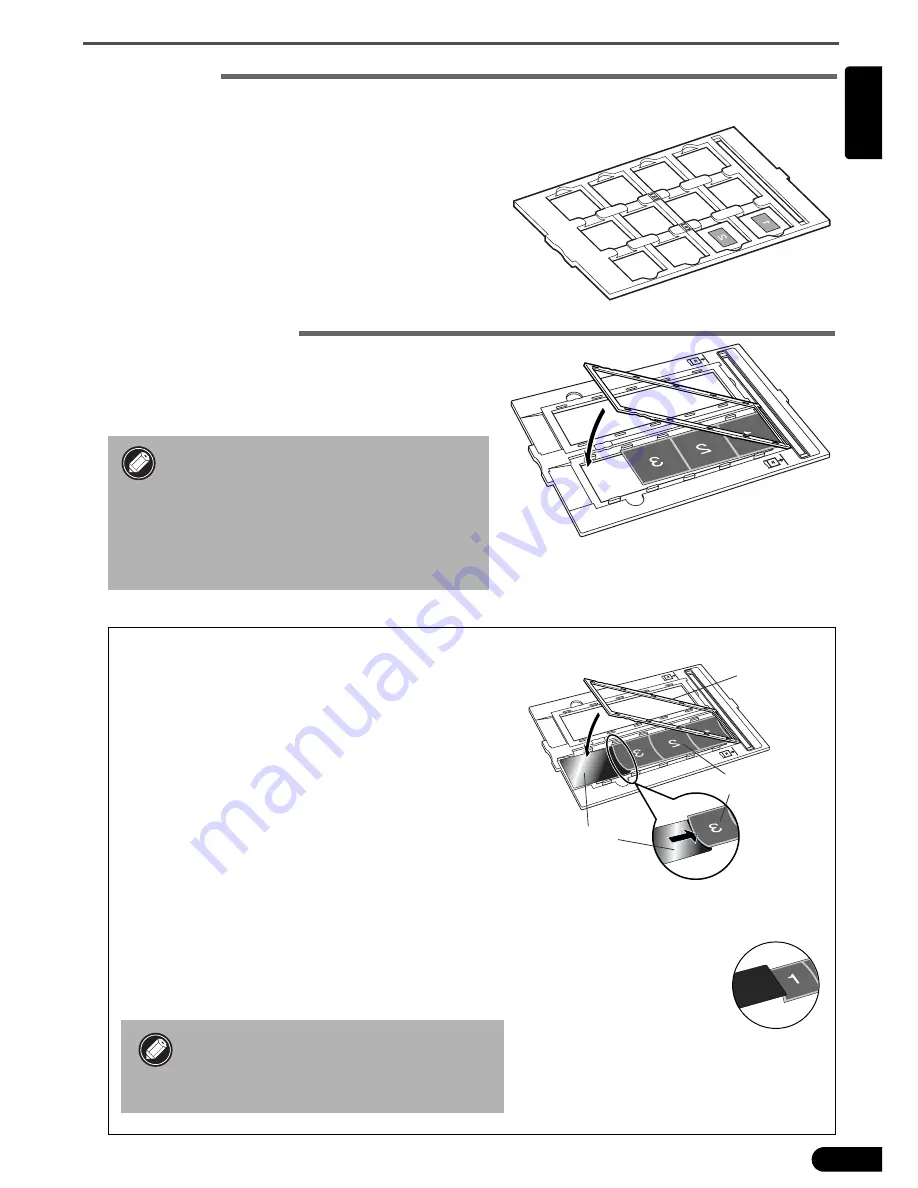
Scanning Curled 120 Format Films
Curled film strips can stick to the document glass of
the scanner and cause a pattern of rings called Newton
Rings to appear on the scanned image. If this occurs,
scan using the supplied film retainer sheet as shown in
the figure.
(A)
Scan with the film retainer sheet inserted beneath
the film.
(B)
If Newton Rings still appear after following
Instruction (A), turn the film strip over and place it
in the Film Holder with the film retainer sheet on
top so that the film edges are held down for
scanning. Then preview the image in ScanGear CS
and click the [Mirror] button to reverse the image
before initiating the final scan.
To avoid damaging the film, always
place the glossy side (the side without
an illustration) of the film retainer
sheet against the film.
(A)
Film Holder
120 Format Film
Film Retainer
Sheet
With its glossy side facing upward, slip
the film retainer sheet under the film.
(B)
Hold the film edges down
by placing the film retainer
sheet on top with its glossy
side facing downward.


