

Quick Guide
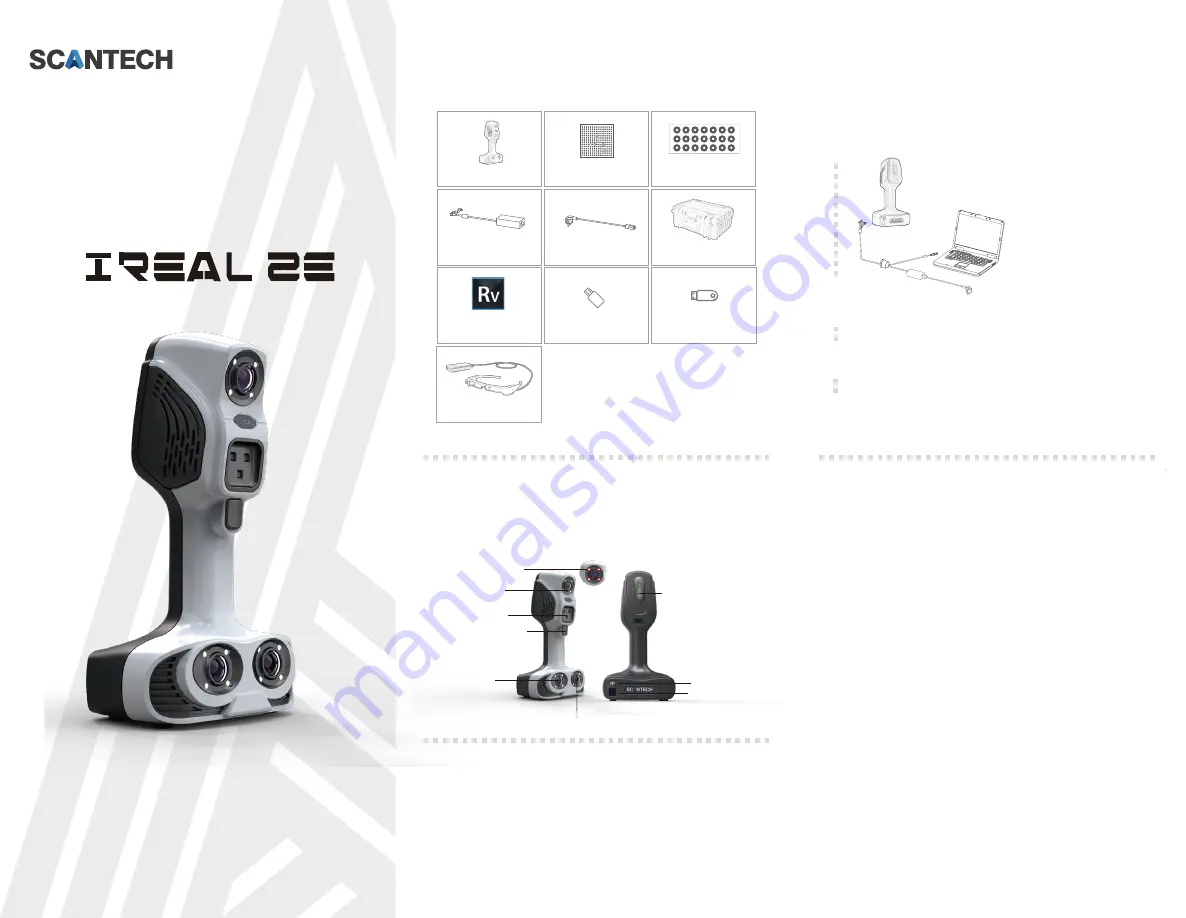
Equipment list
Software and hardware
installation
Terms & Conditions
Computer Specifications (Recommended)
OS:
CPU:
RAM:
Graphics card:
Ports:
win7/10, professional, 64-bit (recommended)
i7-8750H or higher
32G or above (64G is best)
NVIDIA GTX1050Ti (4G) or above
USB3.0 port
01
02
03
Plug cable and connect it to the USB3.0 of the computer, then turn on the
power.
Note: It must be USB3.0 port; first plug the USB and then the power.
Take the USB stick in the device case, plug it into the computer, Copy
the software package than double click the software to install it.
Set up the computer and software according to the "Training Course".
04
Take the dongle of the device box, plug it into the computer USB port,
double clicktrun the scansoftware and star t calibration/scanning
*Before using the device , please read the quick guide, training tutorials, and the comments
for each button on the software.
*Suitable for scanning objects over 50cm, especially for portraits, body
parts and medium-sized sculptures.
*The plate is fragile, please handle it with care.
* In bright light sources (e.g., Sunlight), Shading is required to scan.
*The dark, black, transparent, or reflective objects will need spray contrast enhancer
before scanning.
*when do scanning Plug laptop power source and set the power supply to High
Performance mode.
* When runs the software, if the software says "device not connected"/"wrong USB
recognition" or the scanning is stuck, please turn off the software, replug the USB
port (or change to other USB3.0 port/use USB3.0 Hub adapter). ).
*When using a desktop computer, please use the USB 3.0 port on motherboard
*Press the Start/Pause Scan button on the scanner once, no need long press
*When first time runs the software, it needs calibrated before scanning; please do
re-calibrate when the number of single-frame outputs/stitching/marker recognition
rate is low.
*Do not use it with other scanners (before using it, you need to turn off the other scanner's
software and unplug the other scanner from the computer).
Scanner structure
Smart Indicator
Green: Suitable distance/software/
hardware connected
Red: Too far away/device not connected
Blue: Too close
Yellow: not stitchable.
power socket
data port
light source module
Start/Pause Scan Button
Color camera
black and white camera
black and white camera
USB stick
Scanner
Adaptor
Software
Cable
Dongle
E-AR Display (optional))
Waterproof box
Calibration board
Mark point
Intelligent fill system
Note: The power cord is marked with
an arrow, so please flip the arrow to
the top and align the four thimble
pins with the power port jack before
gently plugging them in.
①
①
②
③
④
④
⑤
⑤
⑥
⑦
⑧
⑩
⑨
TM


