20
C H A P T E R 4
Teach Your Camera New Tricks
to get a completely clean screen is to switch off the CHDK OSD com-
pletely (see above).
f
Center Menu
. Displays the CHDK menus in the center of the screen if
switched on. If switched off, the CHDK menus are aligned to the top of
the screen.
f
Auto select 1st entry @ menu
. When switched on, the first item of a
freshly opened menu is selected automatically. If switched off, no item
will be selected.
f
Enable Symbols
. Determines whether symbols should be shown at the
beginning of each menu item. I find the information value of these
symbols rather limited and I can read the menu easier without the
symbols.
f
For the
User Menu
entries, please see section 4.2.5.
f
Show State Displays
. Determines whether the settings made in the
submenus
Extra Photo Operations
(section 4.3.1) and
Custom Curves
(section 4.3.8) should be displayed on screen.
f
Show temperature
. Determines if and when temperature should be dis-
played on screen (
Off
,
Optical
,
CCD
,
Battery
,
All
). This can be useful
when operating in a very hot or cold climate. (The optical temperature
is the temperature of the lens elements and is the closest one to the
environment temperature.) The temperature reading is in degrees
Celsius if the following menu entry
in Fahrenheit
is not switched on.
f
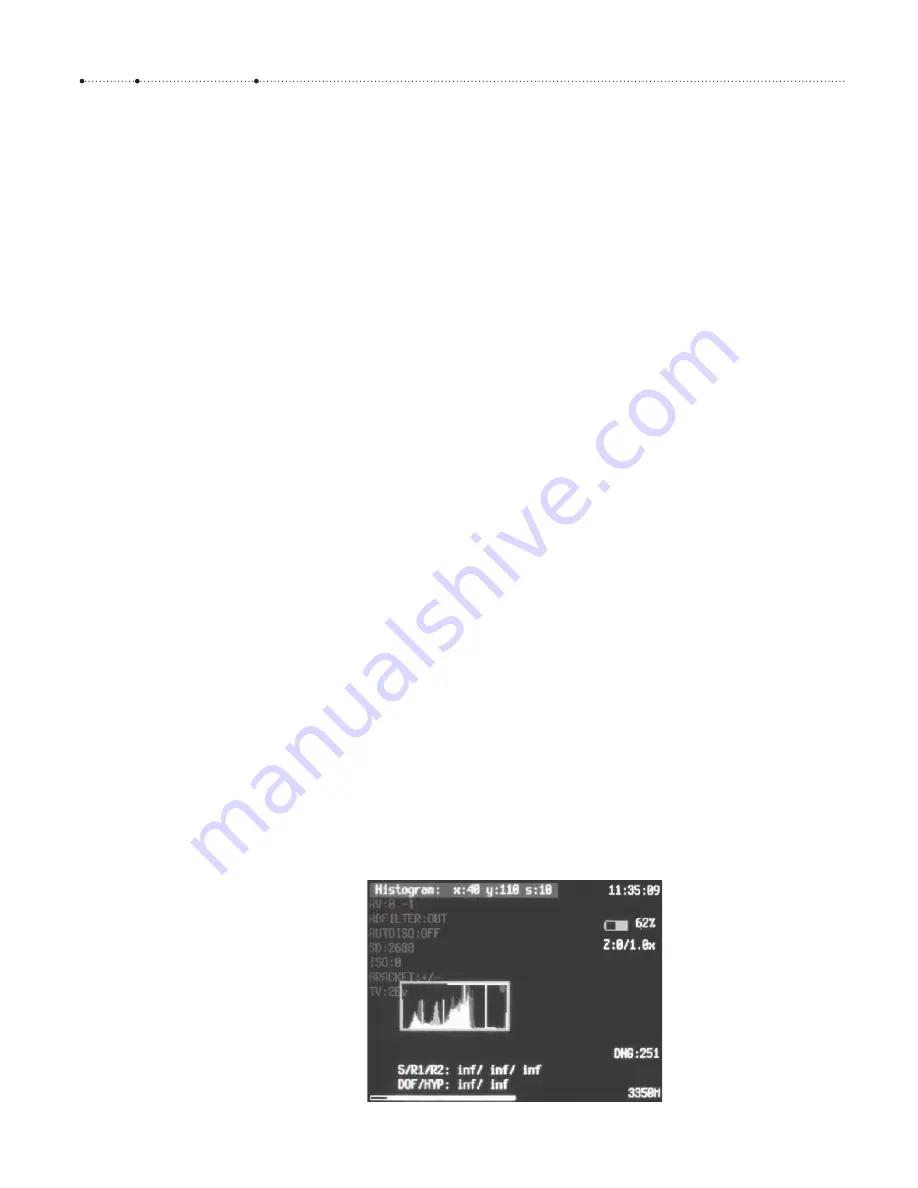
OSD Layout Editor
. This entry allows you to modify the layout of the OSD
information items on the screen. For this purpose, the CHDK organizes
the information items into groups: histogram, DOF calculator, exposure
status display, remaining RAW images, miscellaneous values (focal
length and other values), battery symbol, memory card symbol, vertical
memory usage bar, horizontal memory usage bar, battery text, memory
usage text, clock, temperature, remaining video time, EV correction
factor photo, and EV display video. By pressing the
FUNC/SET
key repeat-
edly, you can select between these groups in the given sequence. The
selected group is shown with a green frame. To modify the position of
the selected group on the screen, simply press the
LEFT
,
RIGHT
,
UP,
and
DOWN
buttons. You can leave the editor with the
MENU
button.
Figure 4-5
The OSD layout editor in action. The
status bar (top left) displays the
currently selected layout item
(Histogram), its x/y-position, and the
step width(
s
). The step width can be
changed between 1 and 10 via the
DISP
button.
Summary of Contents for Camera
Page 1: ......
Page 2: ...The Canon Camera Hackers Manual ...
Page 3: ......
Page 4: ...Berthold Daum The Canon Camera Hackers Manual Teach Your Camera New Tricks ...
Page 19: ...10 CH APTER 2 Cameras and Operating Systems ...
Page 25: ...16 CH APTER 3 ...
Page 85: ...76 CH APTER 4 Teach Your Camera New Tricks ...
Page 213: ...204 CH APTER 6 ...
Page 253: ...244 AP PENDIX ...


