180
Arrange and Save Layouts
●
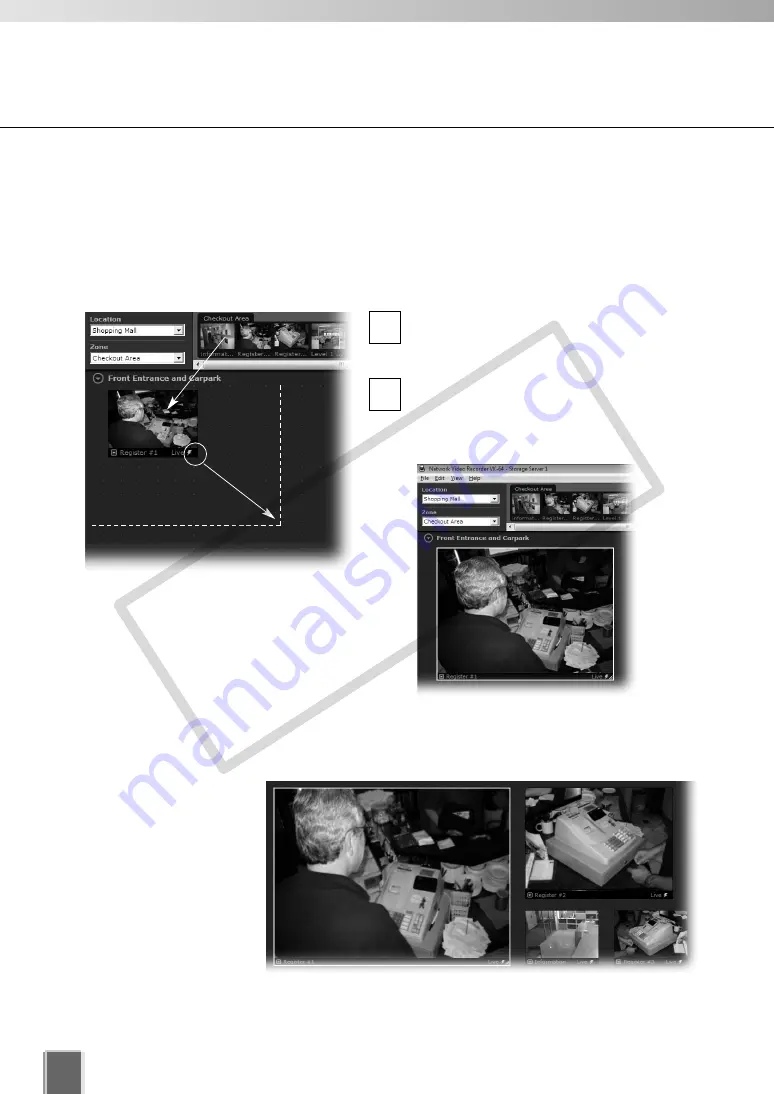
Drag, drop and re-size a Video Window
In the Camera Selection Area, click a
thumbnail image and drag its selection
boundary onto the Viewing Area grid.
Move it to the position you want to
display. When you release the mouse,
the size and position are adjusted to
match the layout frame.
To re-size the Video Window, click any
corner and drag the image outwards to
snap to a larger grid area. Release the
mouse button. When you release the
mouse, the size and position are adjusted
to match the layout frame.
2
1
Alignment Grid
Select the
Alignment Grid
from the
Layout Grids
sub-menu. The Viewing Area displays a
grid of dots. When you place a Video Window, it “snaps” to the grid boundaries.
●
Create and align more Video Windows
Click and drag other
camera thumbnails onto
the Viewing Area to
create Video Windows
for monitoring, and resize
the window. A layout
example is shown to the
right.
COP
Y
Summary of Contents for C50FSi - VB Network Camera
Page 13: ...Chapter 1 System Overview COPY ...
Page 15: ...15 1 System Overview COPY ...
Page 42: ...42 COPY ...
Page 43: ...Chapter 2 Installation COPY ...
Page 49: ...Chapter 3 Storage Server Configuration Reference COPY ...
Page 75: ...Chapter 4 Register Camera Server and Set Recording Schedule COPY ...
Page 152: ...152 COPY ...
Page 153: ...Chapter 5 Viewer Reference COPY ...
Page 155: ...155 5 Viewer Reference COPY ...
Page 218: ...218 COPY ...
Page 219: ...Chapter 6 Operation and Management COPY ...
Page 227: ...Chapter 7 Backup Scheme COPY ...
Page 243: ...Chapter 8 System Maintenance COPY ...
Page 250: ...250 COPY ...
Page 251: ...Chapter 9 Troubleshooting COPY ...
Page 290: ...290 COPY ...
Page 291: ...Appendix COPY ...
Page 301: ...301 COPY ...


