Scanning Film
6
Scanning Film
This scanner can scan 35 mm film strips (6 frames at a time). Follow the procedure below when scanning
film.
1
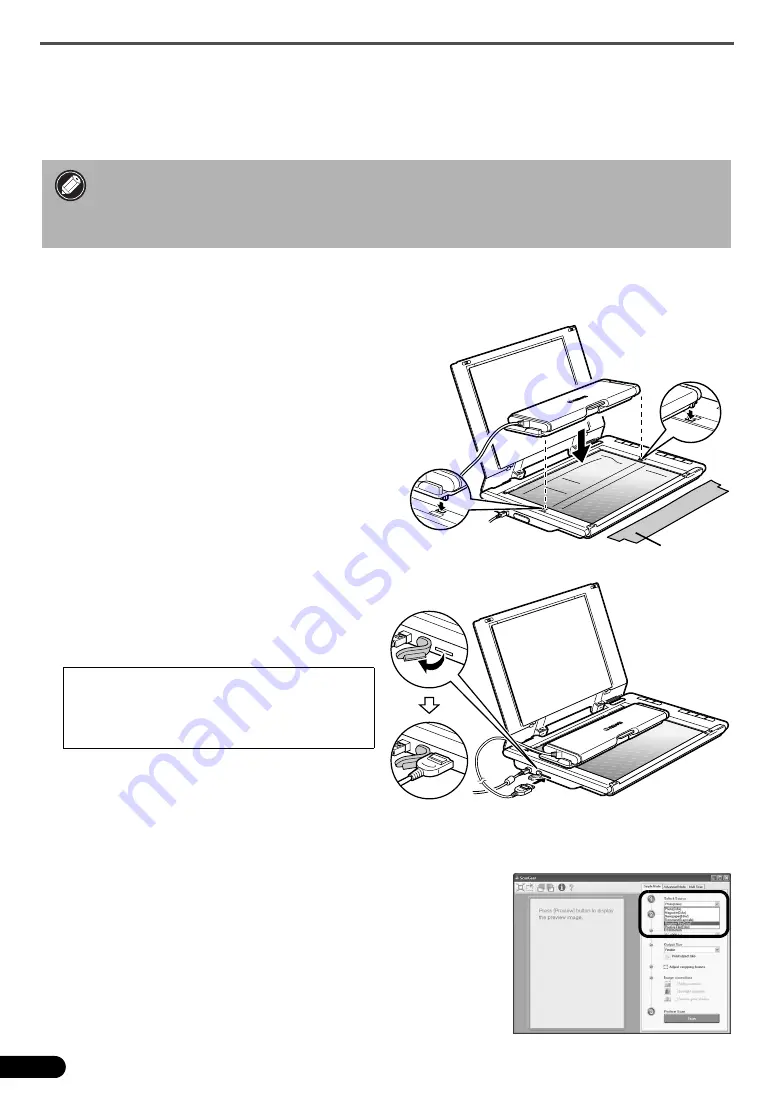
Open the film adapter unit by the center latch and remove the protective cloth. Detach
the cable from the retainers on the side of the film adapter unit.
2
Open the document cover and set the film
adapter unit on the document glass.
Align the dots on the film adapter unit and the dots
on the scanner (labeled [FAU]) to set the unit in
place.
3
Connect the cable to the connector on
the side panel of the scanner, then
gently close the document cover.
4
Start ArcSoft PhotoStudio, then start ScanGear.
Follow the steps 2 to 4 in "Try Scanning" on page 4.
5
Select [Negative Film (Color)] or [Positive Film
(Color)] in [Select Source] to match the type of film
you are scanning, and then click [Preview].
• Make sure the document glass is wiped clean before placing the film adapter unit on the
scanner.
• Handle the film adapter unit carefully to avoid damaging the glass panel.
• Handle film strips carefully to avoid scratching or leaving fingerprints on them.
You need to calibrate the scanner before
scanning film for the first time. Do not place a
film strip in the film adapter unit at this point
as it is not required for calibration.
Protective
Cloth


