81
Exter
n
al Connections
Audio Output
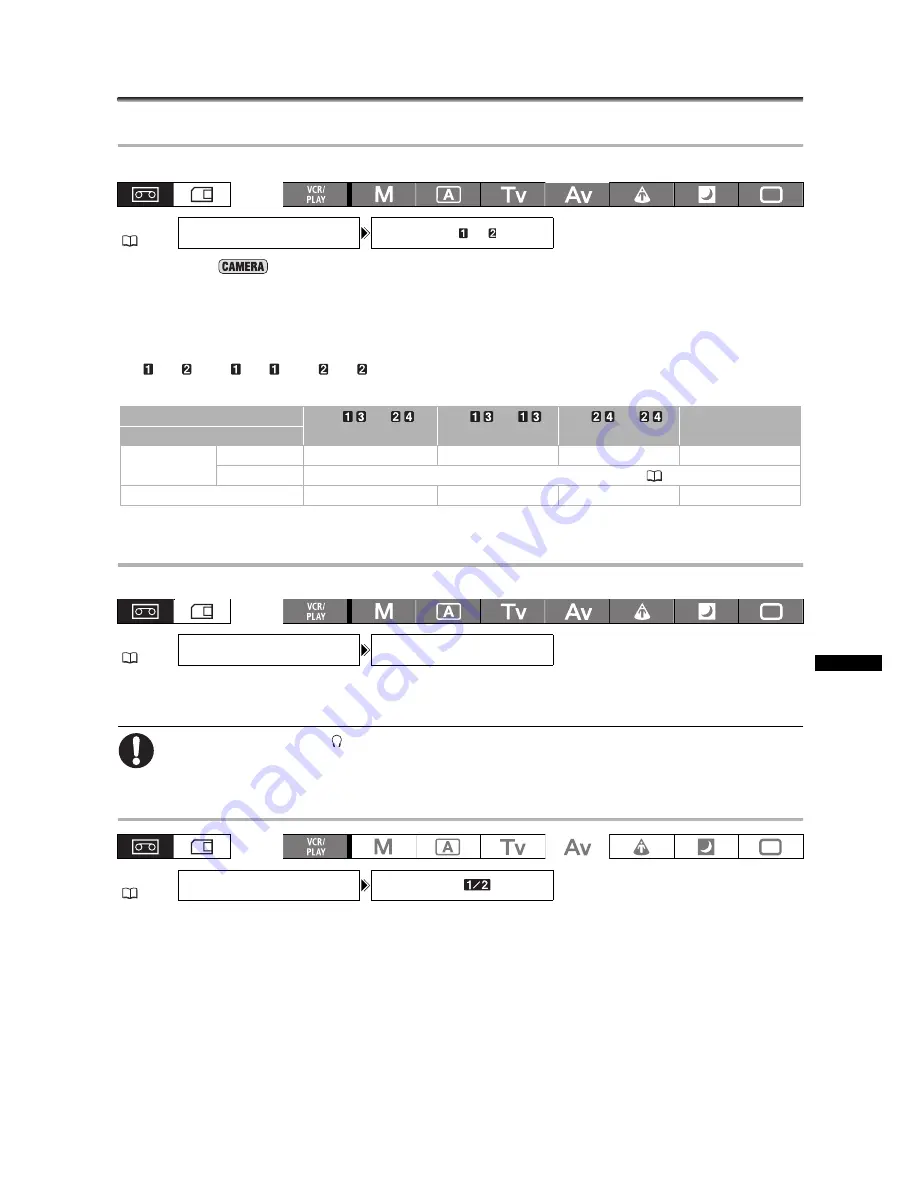
Selecting the Audio Channel
You can select the channel for audio signal output from the A/V1 terminal.
* Default value in
mode.
Open the menu and select [AUDIO SETUP]. Select [OUTPUT CH], select a setting option
and close the menu.
While recording external video with 4-channel audio from the HDV/DV terminal, the available options will be
[CH
/CH
], [CH
/CH
], [CH
/CH
], and [ALL CH/ALL CH]. During playback, the audio output differs
according to the setting option and audio input.
1
Playback of a tape recorded with 4-channel audio (using another device)
Selecting the Audio Output Level
You can boost the level of the audio output signal from the A/V1 terminal from 1 Vrms to 2 Vrms (+6 dB).
Open the menu and select [AUDIO SETUP]. Select [OUTPUT LEVEL], select a setting
option and close the menu.
The output level from the
headphone terminal does not change.
Selecting the Audio Monitor
Open the menu and select [AUDIO SETUP]. Select [AUD.M.SET], select a setting option
and close the menu.
• You can also select the audio monitor using the wireless controller.
• If you selected [MIX/VAR.], adjust the mix balance with the [MIX BALANCE] setting or using the MIX
BALANCE buttons on the wireless controller.
MENU
(
25)
AUDIO SETUP
OUTPUT CH•••CH
/CH *
Setting Option
→
[CH /CH
]
[CH /CH
]
[CH /CH
]
[ALL CH/ALL CH]
Audio Input
↓
HDV/DV input
2 channels
CH1/CH2
CH1/CH1
CH2/CH2
ALL CH/ALL CH
4 channels
1
Operates according to the [AUD.M.SET] setting (
81).
Analog input
CH1/CH2
CH1/CH1
CH2/CH2
ALL CH/ALL CH
MENU
(
25)
AUDIO SETUP
OUTPUT LEVEL•••1Vrms
MENU
(
25)
AUDIO SETUP
AUD.M.SET•••CH


