10
Loading Paper
EN
G
L
IS
H
Loading Paper
1
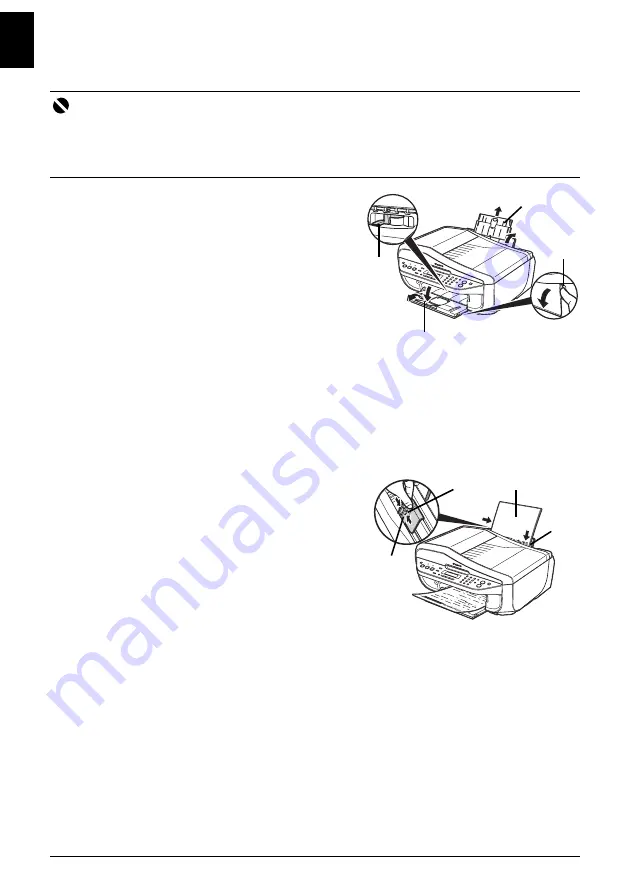
Open the Rear Tray and pull out the Paper
Support.
Put your finger in the rounded indent of the Paper
Support and pull it out until it stops.
2
Open the Paper Output Tray.
Put your finger in the rounded indent beside the
Paper Output Tray and open it gently.
3
Open the Output Tray Extension.
Open up and set the Output Tray Extension
completely by pressing down the hollow on its front side.
4
Adjust the position of the Paper Thickness Lever.
Set it to the right when printing on envelopes or T-shirt transfers, and left when printing on any
other type of paper. Refer to “Compatible Media Types” in the
User’s Guide
on-screen
manual.
5
Load the paper in the Rear Tray with the print
side facing UP.
Do not load higher than the Load Limit Mark (A).
6
Align the paper stack against the right side of
the Rear Tray.
7
Pinch the Paper Guide and slide it against the
left side of the paper stack.
Important
z
Load A4, Letter, or Legal-sized plain paper when receiving faxes.
z
If you cut plain paper to 4" x 6" / 101.6 x 152.4 mm, 5" x 7" / 127.0 x 177.8 mm, or 2.13" x 3.39" / 54.0 x
86.0 mm (credit card-size) for a trial print, it can cause paper jams.
z
Always load paper in portrait orientation. Loading paper in landscape orientation can cause the paper
to be jammed.
2
1
3
4
5
6
7
(A)


