


- 14 -
AS CAMPINGAZ
®
CV 470 PLUS
CARTRIDGES ARE
VALVE-OPERATED, THEY CAN BE DETACHED
FROM THE EQUIPMENT, EASILY TRANSPORTED
(EVEN WHEN NOT EMPTY) AND FITTED TO OTHER
CAMPINGAZ
®
EQUIPMENT IN THE
470 PLUS
RANGE
DESIGNED TO OPERATE EXCLUSIVELY WITH
THESE CARTRIDGES.
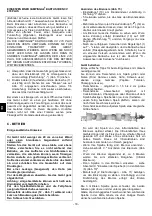
a) Check that the gas feed is properly closed by turning
the adjustment wheel (10) in a clockwise direction
(toward the “ - ” end of the arrow) all the way until it
stops (fig. 13).
b) Holding the regulator (9), carefully screw the cylinder
(11) onto the regulator by turning in the direction
indicated in figure 13 until you hear a “click” (about
one-sixth of a turn). Do not screw the cylinder any
tighter; you may damage the cylinder valve.
In the event of leakage (smell of gas prior to turning the
tap on), take the equipment outside immediately, in a
well-ventilated area with no combustion source, where
the leak can be located and halted. If you wish to check
that your equipment is correctly sealed, do so outside.
Never attempt to locate leaks using a flame. Use gas
leak solution.
C - USE
Additional instructions:
Do not use your device at a distance of less than 20
cms from a wall or a combustible object.
Position the equipment on a stable, horizontal
surface and do not move when in use so as to avoid
the appearance of large flames resulting from the
combustion of liquid butane rather than vaporised
butane. Should this occur, position the equipment
and turn the tap off - found on the regulator.
In case of leakage (gas smell), close the valve
(located on the regulator).
Wait until the device has completely cooled before
preparing it for storage.
Careful: some parts may be very hot. Keep young
children away from the device.
Use heat-proof gloves for manipulating the spit
holder frame and the drippings tray.
Never touch the burner (12 – fig. 7) during or
immediately after using the device.
Avoid twisting the flexible hose.
Lighting the stove (fig. 15)
- Turn the adjustment wheel (10) located on the
regulator all the way toward the “ + ” mark.
- Wait about five seconds for the gas to fill the burner
cage.
- Push repeatedly on the red piezo lighter button (
)
(14) located behind the device by putting your fingers
in the notch found under this button.
- Check to see whether the burner has lighted. If lighting
does not occur, turn the adjustment wheel (10) to the
OFF position (toward the “ – ” end of the arrow) and
restart the lighting procedure.
- If the equipment still does not light after three
attempts, turn the control knob (10) to position '' - '' and
check that the cartridge contains gas (sound of liquid
sloshing when shaken) before starting the previous
steps again. (If the cartridge is empty, refer to
paragraph D - Changing the cartridge).
Cooking
Here are a few simple tips for obtaining the best results
using the innovative features of your stove:
All types of meat can be grilled or roasted in kebabs
(beef, mutton, lamb, chicken, pork, etc.), as well as
certain vegetables (peppers, tomatoes, mushrooms,
etc.).
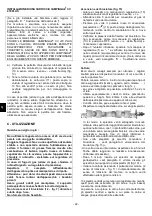
- If possible, cut the meat into cubes measuring 1.5 to 2
cm square.
- Thread the meat cubes onto a spit, separating them
with cherry tomatoes, mushrooms or slices of pepper.
Be careful not to place meat cubes or vegetables at
the ends of the spit (approximately the last 4 cm on
each end).
- When the brochettes are ready, salt and pepper them
and add your favorite spices.
- Be sure the pieces of meat cover the same length on
each spit.
In this way, heat from the infrared spectrum of the
burner will penetrate the brochettes in an optimal way.
Infrared rays from your device penetrate the meat for a
healthy result, with no burned fat and a tender
consistency. This type of infrared heat is particularly
appropriate for cooking meat.
- When your brochettes are ready, turn on the stove –
see paragraph C “Lighting the stove (fig. 15)”.
- When the stove has been lighted, wait about five
minutes to obtain maximum glow (maximum infrared).
- Next, insert the spits on the spit holder frame – see
paragraph C “Inserting spits (4) on the spit holder
frame (6) (fig. 10)”.
- Start cooking by turning on the motor button (two
rotational directions – fig. 11). Whichever direction the
motor turns, food will always be cooked in the best
way.
The three central spits provide faster cooking, while the
two outside spits (the highest and lowest ones) cook
more slowly.
Guests who prefer thoroughly cooked kebabs will
choose the spits from the center.
Guests who like rarer meat will choose the outer spits.
For uniform cooking of all kebabs, change the position of
the central spits during cooking with those on the outer
ends (outside spits go to the inside and inside spits go to
the outside). Check to see that all spits are being turned
by the motor.
Average cooking time is 10 to 15 minutes, depending on
the type of meat and the desired results.
Burner flame adjustment
To adjust flame size, turn the adjustment wheel (10)
carefully between the “ + ” and “ – ” positions.
G
B


