


1
5
Connecting
Additional
Remote Controls
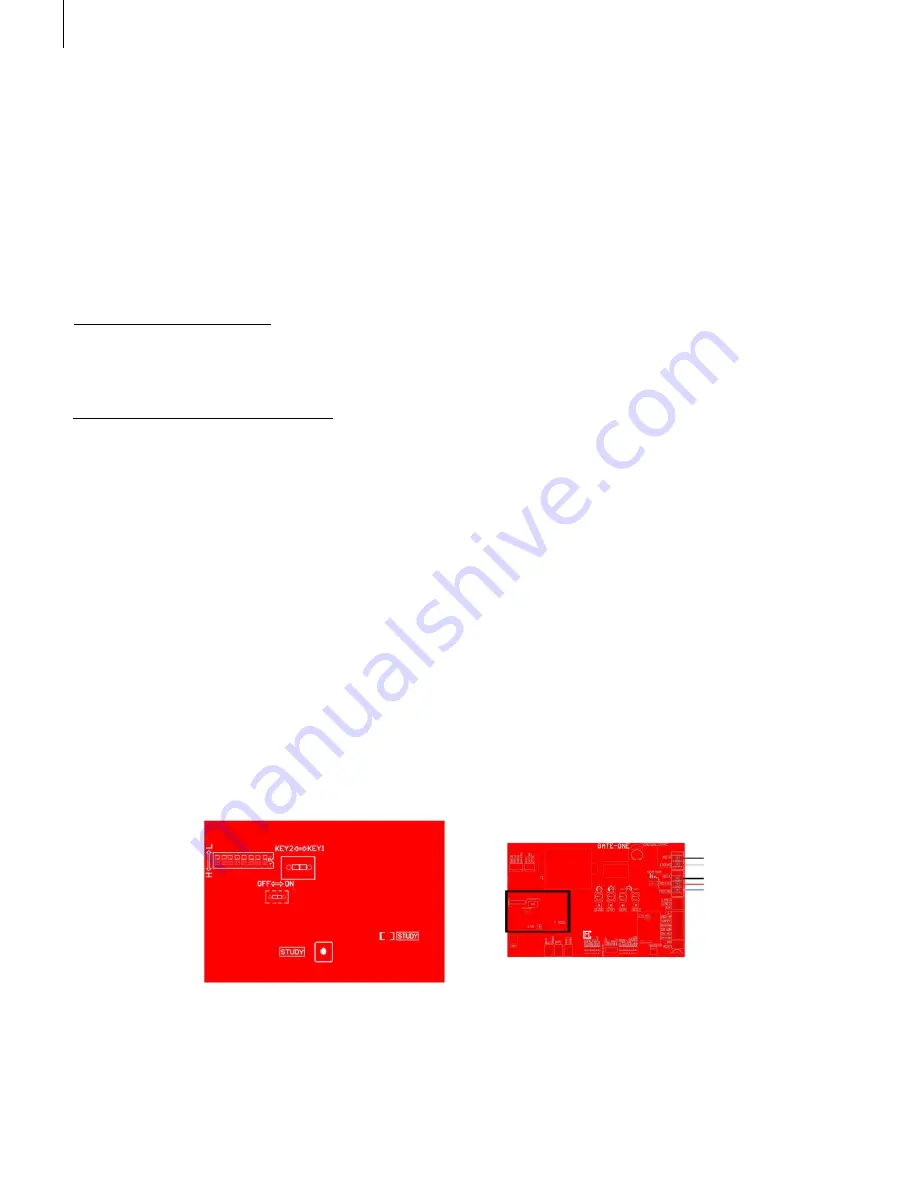
Figure 1
7
There are two ways to connect your remote control: Study Mode & Numeric Mode.
Study mode can fit up to 60 different remote controls.
Connect using Study Mode On your gate operator circuit board, look for the study key. Press
and hold the button on the remote control. Press and hold the study key for 1.5-2 seconds.
Done, the remote is now connected to the gate opener.
Removing existing remote controls Press the STUDY key on the gate operator circuit
board and hold for 8 seconds. Done. All remote controls are now removed.
Numeric Mode
A. On your circuit board, turn the SW9 key to the ON position.
B. Unscrew the back of the remote control to gain access to the control board. You
should see 1-8 dip switches. Each switch has 3 positions: up, middle, bottom. Flip
these 1-8 switches to any position you'd like.
C. On the gate opener control board, look for the same 1-8 dip switches, and set the same
combination as you did on the remote.
D. Finished.
Note: On switch SW10, KEY 1 and KEY 2 are used for the 2-button model of remote
controls. Note: if KEY 1 code was set with BUTTON ONE on remote control; KEY 1 will NOT
work with BUTTON TWO on the remote control.
By default, the remote controls are already connected to the gate operator. You do not need
to do any of the following steps unless you are adding more remote controls.
Study Mode
Youtube
Youtube video that explains more on remote control programming:
https://youtu.be/QfT6O4apTI8
Features


