background image

13

Vi s i t   u s   o n l i n e   a t   c a l i fo n e. co m
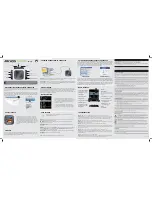
Troubleshooting

Care and Maintenance 

continued

Cassette Maintenance & Service Cleaning

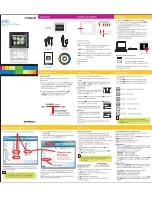
The heads, capstan and pinch roller should be cleaned from time to time to prevent buildup of tape oxide, 
which degrades performance.
1. Remove cassette tape before cleaning.
2. Clean the head of all visible, reddish-brown oxide with a cotton-tipped swab moistened with a methyl alcohol 
    or any solution specifically manufactured for this purpose.
Caution:  DO NOT scrape the head surface with hard, sharp or abrasive objects. This will permanently damage the heads.
3. Clean the pinch roller by scrubbing the surface of the roller with the moistened swab. Rotate the roller by hand 
    until the entire surface is clean.
4. Clean external case surfaces with a moist, soft cloth. Use only a mild detergent water solution.

Tape Head Demagnetization
It is recommended that the tape heads be demagnetized from time to time. This eliminates residual magnetism 
which degrades sound reproduction and the recording function.
1. After cleaning the heads and capstan, place the demagnetizer several feet away from the cassette unit and 
    plug it into an AC outlet.
2. Follow the manufacturer’s operating instructions supplied with the demagnetizer.

Transmission Frequency 

2.3 MHz

IR Transmission Range 

15 feet @ 360 degrees

Output Power 


6W

Radio Frequency Range 

AM 525-1710KHZ 


FM 88 – 108 MHz

Cassette Frequency Response  80Hz – 12000Hz
CD Frequency Response 

20Hz-20000Hz

Power Supply  


AC 110V – 60Hz, 8”D” (UM-1) Cells

Dimensions (WxHxD)  

16 1/4”W x 6 1/4”H x 9 1/4”D

Weight 


7 lbs.

Specifications

califone_2395IR_manual.indd   16

9/14/07   4:34:48 PM

Summary of Contents for Music Maker

Page 1: ...Manual califone com Infrared Music Maker Plus Multimedia Player Recorder 2395IR Infrared Music Maker Plus 2395IRPLC 6 Six Person Learning Center shown above califone_2395IR_manual indd 3 9 14 07 4 34...

Page 2: ...andinspectitforanysignsofdamage Save all packaging materials for possible later use Report any damageclaim directlytothefreightcarrier immediately Save the product and packaging for inspection by the...

Page 3: ...ht D or UM 1 size batteries are required When installing the batteries refer to the orientation diagram shown inside the battery compartment Place the batteries on top of the nylon ribbon This helps t...

Page 4: ...online at califone com Front View Rear View HEADPHONE R L EXT SPK MIC REMOTE BEAT CUT 0 1 27 28 29 30 49 33 2 3 18 13 46 48 36 38 42 44 34 40 37 39 43 45 35 41 48 califone_2395IR_manual indd 6 9 14 07...

Page 5: ...Treble Down 11 Bass Up 12 Bass Down 13 Telescoping Antenna 14 Tuner Up 15 Tuner Down 16 Preset 17 Program 18 CD Door 19 Play Pause 20 Skip Forward 21 Skip Backward 22 Stop 23 Repeat 24 Random 25 Play...

Page 6: ...o adjust the Treble up and down respectively while BASS p 11 and BASS q 12 can be used to adjust the Bass up and down respectively Both Treble and Bass can be adjusted in the range of 5 to 5 EQ Contro...

Page 7: ...ess preset stations simply press the PRESET button until the desired channel is found AM FM Radio Operation The 2395IR features an AM FM PLL phase locked loop stereo radio and telescopic antenna for l...

Page 8: ...om Stop or Pause Each press will change the track number by one If the CD is playing pushing and holding the SKIP button will advance through the current track until it is over then proceed to advance...

Page 9: ...Disc 1 Lift to open the CD door and see OPEN on the LCD display 2 Place a CD in compartment with label side up 3 Press the CD door down to close Compact Disc Play To play a loaded CD 1 Turn power ON 2...

Page 10: ...selections in programmed order Push the button three times to clear the REPEAT function REPEAT ONE or REPEAT ALL will appear on the CD PROGRAM DISPLAY when the CD REPEAT button is pushed Dual Cassette...

Page 11: ...utton on Deck A to prepare for recording As the RECORD button is pressed the PLAY button will follow 3 Press PAUSE again to start recording Recording from Tape B to Tape A 1 Insert a blank tape into c...

Page 12: ...d Audio signals are sent through the air by an FM frequency modulation carrier Since the transmission is from a light source LED light emitting diodes the system will not work in bright sunlight Sugge...

Page 13: ...CAN SKIP buttons are the same as the Tuner p Skip forward and Tuner q Skip back buttons on the boombox The REPEAT button is the same as the PRESET REPEAT button on the boombox The TIME button is the s...

Page 14: ...is clean 4 Clean external case surfaces with a moist soft cloth Use only a mild detergent water solution Tape Head Demagnetization It is recommended that the tape heads be demagnetized from time to t...

Page 15: ...the master volume turned up CD CD play does not begin Is the AC power cord unplugged or loose Is the CD upside down Is the CD or lens excessively dirty Is the disc holder closed properly Is the PAUSE...

Page 16: ...POWER CORD FROM THE OUTLET WHEN LEFT UNUSED FOR A LONG PERIOD OF TIME OBJECT LIQUID ENTRY CARE SHOULD BE TAKEN SO THAT OBJECTS DO NOT FALL AND LIQUIDS ARE NOT SPILLED INTO THE ENCLOSURE THROUGH OPENIN...

Reviews: