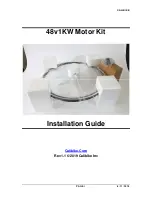
background image


48V 1KW Motor Kit


P A G E   1 0  

8 / 1 1 / 2 0 1 9  

2.6  Display LCD and throttle Install. 

The wiring connectors are color coded and have matching oriented connectors.   

Install the LCD. Should be center on handlebar but on either side is ok. 


Summary of Contents for 48V 1KW Motor Kit

Page 1: ...CALIBIKE PAGE i 8 11 2019 48v1KW Motor Kit Installation Guide Calibike Com Rev 1 1 2019 Calibike Inc...

Page 2: ...2 48V1KW MOTOR KIT SETUP 4 2 1 PARTS LIST 4 2 2 MOUNTING CASSETTE GEARS ON MOTOR 6 2 3 MOTOR WHEEL CENTERING 6 2 4 MOTOR WHEEL MOUNT 7 2 5 MOTOR WIRING HOOKUP 8 2 6 DISPLAY LCD AND THROTTLE INSTALL 10...

Page 3: ...r kit 1 Ultra light hub motor 3Kg motor 2 Geared for great torque 3 High RPM 370 rpm 36V 450 rpm at 48v 4 Quality Alex 700C or 26 wheel 5 High Quality spokes 6 1000 watt 1500 watt peak motor controlle...

Page 4: ...48V 1KW Motor Kit PAGE 4 8 11 2019 2 48V1KW MOTOR KIT SETUP 2 1 Parts List...

Page 5: ...otor extension cable 4 LCD Throttle breakout cable 5 Wiring conceal wrapping 6 Thumb throttle 7 Cassette gears 8 Handlebar grip optional 9 PAS magnet ring optional 10 PAS sensor optional 11 Disk brake...

Page 6: ...motor wheel Place the small lock washer at end Twist it to lock gears in place May need local bike shop to tighten lock washer 2 3 Motor Wheel centering 1 The motor wheel requires 135 to 139 mm cleara...

Page 7: ...e is putting the torque lock washer on the inside on side of the wheel and on the outside on the other side of the wheel 2 4 Motor wheel mount Take the old wheel out of the donor bike and place the ca...

Page 8: ...Kit PAGE 8 8 11 2019 2 5 Motor wiring hookup The wiring connectors are color coded and have matching oriented connectors The Green goes to green LCD Orange to orange Throttle etc The 2 red connectors...

Page 9: ...cable 3 Plug Thumb throttle LCD Throttle breakout cable 4 Plug motor extension cable into controller 5 Plug motor extension cable into motor 6 Plug the battery ground into the controller ground black...

Page 10: ...tor Kit PAGE 10 8 11 2019 2 6 Display LCD and throttle Install The wiring connectors are color coded and have matching oriented connectors Install the LCD Should be center on handlebar but on either s...

Page 11: ...48V 1KW Motor Kit PAGE 11 8 11 2019 Install the 3 button switch next to LCD...

Page 12: ...ing Bike on Turn the battery on Press the center switch of the 3 buttons for 2 to 5 seconds The LCD should turn on Press the throttle gently and motor should spin 2 8 Support Send an email to support...

Page 13: ...or Kit PAGE 13 8 11 2019 3 WARRANTY The 48v 1kw motor kit comes with a 90 day plain English warranty Warranty covers all parts and labor but excludes shipping For warranty issues please email urgent c...

Reviews: