

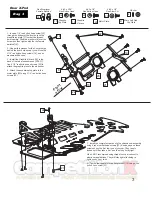

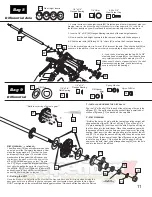


Bag 4
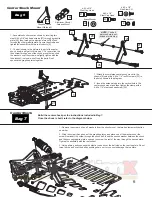
Graphite Tweak
Plate (x2)
1 - Place the Tweak Plate [24] in front of you so the holes face the same
direction as the picture.
2 - Attach the red 7/8” hex standoffs [15] to the tweak plate with the 1/4”
red button head screws [22] using the holes shown.
3 - Attach the female ballstud [18] to the tweak plate with the 3/16” button
head [16] in the hole shown.
4 - Repeat the above steps for the second Tweak Plate, but flip the plate
first as this is for the opposite side of the car.
Tweak Plates
4
24
24
16
15
22
18
Red Aluminum
Female Ballstud
18
4-40 x 1/4”
Red Button Head
22
4-40 x 3/16”
Red Button Head
16
Red 7/8”
Standoff
15
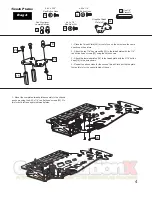
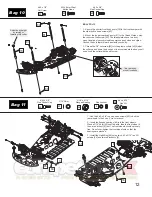
1 - Mount the completed tweak plate assembly to the chassis
as shown using the 4-40 x 1/4” red flat head screws [23]. Do
this for both left and right side tweak plates.
4-40 x 1/4”
Red Alum FH
23
23


