CAE Healthcare METIman User Manual Download Page 67

41

Using the Software

Using the Software

The Müse software used with the METIman simulator is a web-based application that can 

communicate directly with the simulator. With the software, users can run SCEs, create 

scenarios and SCEs, import and export data and perform administrative functions. 

NOTE

: For optimal Müse performance, no other software programs should be open while Müse 

is running. 

IMPORTANT

: Only one Müse application window and/or tab can be used per Instructor 

Workstation, per simulator at a time.

IMPORTANT

: Do NOT use any of the browser’s navigational tools while operating Müse.

Starting the Application

Once the METIman simulator is powered on and the Instructor Workstation is connected to the 

METIman network, the Müse software can now be launched.

To launch the software: 

Using the Laptop or Tablet Instructor Workstation, launch the web browser (e.g., 

1. 

Safari, Internet Explorer). 

NOTE

: If using a computer other than the one supplied, the computer will have 

to be configured to the METIman network. (The directions for using a different 

computer are the same as the directions for Connecting a TouchPro Computer to 

the Wireless Network, found on 

page 34

.)

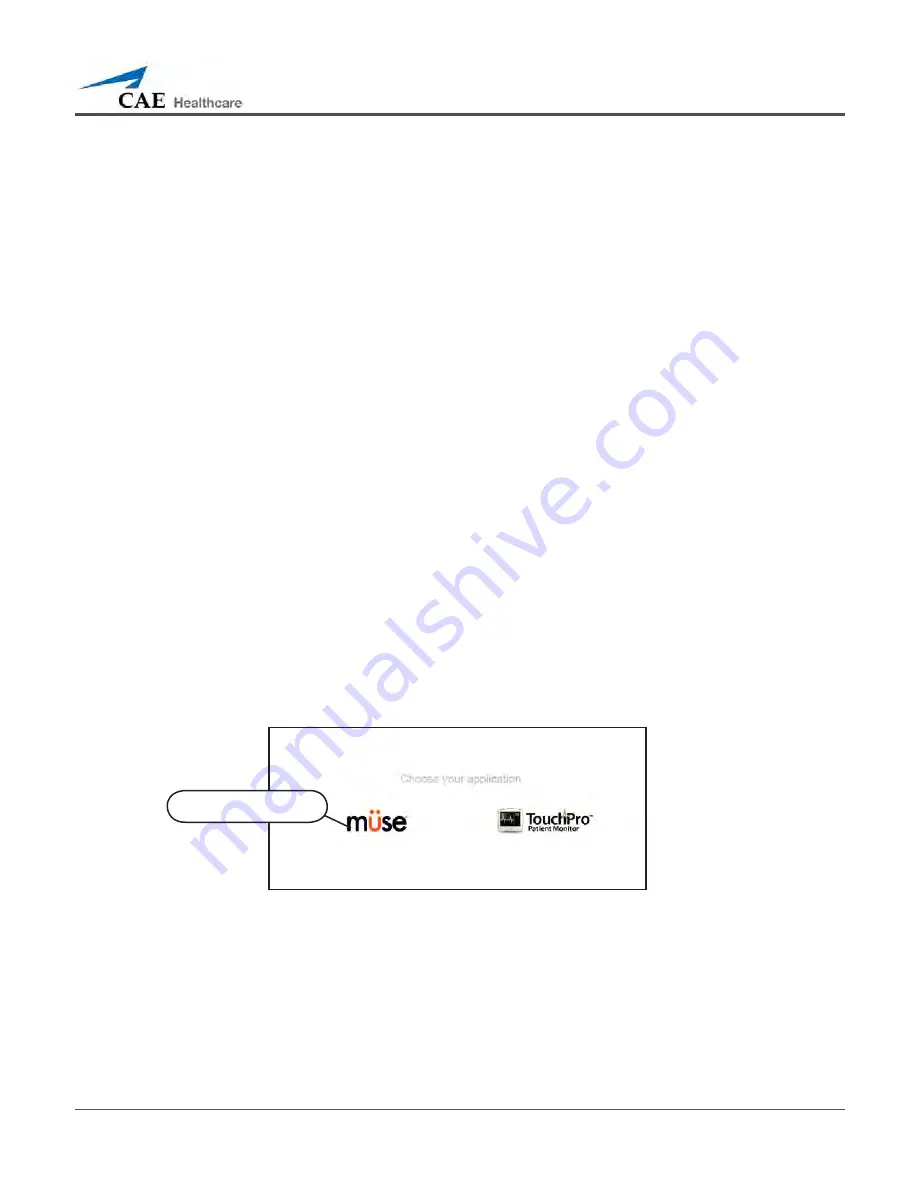
The Müse Start Screen appears.

The Müse Start Screen

The 

Müse

 icon

Summary of Contents for METIman

Page 1: ...METIman User Guide...

Page 2: ......

Page 3: ...ch is in the possession of or belonging to CAE Healthcare and relating to the Product including without limitation all Data Software trade secrets know how processes methodologies samples components a...

Page 4: ...fidential Information to enable support or otherwise aid Licensee or a third party to develop any product software or service competitive with any of CAE Healthcare s products 2 5 Licensee agrees to g...

Page 5: ...are intended to survive 5 NON DISCLOSURE 5 1 Licensee agrees to keep this License and all Confidential Information obtained hereunder in strict confidence and shall only disclose same a to Authorized...

Page 6: ...O IRREVOCABLY WAIVES TO THE FULLEST EXTENT PERMITTED BY APPLICABLE LAW ANY AND ALL RIGHT TO TRIAL BY JURY IN ANY LEGAL PROCEEDING ARISING OUT OF OR RELATING TO THIS AGREEMENT 8 3 Notwithstanding the f...

Page 7: ...ay assign this Agreement in whole or in part and or its rights and obligations in CAE Healthcare s sole discretion to any party This Agreement shall be binding upon and enure to the benefit of the par...

Page 8: ...o 122 F 4 C to 50 C Relative Humidity 0 to 90 non condensing Power Mannequin Simulator AC Input AC 90 240VAC 50 60Hz Consumption 70W nominal Internal Batteries 18 5V lithium ion rechargeable Run Time...

Page 9: ...d Do not place defibrillator paddles on or adjacent to the ECG patient electrodes Contact between defibrillator paddles and the electrodes may cause injury to the user and damage to the equipment Alwa...

Page 10: ...se CO2 canister to heat above 140 F as rupture may occur Never point CO 2 canister towards your face or someone nearby Use only CAE Healthcare specified CO 2 canisters Wear protective gloves and eye p...

Page 11: ...f small amounts of approved lubricant Only perform invasive procedures supported by the system as described in the applicable sections of the User Guide Do not pick the mannequin up by the limbs suppo...

Page 12: ...battery close to heat or flame Do not use the battery inside of a car where temperature may exceed 80 C 176 F Also do not charge discharge the battery in such conditions Do not short circuit the posi...

Page 13: ...e power the equipment diminishes significantly the battery life is at an end Replace the battery with a new battery of the exact same make and model Immediately remove a battery whose life cycle has e...

Page 14: ...stem XP Service Pack 2 Vista or Windows 7 Firefox 10 ESR Internet Explorer 8 or Safari 5 x x minimum Adobe Flash Player 10 1 x x minimum Adobe Reader 9 x or higher Hardware Windows and Macintosh Intel...

Page 15: ...ment Overview 2 Standard Components Inventory 2 Optional Components Inventory 3 METIman Standard Equipment 4 Full BodyWireless Simulator 4 Battery Charger and External Power Supply 4 InstructorWorksta...

Page 16: ...ETIVision 11 METI FX 11 Moulage Kit 12 METIman Setup 13 Before Beginning Setup 14 Step 1 Place METIman in theWork Area 15 Step 2 Connect the Lower Legs to METIman 16 Step 3 Power On METIman 18 Step 4...

Page 17: ...aFillTankandFilltheOn BoardBloodReservoir 32 Step4 ReleasePressurefromtheTraumaFillTank 33 Step5 DisconnecttheTraumaFillTankUmbilicalfromtheSimulator 33 Preparing for Storage 33 Step1 CleantheSimulato...

Page 18: ...51 Setting Parameters 53 UsingtheConditionsPalettetoSetParameters 53 UsingthePhysiologicalViewstoSetParameters 55 Performing Interventions 56 UsingtheMedicationsPalette 56 UsingtheInterventionsPalett...

Page 19: ...roSetup 73 PatientStatusDisplay 74 The Scenario Designer 75 The Scenario Button 76 Scenario DesignerViews 77 Creating a New Scenario 79 ModifyingScenarioStates 79 AddingParametersandInterventions 80 A...

Page 20: ...3 BasePatients 94 Scenarios 95 User Accounts 96 CreatingaUser 97 EditingaUser 98 DeletingaUser 98 Groups 99 PrivilegeSystem 100 CreatingaNewGroup 101 DeletingaGroup 101 Maintenance 102 System Settings...

Page 21: ...ing the Layout 111 SelectingaPreconfiguredLayout 112 ChangingaWaveformorNumericDisplay 113 AddingaWaveformDisplay 114 AddingaNumericDisplay 115 MovingaWaveformorNumericDisplay 116 SavingaLayout 117 So...

Page 22: ...PrehospitalOnly 133 Laryngospasm PrehosptialOnly 134 TeethwithBreakawayIncisors PrehosptialOnly 134 AirwaySecretions NursingOnly 135 Cricothyrotomy 136 ReplacingtheCricothyrotomyTape 136 ResealingtheM...

Page 23: ...on InvasiveBloodPressureMeasurement 148 Heart Rate 152 Five Lead ECG 152 Cardiovascular Interventions Therapy 153 ChestCompressions 154 DefibrillationandCardioversion 154 Pacing 155 Subclavian Cathete...

Page 24: ...cSuction NursingOnly 162 Genitourinary System 163 Urinary Catheterization 163 Simulating Urine Output 164 Changing the Simulator s Genitalia 165 Sounds 166 Speech 166 VocalSounds 166 SpeechSounds 168...

Page 25: ...e Upgrade Support 179 Pricing Structure 179 Time and Materials 179 Breakdown 180 Step 1 Stop All Running SCEs 180 Step 2 Clean the Simulator and the Fluid System 180 Step 3 Shut Down the Software 180...

Page 26: ...tying the Head Secretions Lines Prehospital Only 190 Emptying the Airway Secretions Reservoir Nursing Only 190 Flushing the Subclavian Catheter Nursing Only 190 Handling CO2 Canisters 191 Removing CO2...

Page 27: ...uilt tough to withstand a wide variety of real life indoor and outdoor learning environments METiman comes with extensive clinical features and capabilities designed specifically for emergency medical...

Page 28: ...he necessary equipment for establishing an educational simulation center CO2 Canisters Prehospital Only Standard Equipment METIman Simulator Battery Charger and External Power Supply Instructor Workst...

Page 29: ...create real life scenarios at authentic locations Optional Equipment METI FX External Compressed Air Kit External CO2 Kit Air Compressor Hands Free Training Cables METIman Replacement Lithium Battery...

Page 30: ...offers features like arm pronation and supination breath heart and bowel sounds palpable pulses patient voice and genitourinary features Battery Charger and External Power Supply The simulator is rec...

Page 31: ...Kit Quick Start Chart and Setup Map iStan Logo Accessories Priming syringe Roll 4 ft of VHB tape and roll of 2 inch wide red tape for cricothyrotomy Cricothyrotomy skin BP adapter kit Silicone lubrica...

Page 32: ...hat may be attached to a belt or waistband Wireless Microphone The microphone is battery operated and has a power switch on the top to turn it on and off Wireless Voice Link The wireless voice link re...

Page 33: ...onents enable the METIman system to be customized to fit the specific needs of a wide variety of education environments METIman Replacement Lithium Battery Under normal usage a battery pack should las...

Page 34: ...External CO2 Kit includes a flexible 30 ft 9 m hose attached to a preset air regulator and an adapter for wall or tank fittings Air Compressor An air compressor product AIR 003 designed for quiet oper...

Page 35: ...electrode pads Three different cable designs are available to support the most popular defibrillation and pacing equipment Each cable kit includes posts that attach to the defibrillator or pace locat...

Page 36: ...provides learners with an overview of the system and its components as well as an introduction to patient creation and scenario design METIman Basic two days at CAE Healthcare facility TRN 018 METIman...

Page 37: ...ability to provide a complete record of your simulation exercise for debriefing assessment and evaluation product MTV 001 METIVision Console METI FX CAE Healthcare takes realism to the next level with...

Page 38: ...12 Introduction Moulage Kit The kit provides the materials needed to create wounds on METIman product MODS 999 Moulage Kit The Moulage Kit may also be ordered separately...

Page 39: ...Connect the SpO2 Probe Optional Connect the External Air Optional Insert the CO2 Canister Optional Prehospital Only Detach the Arms Optional Place METIman in the Work Area 1 Connect the Lower Legs to...

Page 40: ...uide Follow the sequence of steps carefully Complete all steps in order Do not power on any components until instructed in the text KEEP all original shipping materials including BOXES warranty and re...

Page 41: ...METIman METIman and the Laptop or Tablet Instructor Workstation can be operated from their batteries allowing for wireless use In a lab environment make sure a multi plug AC power outlet exists withi...

Page 42: ...n securely in place Doing so can seriously damage the sensor cables and pulse tubes On each leg at the knee remove the locking pin from its position a Removing the Locking Pin Place lower limbs in the...

Page 43: ...three black electrical d connectors Connecting Electrical Carefully place tubes and cables in the hole on the lower leg e Align holes on the knees and insert the locking pin f Screw the nut on the lo...

Page 44: ...ress and hold the b ON OFF button for one second The power light blinks indicating the system is busy In approximately one minute the light stops blinking and remains solid indicating the simulator is...

Page 45: ...e Laptop or Tablet Instructor Workstation near METIman in a convenient a location Ensure the Instructor Workstation battery is fully charged or connect the AC b adapter to the workstation and a surge...

Page 46: ...tion Click the a AirPort icon located in the top right hand corner of the screen Clicking the AirPort Icon If the b AirPort is not on select Turn AirPort On Activating the AirPort Card Select the netw...

Page 47: ...21 Setup The AirPort dialog box appears The AirPort Dialog Box Enter the password d metiadmin into the Password field Click e OK Connecting to the METIman Network The M se software can now be launched...

Page 48: ...r is opened the M se software launches If the auto connect does not occur perform the following steps Tap on the 1 Wireless Network icon in the task bar Select the METIman wireless network e g MMPXXX...

Page 49: ...pO2 probe to METIman Locate the a SPO2 port on METIman s left hip Connect the SpO b 2 probe to the SPO2 port Place the SpO c 2 probe on METIman Attached SpO2 Probe The probe must be connected to view...

Page 50: ...sed Air Kit consists of a flexible 30 ft 9 m hose attached to a preset air regulator and a fitting for air compressors and adapters for wall or tank air To connect the air hose Connect the External Co...

Page 51: ...canisters in a dry location between 32 and 104 F 0 to 40 C Do not expose the CO 2 canister to heat above 140 F as rupture may occur Never point the CO 2 canister toward your face or someone nearby Use...

Page 52: ...d 2 canister into the regulator as far as it will go The final turns puncture the CO2 canister which is necessary for correct operation Connecting the CO2 Canister CAUTION Do not loosen the canister...

Page 53: ...reposition the abdominal insert and pull the skin back over the simulator g to its original location Once the canister and regulator assembly are in place CO2 is measurable with a disposable ETCO2 det...

Page 54: ...for use with trauma scenarios To detach METIman s arms Unscrew and remove the locking pin at the elbow 1 Removing the Locking Pin Carefully separate the lower arm from the upper arm 2 Twist to disconn...

Page 55: ...three electrical connectors black 4 Disconnecting the Electrical Connectors Place the loose connectors carefully within the upper arm 5 NOTE When replacing arms ensure tubing and electrical connectors...

Page 56: ...ill the on board blood reservoir CAUTIONS and WARNINGS Carefully follow all instructions for using the Trauma Fill Tank Pay particular attention to the following cautions and warnings ALWAYS read and...

Page 57: ...a Fill Tank Be careful to complete the following steps correctly to ensure proper use and maintenance of the METIman and its peripherals Step 1 Pour the Fluid into the Trauma Fill Tank Pour the desire...

Page 58: ...iking and injuring you NEVER stand with your face or body directly over the top of the tank when pumping or loosening the pump To operate the pump and fill the reservoir Unlock the pump handle by turn...

Page 59: ...simulator s blood reservoir both must be cleaned for storage Step 1 Clean the Simulator and Fluid System When the simulation is completed and the Trauma Fill Tank has been disconnected remove the flu...

Page 60: ...TouchPro software on a TouchPro computer Step 1 Set Up METIman The METIman simulator must be set up and powered on and the Instructor Workstation must be powered on and connected to the METIman networ...

Page 61: ...s must match the IP address obtained in Step 2 except for the number after the third and final period This number can be any number between 2 and 254 BUT must be different from the final number of the...

Page 62: ...he METIman Network Using a Macintosh Operating System Click the a AirPort icon located in the top right hand corner of the screen Clicking the AirPort Icon If the b AirPort is not on select Turn AirPo...

Page 63: ...unit number Selecting METIman s Network The AirPort dialog box appears The AirPort Dialog Box Enter the password d metiadmin into the Password field Click e OK Connecting to METIman s Network The com...

Page 64: ...g a Windows Operating System Click the a Wireless Network icon located in the bottom right hand corner of the screen Clicking the Wireless Network Icon Click b Connect to a Network Clicking Connect to...

Page 65: ...imulator s unit number Selecting METIman s Network If prompted for a password enter d metiadmin into the available field Click e Connect Connecting to METIman s Network The computer has joined the MET...

Page 66: ...n appears The M se Start Screen The TouchPro software can now be launched OPTIONAL From your web browser a bookmark can be created on the TouchPro computer for ease of access to the M se or TouchPro s...

Page 67: ...TANT Do NOT use any of the browser s navigational tools while operating M se Starting the Application Once the METIman simulator is powered on and the Instructor Workstation is connected to the METIma...

Page 68: ...on is available for download by clicking the User Guide link in the bottom left hand corner of the screen To access the User Guide in other languages please visit www caehealthcare com and click the S...

Page 69: ...he 3 Username admin and the Password admin in the appropriate fields to access the software Entering the Username and Password The software opens to the Home page by default Enter the admin and the ad...

Page 70: ...me page can be accessed by clicking the Home button in the top right hand corner of any screen in the M se software The Home Button The Home Page The SCE Selection Panel A selected SCE The Print SCE a...

Page 71: ...ection panel has four tabs that access SCEs Running Now Recent Favorites and All Running Now lists the SCEs that are currently running and is only available when at least one SCE is running Recent lis...

Page 72: ...Library button at the bottom of the SCE Selection panel The SCE Library appears listing all available Learning Applications Click the desired Learning Application name to access the SCEs for that Lea...

Page 73: ...rkstation consult your network administrator for assistance connecting to a printer If the Instructor Workstation is connected to a wireless printer the Instructor Workstation will need to be disconne...

Page 74: ...he SCE view physiological status and events and perform overrides and interventions From the Home screen click Run to access the Run screen Clicking the Run Button The Run Screen appears The Run Scree...

Page 75: ...ere are widgets that display the patient s physiological status The Patient Status Display widgets can be changed to reflect the user s needs There are six available display panels for the widgets Wav...

Page 76: ...r from the list and the widget changes to reflect the new selection The Event Log During an SCE all software operations sensed by the simulator or entered manually e g virtual defibrillation are recor...

Page 77: ...gy Click the Add Scenario button on the Run screen to add a scenario to an SCE that is running The Add Scenario Button The Select a Scenario Dialog Box Physiological Views From the Run screen users ca...

Page 78: ...balloon For Neurological click the brain For Respiratory click the lung For Cardiovascular click the heart For Fluids click the blood droplet For Sounds click the Sounds button Physiological Views Fro...

Page 79: ...ditions palette using a Quick Link or using the complete Conditions menu Quick Links are preconfigured conditions that are made accessible in the Conditions palette for quick application Quick Links c...

Page 80: ...ed by system or all available conditions can be listed by choosing ALL CONDITIONS Conditions Menu Navigate through the menus and once the condition has been located click the condition s name from the...

Page 81: ...and menus In the image below the Heart Rate parameter is shown Within the Heart Rate parameter there are switches that toggle between Modeled and Override and Seconds and Minutes a slider that sets th...

Page 82: ...Quick Link or using the Medications menu Quick Links are preconfigured medications that are made accessible in the Medications palette for quick application Quick Links can also be created for the Con...

Page 83: ...available medications are listed under ALL MEDICATIONS The Medications Menu Navigate through the menus and once the medication has been located click the medication s name from the list Selecting a Me...

Page 84: ...ns that are made accessible in the Interventions palette for quick application Quick Links can also be created for the Conditions and Medications palettes To apply an intervention using the Quick Link...

Page 85: ...ventions are organized by type or all available interventions can be listed by choosing ALL INTERVENTIONS Interventions Menu Navigate through the menus and once the intervention has been located click...

Page 86: ...ed from the Scenario screen or from the Run screen Changing Scenario States from the Scenario Screen To change a scenario state from the Scenario screen From the Run screen click the desired loaded sc...

Page 87: ...e screen NOTE Pausing a scenario does NOT pause the SCE Click the 3 Jump to State button The Jump to State Button The Jump to State menu appears displaying the available states Select the desired stat...

Page 88: ...state from the Run screen Click the desired scenario The Scenario Management pop up menu appears and 1 all available states are listed The Scenario Management Pop Up Menu Pause or continue the scenari...

Page 89: ...e amount of time that has elapsed and shows bookmarks that have been created Bookmarks are used to create a point in the SCE timeline to which users may easily return To create a bookmark click Bookma...

Page 90: ...ent with the same gender as the 1 Patient to be created From the Run screen apply the desired conditions and set the necessary 2 parameters Once complete click 3 Patient at the bottom of the Run scree...

Page 91: ...he new Patient in the Enter the new patient name field of the 5 Save a copy of the Patient dialog box Entering a Name for the Patient Click Save The new Patient is now available in the Patients Palett...

Page 92: ...hen the Patient is reset To reset a Patient While running an SCE click 1 Patient at the bottom of the Run screen Clicking Patient The Patient pop up menu appears Click 2 Reset Clicking Reset from the...

Page 93: ...n screen The Medication Monitor The number shown on the Medication Monitor next to each medication listing is the normalized effector site concentration When a medication is reset from the Medication...

Page 94: ...include selecting a Patient naming the SCE and saving the SCE Once the new SCE is created you can continue with the SCE creation or use the Review button to edit later To edit an existing SCE click Re...

Page 95: ...the SCE the name of the SCE may NOT exceed 80 characters Additionally SCE file names CANNOT contain any special characters such as Click 4 Save Once the SCE is saved it is stored and can be edited an...

Page 96: ...cture button if you wish to change the patient s picture Click 4 Save IMPORTANT No aspect of the patient s profile can contain any special characters such as To set the Patient s Baseline From the SCE...

Page 97: ...E Editor The Content Management Buttons Each screen allows users to enter different information Click the Edit button of each section on the SCE Editor to access a rich text editor that enables data e...

Page 98: ...ss the Condition Setup screen From the Conditions Setup screen conditions medications and interventions can be preconfigured for the SCE creating Quick Links On the Condition Setup screen Conditions M...

Page 99: ...SCE Editor The TouchPro Pre selected Layout screen appears The TouchPro Setup Screen From the TouchPro Pre selected Layout screen the following predefined layouts can be made available in the TouchPr...

Page 100: ...creen appears Patient Status Display Screen To preconfigure the Patient Status Display for an SCE drag and drop the desired waveform numeric or volume widgets on the Patient Status Display screen to a...

Page 101: ...alog Box To choose a saved scenario from the list select the scenario and click Add The scenario appears beneath the Preloaded Scenarios heading Click the scenario to open it in the Scenario Designer...

Page 102: ...rs to save scenarios add blank states and rename and delete selected states The Scenario Drop Down Menu IMPORTANT When naming a new Scenario the scenario name may NOT exceed 128 characters When naming...

Page 103: ...The Graphical View allows users to branch out scenario states The Line Item view places the states into a linear format Click the Graphical View button to utilize the Graphical View Double click on an...

Page 104: ...ng the Software Click the Line Item View icon to utilize the Line Item view Double click on any state to expand and view all its components as shown in the example below Line Item View Line Item View...

Page 105: ...State and a new state appears on the canvas NOTE When naming a Scenario State the state name may NOT exceed 127 characters Additionally scenario file and state names CANNOT contain any special charac...

Page 106: ...terventions can be set in two ways Users can drag and drop additional parameters from the Conditions menu to the canvas or to states Adding a Condition Or click the Parameters button within the state...

Page 107: ...ed it appears in the Patient Control panel Add as many parameters as needed Added parameters appear consecutively within the state Drag and drop to reorder as needed Click Complete to save and exit th...

Page 108: ...ition A menu appears with all available transition variables Transitions Menu Select the desired variable from the menu For example if a medication is desired 2 select Medications and select the desir...

Page 109: ...t the resulting state from the menu Transition Menu An orange connector line appears linking the transition to the state A Connected Transition Follow the same steps to add multiple transitions to the...

Page 110: ...nt at least one other state must be created first To add an ELSE statement click ELSE in the original state A menu appears with all the available states listed ELSE Menu Click the desired state A blac...

Page 111: ...he trash Deleting a State in the Graphic View In the Line Item view drag and drop the state into the trash Deleting a State in the Line Item View Deleted states remain in the trash can until you log o...

Page 112: ...Using the Software Deleting Parameters and Transitions From an active state drag and drop the desired parameter or transition into the trash Deleting a Parameter Drag and drop the parameter in the tra...

Page 113: ...rash are listed Trash Can Contents Click Empty Trash to empty the trash If you do not wish to delete the items listed they can be dragged back into the scenario at which time they are removed from the...

Page 114: ...saving a new scenario users receive the same prompts To save a modified scenario as a new scenario click Save As The Scenario Drop Down Menu When Save As is clicked the Save Scenario dialog box appear...

Page 115: ...ater use To save a state drag and drop the state to the State Library button A Saved State The state is stored in the library and appears in the State Library panel A Saved State Click Conditions Libr...

Page 116: ...d export the Simulation Session Logs of performed SCEs Each Simulation Session lists the Start Time the title of the SCE and the Patient s name In addition the Physiological Data and Simulation Events...

Page 117: ...ystem Administration screen click the System Administration button from the Home screen The System Administration Button Content Management From the Content Management screen users can manage Learning...

Page 118: ...all a Learning Application Click 1 Install Learning Module The Select file to upload dialog box appears Locate the correct Learning Application file on the Learning Application CD The 2 file extension...

Page 119: ...Es panel The SCEs Screen On the SCEs screen users can import and export the SCEs they have created NOTE SCEs purchased from CAE Healthcare CANNOT be exported Click Import SCE to import an SCE from an...

Page 120: ...w delete import and export Patients they have created by clicking the respective buttons within each Patient Locked Patients can only be reviewed from this screen Click Import Patient to import a Pati...

Page 121: ...only be reviewed from this screen Users can also create new scenarios from the Scenarios screen by clicking the Create New Scenario button User created scenarios can be renamed reviewed and deleted fr...

Page 122: ...m the User Accounts screen users can create edit and delete users To access the User Accounts features on the System Administration screen click User Accounts The User Accounts Screen Click User Accou...

Page 123: ...data 2 First Name Last Name Email Password The password should be one that is not easily guessed Confirm Password NOTE A suggested User ID is generated automatically when the user s first and last na...

Page 124: ...a User Delete a user when the user is no longer needed To permanently delete a user From the Users panel select the user to be deleted 1 Click 2 Delete The User Deletion Warning box appears stating a...

Page 125: ...Administration screen click Groups The Groups Screen From the Groups screen users can create new groups delete groups and assign privileges to groups In the Groups panel three groups appear by defaul...

Page 126: ...gement privileges listed below Users with the System Management privilege can also view system settings back up and restore data and apply software updates User Management Users with the User Manageme...

Page 127: ...roups panel on the Groups screen Privileges can now be selected Select the privilege s to be assigned to the Group 4 Click 5 Save Deleting a Group Delete a group when it is no longer needed Once a Gro...

Page 128: ...he Maintenance screen users can flush the fluids from their METIman simulators For more instructions on how to flush the simulator see the Care and Maintenance section The Maintenance Screen Click Mai...

Page 129: ...tings Screen System Configuration Under System Configuration Disk Space and System Time are displayed Data Management The Data Management feature allows users to back up data to an external device Use...

Page 130: ...appropriate file to restore the data 4 Click 5 Select The data is restored Product Licensing To view product licensing information for your simulator or to enter a license key to activate your softwar...

Page 131: ...ile screen click Profile Information to access the Profile Information screen From this screen users can change their profile information and reset their passwords The Profile Information Screen To ch...

Page 132: ...the logged in user s favorite SCEs appear in the Favorite SCEs panel The Favorite SCEs Screen To add SCEs to the Favorite SCEs panel click Add Favorites The SCE Library appears Select the desired SCE...

Page 133: ...cation Preferences screen found under Account Profile users can import customized medication response files created in the Pharmacology Editor software The Medication Preferences Screen Click Medicati...

Page 134: ...108 Using the Software Profile Preferences Profile preferences allow users to change the font size The Profile Preferences Screen Click Profile Preferences to access the Profile Preferences screen...

Page 135: ...with computers that have touch screen capabilities To run the TouchPro software the Instructor Workstation must be connected to the METIman network An SCE must be running on the M se software for any...

Page 136: ...appears The TouchPro Display NOTE If using TouchPro on a separate computer other than the Instructor Workstation the additional computer must be on METIman s network For instructions on how to join th...

Page 137: ...pressure NIBP ICU OR Arterial Line Only preconfigured with waveform and numeric readouts for ECG Lead II ECG Lead V ABP Pleth and a numeric readout for Body Temperature ICU OR No CVP preconfigured wi...

Page 138: ...from the Layouts panel and click the Close Settings button Settings Menu NOTE Preconfigured layouts must be enabled in the M se TouchPro Setup for the currently running SCE to be accessible in the Lay...

Page 139: ...ection menu appears displaying all the available waveforms or numerics Wave Vital Selection Menu Select the desired waveform or numeric 2 The new waveform or numeric is reflected on the screen From th...

Page 140: ...tom right corner of the TouchPro display The Settings Button The Settings menu opens and the Add Waveform and Remove Waveform buttons appear Click the plus button in the location above which you want...

Page 141: ...d on the screen Adding a Numeric Display The TouchPro software contains four numeric display fields All four numeric display fields are located on one row beneath the waveform displays When fewer than...

Page 142: ...c vital display is reflected on the screen Moving a Waveform or Numeric Display Waveforms and numerics can be moved on the screen to suit the user s needs To move a waveform or numeric click the desir...

Page 143: ...e field enter a name for the layout Entering a Layout Name Click 5 Save Click the 6 Close button to exit the Settings menu Saved layouts can be deleted from the Settings menu by dragging and dropping...

Page 144: ...tings menu click Audio Setup The Audio Setup Menu From the Audio Setup window select a waveform to set it as the pulse sound Once a waveform is selected the Audio Setup window automatically closes Cli...

Page 145: ...tor Workstation From the 12 lead ECG report screen click the Print button located in the bottom right 1 corner of the 12 lead ECG report Select the Save As PDF option 2 The report saves as a PDF on th...

Page 146: ...NIBP Cycling or the current NIBP can be displayed immediately using the Manual NIBP button To set the patient s NIBP to be updated at regular intervals from the Settings menu click NIBP Cycling The NI...

Page 147: ...play the patient s current NIBP click the Manual NIBP button The Manual NIBP Button The current NIBP is displayed NOTE Manual NIBP can be used at any time during cycling However this turns off auto cy...

Page 148: ...he Settings button in the bottom right hand corner of the TouchPro screen to access the Settings menu From the Settings menu click Patients to view the current Patient Available Patients NOTE When con...

Page 149: ...Configure panel To access the Configure panel Click the 1 Settings button in the bottom right hand corner of the TouchPro screen Click the 2 Configure button from the Settings menu From the Configure...

Page 150: ...ck the 2 Language Selection button from the Settings menu From the Language Selection panel select a language 3 The Language Selection Panel Click Accept Exiting the TouchPro Software To exit the Touc...

Reviews: