background image

Refer to Owner Manual for further information.

Reviewed with Customer (Please Check Box)

13

Entertainment

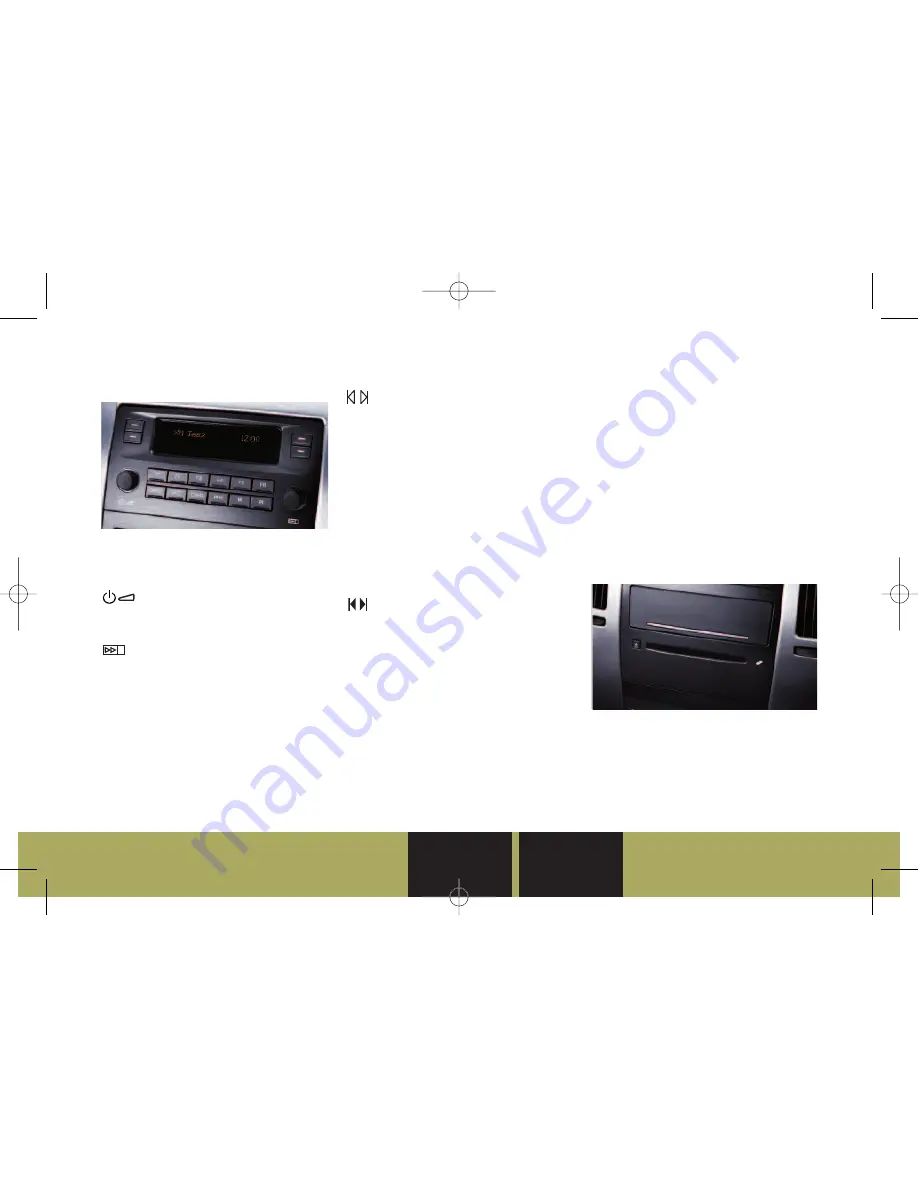
RADIO AND CD CONTROLS

While most of the features on your
radio will look familiar, following are
some that may be new:

(Power/Volume):

Press the left

knob to turn the system on or off.
Turn the knob to adjust the volume.

(Tune/Select):

Turn the right

knob to select radio stations.
Press the knob to enter the radio’s
main menu.

BAND:

Press this button to switch

to FM1, FM2, AM, or XM1 and XM2
(if equipped).

SRCE (Source):

With a CD loaded,

press this button to switch between
radio and CD operation.

CNFG (Configure):

Press this button

to enter the radio’s main menu.

(Scan):

Press this button to scan

radio stations or, when a CD is
playing, to scan each track or MP3
file. Each station, track or file will
play for several seconds and then
advance to the next station, track
or file. Press the button again to
stop scanning.
To scan preset radio stations, press
and hold the button for two
seconds until a beep sounds and
PSCAN is displayed. Press the button
again to stop scanning.

(Seek):

Press the right or left

arrow button to go to the next or
previous radio station or, when a CD
is playing, to the next or previous
track or MP3 file.

Radio Data System

When you tune to a Radio Data
System (RDS) station, the station
name and call letters will appear
on the display. RDS stations may
also provide the time of day, a
program type for current
programming and the name of
the program being broadcast.

RDS features are available for use
only on FM stations that broadcast
RDS information. RDS relies on
receiving specific information from
these stations and will work only
when the information is available.

MULTIPLE-DISC CD PLAYER

(if equipped)

With the in-dash 6-Disc CD Player,
note that you cannot directly load a
CD as in single-play systems. CDs
can be loaded or ejected with the
audio system on or off.

Loading CD(s)

• To load a single CD, press and

release the Load button. Wait
for the display prompt to load
the CD.

Driver

Information

Safety & Security

Convenience

Vehicle

Personalization

Entertainment

Performance &

Maintenance

Owner

Privileges™

111983_09a_STS_GTK_042908.qxd:STS 2007 A  4/29/08  5:18 PM  Page 15

Summary of Contents for 2009 STS

Page 1: ...CU STOM ER CON VEN IEN C E PERSON ALIZATION GU ID E 111983_09a_STS_GTK_042908 qxd STS 2007 A 4 29 08 5 17 PM Page 1...

Page 2: ...daptive Cruise Control 9 Tire Sealant and Compressor Kit 10 Power Mirrors and Curb View Assist 11 VEHICLE PERSONALIZATION Vehicle Personalization Settings 11 Memory Settings 12 ENTERTAINMENT Radio and...

Page 3: ...udio System 7 Adaptive Cruise Control and Heated Steering Wheel Controls if equipped 8 Horn 9 Audio Steering Wheel Controls 10 Start Button on instrument panel 11 Dual Zone Climate Control System 12 S...

Page 4: ...Low Tire Pressure Warning Light 14 Antilock Brake System Warning Light 15 Traction Control Off Light 1 2 3 4 15 14 11 9 8 7 10 12 13 6 5 Note The instrument panel cluster is designed to let you know...

Page 5: ...play EM Press this button to change the display from English to Metric DIC Controls with HUD Uplevel DIC systems include Head Up Display HUD controls see Head Up Display along with the following DIC c...

Page 6: ...the instrument panel Up Down Adjustment Press this button A to adjust the up down position of the HUD image on the windshield It cannot be adjusted side to side Press the up arrow to move the HUD imag...

Page 7: ...ock Press this button when all doors are closed to immediately lock all the doors Press and hold this button to express close all of the open windows in the vehicle Unlock Press this button to unlock...

Page 8: ...WARNING if equipped This feature uses a camera located between the rearview mirror and the windshield to detect lane markings It operates only at speeds greater than 35 mph 56 km h The warning symbol...

Page 9: ...RK Once the shift lever is moved to Park P the vehicle will turn off ADAPTIVE REMOTE START This feature allows you to start the engine from outside the vehicle by using the Keyless Access System trans...

Page 10: ...rs button inside the vehicle Press the button again to turn off the flashers Press the Off Accessory button on and then off The engine will automatically stop when time expires VOICE RECOGNITION if eq...

Page 11: ...2 Enable the system by rotating the exterior lamp control switch to AUTO with the turn signal multifunction lever in its neutral position The High Beam On light will illuminate on the instrument pane...

Page 12: ...nce Decrease Follow Distance Press the bottom of the GAP button to decrease the follow distance The Vehicle Ahead symbol on the Head Up Display will illuminate when a vehicle is detected in your path...

Page 13: ...Driver 1 or Driver 2 3 Turn on the radio 4 Press the CNFG Configure button or theTune Select knob on the radio to enter the radio s main menu 5 Use theTune Select knob to scroll to SETUP and then pre...

Page 14: ...Keyless Access System transmitter to identify yourself 3 Turn on the radio 4 Press the CNFG Configure button to enter the radio s main menu 5 Use theTune Select knob to scroll to SETUP and then press...

Page 15: ...sounds and PSCAN is displayed Press the button again to stop scanning Seek Press the right or left arrow button to go to the next or previous radio station or when a CD is playing to the next or previ...

Page 16: ...tton to eject the CD that is currently playing Press and hold the button to eject all CDs DVD NAVIGATION RADIO SYSTEM if equipped With the 6 disc CD DVD changer Navigation Radio System you can play up...

Page 17: ...ect hard key E 2 Press the numbered touch screen key of the slot you will be ejecting the disc from 1 6 at the bottom of the CD DVD display screen 3 The system will eject the disc To eject all discs a...

Page 18: ...TC Traction Control button located near the shift lever on the center console The message STABILITY SYS OFF will appear on the DIC To turn the system back on either press the TC Traction Control butt...

Page 19: ...ct location so you get the help you need Roadside Service is also available to Cadillac customers beyond the warranty period for a charge CUSTOMER ASSISTANCE 1 800 458 8006 Should you need to ask a qu...

Page 20: ...25795638A 25795638A 111983_09a_STS_GTK_042908 qxd STS 2007 A 4 29 08 5 18 PM Page 20...

Reviews: