CADDX NX148-E Installation Manual Download Page 4

4

6HOHFWDQ2SWLRQ
3UHVV

IRU +HOS

6HOHFWDQ2SWLRQ

Ü

 =RQH5HYLHZ

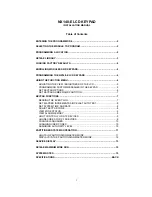
NX148-E AMERICAN SPANISH LIBRARY

ABAJO

CONTACTO

EXTERIOR

JARDIN

PRINCIPAL

SOTANO

ALARMA

CRISTAL

FACHADA

LABORATORIO

PUERTA

TALLER

ALMACEN

DESPACHO

FUEGO

LATERAL

RECEPCION

TECHO

ARRIBA

DETECTOR

GARAJE

LAVABO

RECIBIDOR

TERRAZA

AVERIA

DISPARO

GERENCIA

MAGNETICO

SABOTAJE

TIENDA

AZOTEA

DOBLE TECHNOLOGIA

GOLPE

OFICINA

SALA

TRASERO

BARRERA

DORMITORIO

HABITACION

PANICO

SALIDA

VALLA

CAJA FUERTE

EMERGENCIA

HUMO

PARED

SALON

VENTANA

CLARABOYA

ENTRADA

INFORMATICA

PASILLO

SENSOR

VESTIBULO

COCINA

ESTACIONAMIENTO

INFRARROJO

PERSIANA

SILENCIOSA

ZONA

COMEDOR

ESTUDIO

INTERIOR

PLANTA

SIRENA

LOADING FACTORY DEFAULTS

To load the factory defaults, enter the Program Mode for the module to be defaulted using the procedure on page 2,
then type [9]-[1]-[0]-[#]. The keypad will beep 3 times indicating that the loading is in progress. The loading takes about
6 seconds.  To load the factory defaults for the LCD keypad, enter the Program Mode from a 

different keypad (does

not have to be LCD keypad), and follow the procedures mentioned previously.  

NOTE:  The two-line Custom and

two-line Shutdown Messages will not be defaulted.

ENROLLING MODULES AND KEYPADS

For supervision purposes, the NetworX control panel has the ability to automatically find and store in its memory the
presence of all keypads, zone expanders, wireless receivers, and any other module connected to the data terminal.
This allows these modules to be supervised by the control panel. NOTE: All modules should be connected and set
to unique addresses prior to enrolling modules. To enroll the modules, enter the Program Mode of the NetworX control
panel.  When the Program Mode is exited, the control will enroll the devices.  The enrolling process takes about 12
seconds, during which time the "Service Required" will be displayed.  Once a module is enrolled, if it is not detected
by the control, the "Service Required

 will be displayed.

PROGRAMMING THE NX148-E LCD KEYPADS

This section describes how to program the address and partition of each keypad, as well as the options that are
available.  The address of the keypad is important because this is how the panel supervises the keypads. The factory
default for the “Master Code” is [1]-[2]-[3]-[4] when using a 4-digit code, or  [1]-[2]-[3]-[4]-[5]-[6] for a 6-digit code.  The
factory default for the "Go To Program" code is [9]-[7]-[1]-[3] when using a 4-digit code, or [9]-[7]-[1]-[3]-[0]-[0] for a
6-digit code.

USING THE FUNCTION MENU

Many of the functions shown below are in the Function Menu. Press [

U

] to access this menu. Once the [

U

] key is

depressed, the display will begin scrolling though a list of functions and the corresponding number(s) associated with
those functions. To access a function press the number(s) listed for that function. If you already know the function
numbers simply press [

U

] followed by the function number.

NOTE: Some of the functions are not listed because they are installer-level functions.

These are samples of the displays that will appear in the Function
Menu. Each time the [

U

] key is pressed the next menu item will be

displayed.  Press the number or key to access the function desired.
Press the [#] key to exit.

Summary of Contents for NX148-E

Page 1: ...AD 5 SET KEYPAD OPTIONS 6 SET KEYPAD NUMBER AND PARTITION 7 KEYPAD FUNCTIONS 7 READING THE EVENT LOG 7 SET ELAPSED INCREMENTS SINCE LAST AUTOTEST 8 SET SYSTEM TIME AND DATE 8 ADJUST KEYPAD TONE 8 VIEW...

Page 2: ...on the bottom line with the numbers 1 8 in the first 8 characters If the number appears this binary switch is on If a minus sign appears where the number should be this switch is off Toggle numbers on...

Page 3: ...ER RUMPUS STAIRS WINDOW BATHROOM DURESS HEAT MICROWAVE SAFE STORAGE WING BEAM EAST HOLDUP MOTION SENSOR STUDY WIRELESS BEDROOM EMERGENCY HOUSE NORTH SHOCK TAMPER YARD BUTTON EXIT INFRARED NURSERY SHOP...

Page 4: ...the control panel NOTE All modules should be connected and set to unique addresses prior to enrolling modules To enroll the modules enter the Program Mode of the NetworX control panel When the Progra...

Page 5: ...e keypad numbers with U 9 4 prior to programming custom messages If a keypad is added after messages are programmed you should either program ALL messages in it or enter custom message programming on...

Page 6: ...hart The current state of the option will be shown in the lower right corner of the display Press U to advance to the next option without making changes Otherwise follow the directions on the bottom l...

Page 7: ...September 25 th at 5 27 p m by user 75 The U shows that this event is not programmed to be reported to the central monitoring station POSSIBLE LOG MESSAGES DISPLAY DESCRIPTION TXlobat Transmitter Low...

Page 8: ...Code Entry A code has been entered First Open First Open Reports when the first partition is disarmed Last Close Last Close Reports when the last partition is armed Sprnklr Sprinkler Instant sprinkler...

Page 9: ...LCD Screen will prompt to Select Light Number 0 9 2 Enter the number of the device to edit The LCD will display the light number on the left On the right side of the display it will prompt to turn the...

Page 10: ...digit NX8E user number Remember to use leading zeros i e 03 or 003 for user 3 The LCD will now prompt you for the first in the following list of attributes PROMPTS 1 Outputs used Open Close Rprt Bypas...

Page 11: ...sly To set the multi partition mode use the U 9 3 function and answer YES to the question Master keypad NOTE U 1 followed by a code will temporarily access the Master Mode The keypad will revert back...

Page 12: ...e Arm Dash Flashing Area Armed Instant Area Dash Area Disarmed Ready to Arm Dash Area Area is Armed To disarm all of the areas press the x up scroll key To arm all of the areas press the down scroll y...

Page 13: ...ore of the following fault messages will be displayed Use the scroll keys to browse through them To exit the service messages press RQWURO 2YHU XUUHQW A short circuit of a control s power supply has o...

Page 14: ...QVLRQ 5 DPPHG A radio receiver is being jammed SDQVLRQ 7URXEOH An expansion device or keypad is not reporting to the control panel SDQVLRQ 6LUHQ WURXEOH An expansion device has detected some form of t...

Page 15: ...24 225 226 227 228 229 230 231 6 232 233 234 235 236 237 238 239 7 240 241 242 243 244 245 246 247 8 248 249 250 251 252 253 254 255 NX148 E MAXIMUM WIRE RUN Note These numbers are for one keypad at t...

Page 16: ...0 degrees F CURRENT DRAW 110 mA Maximum 75 mA without Sounder LCD KEYPAD DIMENSIONS 6 4 Wide 5 3 High 1 0 Deep SHIPPING WEIGHT 2 lbs CADDX CONTROLS INC 1420 NORTH MAIN STREET GLADEWATER TEXAS 75647 TO...

Reviews: