background image

For any help concerning set up and use of your TV please call the 

Customer Helpline: 0845 604 0105

33

Product Support

Cleaning the disc

A defective or dirty disc inserted into the unit can 

cause sound to drop out during playback.

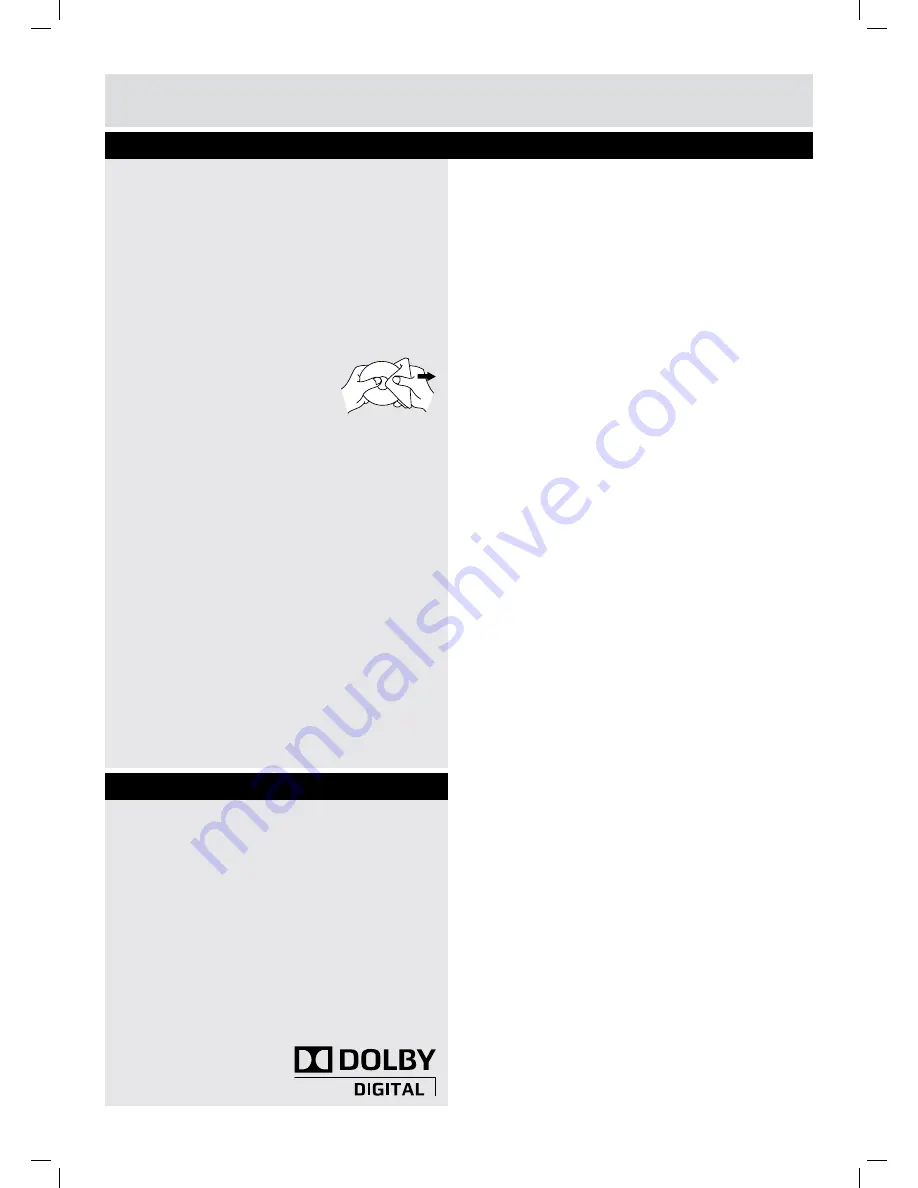
Handle  the  disc  by  holding  its  inner  and  outer 

edges.

•  Do NOT touch the surface of the unlabeled side 

of the disc.

•  Do NOT stick paper or tape on the surface of the 

disc.

•  Do  NOT  expose  the  disc  to  direct  sunlight  or 

excessive heat.

•  Clean the disc before playback. 

Wipe the disc from the center 

outward with a cleaning cloth.

•  NEVER use solvents such as benzene or alcohol 

to clean the disc.

•  Do NOT use irregular shape discs (example : 

heart shaped, octagonal, etc.). They may cause 

malfunctions.

Cleaning the unit

•  Be sure to turn the unit off and disconnect the 

AC power cord before cleaning the unit.

•  Wipe the unit with a dry soft cloth. If the surfaces 

are extremely dirty, wipe clean with a cloth which 

has  been  dipped  in  a  weak  soap-and-water 

solution and wrung out thoroughly. Then wipe it 

with a dry cloth.

•  Never  use  alcohol,  benzine,  paint-thinner, 

cleaning fluid or other chemicals. Do NOT use 

compressed air to remove dust.

Important note

Before shipping the unit, remove any disc from the 

disc compartment.

Maintenance

DOLBY DIGITAL (For DVD) 

Dolby  Digital  is  a  sound  system  developed  by 

Dolby  Laboratories  Inc.  This  unit  automatically 

recognizes DVDs that have been recorded with 

Dolby Digital.
Not all Dolby Digital sources are recorded with 6 

channels.
Some  sources  marked  Dolby  Digital  may  be 

recorded in Dolby Surround, a 2 channel system. 

Look for this logo on your unit.
Manufactured  under  license  from  Dolby 

Laboratories.
“Dolby” and the double-D 

symbol are trademarks of 

Dolby Laboratories.

Sound system

BTVD9xxx6_IB_BUSH 2011_Rev3.indd   33

6/1/2011   16:27:40

Summary of Contents for BTVD91186B

Page 1: ...tions contain important information which will help you get the best from your television and ensure safe and correct installation and operation For any help concerning set up and use of your TV please call the Customer Helpline 0845 604 0105 Lines open 9am 8pm Monday to Saturday and 10am 4pm Sunday Issue 1 7 3 11 Installation Operating Instructions Please keep for future reference 19 22 HD Ready ...

Page 2: ... 1 8 Time Menu 1 8 Setup Menu 1 9 Lock Menu 2 0 Teletext 2 1 CD DVD operation 22 25 Playing a disc 22 Playing a picture file disc 22 Pausing playback still mode 23 Stopping playback 23 Skipping to a different track 23 Fast forward fast reverse 23 Slow motion play DVD 23 Audio selection DVD 23 Subtitle selection DVD 23 Angle selection DVD 24 Display function 24 Locating a specific title DVD 24 Loca...

Page 3: ... instructions in this user s manual The lightning flash with an arrowhead within a triangle alerts you to uninsulated dangerous voltage within the product s enclosure that could cause an electric shock WARNING TO REDUCE THE RISK OF ELECTRIC SHOCK DO NOT REMOVE COVER OR BACK NO USER SERVICEABLE PARTS INSIDE REFER SERVICING TO QUALIFIED PERSONNEL This symbol means that the unit complies with Europea...

Page 4: ...ate from a 230V AC 50Hz mains supply Please note that when the STANDBY ON switch is in the standby position this does not completely disconnect the unit from the mains supply If the equipment is not to be used for a day or more disconnect it at the wall outlet This symbol means that the unit is double insulated No connection to earth is necessary Safe use of your equipment This equipment has been ...

Page 5: ...sistance with Technical experts are available 7 days a week Lines open 9am 8pm Monday to Saturday and 10am 4pm Sunday Calls to Argos enquiry lines may attract a charge and set up fee from residential lines depending on your call plan tariff Mobile and other providers costs may vary see www bt com pricing for details For Security and training purposes telephone calls to and from customer service ce...

Page 6: ...h as video video games audio set etc Stereo sound system Teletext fastext TOP text Headphone connection Automatic programming system Forward or backward manual tuning Sleep timer Child lock NTSC PAL playback according to disc content LPCM audio via coaxial and optical digital audio outputs optional Multi Audio up to 8 support according to disc content Multi Subtitle up to 32 support according to d...

Page 7: ... button in Teletext 9 List button Guide button Information button 10 Size button in Teletext 11 Audio Language button 12 Text button in Teletext 13 Time button 14 Sleep button 15 Function button DTV ATV AV1 AV2 SCART YUV SCART DVD or HDMI 16 Radio button 17 AV button 18 Last Ch button 19 TV Menu button 20 Channels Page buttons 21 FAV Favourite programme button Exit button 22 Index button in Telete...

Page 8: ...t reverse button Fast forward button 5 Previou button 6 Stop button 7 Angle button 8 Subtitle button 9 Title button 10 Goto button 11 Memory button 12 Clear button 13 Next button 14 Play button 15 Pause button 16 Slow button 17 Audio button 18 DVD Menu button 19 Setup button 20 Display button 21 Repeat button 1 2 3 4 5 6 7 8 9 10 11 12 14 13 18 19 20 21 15 16 17 BTVD9xxx6_IB_BUSH 2011_Rev3 indd 8 ...

Page 9: ...ack 3 Function button Select DTV ATV AV1 AV2 SCART YUV SCART DVD or HDMI 4 Menu button Press to display the on screen TV menu 5 Play button Press to start or resume playback of a disc 6 I button Turns the unit on and off 7 Common Interface slot For optional Conditional Access Module TV DVD jacks left view TV DVD right view 8 Audio in jacks Left Right Video in jack AV IN 1 9 TV Aerial Coaxial TV an...

Page 10: ...necting device It should remain readily accessible and should not be obstructed during use To be completely disconnected from the supply mains the mains plug of the TV should be disconnected from the mains socket outlet completely Satellite Cable RF Out or TV antenna cable to TV AERIAL CABLE Terminal cable not included There is a CI slot at top center of the cabinet which allows you to insert a CA...

Page 11: ...ot to be used for a long time remove the batteries to avoid damage caused by battery leakage corrosion Do not mix old and new batteries Do not mix ALKALINE standard CARBON ZINC or rechargeable NICKEL CADMIUM batteries Corrosion oxidation battery leakage and any other gradually acidic defect of this nature will invalidate the guarantee When discarding batteries environmental problems must be consid...

Page 12: ... button to select Country then press the ENTER OK button to confirm fig 4 4 The system will automatically scan and store all available programs which may take five minutes or more fig 5 If the digital TV region choice menu appears press ENTER OK to confirm your digital TV regions fig 6 Note If tuning fails a screen will appear as shown fig 7 DTV region menu Please press OK to continue Choose prefe...

Page 13: ...ting HDMI HDMI High Definition Multimedia Interface supports both video and audio on a single digital connection for use with DVD players DTV set top boxes and other digital AV devices HDMI was developed to provide the technologies of High Bandwidth Digital Content Protection HDCP as well as Digital Visual Interface DVI in one specification HDCP is used to protect digital content transmitted and r...

Page 14: ...ut must be connected to the SCART input Connects the SCART from the source to the corresponding SCART on this unit SCART cable not included as shown Make sure you connect both to SCART to SCART To operate the connected device and play the source first press the FUNCTION or AV button to select the AV2 SCART mode To AUDIO VIDEO IN jacks AV IN 1 To AUDIO VIDEO OUT jacks To connect to A V devices such...

Page 15: ...nnels Press the or to skip to the programmes of different periods Note Programme names in GREEN indicates that these programmes are now broadcasting on different channels Use the or or button to select a programme press the INFO button to display detailed information if available Press the INFO button again to return Press the YELLOW button to view the programme list of the next date press the GRE...

Page 16: ...BLUE button to skip or not skip the selected channel TV Setting only in ATV or DTV mode 1 Press the TV MENU button 2 Use the or button to select fig 3 3 Use the or button to select the options Auto Tuning DTV Manual Tuning ATV Manual Tuning Programme Edit adjust them using the or button Common Interface and Signal information are only available in DTV mode 4 Press the TV MENU button to return to p...

Page 17: ...picture The black portions of the picture become richer in darkness and the white become brighter Brightness Adjust the brightness of the picture Colour Adjust the colour of the picture Sharpness Adjust the sharpness level to improve detail in the picture Tint only for AV mode with NTSC signal Adjust the tint of the picture Colour Temperature Select the colour temperature of the picture Select Nor...

Page 18: ... Sound memu 1 Press the TV MENU button 2 Use the or button to select the fig 6 3 Use the or button to select the options Sound Mode Treble Bass Balance adjust them using the or button 4 Press the TV MENU button to return to previous menu 5 To exit the setup menu and return to the normal screen press the EXIT button Experiment with different sound settings until you find the settings you prefer Sou...

Page 19: ...d On Screen Display language Audio Language Selectyourpreferredaudiolanguage Available for digital channels if multiple audio languages are broadcasted Subtitle Language Selectyourpreferredsubtitlelanguageorturnoff subtitle Available for digital channels if multiple subtitle languages are broadcasted Restore Setting Press the ENTER OK button to restore the system settings to the factory default OA...

Page 20: ...tem will only work if the correct information is transmitted by the TV channel If you forget the password enter 8888 to unlock parental control Lock menu 1 Press the TV MENU button 2 Use the or button to select the fig 9 3 Press the button to highlight Lock System then press ENTER OK or or to enter enter password to proceed The default password is 0000 4 Use the or button to select the options Loc...

Page 21: ...f coloured subjects on the screen Pressing one of the colour buttons will take you directly to the page corresponding to the subject heading ANALOGUE TEXT ONLY Mix To view a page of the text whilst watching a TV programme press the MIX button The text will be superimposed over the TV programme Press the MIX button again to return to the text page Page search whilst watching TV In Text mode press t...

Page 22: ...eans that the desired operation is not permitted by the unit or disc CD DVD Operation Basic Features Playing a disc 1 Press the I button to turn the unit on 2 Press the FUNCTION button repeatedly to select DVD mode or directly to press DVD button on the remote See CUSTOMISING THE FUNCTION SETTINGS before proceeding to step 3 3 Push down the knob to open the disc door 4 Hold the disc by its edge an...

Page 23: ...the DVD Press the DVD MENU button to activate the main menu Pausing playback still mode Press the PAUSE button To resume normal playback press the PLAY button Each time you press the PAUSE button the picture advances one frame on DVD Stopping playback Press the STOP button at the location where you want to interrupt playback To resume playback at the position where the disc was stopped press the P...

Page 24: ...ailable only within the current title of the DVD disc Basic Features Angle selection DVD Some DVDs contain scenes which have been shot from a number of different angles For these discs the same scene can be viewed from each of these different angles 1 While you are playing a DVD with different angles recorded press the ANGLE button to view the number of the current angle available 2 Press the ANGL...

Page 25: ... repeat Repeat all A B repeat Repeating a chapter DVD You can play the same chapter repeatedly 1 While the disc is playing press the REPEAT DISC button until the indicator displays on the screen The current chapter is played repeatedly Repeating a title You can play the same title repeatedly 2 While the disc is playing press the REPEAT DISC button until the indicator displays on the screen The cur...

Page 26: ...itle chapter for DVD and track for CD Track Title Chapter programmed playback 1 Press the MEMORY button A screen will be shown as right fig 11 2 Press the button to highlight the Title Press the or button to choose the desired title Press the button again to highlight the Chapter Press the or button to choose the desired Chapter Press the ENTER OK button to confirm The highlight bar will move to t...

Page 27: ...ress the ENTER OK button Note Some DVDs may not play in the audio language you selected A prior language may be programmed on the disc Some DVDs may be set to display subtitles in a language other than the one you selected A prior subtitle language may be programmed on the disc Some DVDs allow to change subtitle selections only via the disc menu If this is the case press the DVD MENU button and ch...

Page 28: ... right and left sides of the image so that it can be viewed on a conventional screen Some wide screen DVDs that do not permit Pan Scan playback are automatically played in Letter Box mode black bands at top and bottom of screen Letter Box When wide screen video is played in this mode on a conventional screen black bands appear at the top and bottom of the screen Wide screen This is the correct mod...

Page 29: ...allows you could lockout violent scenes unsuitable for children or you could lock out playback of the disc altogether You cannot play password function equipped DVDs rated higher than the level you selected unless you cancel the parental lock function The parental lock levels are equivalent to the following ratings Level 1 Kid Safe Level 2 G Level 3 PG Level 4 PG 13 Level 5 PG R Level 6 R Level 7 ...

Page 30: ...ds connected to the unit 2 Lay the unit down on a flat surface so the back is facing up making sure to place a soft cushioned material such as a pillow or thick piece of foam beneath the screen 3 Install remove the two screws and then install remove the STAND to from the TV TV Broadcasting Receiving Channels Channel Indicator RF Aerial Input Operating Voltage Audio Audio Output Power Power Consump...

Page 31: ... you may need assistance with Technical experts are available 7 days a week Lines open 9am 8pm Monday to Saturday and 10am 4pm Sunday Calls to Argos enquiry lines may attract a charge and set up fee from residential lines depending on your call plan tariff Mobile and other providers costs may vary see www bt com pricing for details For Security and training purposes telephone calls to and from cus...

Page 32: ... You may not be able to play back some DVD discs onthisunitiftheywerepurchasedfromoutsideyour geographic area or made for business purposes Disc Function or Operation that is Not Available When the symbol appears on the screen it indicates that the function or operation attempted is not available at that time This occurs because theDVDdiscmanufacturerdeterminesthespecific functions Certain functio...

Page 33: ...cord before cleaning the unit Wipe the unit with a dry soft cloth If the surfaces are extremely dirty wipe clean with a cloth which has been dipped in a weak soap and water solution and wrung out thoroughly Then wipe it with a dry cloth Never use alcohol benzine paint thinner cleaning fluid or other chemicals Do NOT use compressed air to remove dust Important note Before shipping the unit remove a...

Page 34: ...ff the unit for 30 minutes to cool it down Check that the AC power cord is connected The unit is not turned on There is no disc inside No Disc appears on the screen or clean the disc Insert the disc correctly with the playback side facing frontwards A non valid disc has been inserted The unit and disc region number are incompatible Condensation may have formed inside the unit due to a sudden chang...

Page 35: ...ge misuse cabinet parts knobs or consumable items The product must be correctly installed and operated in accordance with the instructions contained in this manual It must be used solely for domestic purpose The guarantee will be rendered invalided if the product is re sold or has been damaged by inexpert repair Specifications are subject to change without notice The manufacturer disclaims any lia...

Page 36: ...811 918691W041 BTVD9xxx6_IB_BUSH 2011_Rev3 indd 36 6 1 2011 16 27 41 ...

Reviews: