37
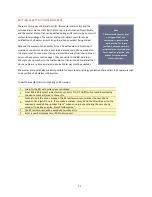
A successful installation depends on preparation and proper sequence. (Sunday at 2AM is not the best time to be
looking for a manual or a needed tool.) Experienced engineers usually perform a complete setup at the bench
then install the equipment at the transmitter site, connect I/O and calibrate.od
NEEDED ITEMS
ARC Plus Touch Remote Control Unit
At least one Plus-X I/O device
A windows computer with access to the LAN for AutoLoad
AutoLoad software downloaded from www.burk.com
An Ethernet switch or sufficient ports on an existing LAN
Manuals for ARC Plus Touch and all peripherals, either printed or, preferably,
on a laptop or tablet that will be available during installation
A list of IP addresses and related information for your Ethernet connections to
the ARC Plus Touch and peripherals
RECOMMENDED SEQUENCE
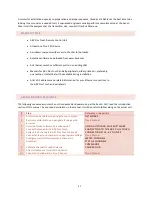
The following sequence assumes the unit is unpacked and powered up at the bench. First, read the Introduction
section of this manual. As you read descriptions in the manual, it will be useful to follow along on the actual unit.
#
Step
Reference or Hyperlink
1
Perform the network setup using the touch screen
2
3
4
5
6
7
8
9
10
Perform network setup on peripherals using a web
browser
Install AutoLoad software on a windows PC
Connect AutoLoad to the ARC Plus Touch
Assign Plus-X channels to ARC Plus Touch channels
Connect at least one channel to an appropriate voltage
Configure meter/status/command channels in
AutoLoad
Calibrate channels to read correctly
After full checkout, install at remote site
Connect all peripherals to Plus-X devices
Plus-X manual
USING AUTOLOAD PLUS SOFTWARE
CONNECTING TO THE ARC PLUS TOUCH
CONNECTING PLUS-X I/O UNITS
Plus-X Manual
METER CHANNELS
STATUS CHANNELS
COMMANDS
CALIBRATION
Plus-X Manual


