SecuTronic
5
I Englsih
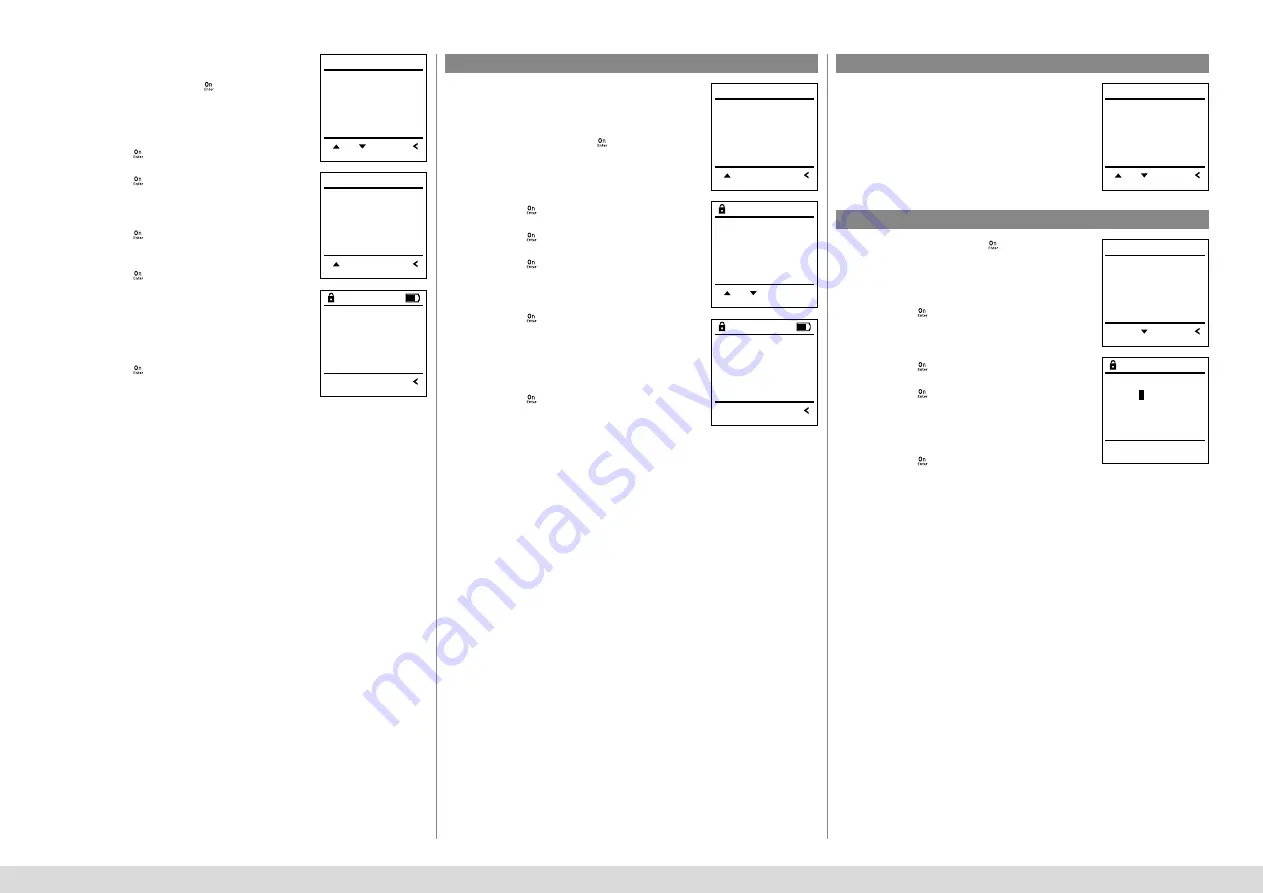
Sub-menu Administrator / User / Assign / Assign
fingerprint
• Switch on the lock using the
key.
• Then press
.
• The “
Main menu
“ appears.
• Scroll with the 1 or 2 key until the menu
item “
Administrator
“ is highlighted.
• Confirm with
.
• “
Main menu / Administrator
“ appears.
• Confirm with
.
• “
Main menu / Administrator / User
“ appears.
• Scroll with the 1 or 2 key until the “Assign“
menu item is highlighted.
• Confirm with
.
• Scroll with the 1 or 2 key until the
“
Create fingerprint
“ menu item is highlighted.
• Confirm with
.
• Enter the administrator code to acquire
the authorisation for programming.
• “
Main menu / Administrator / User / Assign
“ appears.
• You can use the keys 1 or 2 to scroll until
the user is marked whose fingerprint is
supposed to be assigned.
• Confirm with
.
• “
Create fingerprint
“ appears.
• Move the finger from the top to bottom
centrally and a number of times over the sensor.
• The display will either prompt you to repeat
the process (for error messages, see page 15),
or the message “USER.XXXX FP was successfully
created“ will appear.
• Press any key.
Deleted users no longer have access to the safe.
However, these remain in the history.
Sub-menu Administrator / User / Delete
• Switch on the lock using the
key.
• Then press
.
• The “
Main menu
“ appears.
• Scroll with the 1 or 2 key until the menu
item “
Administrator
“ is highlighted.
• Confirm with
.
• “
Main menu / Administrator
“ appears.
• Confirm with
.
• “
Main menu / Administrator / User
“ appears.
• Confirm with
.
• “
Main menu / Administrator / User / Delete
“ appears.
• Scroll with the 1 or 2 key until the menu
item “
Delete
“ is highlighted.
• Confirm with
.
• Enter the administrator code to acquire the
authorisation for programming.
• You can use the keys 1 or 2 to scroll until the
user is marked whose code is supposed to
be deleted.
• Confirm with
.
• “
Data has been deleted
“ appears.
• Press any key.
Menu Administrator / User / Delete
Menu Administrator / Time functions
Menu Administrator / Time functions / Set time
Time and date can be set, as well as whether the
system should automatically switch between
Central European Summer/Winter Time. The delay
time prevents quick opening in the event of
a robbery.
• Switch on the lock using the
key.
• Then press
.
• The “
Main menu
“ appears.
• Scroll with the 1 or 2 key until the menu
item “
Administrator
“ is highlighted.
• Confirm with
.
• “
Main menu / Administrator
“ appears.
• Scroll with the 1 or 2 key until the menu
item “
Time functions
“ is highlighted.
• Confirm with
.
• “
Administrator /Time functions
“ appears.
• Confirm with
.
• Enter the administrator code to acquire
the authorisation for programming.
• The time (24-hour format) can be set via
the keypad.
• Confirm with
.
• “
Data has been saved
!“ appears.
• Press any key.
Create
Assign
Delete
FUNC:
1:
2:
U S E R
Assign Code
Assign Finger
1:
FUNC:
U S E R
USER.0003 FP
created!
FUNC:
Dataset has
been deleted!
FUNC:
Time entry
H.M 00.00
FUNC: M
USER.0001 CD
FUNC: M
1:
2:
Create
Delete
1:
FUNC:
U S E R
User
Timer functions
Programming
Processes
FUNC:
1:
2:
A D M I N
Time entry
Date entry
Autom. ST/WT
Delay time
FUNC:
2:
T I M E R F U N . . .


