background image


13 


8.2 Hand Washing 

1.


A) To operate, place your foot momentarily into the black plastic moulding at the bottom of the unit. 

This interrupts an infra-red beam, which in turn pumps water out of the water spout for approximately 

7 seconds. Repeat by momentarily putting your foot back into the plastic moulding once the previous 

dispense has finished.  

B) For foot pedal version place foot on the foot pedal located at the bottom of the unit. Repeat this 

process  as  necessary  to  dispense  water  from  the  water  spout. 

The  pedal  should  be  pressed  for  5-7 

seconds per wash


2.


When water is no longer dispensed from the nozzle when activated, the lower tank may be empty  


Important: Turn off the power and remove the plug when empty. 

3.


Empty the waste container and refill the lower tank as described above.  

4.


If there is water remaining in the lower tank check that the quick release fitting is securely attached to 

both pipes, see cleaning and descaling.  

8.3 After Use 

Disconnect from the mains supply and empty the waste container. 

Water may be left in the lower tank when not in use for short periods, but to maintain a supply of fresh water, 

it should be emptied periodically and cleaned out. 

8.4 Protective Cutout 

The hand wash is fitted with a thermal cut-out which protects the unit from damage if allowed to boil dry or 

switched on without water.  

8.


Relatch the catches ensuring the wire retainers are situated above the cleat 
 

9.


Plug into the supply. The indicator light will illuminate to indicate power to the 
unit and the water will start to heat up.  
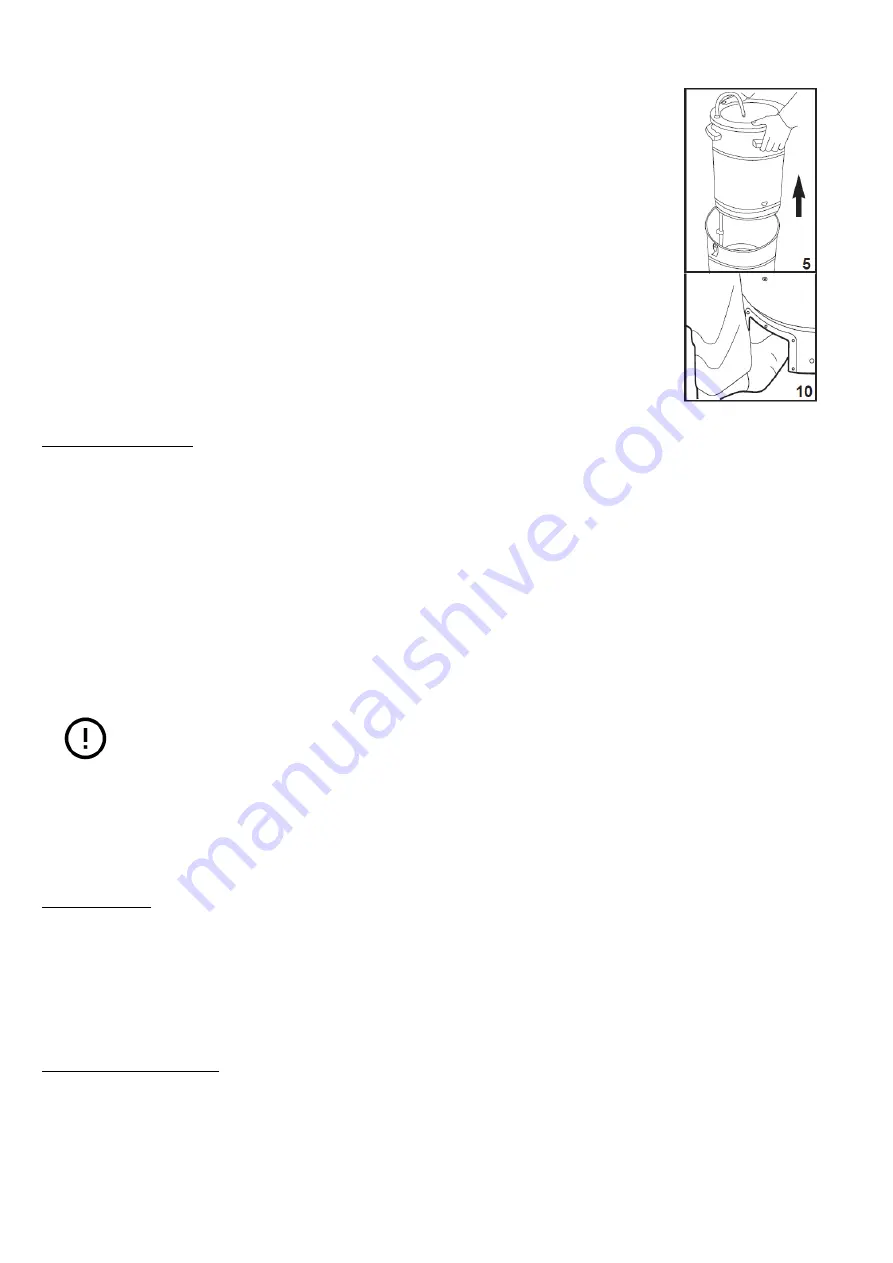
 

10.


A) For IR senor version put your foot momentarily into the black plastic 
moulding at the bottom of the unit. This interrupts an infra-red beam which in 
turn operates the water pump. Do this twice to prime the pump. No water will 
be dispensed until this is done.  

B) For foot pedal version put your foot on the pedal with little force to operate 
the water pump. The pedal should be pressed for 5-7 seconds per wash 


11.


The unit takes approximately 15 mins to reach full temperature. The unit is 
now ready to use.  

Summary of Contents for 111715

Page 1: ...mplex Heating Ventilation Web www gdhv co uk Millbrook House Grange Drive Hedge End Southampton SO30 2DF UK Customer Service Tel 44 0 344 879 3588 ROI Customer Service Tel 353 0 1 8424833 www burco co...

Page 2: ...onnection 9 7 3 Important Safety Instructions 10 7 4 Other Safety Considerations 10 8 0 Operating Instructions 11 8 1 Filling 12 8 2 Hand Washing 13 8 3 After Use 13 8 4 Protective Cutout 13 9 0 Desca...

Page 3: ...ber this can be found on the data badge on the back of the product Date of purchase Purchased from In your instruction pack you will find a duplicate data badge which contains all the critical informa...

Page 4: ...IONS BS CODES OF PRACTICE LOCAL AND NATIONAL BUILDING REGULATIONS LOCAL AND NATIONAL WATER REGULATIONS THIS APPLIANCE MUST BE INSTALLED IN LOCATIONS OVERSEEN BY TRAINED PERSONNEL ON A FLAT HORIZONTAL...

Page 5: ...DED FOR USE BY PERSONS INCLUDING CHILDREN WITH REDUCED PHYSICAL SENSORY OR MENTAL CAPABILITIES OR LACK OF EXPERIENCE OR KNOWLEDGE UNLESS THEY HAVE BEEN GIVEN SUPERVISOR OR INSTRUCTION CONCERNING USE O...

Page 6: ...t quality and design The company therefore reserves the right to change the specification at any time 5 0 Warranty Period This Burco handwash comes with a comprehensive 1 year parts and labour warrant...

Page 7: ...mm 415 Clean Water Capacity L 10 0 Number of Handwashes per fill 80 Water Temperature C 42 Water Inlet Pressure Bar 1 8 Weight kg 9 30 Water Protection IPX4 Voltage V 220 240V 50 60Hz Power Rating W...

Page 8: ...ses at end of life that these products must be taken to a recognised collection points such as local authority sites local recycling centres This appliance Complies with European Community Directives...

Page 9: ...the fuse must be replaced use a 13 amp fuse complying with BS 1362 A residual current device RCD should be used with this unit The RCD must be plugged directly into the socket and the appliance plugg...

Page 10: ...damaged lead or plug or after an appliance has malfunctioned or has been dropped or damaged in any way Contact Burco for advice on examination repair or electrical or mechanical adjustment Do not dis...

Page 11: ...Spout 3 Sink Bowl 4 Latches connecting top and bottom sections together 5 Handles 6 Water feed tube Inside 7 Wheels 8 Overflow 9 Infra Red Sensor Housing SKU 444448591 only 10 Upper Section 11 Lower...

Page 12: ...replace the bowl ensure that it is fitted snugly back in place 4 To fill release the catches situated either side of the handwash that secure the upper section to the lower 5 Lift the upper section un...

Page 13: ...and descaling 8 3 After Use Disconnect from the mains supply and empty the waste container Water may be left in the lower tank when not in use for short periods but to maintain a supply of fresh wate...

Page 14: ...LEAN THE INTERIOR OR EXTERIOR OF THE APPLIANCE OR USE A WATER JET IN THE VICINITY OF THE APPLIANCE To proficiently clean the product follow these instructions Lift out the bowl by the edges raising it...

Page 15: ...e or sediment from the element and rinse thoroughly with clean water 9 1 Descaling In hard water areas scale will form on the element and interior This will adversely affect the operation of the hand...

Page 16: ...uld not be disposed of with household waste Please recycle where facilities exist Check with your local authority for recycling facilities and advice in your area For electrical products sold within t...

Page 17: ...hermostat 55 13102 150 SP62629 SP62629 Reset rod tube Spring Set SP59093 SP59093 Overheat thermostat SP62819 SP62819 Spiderfixes push on SP62658 SP62658 Footpedal N A SP03 24017 0 Cable Gland N A SP03...

Page 18: ...444448591 is shown below Wiring should be replaced by the manufacturer service agent or similar qualified person in order to avoid a hazard This diagram is the property of Glen Dimplex UK Ltd and is...

Page 19: ...is shown below Wiring should be replaced by the manufacturer service agent or similar qualified person in order to avoid a hazard This diagram is the property of Glen Dimplex UK Ltd and is not to be r...

Page 20: ...o be ensured For a detailed overview of installation requirement please refer to Page 8 of this instruction book Q There is no water coming from the tap A Check that the water tank is full and the app...

Page 21: ...ur Burco product its serial number and a description of the fault which has occurred You can find the model number and serial number for your Burco product on the lower half of the product Once we rec...

Page 22: ...e original receipt as proof of purchase and if required by Burco proof of delivery If you are unable to provide this documentation you will be required to pay for any repair work required Any repair w...

Page 23: ...23 17 0 Notes...

Page 24: ...ntee terms without prior notice due to a policy of continuous improvement To speak to customer services please contact Glen Dimplex UK LTD Millbrook House Grange Drive Hedge End Southampton Hants SO30...

Reviews: