background image

EQUIPMENT

vmo2012-014-007_a

1. Cargo area
2. Plastic eyelets

WARNING

MAXIMUM load for cargo area is
16 kg (35 lb).

WARNING

– Never carry a passenger on the

rear cargo area.

– Cargo must never interfere with

the or reduce its ability to steer
the vehicle.

– Cargo must be secured and

must not protrude the cargo
area.

5) Tool Kit

The tool kit is located under seat. It
contains tools for basic maintenance.

6) Recovery Hook

Convenient hook that can be use to re-
cover a stuck ATV.

vmo2014-010-002_a

1. Recovery hook

_______________

77

Summary of Contents for can-am RENEGADE 1000 2015

Page 1: ...EHICLE WITHOUT PROPER INSTRUCTIONS Complete a certified training course NEVER CARRY A PASSENGER You increase your risk of losing control if you carry a passenger NEVER OPERATE THIS VEHICLE ON A PAVED SURFACE You increase your risk of losing control if you operate this vehicle on pavement NEVER OPERATE THIS VEHICLE ON PUBLIC ROADS You can collide with another vehicle if you operate this vehicle on ...

Page 2: ...amiliarize yourself with your new vehicle CALIFORNIA PROPOSITION 65 WARNING WARNING This product contains or emits chemicals known to the state of California to cause cancer and birth defects or other reproductive harm The following trademarks are the property of Bombardier Recreational Products Inc In Canada products are distributed by Bombardier Recreational Products Inc BRP In USA products are ...

Page 3: ...cked by the BRP warranty and a network of autho rized Can Am dealers ready to provide the parts service or accessories you may require Your dealer is committed to your sat isfaction He has taken training to per form the initial setup and inspection of your vehicle as well as completed the final adjustment before you took pos session If you need more complete servicing information please ask your d...

Page 4: ...nd safe operating instructions It is indispens able for the proper use of the product Note that this guide is available in sev eral languages In the event of any dis crepancy the English version shall pre vail Keep this Operator s Guide in the vehi cle as you can refer to it for things such as maintenance troubleshooting and instructing others If you want to view and or print an extra copy of your...

Page 5: ...ty Labels 38 Compliance Labels 40 Technical Information Labels 40 PRE RIDE INSPECTION 41 Pre Ride Inspection Check List 42 RIDING THE VEHICLE 44 Riding Gear 45 Recreational Riding 45 Environment 46 Design Limitation 47 Off Road Operation 47 Riding Techniques 47 MOVING LOADS AND DOING WORK 57 Working with your Vehicle 57 Carrying Loads 57 VEHICLE INFORMATION CONTROLS 62 1 Throttle Lever 62 2 LH Bra...

Page 6: ...e Transmission 81 Stopping the Engine and Parking the Vehicle 81 SPECIAL PROCEDURES 82 What to Do if Water is in the CVT 82 What to Do if Water is in the Air Filter Housing 82 What to Do if Vehicle is Turned Over 83 What to Do if Vehicle is Immersed in Water 83 TUNE YOUR RIDE 84 Suspension Adjustments 84 Steering Assist Adjustment DPS X xc Models 86 VEHICLE TRANSPORTATION 87 MAINTENANCE BREAK IN I...

Page 7: ...e Cleaning 120 STORAGE AND PRESEASON PREPARATION 122 TECHNICAL INFORMATION VEHICLE IDENTIFICATION 124 Vehicle Identification Number 124 Engine Identification Number EIN 124 NOISE EMISSION CONTROL SYSTEM REGULATION 125 SPECIFICATIONS 126 TROUBLESHOOTING TROUBLESHOOTING GUIDELINES 132 MULTIFUNCTION GAUGE MESSAGES 136 WARRANTY BRP LIMITED WARRANTY USA AND CANADA 2015 CAN AMTM ATV 138 CUSTOMER INFORMA...

Page 8: ...TABLE OF CONTENTS 6 _______________ ...

Page 9: ...SAFETY INFORMATION ________ SAFETY INFORMATION ________ 7 ...

Page 10: ...ires and Other Hazards Gasoline is extremely flammable and highly explosive Fuel vapors can spread and be ignited by a spark or flame many feet away from the en gine To reduce the risk of fire or explo sion follow these instructions Use only an approved red gasoline container to store fuel Never fill a gasoline container on the vehicle An electrical static dis charge may ignite the fuel For refuel...

Page 11: ...on with another vehicle Never use this vehicle if you are tired ill or with drugs or alcohol Your reaction time and judgement is greatly affected under these conditions Never attempt wheelies jumps or other stunts Never operate at excessive speeds Always go at a speed that is proper for the terrain visibility and operating conditions and your experience Always go slowly and be extra careful when o...

Page 12: ... for braking Always keep in mind that braking distance is readily affected by but not limited to weather and terrain conditions braking system and tire conditions vehicle speed and attitude and vehicle load including towing Remember to adjust your driving accordingly Never exceed the stated load limits for this vehicle including operator all other loads and added accessories Cargo should be proper...

Page 13: ...ction WHAT CAN HAPPEN The risk of an accident is greatly increased if the operator does not know how to operate this vehicle properly in different situations and on different types of terrain HOW TO AVOID THE HAZARD Beginners and inexperienced operators should complete a training course They should then regularly practice the skills learned during the course as well as the operating techniques des...

Page 14: ...on can lead to severe injury or death of the child Even though a child may be within the age group for which this vehicle is recommended he may not have the skills abilities or judgment needed to operate this vehicle safely and may be involved in a serious accident HOW TO AVOID THE HAZARD No one under 16 should operate this vehicle 12 _______ SAFETY INFORMATION ________ ...

Page 15: ...ur ability to balance and control this vehicle Could cause an accident resulting in harm to you and or your passenger HOW TO AVOID THE HAZARD Never carry passenger Even with a long seat that provides unrestricted op erator movement it is not designed nor intended to carry passenger s ________ SAFETY INFORMATION ________ 13 ...

Page 16: ...er could Impair vehicle stability which could lead to a loss of control Result in injury to passenger from impact on hard surfaces Cause an accident resulting in harm to you and or your passenger HOW TO AVOID THE HAZARD This vehicle is designed for an operator only Never allow any passenger on this vehicle 14 _______ SAFETY INFORMATION ________ ...

Page 17: ...ays WHAT CAN HAPPEN You can collide with another vehicle HOW TO AVOID THE HAZARD Never operate this vehicle on any public street road or highway even a dirt or gravel one In many states it is illegal to operate this vehicle on public streets roads and highways ________ SAFETY INFORMATION ________ 15 ...

Page 18: ...ding without eye protection can result in an accident and increases the chances of a severe injury in the event of an accident Riding without protective gear increases the chances of severe injury in the event of an accident HOW TO AVOID THE HAZARD Always wear an approved helmet that fits properly You should also wear Eye protection goggles or face shield Rigid chin guard Gloves and boots Long sle...

Page 19: ... alcohol WHAT CAN HAPPEN Could seriously affect your judgment Could cause you to react more slowly Could affect your balance and perception Could result in an accident or death HOW TO AVOID THE HAZARD Never use this vehicle with drugs or alcohol ________ SAFETY INFORMATION ________ 17 ...

Page 20: ...peeds WHAT CAN HAPPEN Increases your chances of losing control of the vehicle which can result in an accident HOW TO AVOID THE HAZARD Always travel at a speed which is appropriate for the terrain visibility and operating conditions and your experience 18 _______ SAFETY INFORMATION ________ ...

Page 21: ...ry to show off WARNING POTENTIAL HAZARD Failure to inspect the vehicle before operating Failure to properly maintain the vehicle WHAT CAN HAPPEN Increases the possibility of an accident or equipment damage HOW TO AVOID THE HAZARD Always inspect your vehicle prior to ride to make sure the vehicle is in safe operating condition Always follow the maintenance schedule described in this Operator s Guid...

Page 22: ...ING POTENTIAL HAZARD Removing hands from handlebars or feet from the footrests during opera tion WHAT CAN HAPPEN Removing even one hand or foot can reduce your ability to control the vehi cle or could cause you to lose your balance and fall off the vehicle If you re move a foot from the footrests your foot or leg may come into contact with the rear wheels which could injure you or cause an acciden...

Page 23: ...ou can come upon hidden rocks bumps or holes without enough time to react Could result in the vehicle overturning or loss of control HOW TO AVOID THE HAZARD Go slowly and be extra careful when operating on unfamiliar terrain Always be alert to changing terrain conditions when operating the vehicle ________ SAFETY INFORMATION ________ 21 ...

Page 24: ...of traction or vehicle control which could result in an acci dent including an overturn HOW TO AVOID THE HAZARD Do not operate on excessively rough slippery or loose terrain until you have learned and practiced the skills necessary to control this vehicle on such terrain Always be especially cautious on these kinds of terrain 22 _______ SAFETY INFORMATION ________ ...

Page 25: ...ut of control causing a collision or an overturn HOW TO AVOID THE HAZARD Always follow proper procedures for turning as described in this Operator s Guide Practice turning at low speeds before attempting to turn at faster speeds Do not turn at excessive speed ________ SAFETY INFORMATION ________ 23 ...

Page 26: ... vehicle can overturn more easily on extremely steep hills than on level surfaces or small hills HOW TO AVOID THE HAZARD Never operate this vehicle on hills too steep for the vehicle or for your abili ties Practice on smaller hills before attempting larger hills 24 _______ SAFETY INFORMATION ________ ...

Page 27: ...ator s Guide Always check the terrain carefully before you start up any hill Never climb hills with excessively slippery or loose surfaces Shift your weight forward Never open the throttle suddenly or make sudden gear changes The vehi cle could flip over backwards Never go over the top of any hill at high speed An obstacle a sharp drop or another vehicle or person could be on the other side of the...

Page 28: ... hills as described in this Operator s Guide NOTE A special technique is required when braking as you go down a hill Always check the terrain carefully before you start down any hill Shift your weight backward Never go down a hill at high speed Avoid going down a hill at an angle which would cause the vehicle to lean sharply to one side Go straight down the hill where possible 26 _______ SAFETY IN...

Page 29: ... have mastered the turning technique as described in this Operator s Guide on level ground Be very careful when turning on any hill Avoid crossing the side of a steep hill if possible When crossing the side of a hill Always follow proper procedures as described further in this Operator s Guide Avoid hills with excessively slippery or loose surfaces Operator must shift weight to the uphill side of ...

Page 30: ... could flip over backwards Apply brakes gradually Lock parking brake after you have stopped Dismount on uphill side or to a side if pointed straight uphill If you begin rolling backwards Keep your weight uphill Never open the throttle suddenly or make sudden gear changes The vehicle could flip over backwards Apply brakes gradually When fully stopped apply brakes and lock parking brake Dismount on ...

Page 31: ...lision Could cause the vehicle to overturn HOW TO AVOID THE HAZARD Before operating in a new area check for obstacles Never attempt to ride over large obstacles such as large rocks or fallen trees When you go over obstacles always follow proper procedures as described in this Operator s Guide ________ SAFETY INFORMATION ________ 29 ...

Page 32: ... unexpectedly which may cause the vehicle to overturn HOW TO AVOID THE HAZARD Learn to safely control skidding or sliding by practicing at low speeds and on level smooth terrain On extremely slippery surfaces such as ice go slowly and be very cautious in order to reduce the chance of skidding or sliding out of control 30 _______ SAFETY INFORMATION ________ ...

Page 33: ...ident HOW TO AVOID THE HAZARD Never operate this vehicle in fast flowing water or in deep water Check water depth and current before you attempt to cross any water Wa ter should not go above footrests Remember that wet brakes may have reduced stopping ability Test your brakes after leaving water If necessary apply them several times to let friction dry out the pads ________ SAFETY INFORMATION ____...

Page 34: ...AN HAPPEN You could hit an obstacle or person behind the vehicle resulting in serious injury HOW TO AVOID THE HAZARD When you select reverse gear make sure there are no obstacles or people behind the vehicle When it is safe to proceed go slowly 32 _______ SAFETY INFORMATION ________ ...

Page 35: ...mproper or uneven tire pressure may cause loss of control tire blow outs tire to move around on its rim and increases the risk of an accident HOW TO AVOID THE HAZARD Always use the size and type of tires specified in this Operator s Guide for this vehicle Always maintain proper tire pressure as described in this Operator s Guide Always replace wheels or tires that are damaged ________ SAFETY INFOR...

Page 36: ...es sories All parts and accessories added to this vehicle should be approved by BRP and should be installed and used according to instructions If you have questions consult an authorized Can Am dealer NEVER install a passenger seat or use the racks to carry a passenger Modification of the vehicle to increase speed and performance may violate the terms and conditions of your vehicle limited warrant...

Page 37: ... HAZARD Never exceed the stated load capacity for this vehicle including operator as well as other loads and added accessories Cargo should be properly distributed and securely attached Reduce speed when carrying cargo or pulling a trailer Allow greater dis tance for braking Always follow the instructions in this Operator s Guide for carrying cargo or pulling a trailer ________ SAFETY INFORMATION ...

Page 38: ...AL HAZARD Transporting flammable or dangerous material can lead to explosions WHAT CAN HAPPEN This can cause serious injury or death HOW TO AVOID THE HAZARD Never transport flammable or dangerous material 36 _______ SAFETY INFORMATION ________ ...

Page 39: ...N PRODUCT LABELS Hang Tag This vehicle comes with a hang tag and labels containing important safety and emission informations 704903318 704901107 vmo2006 005 009_en TYPICAL ________ SAFETY INFORMATION ________ 37 ...

Page 40: ...cle should be considered permanent parts of the vehicle If missing or damaged they can be replaced free of charge See an authorized Can Am dealer NOTE In the event of any discrep ancy between this guide and the ve hicle the safety labels on the vehicle have precedence over the labels in this guide vmo2012 014 901_a vmo2012 014 902_a vmo2012 014 903_a vmo2012 014 904_a 704902817 LABEL 1 38 _______ ...

Page 41: ...er tire pressure according to the load on the vehicle Refer to table exceed the vehicle load capacity of 141 kg 310 lb Including weight of operator cargo accessories and trailer tongue weight underinflate tire as it could cause the tire to disloge from the rim 704904738 LABEL 7 REFER TO SPECIFICATIONS FOR VALUES NEVER carry a passenger on this cargo area MAXIMUM REAR LOAD 23 kg 50 lb evenly distri...

Page 42: ...S DE LA FAMILLE CYLINDRÉE SYSTÈME DE CONTRÔLE DES ÉMISSIONS BOMBARDIER RECREATIONAL PRODUCTS INC SEE OPERATOR S GUIDE FOR MAINTENANCE SCHEDULE VOIR LE PROGRAMME D ENTRETIEN DANS LE GUIDE DU CONDUCTEUR EMISSION CONTROL INFORMATION THIS VEHICLE IS CERTIFIED TO OPERATE ON UNLEADED GASOLINE AND CONFORMS TO U S EPA AND CALIFORNIA EMISSION EVAP REGULATIONS FOR ATV RENSEIGNEMENTS SUR LE DISPOSITIF ANTIPO...

Page 43: ...eriora tion before they become a prob lem Correct any problem that you discover to reduce the risk of a breakdown or crash See an authorized Can Am dealer as nec essary Before using this vehicle the operator should always perform the following pre ride inspection check list Correct any problem found before riding the vehicle See an autho rized Can Am dealer if necessary ________ SAFETY INFORMATION...

Page 44: ...e and for abnormal play Check that lug nuts and beadlock bolts are tightened Radiator Check cleanliness of the radiator Drive shaft boots Check drive shaft boots and protectors condition Seat Check if operator seat is in place and properly latched If you transport a cargo respect the load capacity Ensure cargo is properly secured to the rack Cargo If you are pulling a trailer or another equipment ...

Page 45: ...d ITEMS TO BE INSPECTED INSPECTION TO PERFORM Steering Check if steering operates freely by completely turning it from side to side Shift lever Check operation of shift lever P R N H and L 2WD 4WD selector Check operation of 2WD 4WD selector Brakes Drive forward slowly a few feet and apply brake lever and brake pedal individually The brakes must fully apply Lever and pedal must fully return when r...

Page 46: ...ure to overturns or collisions which may result in injury includ ing death Not all vehicles are the same Each has its own unique performance characteris tics controls and features Each will ride and handle differently Become completely familiar with the operational controls and the general opera tion of the vehicle before venturing into off road conditions Practice driving in a suitable area free ...

Page 47: ...thing such as a scarf that may get entangled in the vehicle or on tree branches and shrubs Depending on conditions anti fogging goggles or sunglasses may be required Different colored lenses available for goggles or sunglasses help you distinguish terrain variations Sunglasses should only be worn during the daytime Boots Long sturdy pants Gloves Long sleeves Rigid chin guard Eye protection Chest p...

Page 48: ...ap Provided tool kit Snack Environment One of the benefits of this vehicle is that it can take you off the beaten path away from most communities However you should always respect nature and the rights of others to enjoy it Do not ride in environmentally sensitive areas Do not drive over forest crops or shrubs nor cut down trees or take down fencing nor spin your wheels and destroy the terrain Tre...

Page 49: ...ide is limited Increase your knowledge and improve your skills by following a certified training course Care caution experience and driving skill are the best precautions against the haz ards of vehicle operation Respect and follow all posted trail signs They are there to help you and others When driving on hills or slopes two things are highly important be prepared for slip pery surfaces or terra...

Page 50: ...are washboard or rough terrain conditions that will make you feel uncomfortable and can even cause a back injury Posting or riding in a crouched position will often be required Slow down and allow your flexed legs to absorb part of the impact energy Crossing Roads If you have to cross a road the lead driver should get off his vehicle then observe and give directions to the other riders The last pe...

Page 51: ...igned to operate on paved surfaces and is more likely to roll over If you must drive on pavement turn gradually go slowly and avoid abrupt acceleration and braking Avoid sudden inputs to steering throttle or brakes while turning WARNING Do not attempt turns at excessive speed vmo2012 012 525 If you do get into a slide or skid it may help to turn the handlebar in the direction of the skid until you...

Page 52: ...aking Reverse Operation When operating in reverse check that the path behind the vehicle is free of people or obstacles Proceed slowly and avoid sharp turns We recommend sitting on your ATV when operating in reverse Avoid standing up Your weight could shift forward against throttle lever causing an unexpected acceleration Obstacles Obstacles in the trail should be traversed with caution This inclu...

Page 53: ...ills are too steep to safely stop or recover from after an unsuccessful climbing attempt Try to avoid steep inclines If you re not careful you could tip over when going up hills If the hill is too steep and you cannot proceed or the vehicle begins to roll backwards apply the brake being careful not to slide Dismount then use the K turn while walking back next to the vehicle on the up hill side and...

Page 54: ...gotiating a slippery downhill slope could toboggan the ve hicle Maintain steady speed and or accelerate slightly to regain control Keep your body weight rearwards Apply the brake gradually to prevent skidding Do not coast down the slope using solely engine compression or in neutral gear Try to avoid steep inclines If you re not careful you could tip over when going down hills vmo2012 012 523 52 __...

Page 55: ...id all objects or depressions that will intensify the raising of one side of the ve hicle higher than the other thus causing rollover WARNING Be careful when loading and transporting liquid reservoirs They can affect vehicle stability when side hilling by pulling downhill and increasing the risk of a roll over vmo2012 012 527 Drop Offs This vehicle will bottom out and usually stop if either the fr...

Page 56: ...tance for braking Mud or marsh lands may be encountered near water Be prepared for sudden holes or changes in depth Similarly so be watchful of hazards such as rocks logs etc partially covered by vegetation Riding on Ice If your route crosses frozen waterways make sure the ice is thick enough and sound enough to support the total weight of yourself the vehicle and its load Be ever watchful of open...

Page 57: ...ake pads and discs While doing so in low risk driving situations you will test for grip level and keep yourself alerted to how the vehicle reacts to your control inputs Always keep brake pedal footrests floor boards brake and throttle levers free of snow and ice Frequently wipe snow off seat hand grips headlights taillights and reflectors The depth of the snow cover may hide rocks tree stumps or o...

Page 58: ...ke your location more visible to others over the next sand dune Proceed carefully should you see another safety flag ahead Since the antenna type safety flag can snag and rebound on your body if caught do not use it in areas where there are low hanging branches or obstacles Riding on Loose Stones Riding on loose stones or gravel is very similar to riding on ice They will affect the steering of veh...

Page 59: ...ause failure Avoid overexerting yourself if you lift or pull heavy loads or manually push the vehicle Carrying Loads Any load carried on the vehicle will affect the handling stability and braking distance of the vehicle Do not exceed the load limits of the vehicle including the weight of operator cargo accessories and trailer tongue weight Always be aware that the load may slide or fall off and cr...

Page 60: ...Safely reduce speed ac cording to terrain conditions when carrying cargo or pulling a trailer and avoid hills and rough terrain Allow greater distance for braking Always secure cargo as low as possible to reduce the effect of a higher center of gravity Failure to follow the recommendations here could cause changes in vehicle handling which could lead to an accident Hauling a Load if Equipped with ...

Page 61: ...ore distance for braking especially on inclined surfaces Be careful not to skid or slide Improperly loading a trailer may cause loss of control Respect the recommended maximum hauling capacity and maximum tongue load Refer to MAXIMUM HAUL ING CAPACITY table Make sure there is at least some weight on the tongue Always make sure load is evenly distributed and safely secured on the trailer an evenly ...

Page 62: ...MOVING LOADS AND DOING WORK This page is intentionally blank 60 _______ SAFETY INFORMATION ________ ...

Page 63: ...VEHICLE INFORMATION _______________ 61 ...

Page 64: ...RH side of the handlebar The throttle lever controls the engine speed To increase or maintain vehicle speed press the throttle lever with your right thumb To decrease vehicle speed release the throttle lever vmo2012 012 006_a TYPICAL 1 Throttle lever 2 To accelerate 3 To decelerate 62 ______________ ...

Page 65: ... the brake lever should automatically return to its original posi tion Braking effect is proportional to the force applied on the lever 4 Parking Brake The parking brake is located on the LH side of the handlebar The parking brake function is to apply brake to rear wheels to prevent vehicle from moving when parked WARNING Always use the parking brake and engage the PARK position on the shift lever...

Page 66: ...en the brake pedal is pressed down only the rear brake is applied Braking effect is proportional to the force applied on the pedal NOTE The brake will have also an ef fect on front wheels through the drive train when 4WD is engaged 6 Shift Lever The shift lever is located on the RH side of the vehicle near steering column vmo2013 011 003 SHIFT LEVER LOCATION The shift lever is used to change the g...

Page 67: ...ows the vehi cle to reach its maximum speed Low Range Forward This position selects the low speed range of the gearbox It allows the ve hicle to move slowly with maximum torque at the wheels NOTICE Use the low speed range to pull a trailer carry heavy cargo go over obstacles or drive uphill and downhill 7 Ignition Switch and Keys The ignition switch is located on the LH side of the central panel b...

Page 68: ...red qualified and operating with care Normal Key The vehicle is delivered with a normal key The normal key limits the vehicle rate of acceleration 800R 1000 and the vehicle speed to 70 km h 43 MPH WARNING On steep downhills the engine speed limiter may not prevent the vehicle from accelerating beyond this speed This key may be useful for riders who prefer more gradual acceleration or for riding in...

Page 69: ... Engine Stop Switch vmo2012 014 021_b TYPICAL 1 Emergency engine stop switch This switch can be used to stop the en gine and as an emergency control To stop engine set the emergency en gine stop switch to the STOP position NOTE While the engine can be stopped by turning the ignition key to OFF position we recommend the en gine be stopped by setting the emer gency engine stop switch to the STOP pos...

Page 70: ... of losing con trol To engage the override function pro ceed as follows While the shift lever is set to REVERSE position 1 Ensure that the vehicle is stopped 2 Press and hold the override switch then press the throttle lever gradu ally NOTE When using the override func tion the gauge will scroll an OVER RIDE message to confirm that the function is activated 3 To disengage the override function sim...

Page 71: ...ing NOTICE The vehicle must be stopped to engage or disengage 2WD 4WD switch Mechanical dam age may occur if switch is engaged or disengaged while driving The 4WD mode is engaged when the switch is pushed downwards V07I0DY TYPICAL 4WD MODE The 2WD mode is engaged when the switch is pushed upwards The vehicle is then rear wheel drive only V07I0EY TYPICAL 2WD MODE _______________ 69 ...

Page 72: ...am indicator lamp 9 MPH Km h indicator lamp 1 Selector Button The selector button is used to navigate or change settings in the multifunction gauge 2 Transmission Position Display This display will show transmission po sition vmr2007 050 002_d 1 Transmission position DISPLAY FUNCTION P Park R Reverse N Neutral H High range L Low range 3 Main Screen The main screen is used to display nu merous func...

Page 73: ...igh Beam Indicator Lamp When this indicator is ON it indicates that high beam is selected on the headlights and that ignition key is in ON with lights position 9 KM H or MPH Indicator Lamp The proper lamp turns on to indicate the unit the speedometer uses Multifunction Gauge Modes Speed Mode In this mode the main screen shows the speed of the vehicle either in km h or in mph vdd2008 001 084 RPM Mo...

Page 74: ...ing time between 2 places vsi2009 018 032 Press and HOLD the selector button for 2 seconds to reset the hour meter Engine Hour Meter EH The engine hour meter records engine running time vsi2009 018 033 Message Display Mode If an abnormal engine condition oc curs a message may scroll across the main screen in conjunction with a pilot lamp Refer to TROUBLESHOOTING section for details Fault Code Mode...

Page 75: ...ilable Odometer Clock Trip meter resettable Trip Hour meter resettable Engine hour meter Press and release selector button to change the default display mode to the temporary mode vmr2007 050 002_c 1 Selector button The gauge will display the selected mode for 10 seconds then will return to the normal display mode While in a resettable mode push and HOLD selector button for 2 seconds to reset it G...

Page 76: ... vs mph The speedometer odometer and trip meter are factory preset in miles but it is possible to change them to kilo meter reading Contact an authorized Can Am dealer Language Selection The gauge display language can be changed Refer to an authorized Can Am dealer for language availability and setup the gauge to your prefer ence While reading this Operator s Guide remember that WARNING Indicates ...

Page 77: ...EQUIPMENT 6 vmo2014 010 001_a _______________ 75 ...

Page 78: ...ive snap will be felt Double check that the seat is secure by giving it a tug to confirm proper latch ing WARNING Confirm that the operator s seat is properly locked in position by pulling back and up several times 2 Footpeg The footpegs are located on the RH and LH side of the vehicle near engine vmo2012 014 002_a TYPICAL 1 Operator s RH footpeg 3 12 Volt Power Outlet Convenient for handheld spot...

Page 79: ...rgo area Cargo must never interfere with the or reduce its ability to steer the vehicle Cargo must be secured and must not protrude the cargo area 5 Tool Kit The tool kit is located under seat It contains tools for basic maintenance 6 Recovery Hook Convenient hook that can be use to re cover a stuck ATV vmo2014 010 002_a 1 Recovery hook _______________ 77 ...

Page 80: ... attract and hold moisture which may lead to fuel phase separation and can result in engine performance problems or engine damage Recommended Fuel Use common unleaded gasoline with an AKI R M 2 octane rating of 87 or an RON octane rating of 92 NOTICE Never experiment with other fuels Engine or fuel system damages may occur with the use of an inadequate fuel NOTICE Do NOT use fuel from fuel pumps l...

Page 81: ...slowly so that air can es cape from the tank and prevent fuel flow back Be careful not to spill fuel 6 Stop filling when the fuel reaches the bottom of filler neck Do not overfill WARNING Never top up the fuel tank before placing the vehicle in a warm area As temperature increases fuel ex pands and may overflow 7 Fully tighten fuel reservoir cap clock wise WARNING Always wipe off any fuel spillage...

Page 82: ...olonged cruising speeds Avoid engine overheating However brief accelerations and speed variations contribute to a good break in NOTE It is normal that the engine will not operate at its maximum efficiency until the break in period is completed Brakes WARNING New brakes will not operate at their maximum efficiency until their break in is completed Use extra caution Belt A new belt requires a break ...

Page 83: ...shift lever Damage to the transmission may occur Gradually press the throttle lever to increase engine speed and thus en gaging the continuously variable trans mission CVT At the opposite when the throttle lever is released the engine speed decreases Stopping the Engine and Parking the Vehicle WARNING Avoid parking on steep slope as the vehicle may roll away WARNING Always put the vehicle in PARK ...

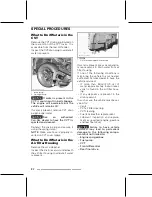
Page 84: ... the drain reservoir underneath the air filter housing to validate if water is present vmo2012 012 054_a TYPICAL 1 Air filter housing drain reservoir If water is present press clamp and re move reservoir to drain water from air filter housing If one of the following conditions is met bring the vehicle to your nearest authorized Can Am dealer to have the vehicle serviced If more than 50 ml 2 U S oz...

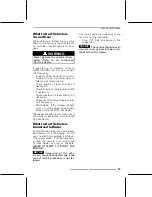
Page 85: ...fill if necessary Start engine If the oil pressure light stays on stop engine immediately See an authorized Can Am dealer Whenever the vehicle is turned over it should be inspected by an authorized Can Am dealer What to Do if Vehicle is Immersed in Water Should the vehicle become immersed immediately stop the engine Do not use any electrical equipment while ve hicle is immersed It will be necessar...

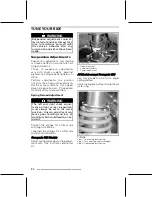
Page 86: ... Preload Adjustment WARNING The left and right shock adjust ment on front or rear suspension must always be set to the same position Uneven adjustment can cause poor handling and loss of stability which could lead to an ac cident Shorten the springs for a firmer ride and rough conditions Lengthen the springs for a softer ride and smooth conditions Renegade 500 Models Adjust spring preload by turni...

Page 87: ...o increase shock damping action stiffer Turn adjuster counterclockwise S to decrease shock damping action softer High Speed Compression Damping High speed compression damping controls how the shock absorber re acts to a high suspension velocity quick compression strokes in most cases when riding at higher speeds ACTION RESULT ON SMALL BUMPS Increasing high speed compression damping force Firmer co...

Page 88: ...sist To show the active DPS mode pro ceed as follows 1 Press and release DPS button vmo2012 014 021_d TYPICAL 1 DPS button 2 Check the multifunction gauge to confirm the current DPS mode vmo2010 006 002_a 1 DPS mode display To change the DPS mode proceed as follows 1 Press and hold DPS button for 2 sec onds to go to the next setting 2 Release DPS button 3 Repeat until desired setting is se lected ...

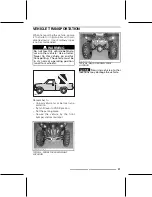
Page 89: ... end for transporting The vehicle must be in its normal operating position on all four wheels V00A17Y Remember to Unload vehicle racks before trans portation Set shift lever to PARK position Set the parking brake Secure the vehicle by the front bumper and rear bumper vmo2012 014 023_a TYPICAL FRONT TIE DOWN POINT LOCATION vmo2012 014 024_a TYPICAL REAR TIE DOWN POINT LOCATION NOTICE Securing vehic...

Page 90: ...VEHICLE TRANSPORTATION This page is intentionally blank 88 ______________ ...

Page 91: ...MAINTENANCE _______________ 89 ...

Page 92: ... The break in inspection is at the expense of the vehicle owner We recommend that this inspection be signed by an authorized Can Am dealer Date of inspection Authorized dealer signature Dealer name BREAK IN INSPECTION Replace engine oil and filter Check valve clearance and adjust as required Inspect engine air filter Inspect battery connections Replace gearbox oil Clean vehicle speed sensor Tighte...

Page 93: ...ean CVT air filter and replace as needed 800R 1000 Models Check battery connections Inspect front differential rear final drive oil level Lubricate front and rear propeller shaft joints Inspect tie rod end and ball joints Lubricate front suspension arms Lubricate upper shock absorber spherical bearings Xxc Inspect and lubricate rear anti sway bar bushings Inspect the drive shaft boots and protecto...

Page 94: ...TY OR MUDDY OR CARRYING HEAVY LOADS CONDITION WHICHEVER COMES FIRST Inspect clean and lubricate CVT drive and driven pulleys including one way bearing Check gearbox oil level and condition Inspect wheel bearings check for abnormal play Inspect steering system check for abnormal play Inspect and clean brake system Replace rear final drive oil Check battery condition and connections 92 _____________...

Page 95: ...ndition and perform a fuel system leak test Clean the fuel pump pre filter Carry out a fuel pump pressure test Replace spark plugs Replace front differential oil Replace gearbox oil Inspect gearbox and differential seals Clean vehicle speed sensor Replace the brake fluid Clean and lubricate lower and upper steering column half bushings EVERY 5 YEARS OR 12 000 KM 8 000 MI IN TRAIL RIDING CONDITIONS...

Page 96: ...n Air filter maintenance should be ad justed according to riding conditions Air filter maintenance must be in creased in frequency and oil must be added to the foam filter for the follow ing dusty conditions Riding on dry sand Riding on dry dirt covered surfaces Riding on dry gravel trails or similar conditions NOTE Riding in a group in these con ditions would increase even more the air filter mai...

Page 97: ...ng inlet drain tube vmr2012 010 017_a TYPICAL SOME PARTS REMOVED FOR CLARITY 1 Air filter housing inlet drain tube 3 Check air filter dirty chamber for cleanliness If any debris or water are found clean air filter chamber using a vacuum cleaner NOTICE Do not blow compressed air into air filter chamber 4 Check air filter drain tube clean chamber If any debris or water are found refer to SPECIAL PRO...

Page 98: ...TICE Do not wash the paper fil ter with any cleaning solution Foam Filter Cleaning CAUTION Always wear ap propriate skin and eye protection Chemicals can cause a skin rash and eye injury 1 Spray the foam filter inside and out with AIR FILTER CLEANER P N 219 700 341 219700341 AIR FILTER CLEANER P N 219 700 341 vbs2009 012 015_a TYPICAL SPRAY THE FOAM FILTER 2 Let stand for 3 minutes 3 As stated on ...

Page 99: ...ilter as the reverse of re moval Ensure air filter cover is properly locked onto the air filter housing See indica tions on filter cover and housing vmr2012 005 001_a 1 Cover position arrow 2 Locked 3 Unlocked Install console as the reverse of re moval However pay attention to the following Align and insert studs with grommets on rear portion of console until studs engage with grommets vmo2014 010...

Page 100: ...For the summer season use XPS 4 STROKE SYNTH BLEND OIL SUM MER P N 293 600 121 For all season use XPS 4 STROKE SYNTHETIC OIL ALL CLIMATE P N 293 600 112 NOTE The XPS oil is specially formu lated and tested for the severe require ments of this engine If not available use 4 stroke SAE 5W40 engine oil that meets or exceeds the requirements for API service clas sification SG SH or SJ Always check the ...

Page 101: ...then check oil level Refill as necessary Dispose of oil as per your local environ mental regulations Oil Filter Oil Filter Replacement Remove the right engine cover Unscrew the oil filter cover tmr2011 010 004_a 1 Oil filter screw 2 Oil filter cover 3 O ring 4 Oil filter Remove the oil filter and replace with a new filter Check the cover O ring and change it if necessary Screw oil filter cover in ...

Page 102: ...SSURE ONLY NEVER USE A HIGH PRESSURE WASHER See an authorized Can Am dealer to check the performance of the cooling system Engine Coolant Engine Coolant Level Verification WARNING Check coolant level with engine cold Never add coolant in cooling system when engine is hot 1 Place vehicle on a level surface 2 Remove seat 3 Lift the front part of the central panel vmo2008 005 002_a TYPICAL 1 Lift her...

Page 103: ... 9 Install console as the reverse of re moval However pay attention to the following 10 Align and insert studs with grom mets on rear portion of console un til studs engage with grommets vmo2014 010 003_a 1 Console 2 Studs and grommets 11 Reinstall the seat Recommended Engine Coolant Always use ethylene glycol antifreeze containing corrosion inhibitors specifi cally for internal combustion aluminu...

Page 104: ...iator hose clamp as noted during removal All Models Install cooling system drain plug with a new sealing ring and tighten to specifi cation TIGHTENING TORQUE Cooling system drain plug 9 N m to 11 N m 80 lbf in to 97 lbf in Bleed cooling system refer to COOL ING SYSTEM BLEEDING Cooling System Bleeding 1 Unscrew bleed screws on both front and rear cylinders tmo2011 001 501_a TYPICAL 1 Front cylinder...

Page 105: ... required 12 Install pressure cap 13 Reinstall the console Refer to EN GINE COOLANT LEVEL VERIFI CATION Muffler Spark Arrester Muffler Spark Arrester Cleaning and Inspection NOTE Spark arrester screen replace ment is required only when damaged CAUTION Let exhaust system cool down before proceeding with cleaning and inspection Remove and discard the tail pipe retain ing screws vmo2012 012 709 TYPIC...

Page 106: ... 11 N m 1 N m 97 lbf in 9 lbf in CVT Air Filter 800R 1000 CVT Air Filter Removal 1 Remove gauge support 2 Remove air filter from CVT air inlet by stretching its sides vmo2012 014 015_a 1 CVT air filter CVT Air Filter Cleaning 1 Spray filter inside and out with AIR FILTER CLEANER P N 219 700 341 219700341 AIR FILTER CLEANER P N 219 700 341 2 Let stand for 3 minutes 3 As stated on air filter cleaner...

Page 107: ...il level plug The oil should be level with the bottom of the oil level hole Refill as required until gearbox oil level flows through oil level hole Recommended Gearbox Oil ENGINE RECOMMENDED PRODUCT QUANTITY 500 800R Approx 400 ml 13 53 U S oz 1000 XPS SYNTHETIC GEAR OIL 75W 140 P N 293 600 140 Approx 450 ml 15 22 U S oz If the recommended oil is not available use a 75W140 gearbox oil that meets t...

Page 108: ...e Body Lubrication No lubrication is required Throttle Body Cleaning 1 Remove air inlet hose from throttle body 2 Check throttle body cleanliness us ing a flashlight Fully open throttle plate and verify Throttle body bore Throttle plate edge Look for Dirt Oily surfaces Carbon and salt deposits on throttle plate and the surrounding bore 3 Clean as necessary 4 Use a throttle body cleaner such as GUN...

Page 109: ...lubricant like a water based lubricant could cause the throttle lever cable to become sticky and stiff Open the throttle lever housing V07I0FY 1 1 Remove these screws Separate the housing Slide rubber protector back to expose throttle cable adjuster 4 V07I0GY 3 2 1 1 Cable protector 2 Throttle cable adjuster 3 Lock nut 4 Throttle lever housing Screw in the throttle cable adjuster Remove inner hous...

Page 110: ... rag around the throttle cable adjuster to prevent the lubricant from splashing Add lubricant until it runs out at throttle body end of the throttle cable Reinstall and adjust the cable Throttle Cable Adjustment Slide rubber protector back to expose throttle cable adjuster 4 V07I0GY 3 2 1 1 Cable protector 2 Throttle cable adjuster 3 Lock nut 4 Throttle lever housing Loosen lock nut then turn the ...

Page 111: ...n spark plugs and cylinder heads with pressurized air if possible Unscrew spark plugs completely then remove them vmo2006 007 029_a RH SIDE REAR CYLINDER 1 Spark plug vmo2006 007 030_a LH SIDE FRONT CYLINDER 1 Spark plug Spark Plug Installation Prior to installation make sure that contact surfaces of cylinder heads and spark plugs are free of grime Using a feeler gauge set the spark plug gap SPARK...

Page 112: ...ning Clean battery battery casing and bat tery posts using a solution of baking soda and water Remove corrosion from battery cable terminals and battery posts using a firm wire brush Battery Installation Battery installation is the reverse of the removal procedure NOTICE Always connect RED battery cable first Fuses CAUTION Always turn the ig nition switch to OFF position before replacing a defecti...

Page 113: ...elay R2 Main Relay R3 Accessories Relay R4 Fuel Pump Relay R5 Lights Relay R8 Brake Relay F4 Gauge Speedo 10 A FRONT FUSE BOX NO DESCRIPTION RATING F5 Injectors Ignition 5 A F6 ECM 5 A F7 2WD 4WD 5 A F8 Key Switch Starter Solenoid 5 A F9 Cooling Fan 25 A F10 Euro Control clock CE Models 5 A F11 Lights 30 A F12 DC Outlet 15 A F14 Accessories 2 15 A F15 Fuel Pump 5 A Rear Fuse Holder Location The re...

Page 114: ... is touched clean it with isopropyl al cohol which will not leave a film on the bulb Unplug connector from bulb Rotate light bulb counterclockwise to release it from light housing vmo2012 014 057_a Pull out bulb Properly reinstall removed parts in the reverse order of their removal Validate headlights operation Headlight Beam Aiming Turn adjustment screws to adjust beam height to your convenience ...

Page 115: ...c Repair or replace damaged parts as necessary vmo2012 015 003_a TYPICAL FRONT OF VEHICLE 1 Drive shaft boots 2 Drive shaft protector vmo2012 015 002_a TYPICAL REAR OF VEHICLE 1 Drive shaft boots 2 Drive shaft protector Wheel Bearing Wheel Bearing Inspection Place vehicle on a level surface Apply parking brake Lift and support vehicle Secure vehicle on jack stands Push and pull the wheels from the...

Page 116: ...6 PSI MIN 34 5 kPa 5 PSI 34 5 kPa 5 PSI Although the tires are specifically de signed for off road use a flat may still occur Therefore it is recommended to carry a tire pump and a repair kit Tire Inspection Check tire for damage and wear Re place if necessary Do not rotate tires The front and rear tires have a different size The tires are directional and their rotation must be kept in a specific ...

Page 117: ...y hand NOTICE Do not use an impact wrench for installing beadlock screws The risk of screw breaking or screw stripping is high when us ing an impact wrench vbs2010 007 004 TYPICAL 4 Tighten beadlock screws as per fol lowing specification and sequence NOTE To ensure even pressure on the beadlock clamp ring tighten screws a few turns at a time TIGHTENING TORQUE Beadlock screws FIRST TORQUE 3 N m 1 N...

Page 118: ...RQUE 8 N m 1 N m 71 lbf in 9 lbf in tbl2011 001 068_a TYPICAL FINAL TIGHTENING SEQUENCE 9 Inflate tire to seat the inner bead on wheel Always use safe practices such as a tire safety cage WARNING Never exceed tire s recommended maximum pressure for seating beads Wheel Removal Place vehicle on a level surface Apply parking brake Loosen lug nuts then lift vehicle Secure vehicle on jack stands Remove...

Page 119: ...ssure on the beadlock clamp ring NOTE It is normal that the beadlock clamp ring flexes slightly to match the tire bead Wheel Beadlock Gap Verification 1 Verify the gap between tire and beadlock clamp ring it should be practically equal all around the ring vmr2012 038 003_a A Gap between tire and ring If the gap is not acceptable see an au thorized Can Am dealer Steering Steering Inspection Tie rod...

Page 120: ...ized Can Am dealer as necessary Rear Trailing Arms Check trailing arms for distortion cracks or bending See an authorized Can Am dealer if any problem is detected Brakes Brake Fluid Reservoir Level Verification With vehicle on a level surface check brake fluid in reservoirs for proper level NOTE A low level may indicate leaks or worn brake pads Front Brake Reservoir Level Verification Turn steerin...

Page 121: ... fluid reservoir Recommended Brake Fluid Always use brake fluid meeting the specification DOT 4 only WARNING To avoid damage to the braking system do not use other brake fluid types Brake Inspection CAUTION The brakes can be very hot after prolonged use of the vehicle and can cause burns Wait for the brakes to cool down The brake inspection maintenance and repair should be performed by an authoriz...

Page 122: ... PRESSURE ONLY like a garden hose Pay attention to certain areas where mud or debris can accumulate and po tentially cause wear interferences or promote corrosion Wash the vehicle with a soapy water solution NOTICE Never clean polypropy lene body parts with any petroleum base cleaning products as it will al ter the glossy finish Non Compatible Cleaning Products MATERIAL TYPE NON COMPATIBLE CLEANIN...

Page 123: ...VEHICLE CARE vbs2012 006 001 SAFE FOR POLYPROPYLENE ______________ 121 ...

Page 124: ... using your vehicle after storage a preparation is required See an authorized Can Am dealer to have your vehicle prepared for either storage or the preseason While reading this Operator s Guide remember that WARNING Indicates a potential hazard that if not avoided could result in serious injury or death 122 ______________ ...

Page 125: ...TECHNICAL INFORMATION ______________ 123 ...

Page 126: ... number EIN or vehicle identification number VIN is removed mutilated or altered in any way We strongly recommend that you take note of all the serial numbers on your vehicle and supply them to your insurance company Vehicle Identification Number vmo2014 022 001_a TYPICAL 1 Label 1 2 Label 2 MFD DATEFAB 12 2003 2BPS1234X2V000123 1234 MODEL VIN NIV MANUFACTURED BY FABRIQUÉ PAR MADE IN FABRIQUÉ AU X...

Page 127: ...o the ultimate purchaser or while it is in use or 2 The use of the vehicle after such device or element of design has been removed or rendered inoper ative by any person Among those Acts Presumed to Constitute Tampering Are the Acts Listed Below 1 Removal or alteration or the punc turing of the muffler or any engine component which conducts re moval of engine exhaust gases 2 Removal or alteration ...

Page 128: ...ce Engine air filter Synthetic paper filter with foam LUBRICATION SYSTEM Type Wet sump Replaceable oil filter Oil filter Replaceable cartridge Capacity 2 0 L 2 1 qt U S liq Engine oil Recommended For the summer season use XPS 4 STROKE SYNTH BLEND OIL SUMMER P N 293 600 121 For all seasons use XPS 4 STROKE SYNTHETIC OIL ALL CLIMATE P N 293 600 112 If not available use a 5W40 motor oil that meets th...

Page 129: ...5W140 API GL 5 ELECTRICAL SYSTEM Renegade 400 W 6000 RPM Magneto generator output Renegade X xc with DPS 625 W 6000 RPM Ignition system type IDI Inductive Discharge Ignition Ignition timing Variable Quantity 2 Make and type NGK DCPR8E Spark plug Gap 0 6 mm to 0 7 mm 024 in to 028 in Engine RPM limiter setting 500 800R 1000 8000 RPM Type Dry battery type Voltage 12 volts Nominal rating 18 A h Batte...

Page 130: ...al oil rear final drive oil Type Rear XPS SYNTHETIC GEAR OIL 75W 140 P N 293 600 140 or a 75W140 API GL 5 synthetic gear oil Renegade Visco lok front differential Front drive Renegade X xc Visco lok QE front differential Front drive ratio 3 6 1 Rear drive Straight bevel gears final drive Rear drive ratio 3 6 1 DRIVE SYSTEM cont d CV joint grease CV joint grease P N 293 550 062 Propeller shaft grea...

Page 131: ...reload adjustment Base and X xc Threaded BRAKES Front brake Type Dual 214 mm cross drilled disc brakes with hydraulic twin piston calipers Rear brake Type Dual 214 mm cross drilled disc brakes with hydraulic twin piston calipers Capacity 340 ml 11 5 U S oz Brake fluid Type DOT 4 Caliper Floating twin pistons 2 x 26 mm Brake pad material Organic Minimum bake pad thickness 1 mm 039 in Minimum brake ...

Page 132: ... in Overall height 124 5 cm 49 in Wheelbase 129 5 cm 51 in Front 96 5 cm 38 in Wheel track Rear 91 4 cm 36 in Ground clearance 26 7 cm 10 5 in LOADING CAPACITY AND WEIGHT 500 279 kg 615 lb 800R 303 kg 668 lb Dry weight Renegade 1000 310 kg 683 lb Weight distribution front rear 49 51 Rear rack capacity 16 kg 35 lb Total vehicle load allowed including driver all other loads and added accessories 141...

Page 133: ...TROUBLESHOOTING ______________ 131 ...

Page 134: ...it is fuel flooded this special mode can be activated to prevent fuel injection and to cut ignition while cranking Proceed as follows Insert key in ignition switch and turn to ON position Press completely and HOLD throttle lever Press the engine START button The engine should be cranked for 20 seconds Release engine START but ton Release throttle lever and start crank engine again to allow startin...

Page 135: ...R POWER 1 Fouled or defective spark plug Refer to ENGINE TURNS OVER BUT FAILS TO START 2 Lack of fuel to engine Refer to ENGINE TURNS OVER BUT FAILS TO START 3 Engine is overheating CHECK ENGINE indicator light will turn on and HI TEMP will appear in the multifunction display Refer to ENGINE OVERHEATS 4 Air filter housing clogged or dirty Check air filter and clean if necessary Check deposits in a...

Page 136: ...gine Refer to ENGINE LACKS ACCELERATION OR POWER 2 Parking brake Ensure parking brake is completely removed 3 Air filter housing plugged or dirty Check air filter and clean if necessary Check deposits in air filter housing drain Check the position of the air intake tube 4 CVT dirty or worn out Contact an authorized Can Am dealer 5 Engine is under a protection limp home mode Check multifunction gau...

Page 137: ... THE VEHICLE DOES NOT MOVE 1 The transmission is on PARK or NEUTRAL position Select the R HI or LO position 2 CVT dirty or worn out Contact an authorized Can Am dealer 3 Water in the CVT housing Contact an authorized Can Am dealer ______________ 135 ...

Page 138: ...e engine CHECK ENGINE indicator lamp will also blink refer to TROUBLESHOOTING section CHECK ENGINE Check engine Engine fault CHECK ENGINE indicator lamp will also be ON refer to TROUBLESHOOTING section MAINTENANCE REQUIRED 2 Check engine Periodic maintenance required See an authorized Can Am dealer ECM NOT RECOGNIZED Check engine Communication error between speedometer and engine control module EC...

Page 139: ...WARRANTY ______________ 137 ...

Page 140: ...ENT THAT THEY CANNOT BE DISCLAIMED THE IMPLIED WARRANTIES ARE LIMITED IN DURATION TO THE LIFE OF THE EXPRESS WARRANTY INCIDENTAL AND CONSE QUENTIAL DAMAGES ARE EXCLUDED FROM COVERAGE UNDER THIS WARRANTY SOME STATES PROVINCES DO NOT ALLOW FOR THE DIS CLAIMERS LIMITATIONS AND EXCLUSIONS IDENTIFIED ABOVE AS A RESULT THEY MAY NOT APPLY TO YOU THIS WARRANTY GIVES YOU SPECIFIC RIGHTS AND YOU MAY ALSO HA...

Page 141: ...ths To obtain a list of the current warranted emission related components please see an authorized Can Am ATV dealer The repair or replacement of parts or the performance of service under this war ranty does not extend the life of this warranty beyond its original expiration date CONDITIONS TO HAVE WARRANTY COVERAGE This warranty coverage is available only if each of the following conditions has b...

Page 142: ... event that service is required outside of the country of original sale the owner will bear responsibility for any additional charges due to local practices and conditions such as but not limited to freight insurance taxes license fees import duties and any and all other financial charges including those levied by governments states territories and their respective agencies BRP reserves the right ...

Page 143: ...y or a dispute in connection with this limited warranty BRP suggests that you try to resolve the issue at the dealership level We recom mend discussing the issue with the authorized dealer s service manager or owner If the issue has not yet been resolved please submit your complaint in writing or call the appropriate number below In Canada BOMBARDIER RECREATIONAL PRODUCTS INC CAN AM ATV CUSTOMER A...

Page 144: ...This page is intentionally blank 142 ______________ ...

Page 145: ...CUSTOMER INFORMATION ______________ 143 ...

Page 146: ...stomer list to distribute marketing and promotional information about BRP and related products To exercise your right to consult or correct your data or to be removed from the ad dressee list for direct marketing please contact BRP By E mail privacyofficer brp com By mail BRP Senior Legal Counsel Privacy Officer 726 St Joseph Valcourt QC Canada J0E 2L0 144 ______________ ...

Page 147: ...nsfer Notifying BRP even after the expiration of the limited warranty is very important as it enables BRP to reach the ATV owner if necessary like when safety recalls are initiated It is the owner s responsibility to notify BRP STOLEN UNITS If your personal ATV is stolen you should notify BRP or an autho rized Can Am dealer We will ask you to provide your name address phone num ber the vehicle ide...

Page 148: ...CHANGE OF ADDRESS OWNERSHIP This page is intentionally blank 146 ______________ ...

Page 149: ...CHANGE OF ADDRESS OWNERSHIP ______________ 147 ...

Page 150: ...CHANGE OF ADDRESS OWNERSHIP This page is intentionally blank 148 ______________ ...

Page 151: ...CHANGE OF ADDRESS OWNERSHIP ______________ 149 ...

Page 152: ...CHANGE OF ADDRESS OWNERSHIP This page is intentionally blank 150 ______________ ...

Page 153: ...CHANGE OF ADDRESS OWNERSHIP NOTES ______________ 151 ...

Page 154: ...CHANGE OF ADDRESS OWNERSHIP NOTES 152 ______________ ...

Page 155: ...amiliarize yourself with your new vehicle CALIFORNIA PROPOSITION 65 WARNING WARNING This product contains or emits chemicals known to the state of California to cause cancer and birth defects or other reproductive harm The following trademarks are the property of Bombardier Recreational Products Inc In Canada products are distributed by Bombardier Recreational Products Inc BRP In USA products are ...

Page 156: ...EHICLE WITHOUT PROPER INSTRUCTIONS Complete a certified training course NEVER CARRY A PASSENGER You increase your risk of losing control if you carry a passenger NEVER OPERATE THIS VEHICLE ON A PAVED SURFACE You increase your risk of losing control if you operate this vehicle on pavement NEVER OPERATE THIS VEHICLE ON PUBLIC ROADS You can collide with another vehicle if you operate this vehicle on ...

Reviews: