7-4
My Custom Stitch
1 —
2 —
3 —
4 —
5 —
6 —
7 —
8 —
?
!
9 —
CONTENTS
Index
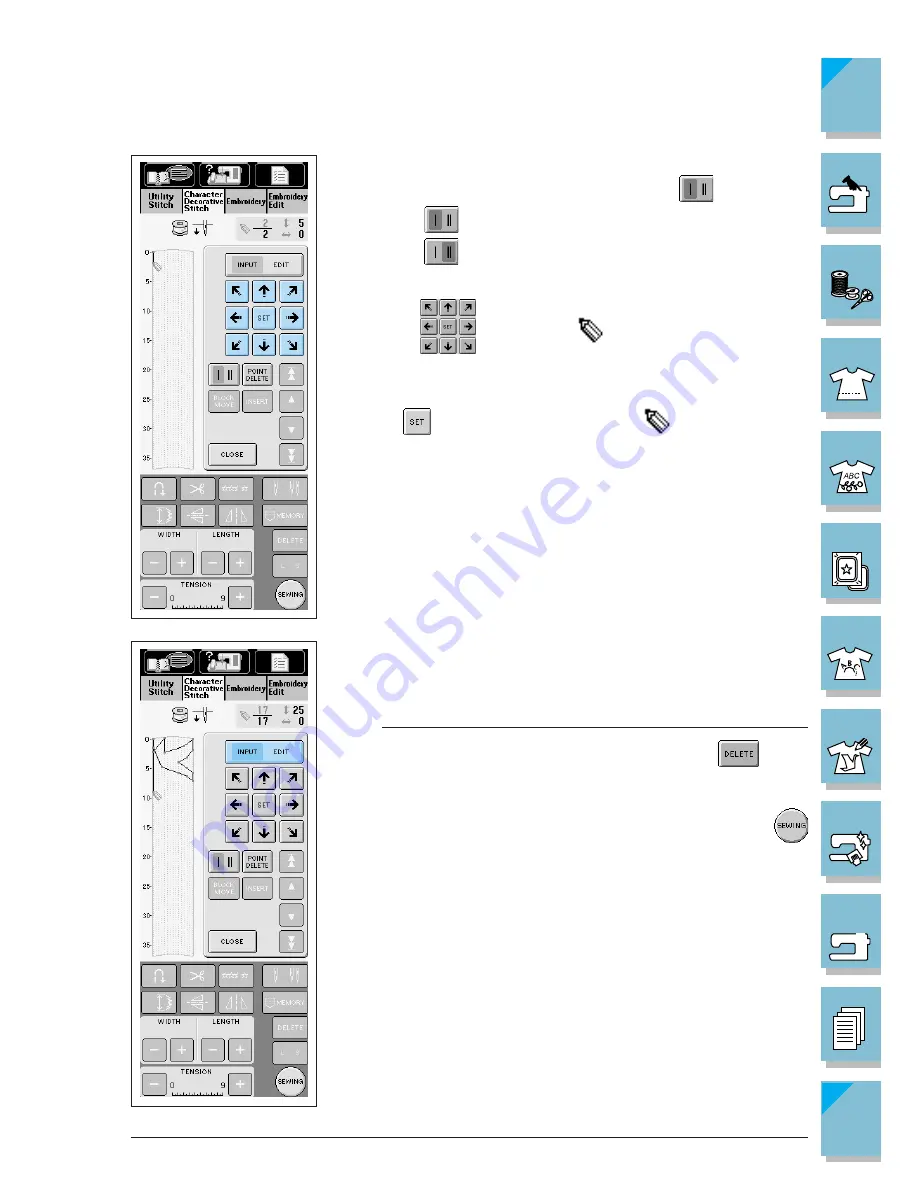
3. Select whether one stitch or three stitches will be sewn between
the first two points. To sew one stitch, press
so that it ap-
pears as
; to sew three stitches, touch the key so that it ap-
pears as
.
4. Use the
keys to move
to the coordinates of the first
point that was made on the grid sheet (from step 2 on page 7-1).
5. Press
to add the point indicated by
.
6. Repeat steps 3 through 5 for each point that you have drawn on
the grid sheet until the stitch design is drawn on the screen as a
continuous line.
Note
If you make a mistake while setting points, press the
key to
erase the last point set.
7. Once you have finished entering the stitch data, press the
key.
Summary of Contents for ULT-2001
Page 1: ......
Page 33: ...1 22 Setting Up 1 2 3 4 5 6 7 8 9 CONTENTS Index Contents of Other Categories ...
Page 34: ...Setting Up 1 23 1 2 3 4 5 6 7 8 9 CONTENTS Index ...
Page 57: ...1 46 Setting Up 1 2 3 4 5 6 7 8 9 CONTENTS Index ...
Page 73: ...2 16 Getting Ready to Sew 1 2 3 4 5 6 7 8 9 CONTENTS Index ...
Page 168: ...Sewing Character Decorative Stitches 4 25 1 2 3 4 5 6 7 8 9 CONTENTS Index More Examples ...
Page 291: ...7 16 My Custom Stitch 1 2 3 4 5 6 7 8 9 CONTENTS Index ...
Page 311: ...9 16 Troubleshooting 1 2 3 4 5 6 7 8 9 CONTENTS Index ...
Page 313: ...A 2 Appendix 1 2 3 4 5 6 7 8 9 CONTENTS Index ...
Page 319: ......


