5-12
Embroidery
1 —
2 —
3 —
4 —
5 —
6 —
7 —
8 —
?
!
9 —
CONTENTS
Index
Example:
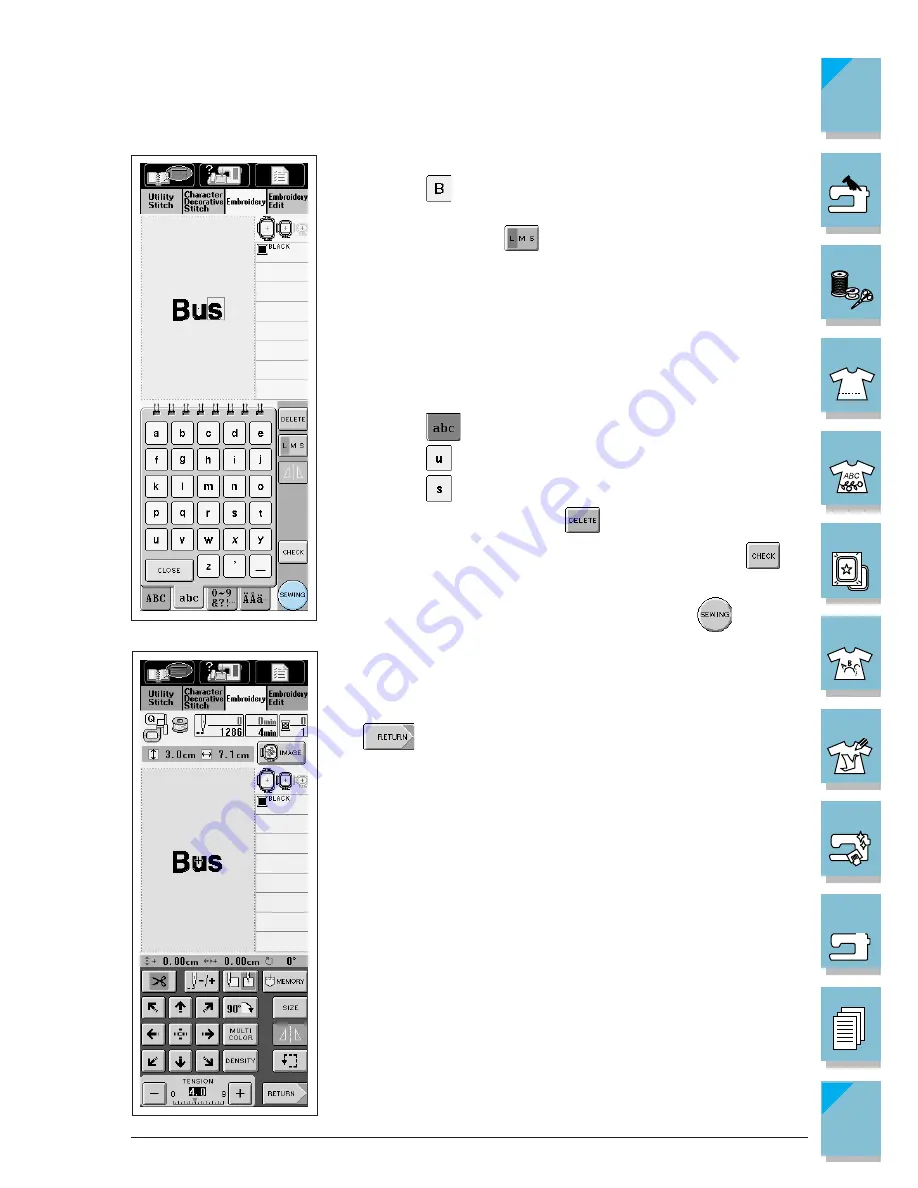
Selecting “Bus”
1
Press
.
* If you want to change the size of the characters, select the char-
acter and then press
to change the size. Every time pressing
the key, the size changes from large, medium, then small.
* If you continue adding letters after changing the size, the new
letters will be entered in the new size.
CAUTION
You can not change the size of the entered characters after com-
bining a character stitch pattern.
2
Press
.
3
Press
.
4
Press
.
* If you make a mistake, press
to erase the mistake.
* If the pattern is too small to see clearly, you can use the
key
to check it.
6. When you finish selecting the characters, press
.
7. The sewing screen is displayed.
* To go to the next step, see page 5-19, “Viewing the Sewing
Screen.”
* To return to the previous screen to select another pattern, press
.
Summary of Contents for ULT-2001
Page 1: ......
Page 33: ...1 22 Setting Up 1 2 3 4 5 6 7 8 9 CONTENTS Index Contents of Other Categories ...
Page 34: ...Setting Up 1 23 1 2 3 4 5 6 7 8 9 CONTENTS Index ...
Page 57: ...1 46 Setting Up 1 2 3 4 5 6 7 8 9 CONTENTS Index ...
Page 73: ...2 16 Getting Ready to Sew 1 2 3 4 5 6 7 8 9 CONTENTS Index ...
Page 168: ...Sewing Character Decorative Stitches 4 25 1 2 3 4 5 6 7 8 9 CONTENTS Index More Examples ...
Page 291: ...7 16 My Custom Stitch 1 2 3 4 5 6 7 8 9 CONTENTS Index ...
Page 311: ...9 16 Troubleshooting 1 2 3 4 5 6 7 8 9 CONTENTS Index ...
Page 313: ...A 2 Appendix 1 2 3 4 5 6 7 8 9 CONTENTS Index ...
Page 319: ......


