II
- 24
[ 7 ]
Inspection Mode
Enter the inspection mode according to the procedure given below and make the final
check.
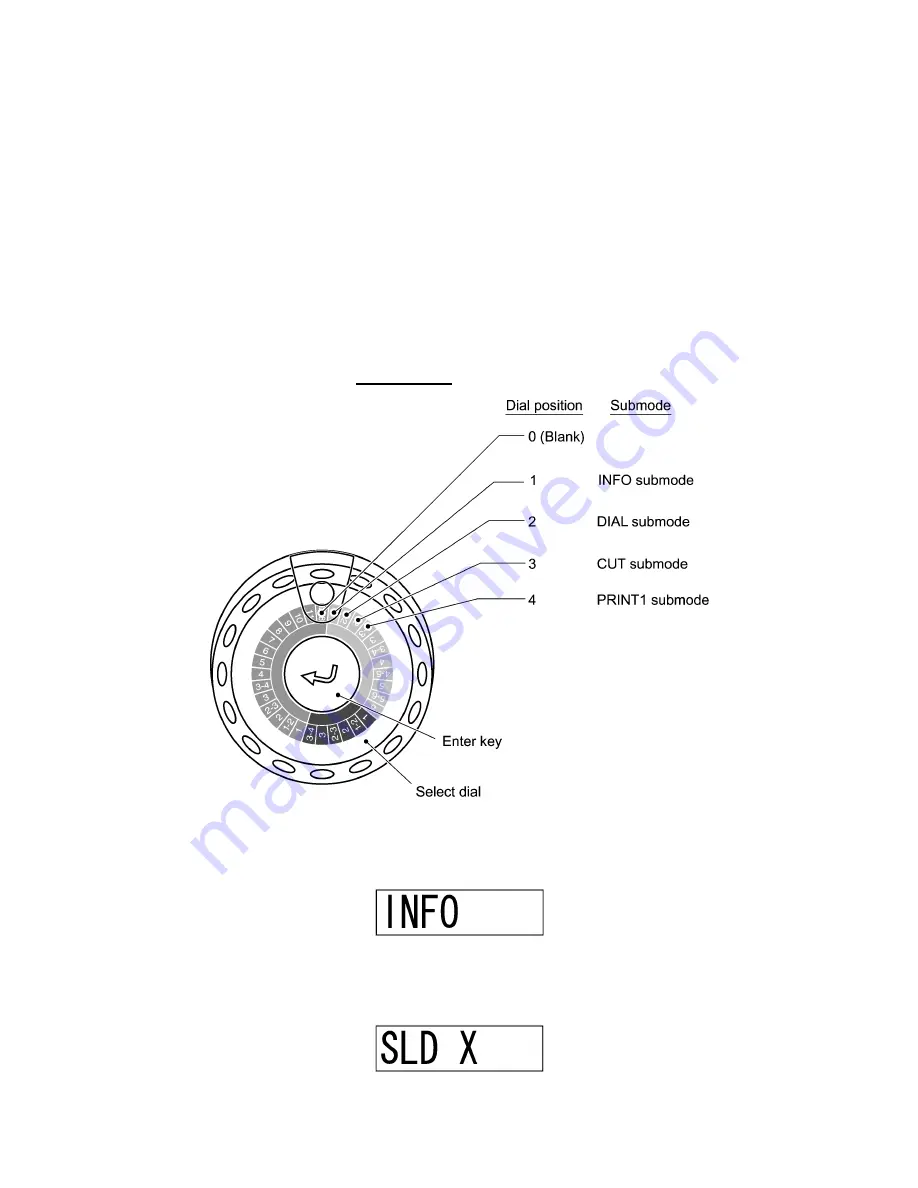
In the inspection mode, you use four submodes--INFO, DIAL, CUT, and PRINT1
submodes.
TIP:
The inspection mode supports a total of nine submodes for factory checking. That is,
there are five more submodes which are not described in this manual. Even if the machine
enters any of those five modes, you do not need to perform them. To escape from the
mode and proceed to any of the INFO, DIAL, CUT, and PRINT1 submodes, rotate the
select dial to any of Dial positions 1 to 4, respectively, and then press the Enter key.
(1) Check that the LCD shows the calendar clock or its setting screen.
(2) Set the select dial to Blank position.
(3) While holding down the Print key, press the Function key ("f").
The machine enters the inspection mode and shows the following on the LCD:
NOTE:
If the following message appears and the machine automatically turns itself
off, then check the solder points on the main PCB. Two or more solder points may be
closed or wrong solder point may be closed.
Summary of Contents for P-touch BB4
Page 1: ...SERVICE MANUAL MODEL P touch BB4 ...
Page 2: ...SERVICE MANUAL MODEL P touch BB4 ...
Page 5: ...Chapter I SPECIFICATIONS ...
Page 9: ...I 3 Figure 1 1 2 Key Arrangement 1 ...
Page 10: ...I 4 Figure 1 1 2 Key Arrangement 2 ...
Page 12: ...Chapter II MECHANISMS ...
Page 42: ...Chapter III ELECTRONICS ...
Page 54: ...III 11 Figure 3 2 14 Waveforms of Control Signal and Motor Drive Current ...
Page 56: ...III 13 Figure 3 2 16 Waveforms of Dial Scanning Pulse Outputs ...
Page 57: ...Chapter IV TROUBLESHOOTING ...
Page 60: ...IV 2 4 1 3 Troubleshooting Flows 1 Tape feeding failure ...
Page 61: ...IV 3 2 Printing failure ...
Page 62: ...IV 4 3 Powering failure Nothing appears on the LCD ...
Page 63: ...IV 5 4 Abnormal LCD indication 5 No key entry possible ...


