


30
Windows
®
Wireless Network
Configuration using the Installation CD-ROM and temporarily using a USB cable
(Windows
®
only)
17
Configure the wireless
settings
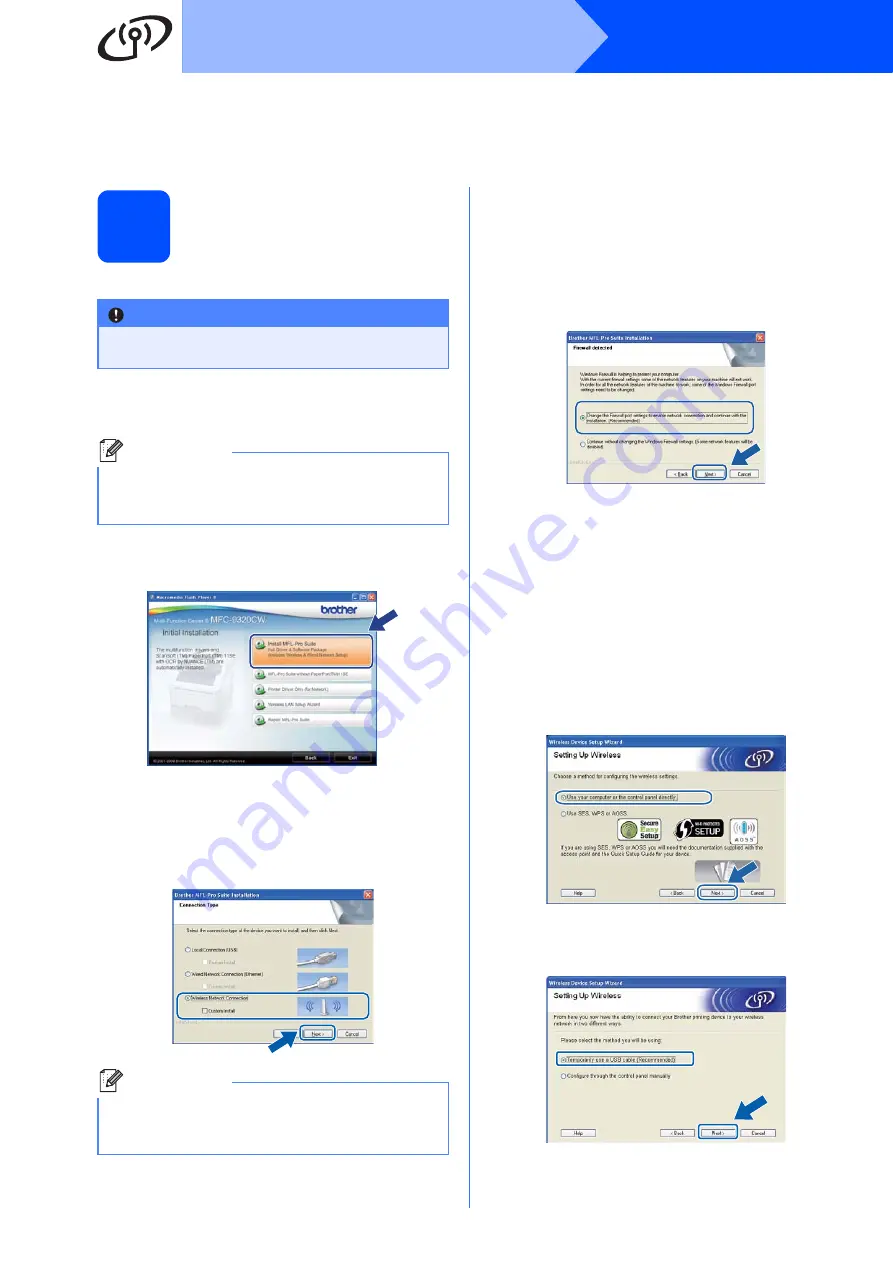
a
Put the installation CD-ROM into your CD-ROM
drive. If prompted, select your model and language.
b
Click
Initial Installation
and then
Install
MFL-Pro Suite
.
c
Click Yes if you accept the license agreement.
Follow the on-screen instructions.
d
Choose
Wireless Network Connection
and
then click
Next
.
e
For Windows
®
XP SP2 or greater/XP
Professional x64 Edition/ Windows Vista
®
/
Windows
®
7 users, when this screen appears,
choose
Change the Firewall port settings to
enable network connection and continue
with the installation. (Recommended)
and
click
Next
.
If you are not using the Windows
®
Firewall, see
the user's guide of your firewall or antivirus
software for information on how to add the
following network ports.
For network scanning, add UDP port 54925.
For network PC-Fax receiving, add UDP port
54926.
If you still have trouble with your network
connection, add UDP port 137.
f
Choose
Use your computer or the control
panel directly
and click
Next
.
g
Choose
Temporarily use a USB cable
(Recommended)
and then click
Next
.
IMPORTANT
You need to temporarily use a USB cable
during configuration (cable not included).
Note
If the Brother screen does not appear automatically,
go to
My Computer (Computer)
, double-click the
CD-ROM icon, and then double-click
start.exe
.
Note
For Windows Vista
®
and Windows
®
7, when the
User Account Control
screen appears, click
Allow
or
Yes
.
Summary of Contents for MFC-9320CW
Page 12: ...12 ...


