


22
Windows
®
Wired Network
g
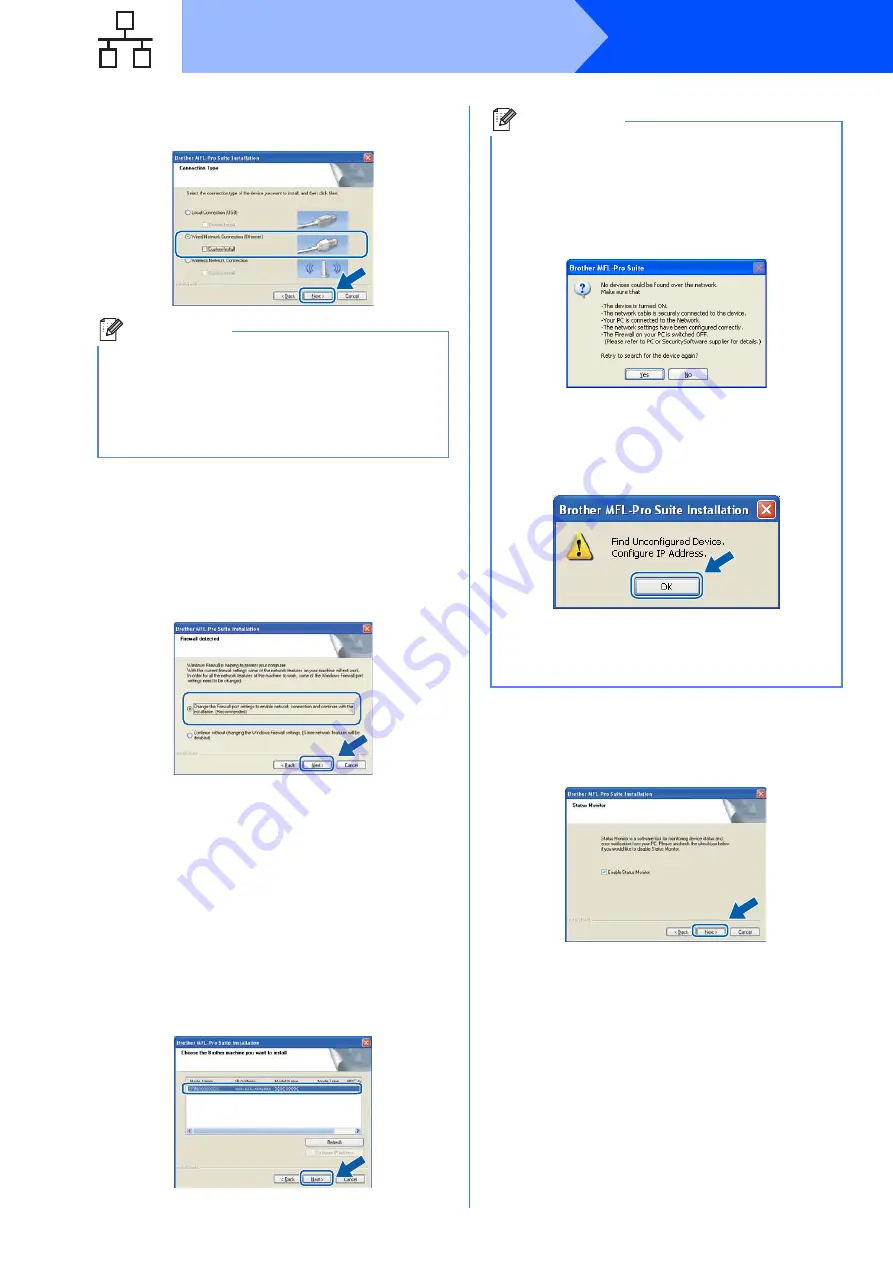
Choose
Wired Network Connection
, and
then click
Next
.
h
For Windows
®
XP SP2 or greater/XP
Professional x64 Edition/ Windows Vista
®
/
Windows
®
7 users, when this screen appears,
choose
Change the Firewall port settings to enable
network connection and continue with the
installation. (Recommended)
and click
Next
.
If you are not using the Windows
®
Firewall, see
the User’s Guide for your software for
information on how to add the following
network ports.
For network scanning, add UDP port 54925.
For network PC-Fax receiving, add UDP port
54926.
If you still have trouble with your network
connection, add UDP port 137.
i
If the machine is configured for your network,
choose the machine from the list, and then click
Next
.
j
If you do not want to monitor the machine
status and error notification from your
computer, uncheck
Enable Status Monitor
and then click
Next
.
Note
If you want to install the PS driver (Brother’s
BR-Script Driver), choose
Custom Install
and
then follow the on-screen instructions. When the
Select Features
screen appears, check
PS Printer Driver
, and then continue following
the on-screen instructions.
Note
•
You can find your machine’s IP address and
the node name by printing out the Network
Configuration List. See Print the Network
Configuration List
• If your machine is not found over the network,
the following screen will appear.
Confirm your network settings by following the
on-screen instructions.
• If the IP Address of the machine is not yet
configured for use on your network, the
following screen appears.
Click
OK
and then
Configure IP Address
.
Enter an IP address for your machine that is
suitable for your network by following the on-
screen instructions.
Summary of Contents for MFC-9320CW
Page 12: ...12 ...


